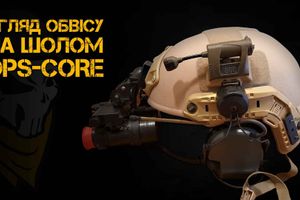
OCC Dial Liner Kit is a replaceable harness for ACH/MICH, Ops-Core FAST and Ops-Core Sentry helmets from the American leader in the production of protective equipment, the company Ops-Core.
If you follow Secret Squrrel on Instagram, then perhaps you should remember the post that not so long ago the buckle fastening the straps of the harness system of the replica Ops-Core FAST helmet from Element failed.
It is clear that there is nothing eternal, especially if it is a replica. But in this way I was faced with the problem of replacing the buckle, and, unfortunately, it was not as simple as it seemed at first glance. Rejecting the option of finding the right size for Fastex, as not very reliable and visually appropriate, the main solutions to the problem turned out to be, in fact, not as much as we would like.
Given that various types of Airsoft brands like Element, Emerson, FMA, etc. They offer a variety of replicas of ARC Rail helmets and accessories for them, as well as an abundance of replacement parts and components for replicas of the active headsets from the Peltor Comtac and MSI Sordin families, as it turned out, replaceable suspension systems for helmets are not listed in their product lines. Accordingly, the buckle or fasteners broke - buy a new helmet entirely. But even here failure awaited me, because at the time of the search for replica helmets in OD color, it simply was not available. Fortunately, Ops-Core itself offers a wide range of accessories not only for its helmets, but also sets for ACH/MICH helmets, which even sometimes come across in our open spaces.
In the absence of other suitable alternatives, I decided to try my luck with the original Ops-Core OCC Dial Liner Kit in order to satisfy my interest in Ops-Core products, and whether it is as high-quality and convenient as it is told. And, I must admit, Ops-Core did not disappoint. Not least in this play key features.
- High-quality materials and workmanship.
- Compliance with safety standards.
- Possibility to choose the side of the buckle: left or right.
- Available sizes: M, L, XL, XXL.
- Available colors: Urban Tan, Foliage Green, Black
The review further presents the Ops-Core OCC Dial Liner Kit harness in the color Foliage Green, and size M.

The Ops-Core OCC Dial Liner Kit suspension system reached me in a cardboard box with a pair of stickers representing basic content information: a compatible helmet model (in my case ACH/MICH), the size and color of the product.

Inside the box you can expect an adjustable headband with a protective damper in the frontal part, a set of small dampers, better known as "pillows", a set of ballistic bolts for fixing the harness to the helmet, and instructions. For the preparation of the Ops-Core instructions, it is necessary to pay tribute, since the clear structure and abundance of illustrations make the installation and adjustment process extremely simple and straightforward. I advise you not to throw it away, because the information in it is really useful and can be useful in the subsequent fitting or changing the configuration of the helmet.
Well, let's get to the point, and for this I will remove the harness from my helmet, and, like the 3M Peltor Comtac III ACH Dual Comm review, I’ll show you the difference between the original and the replica.

And we start with the front foam damper, called Front EPP Pad, which protects your forehead from shock and mechanical damage. And already in the first photo due to the quality of the molding of plastic parts, I think it is immediately clear where the original Ops-Core OCC Dial Liner Kit is.

But it is with Front EPP Pad that, unfortunately, one of my disappointments is connected. The thing is that while Ops-Core offers its own helmet, and, consequently, suspension systems, in four sizes from M to XXL, Element produces replicas of helmets in only one size under the motto “One Size Fits All”.
I suppose that this size corresponds to the original size L, but since I purchased the Ops-Core OCC Dial Liner Kit in size M, the holes of the original Front EPP Pad, intended for bolt fastening, simply do not coincide with the holes in the shell of the replica helmet. This fact upset me, because I expected to replace all the components of the kit with the original ones, but I had to leave the front damper of the replica just so that the original kit could be installed in it.
In addition to the overall width of the damper and the location of the bolt holes, all other dimensions are the same. Fortunately, Ops-Core also offers this damper as a separate product item, which, if desired, can be purchased separately.

In the previous photo, you probably noticed a key lock hole in the center of the front damper. In them, by means of two bolts with rounded caps, an adjustable headband Ops-Core OCC Dial Liner Kit is installed. The location of these bolts in the original and the replica are the same, but what does not match is the height of the internal headband damper. As you can see in the photo above, in the original it is higher and provides a large contact area, which evenly distributes the load over the entire surface of the forehead.
As a result, the helmet not only sits better, but also rests much less on the head, thereby causing discomfort.

The striking differences between the original and the replica are visible from the outside of the damper, which rests against the back of the head. This damper also has an adjusting wheel. Its rotation determines the density at which the headband of the helmet rests on the head.

But far more significant is not even the external, but the inner side of this damper. As you can see in the photo above, the original Ops-Core OCC Dial Liner Kit uses much better and softer material. This, again, significantly affects the comfort of the helmet during long wear.

The same trend is maintained when processing the sides of the adjustable headband. Where all the lines of the damping material clearly converge at the original, in the replica it is made and pasted somehow, and obviously in a hurry. Attention to detail, which ultimately costs you money.

I think by the look and quality of the shock-absorbing lining on the slings, which are fixed to the chin, you will also quickly determine where in the photo above is the original Ops-Core OCC Dial Liner Kit. Besides the fact that the lines of the replica do not inherit the color solutions of the original (Black, Foliage Green, Urban Tan), and are made in OD color, then the lining was obviously simpler and less comfortable than the original. Again, comfort with long-wearing, which justifies an investment in quality equipment.

The same differences are observed in the accessories. And let the cue inherit the Head-Loc inscription for greater visual similarity, it is far from the original hardware of this system. The buckle on the chin of the original Ops-Core OCC Dial Liner Kit is slightly more massive, closes with a noticeable click, and causes much more confidence than the replica buckle. In addition, the plastic used in the original does not “glow” in the infrared spectrum and is guaranteed to be resistant to a wide range of temperatures. As with the replica, the manufacturer clearly does not indicate.

Well, the final element in our comparison - the bolts. The visual differences here are minimal, especially if you do not take into account a small amount of viscous substance that prevents rusting of the thread on the bolts of the original. But in the case of the original, I think it’s not for nothing that the manufacturer calls them Ballistic Bolts, thus clearly hinting at resistance to this type of impact. So, if you ask me, bolts must be replaced without fail.
Now that we have figured out the main design features and quality differences of the original Ops-Core OCC Dial Liner Kit from the replica, let's see how the replacement is made.

Initially, you will need to remove all elements of the suspension system from the helmet, and unscrew the bolts that fix the rails and slings to the shell. Next, using the Velcro on the outside of the Front EPP Pad front damper and the response Velcro on the inner surface of the helmet, install it in the frontal part so that the lower contours of the damper and the helmet coincide.
After you align the front pair of holes on the shell with the holes of the front damper, thread the bolts through them and screw them through the nuts connected to the plastic fittings at the ends of the sling suspension system. The front pair of bolts can be tightened more tightly, but not completely, because Later, you may need to move the rails to better align the fittings at the back of a pair of holes in the shell.

After the front damper and slings have been installed and bolted using the Key Lock slots in the Front EPP Pad and the counter bolts, attach the adjustable headband to the front damper. To do this, you need to bend the central part of the headband inward, align the caps of the bolts with the holes, after which you can push the bolts along the Key Lock slots until the headband is level. On this front part of the Ops-Core OCC Dial Liner Kit is mounted on the helmet, and the finished result is visible in the photo above.

Next you need to install the rear clips. To do this, you have to bend the plastic guides, which are responsible for the depth of the suspension system landing in the helmet, align the holes in it with the holes in the shell, and pass the bolts through them. After that, a flat nut is installed in the plastic fittings at the end of the rear line, and the bolt thread is screwed into it.
Here, do not hurry to tighten the bolts completely, because to find the optimal depth of landing, you will need to try on a helmet and determine the appropriate height for you. Remember that when throwing your head back, the rear damper and the bottom edge of the helmet should not bite into your neck, and the front edge of the helmet should be slightly higher than the eyebrows, at the height of a comfortable ballistic mask. To determine this very depth, my ESS Profile Pivot and several head tilts in the prone position helped me.

After you determine the optimal height for yourself of the helmet, you can tighten the rear pair of bolts completely.
The case remains for the small, namely for installing the remainder of the dampers supplied with the Ops-Core OCC Dial Liner Kit. And they are here.

Unlike the replica, together with the original Ops-Core OCC Dial Liner Kit you get not one, but two sets of EPP Pad Replacement Kit pillows. Besides the fact that their inner surface, instead of the usual foam rubber, is lined with a much higher-quality and softer material with a “memory effect”, they differ in height. This applies to the back and two upper "pillows", which are available in versions 1/2 and 3/4 inches, as evidenced by the inscriptions on their back side.
The material on the inner surface of the pillows is very soft, pleasant to the touch, and, like the silicone embouchures 3M Peltor Comtac III ACH Dual Comm, a long time is restored to its original form after compression. This feature allows the “cushions” to better adapt to the shape of the user's head, and the ability to select the height of the “cushions” significantly affects safety.
The fact is that when the shell falls on the surface when the shell falls, and inside the helmet there is a void between the shell and the loosely fixed suspension system, your head continues inertial movement inside the helmet. Such a movement can lead to a head impact on the inner surface of the helmet shell, and as a result is fraught with head injuries. Therefore, the space between them should be maximally filled with dampers that absorb the impact energy. The ability to select the height of the damper is critical.
If it were insufficient, it would lower the safety of the helmet, if it were excessive, the helmet would pinch your head tightly, causing excessive fatigue and headaches. So the presence of an adjustable headband and the ability to choose the appropriate height of the damper, along with their soft surface, as for me, clearly plays to your advantage.

In my case, in the area of the head, using velcro on the inner surface of the shell, and the response velcro on the “cushion”, a damper with a height of 3/4 inch was installed, which made it possible to avoid the empty space between the head and the shell.

And to maintain the desired height of the helmet, two 1/2 inch high pillows were installed in the upper part of the helmet. In the case of a replica, which comes with only one set of pillows ½ inch high, such a combination would be impossible.

If necessary, for additional protection against side effects, side damping “pillows” can also be installed in the temple area.

Well, the last test that should be carried out before the final installation of all the “pillows” is a compatibility test with an active headset, if you plan to use one. Make sure that the gap between the upper dampers was sufficient for comfortable placement of the earphones, and the side "cushions" do not overwhelm your temples. If necessary, shift the dampers for comfortable positioning.
While I do not need the ballistic properties of the helmet, I use my Ops-Core FAST replica from Element mainly as protection against mechanical effects (high-altitude training, skiing, cycling, etc.) and as a platform for attaching accessories. (flashlights, flashing beacons, reflective elements, glasses, GoPro cameras, etc.). At the same time the shell is 7.5 mm. I have much more confidence in molded plastic than foam and millimeter shells of most sports helmets, and the presence of rails and sockets for mounting accessories in the frontal part significantly expands the functionality of the helmet. At the same time, the reliability of the suspension system and dampers has long been a concern to me, so the breakage of the buckle, which led to the acquisition of the original Ops-Core OCC Dial Liner Kit, somewhat improved this situation. Knowing that Ops-Core FAST meets many safety standards in part due to its suspension system, its originality instills an even greater confidence in the safety of such an upgrade.
The Ops-Core OCC Dial Liner Kit suspension system presented in the review was purchased at the punisher.com.ua store.
Source: https://secretsquirrel.com.ua
Author: MAD


