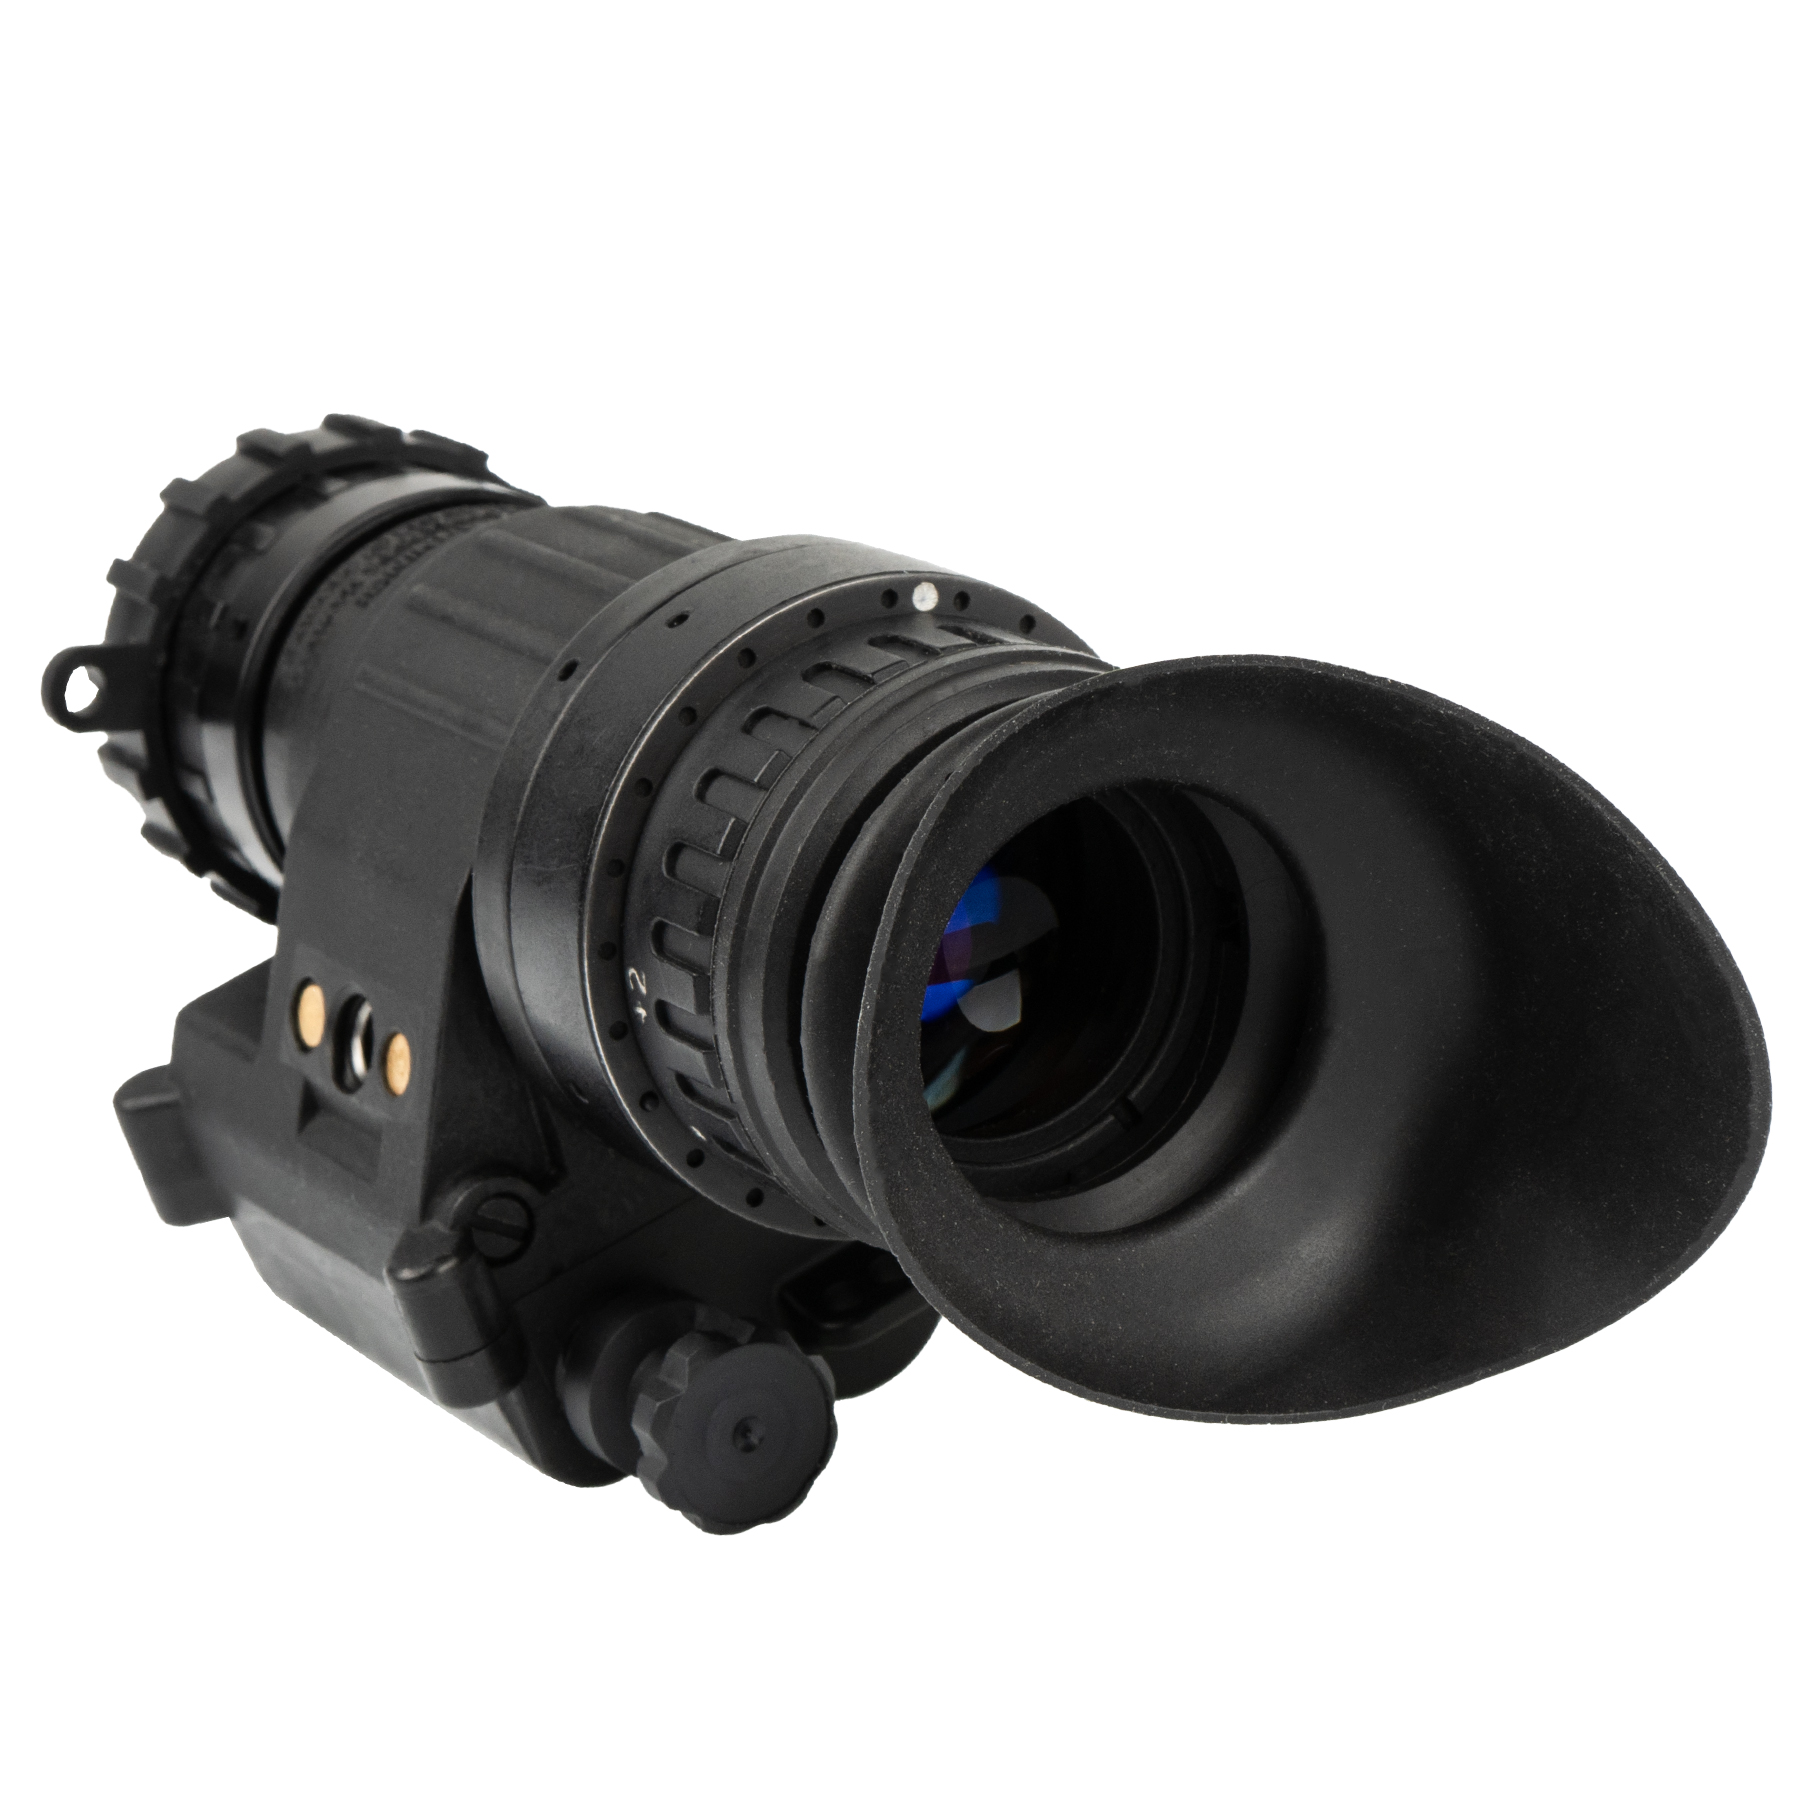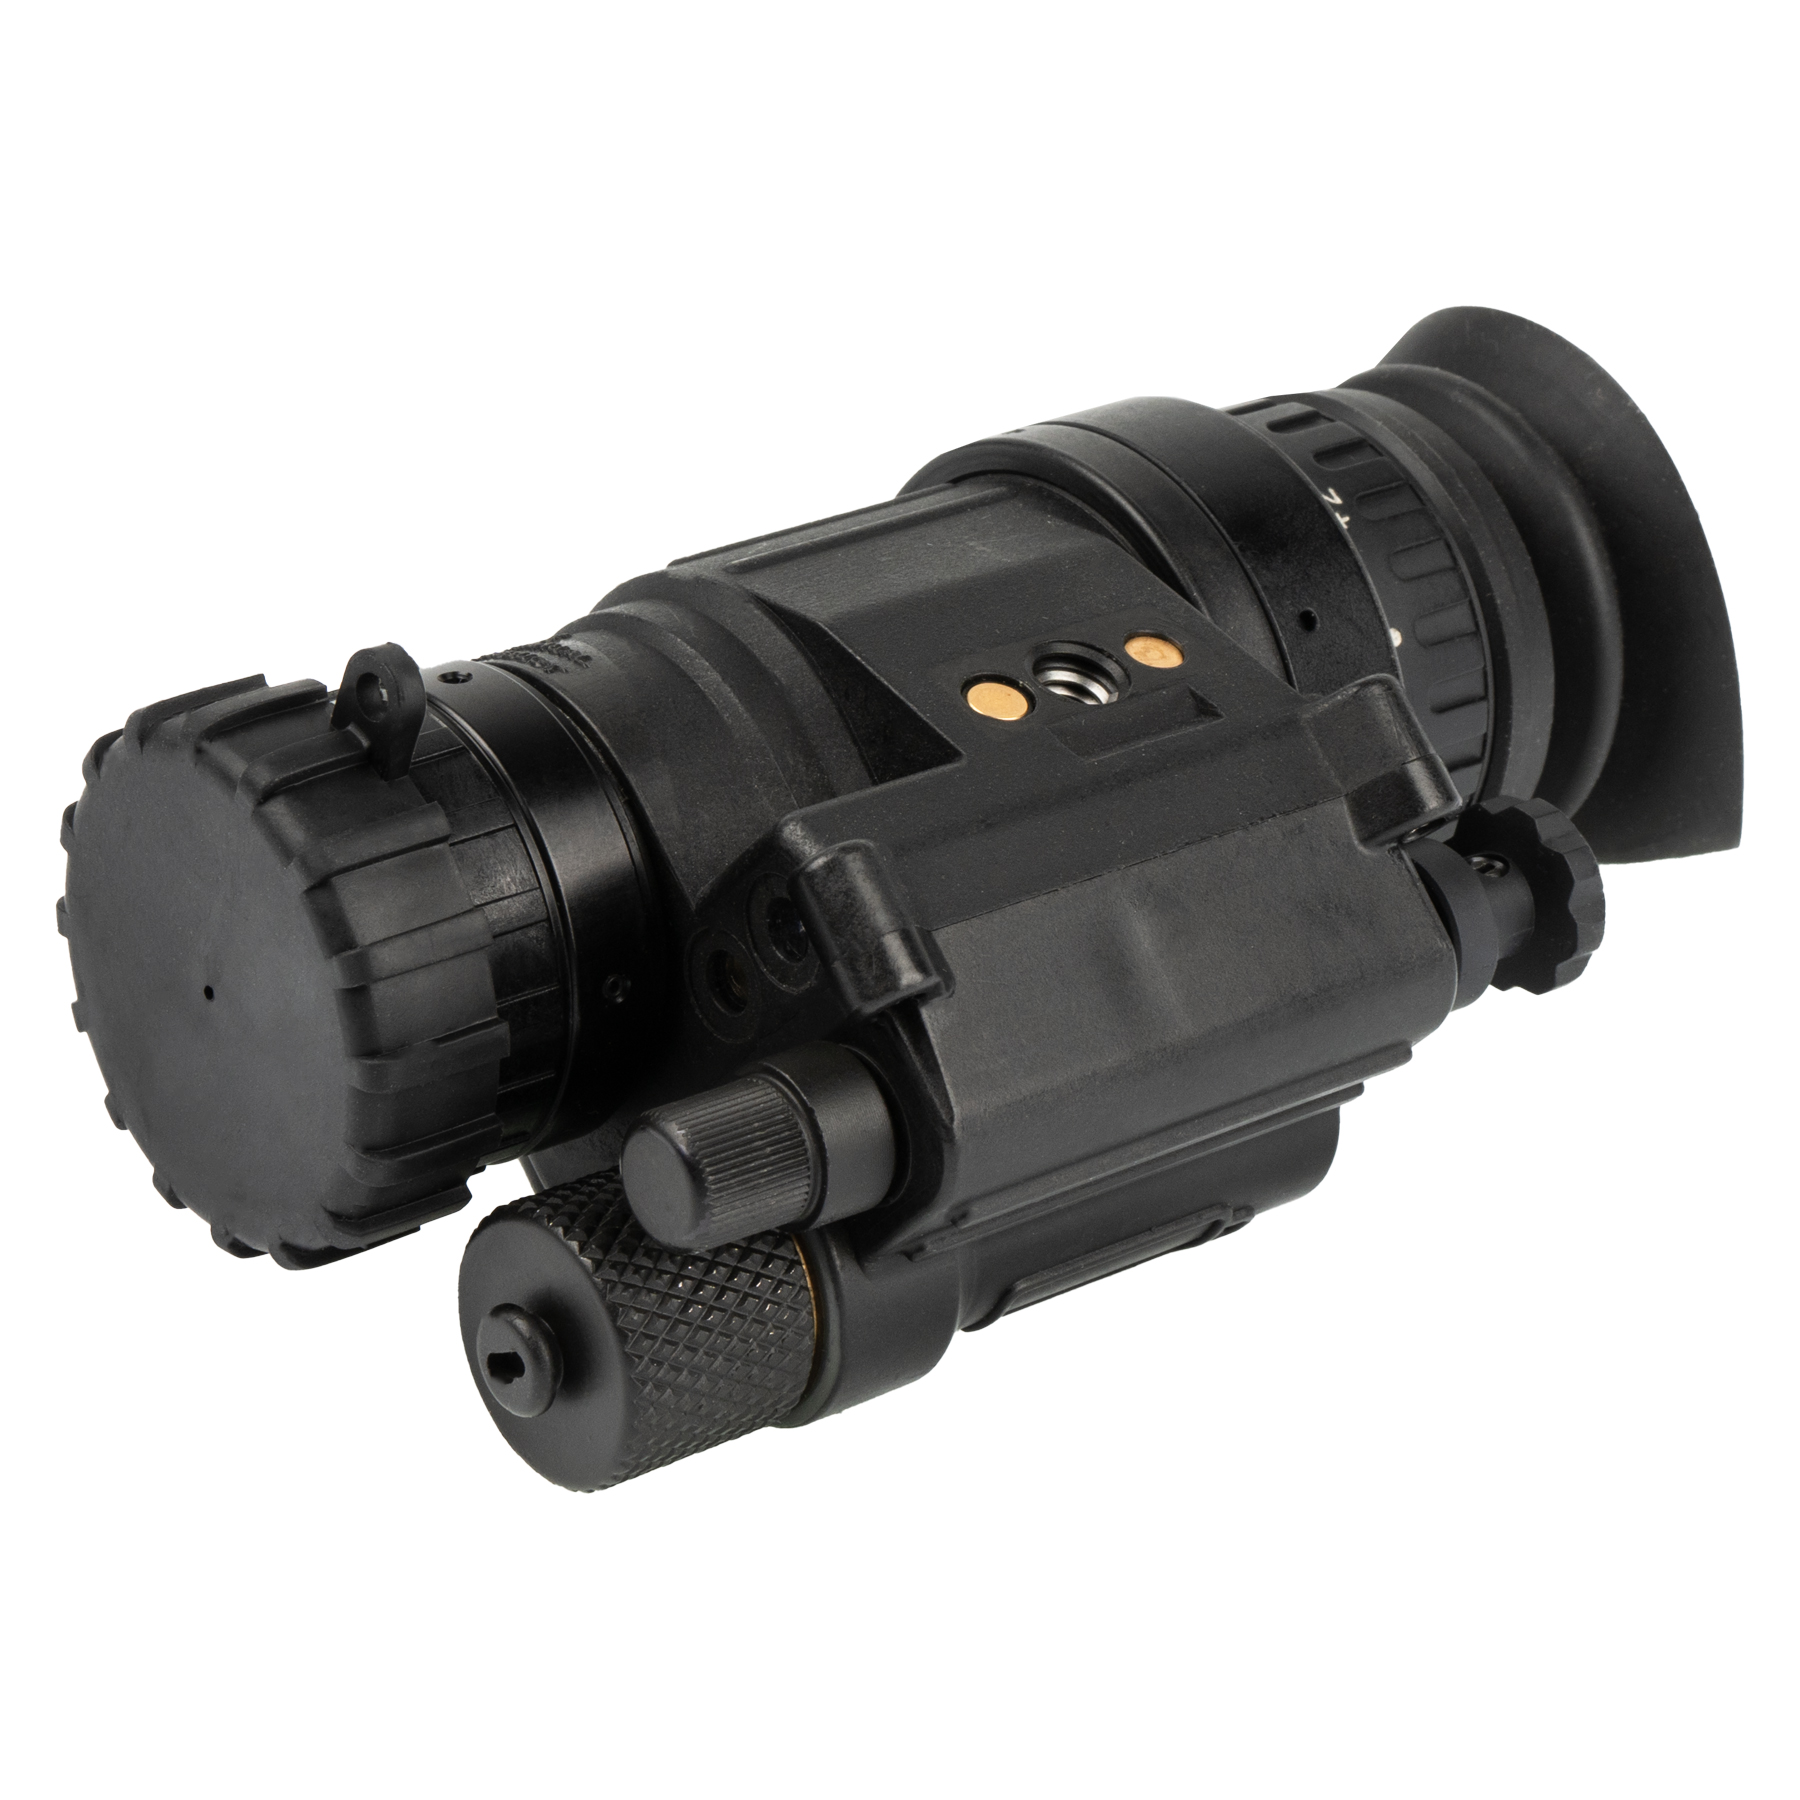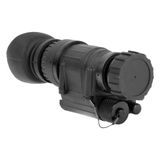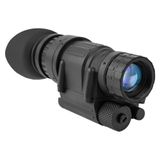
Do you want to repair your PVS-14 monocular? Do you know how to disassemble electronic devices and have minimal knowledge in the field of electronics? Then this article is for you.
Quick navigation by article sections
Below are step-by-step instructions on how to assemble a night vision device if you have all the necessary components. If you have broken one of the parts of the device, you may select the part of the article where we talk about replacing the required component.
If you can find all the components of the monocular — used, but in good condition — then this information will help you assemble a working PVS-14 yourself! Please note that the image intensifier must be in working order. This post does not talk about the repair of the tubes — this is already a branch of work for the relevant specialists.
Components for creating your own PVS-14
The table below shows a list of components typically included in the PVS-14 kit. Some parts that can be dispensed with are highlighted in italics in the table.
|
Detail name |
Detail number |
|
Battery Housing (single battery configuration) |
274422-2 |
|
275113-2 |
|
|
277705 |
|
|
5002569 |
|
|
5009545-1 |
|
|
A3144306 |
|
|
A3144315 |
|
|
A3144316 |
|
|
A3144318 |
|
|
Close Focus Stop |
A3144322 |
|
Objective Cell O-Ring |
A3144323 |
|
A3144422 |
|
|
A3256342 |
|
|
A3256354 |
|
|
A3256356-2 |
|
|
A3256358 |
|
|
A3256360 |
|
|
- |
|
|
MS16995-2B |
|
|
TM11-5855-30610 |
Where to find components
A PVS-14 housing kit costs between $700 and $1000, depending on which retailer you use. You can also use upgraded components such as the Vyper housing or the Hyper aluminum housing from DEP Technologies. They also make titanium retaining rings for extra shine, but of course those parts will cost more.
You can purchase new or used PVS-14 housing from the Punisher online store. This one comes complete with all the necessary components. All you have to do is add an image intensifier tube to it — and you have a NVG ready for use!
|
|
|
In addition to the necessary parts listed in the table above, in our store you will find additional components and accessories for PVS-14: Sacrificial Window, Anti-Fog/Protective Window, LIF, magnetic compass and much more.
For a complete list of PVS-14 and other NV models parts, see the section «Night-Vision devices & Thermal Vision Devices»
Image Intensifier Tubes
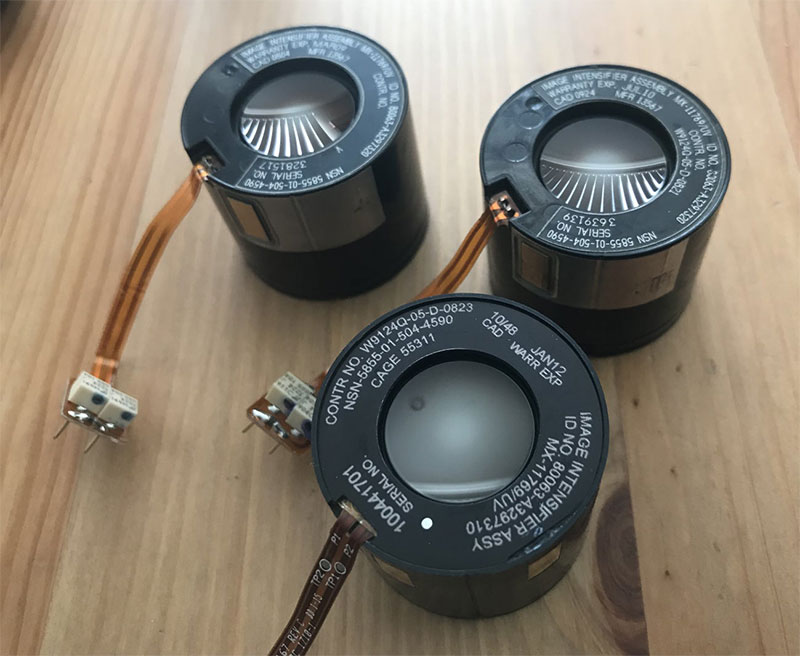
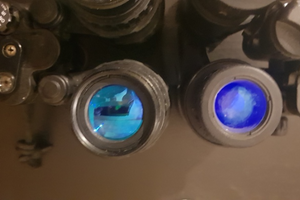
There are two types of image intensifier tubes: MX-10160 and MX-11769. The difference lies in manual gain or lack thereof. Gain is the brightness of the screen in the tube that you are looking into.
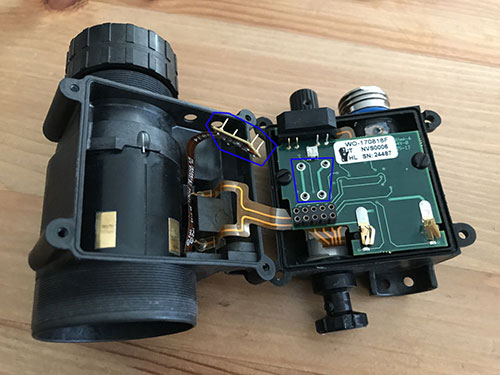
On the PVS-14 there is a knob for adjusting the gain if you have a 11769 style tube. In the photo above you can see the pigtails coming from the body — from them you can determine that these are image intensifier tubes of type 11769. 10160 tubes do not have the pigtail.
In some cases you can unsolder the 11769 pigtail and turn it into a 10160 if you need it. This does not apply to the PVS-14 assembly, but for replacing image intensifiers in binoculars that do not have manual amplification and space for it on the bodies, this is exactly what you need.
PVS-14 Assembling: step-by-step instructions
Tools required for installation:
-
allen wrenches 0.050” and 5/64”;
-
small flat head screwdriver;
-
air duster aerosol can;
-
a pen or wipes for cleaning lenses;
-
an old plastic credit card that can be cut up.
Now you have purchased all the necessary components and prepared the tools. We proceed directly to the assembly or repair of night vision devices.
-
Assembling the PVS-14 battery compartment. Most battery cases come with the parts already installed, but just in case, here's what you need to do.
-
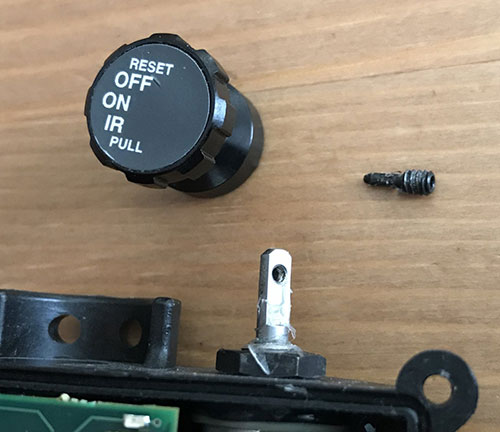
There is a small adjustment screw/pin on the power switch. A 0.050" hex wrench is required to tighten it. Be careful when installing this screw. The pin can fall out if the adjuster is not aligned properly, and if you try to tighten it too hard, the hex screw will come off very easily. We are talking about the hex socket for the hex key, not the thread.
-
|
|
|
-
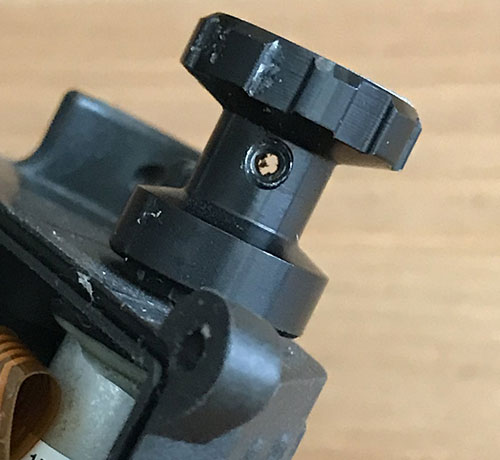
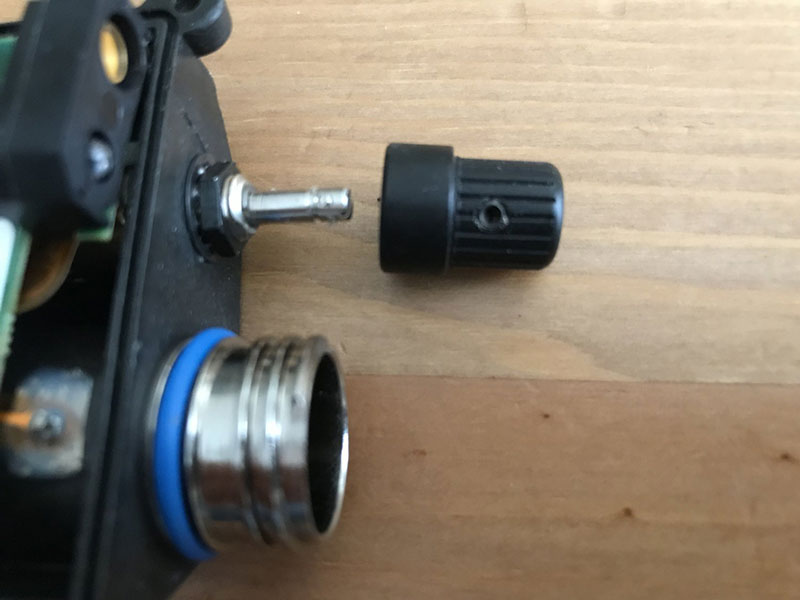
Then set the manual gain knob. To do this, use a screw of the same size only without a pin. Place the knob on the silver rod. Using a 0.050" hex wrench, tighten the adjustment screw into the indentation visible on the rod in the photo below.
-
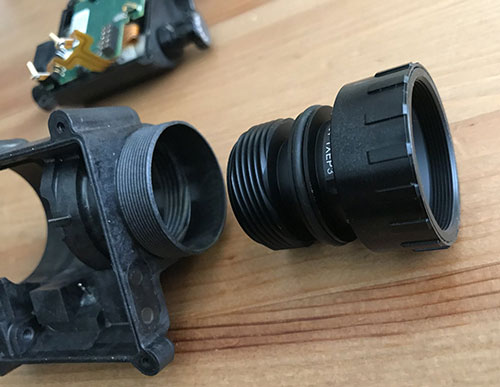
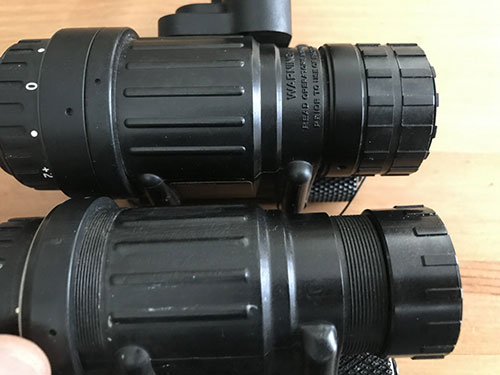
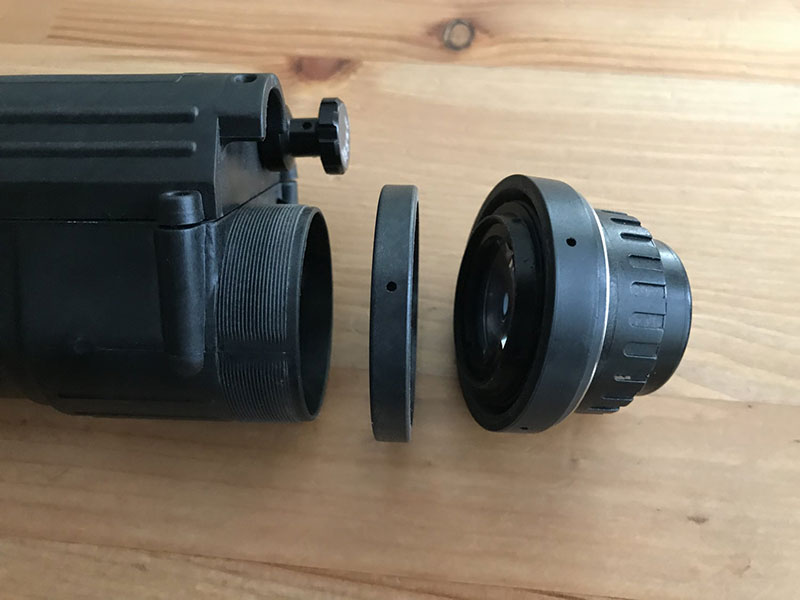
Installing the objective lens into the body. First install the objective locking ring. Before you screw in the objective lens, use the lens cleaning pen or cloth for cleaning glasses and clean the back of the lens.
|
|
|
|
This is what an objective lock ring looks like. The top one has it and the bottom one does not |
There is also a close focus stop. When you install the lock ring and lens, you need to screw on the close focus stop from inside the housing. This prevents you from unscrewing the objective lens right out of the housing.
The PVS-14 has a shallow depth of field. You can focus at infinity and everything close will be out of focus, or you can focus on something close but everything far away will be out of focus. To focus on close objects, you are unscrewing the lens. If you unscrew it far enough it will fall out unless you have the close focus stop installed. In general, you can do without this stop, but the user will need to watch how far he unscrews the lens.
-
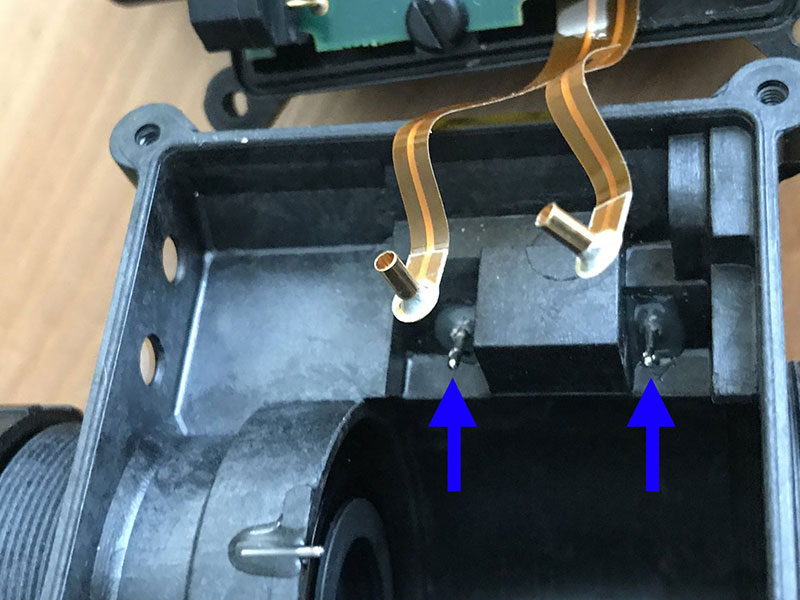
Installing the battery compartment into the monocular housing. If you look inside the monocular body, you will see two small pins sticking up. They correspond with external contacts that are on either side of the threaded hole for attaching a J-Arm. The battery compartment has a pigtail with two contacts that need to be connected to two pins. You can use a small flat head screwdriver to push the brass/copper looking cylinders onto their matching pins.
-
Tube Installation.
-
First, notice the small metal pin glued into the monocular body. It will keep the image intensifier from rotating once installed inside the housing.
-
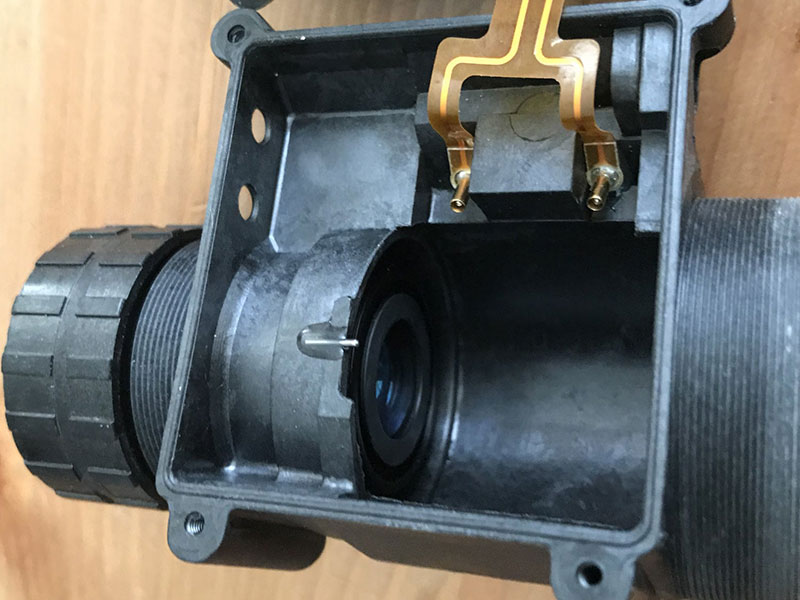
-
If you are using the 11769 image intensifier with a pigtail, make sure that the pigtail is inserted first. Then insert the image intensifier. There will be a small notch on its bottom edge. Align it with the pin in the monocular body. Before inserting the image intensifier all the way,spray it using a canned air duster.
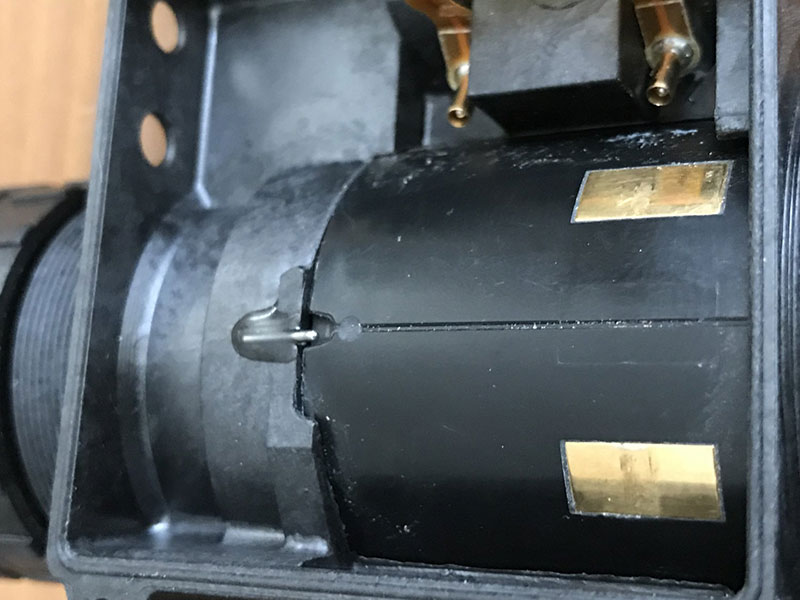
-
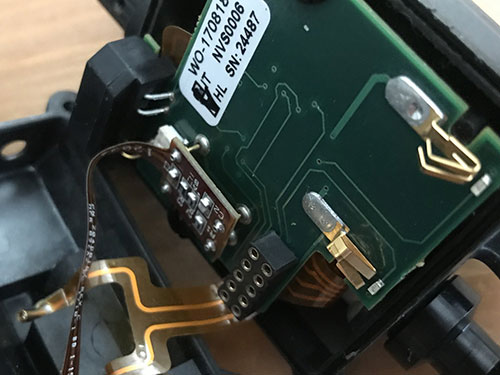
If you have a 10160 image intensifier, you can skip the next step. The 11769 pigtail has a small chip with four pins (circled in blue in the photo below). They correspond to the holes on the battery compartment board. Plug pins into the board.
|
|
|
|
Image intensifier contacts and battery compartment holes |
Partially installed chip. Just press lightly until the chip touches the board |
-
Connecting the monocular housing to the battery compartment.
-
Carefully place the battery compartment onto the monocular body, watching as the ribbon cables fold in on themselves.
-
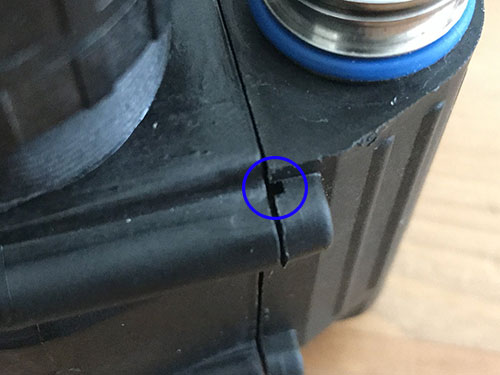
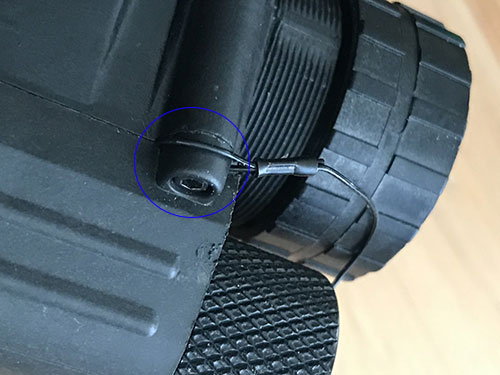
If you look at the battery compartment side of the housing, you will see that there is a notch on one of the screw ears. It is designed to secure the battery cap tether. You need to loop the tether over this little part before you screw the housings together.
-
|
|
|
-
Next take the 5/64 Allen wrench and screw the four battery housing screws.
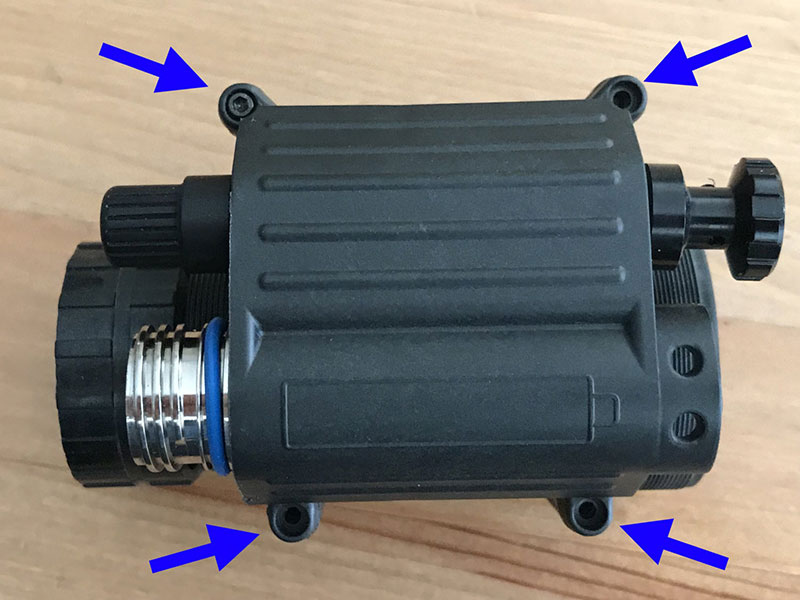
-
Adjusting the position of the image intensifier. If the image intensifier is not secured properly, it will slide back and forth and will not land on the contact pads of the battery compartment.
-
Place the light pipe on top of the image intensifier tube. It has a small rectangular protrusion that should be placed above the place where the pigtail enters the image intensifier.
-
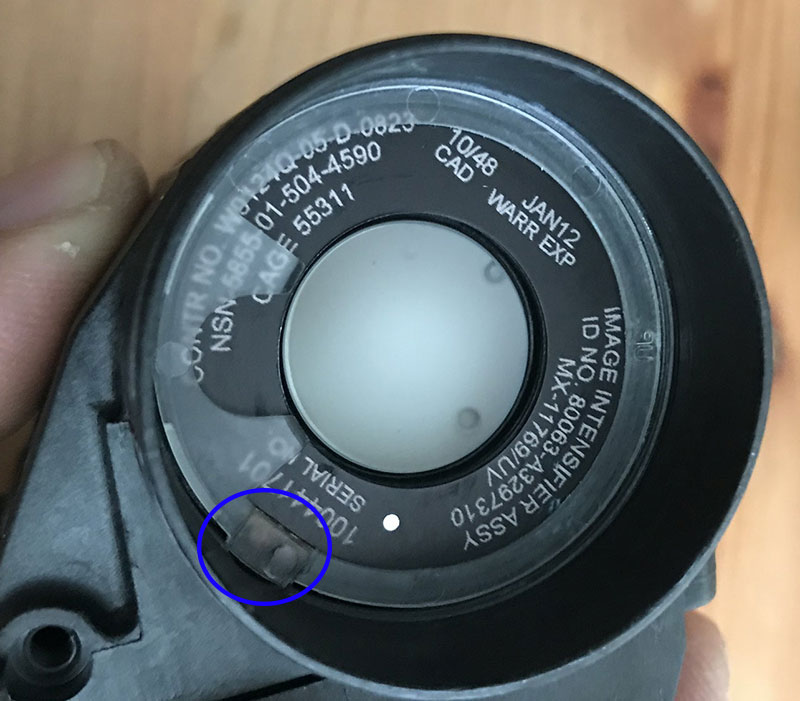
-
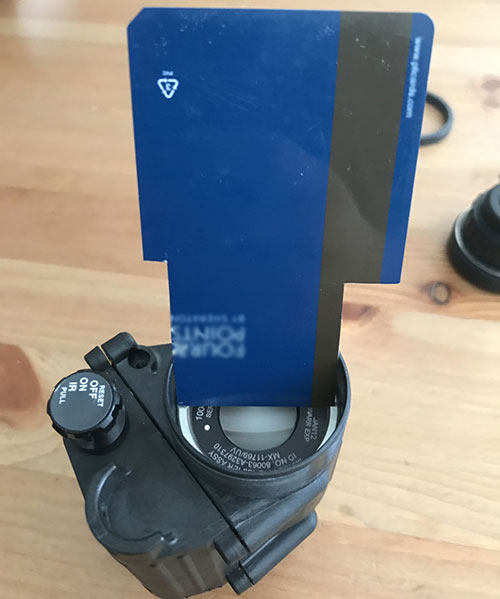
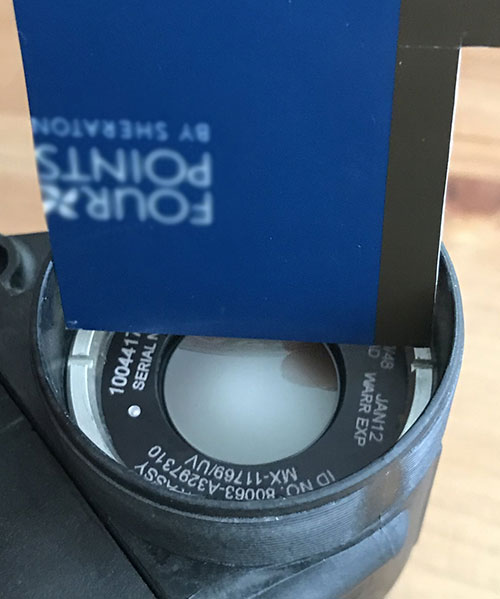
Install the tube retaining ring. To do this, you can use an old credit card. Cut it so that it is the same width as the retaining ring. You can use a small flathead screwdriver, but using a card makes it easier to press and tighten the ring evenly.
|
|
|
-
Installation of the eyepiece lock ring and eyepiece. Pre-clean the image intensifier tube and eyepiece from dust using the canned air duster or use a lens cleaning pen. Be careful when screwing on the eyepiece as the threads on the monocular body are very thin and made of polymer.
-
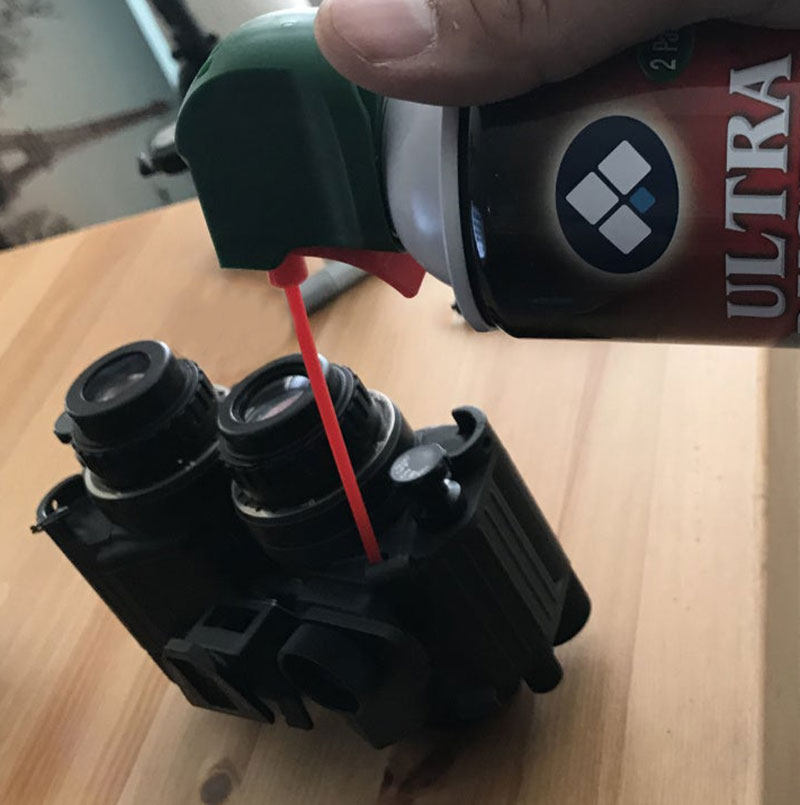
Installing the purge screw and o-ring. In production, night vision devices are cleaned using special equipment. There are also separate life hacks at home on how to clean the inside of the housing.
If you live and plan to use the NVG in a dry climate, you may not need to clean it.
If you are in a humid environment, it is possible that your night vision device will fog up on the inside. In this case, we suggest cleaning with the canned air.
Carefully spray air from the can into the purge hole, and then quickly install the purge screw. This is supposed to replace the air inside the housing and reduce its tendency to fog up.
Congratulations🥳 You have completed the PVS assemble! Now all that remains is to insert the battery, adjust the focus to the user’s eyes, and the device is ready for use.
Source: https://www.thefirearmblog.com/blog/2019/04/05/friday-night-lights-diy-build-your-own-night-vision-pvs-14/
Have you read these instructions and decided that you do not want to repair the night vision devices yourself? Then entrust this task to our professional electronics technicians! To familiarize yourself with the conditions and order repairs 👉click here👈


