Long read came out.
For a long time I was haunted by the question: “Why are Asian manufacturers not copying the most popular night-vision devices?” This is not about the dummy dummy, namely, a high-quality device in which all the basic buns and the prototype functionality are implemented. In my opinion, the most popular monocular is PVS-14 (we have not yet received its budget copy). Among binoculars, ANVIS 6/9, PVS-15 and PVS-31 are common.
We do not take into account the “older” “four-eyed” brothers in the workshop, but there will be a couple of words about them at the end of the article.
Asian craftsmen decided not to trifle and go straight away with trump cards: release a fully functional copy of the PVS-31 night vision binocular.
 |
 |
 |
The manufacturer currently produces cases in several variations:
1. Under PVS-14 lenses without shutting off when tilting the device as a whole
2. Under PVS-14 lenses with auto power off when the device is fully tilted
3. A full copy of the PVS-31 with local lenses.
The first and third type of devices are not yet delivered abroad (in any case, I have not been offered such :)) and mainly go to local LEAF under contracts.
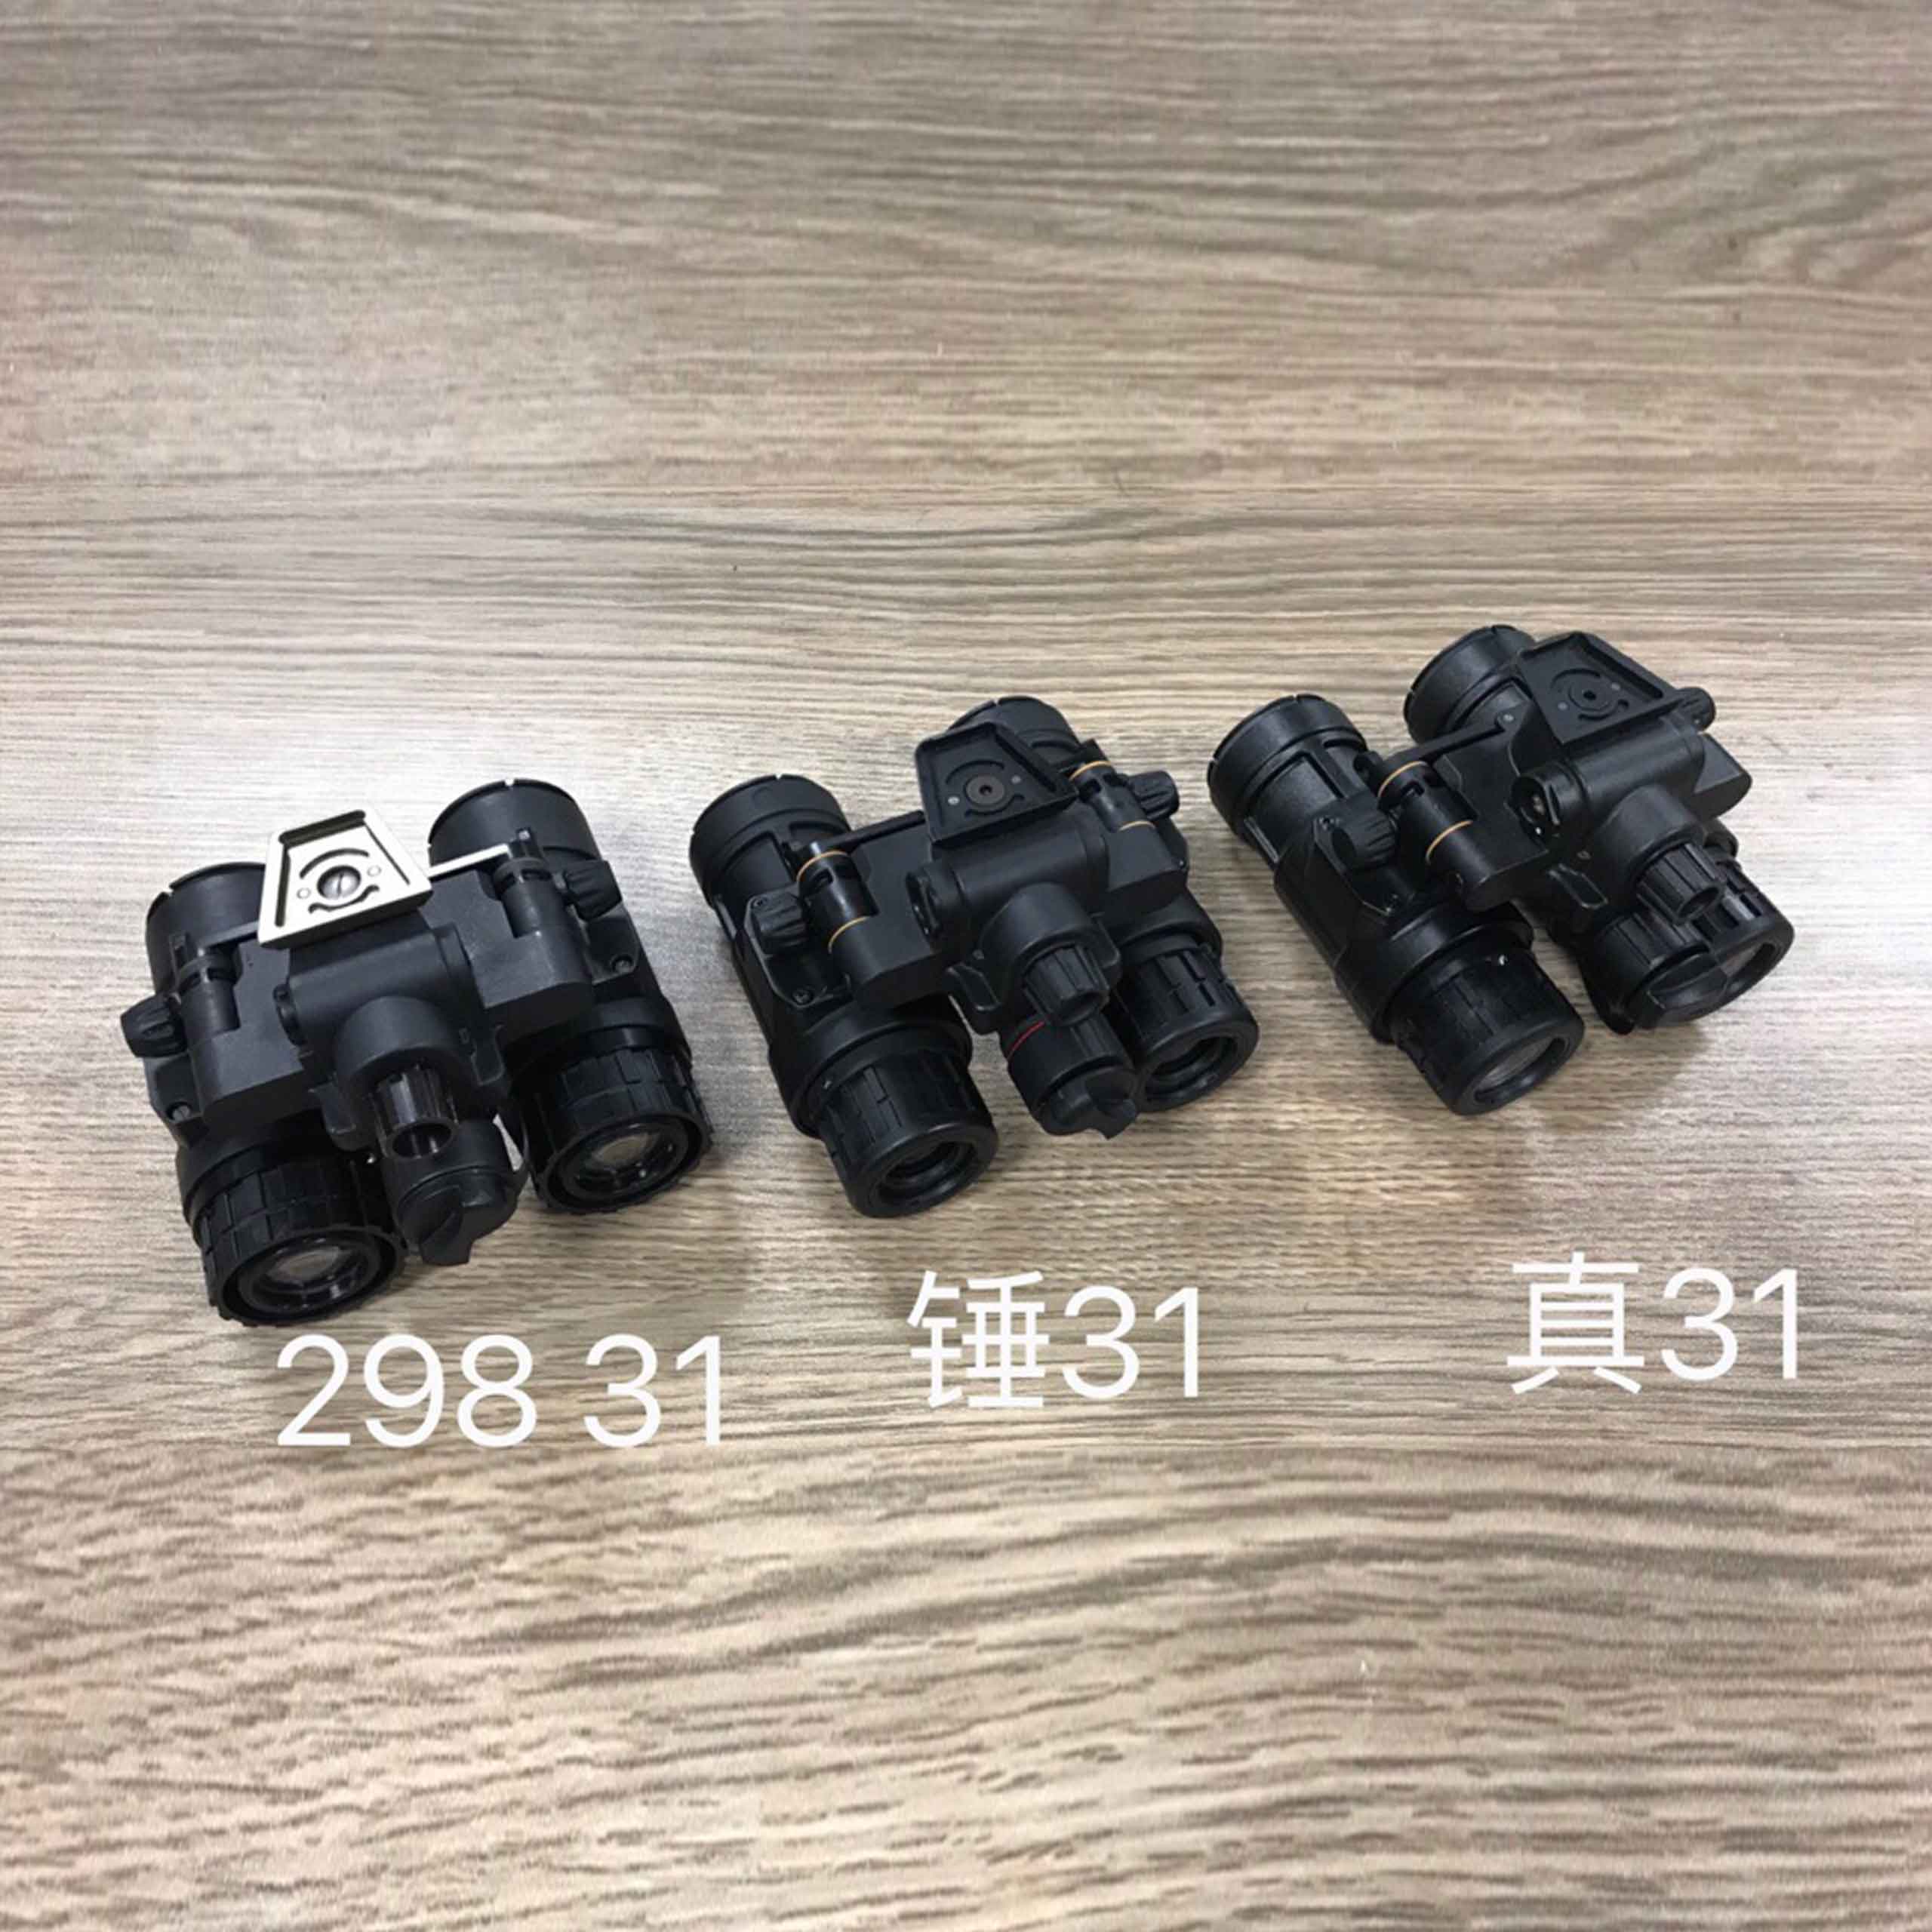
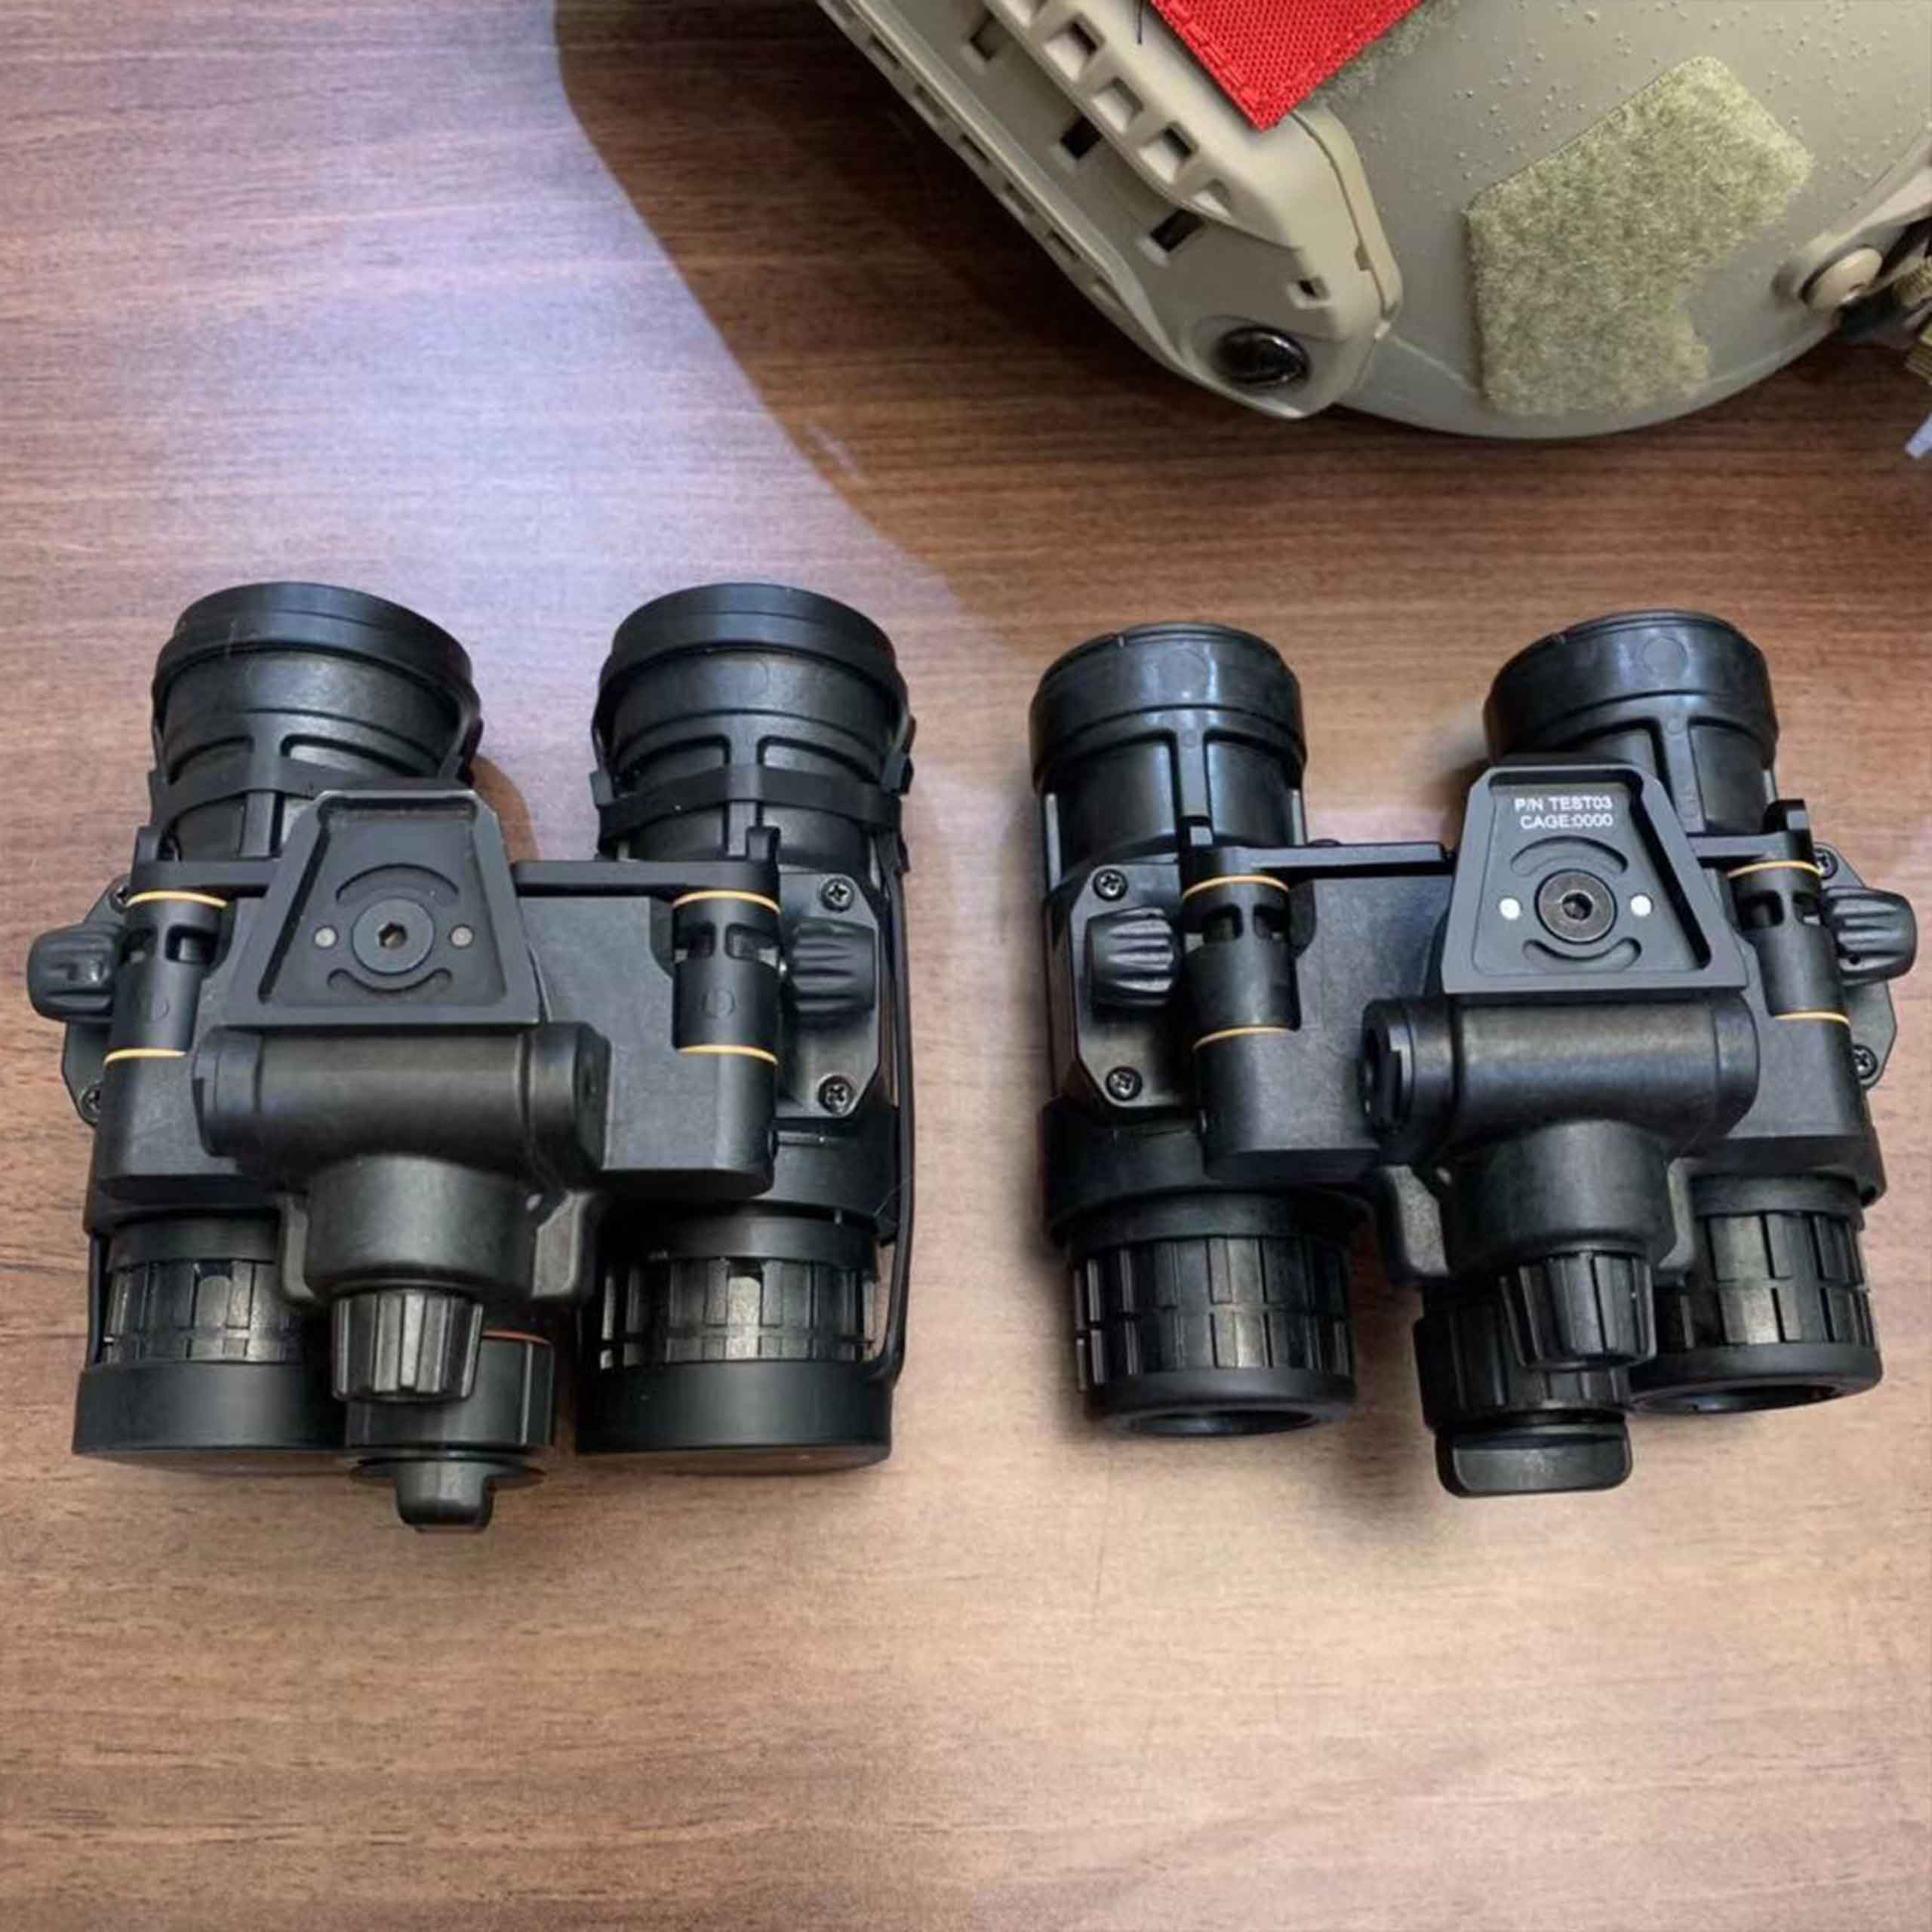
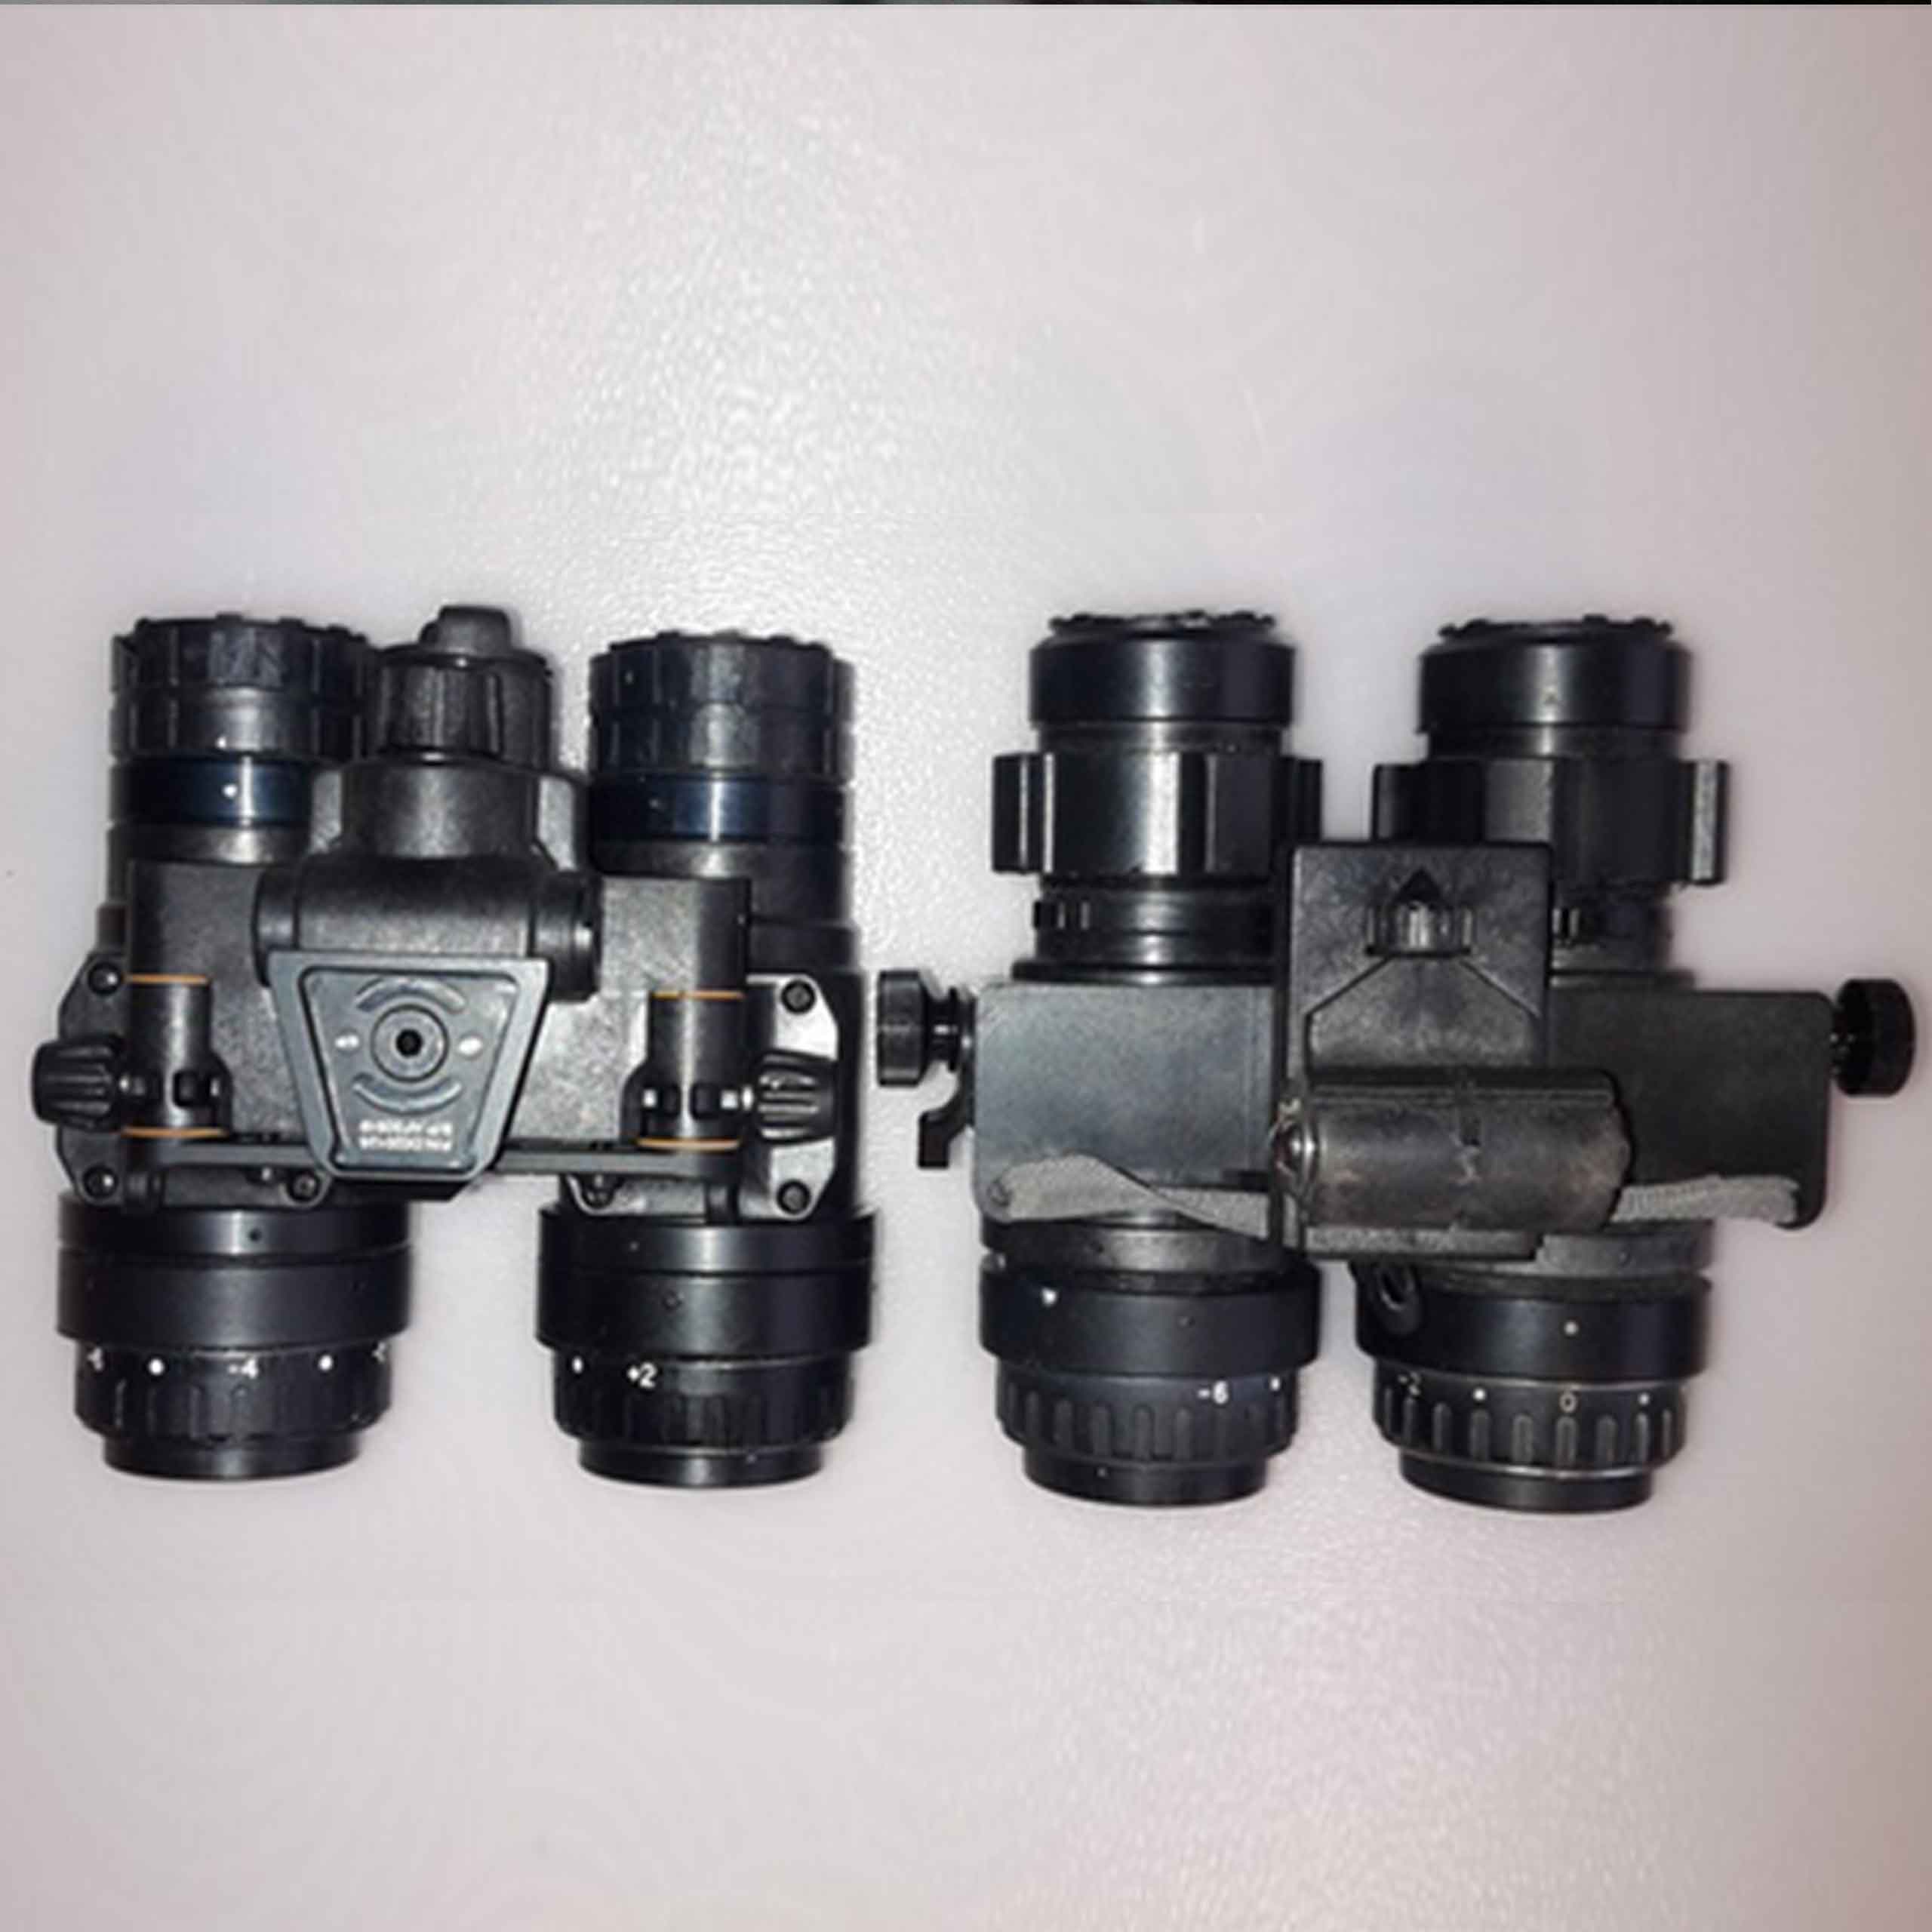
From left to right 1) PVS-31-14 (BNVD-31-14) 2) copy of PVS-31 3) Original L3 PVS-31
In this article we will consider the second option, i.e. the device for PVS-14 lenses and with automatic shutdown when the device is tilted.
In fairness, we note that the device in question is rather a mixture of two common devices: L3 AN / PVS-31 and Act in Black DTNVG.
From PVS-31, the device received a housing, all the basic functionality and ergonomics, and from DTNVG, the concept of using the most common lenses from PVS-14 (which makes life much easier, although it increases the final weight of the device).
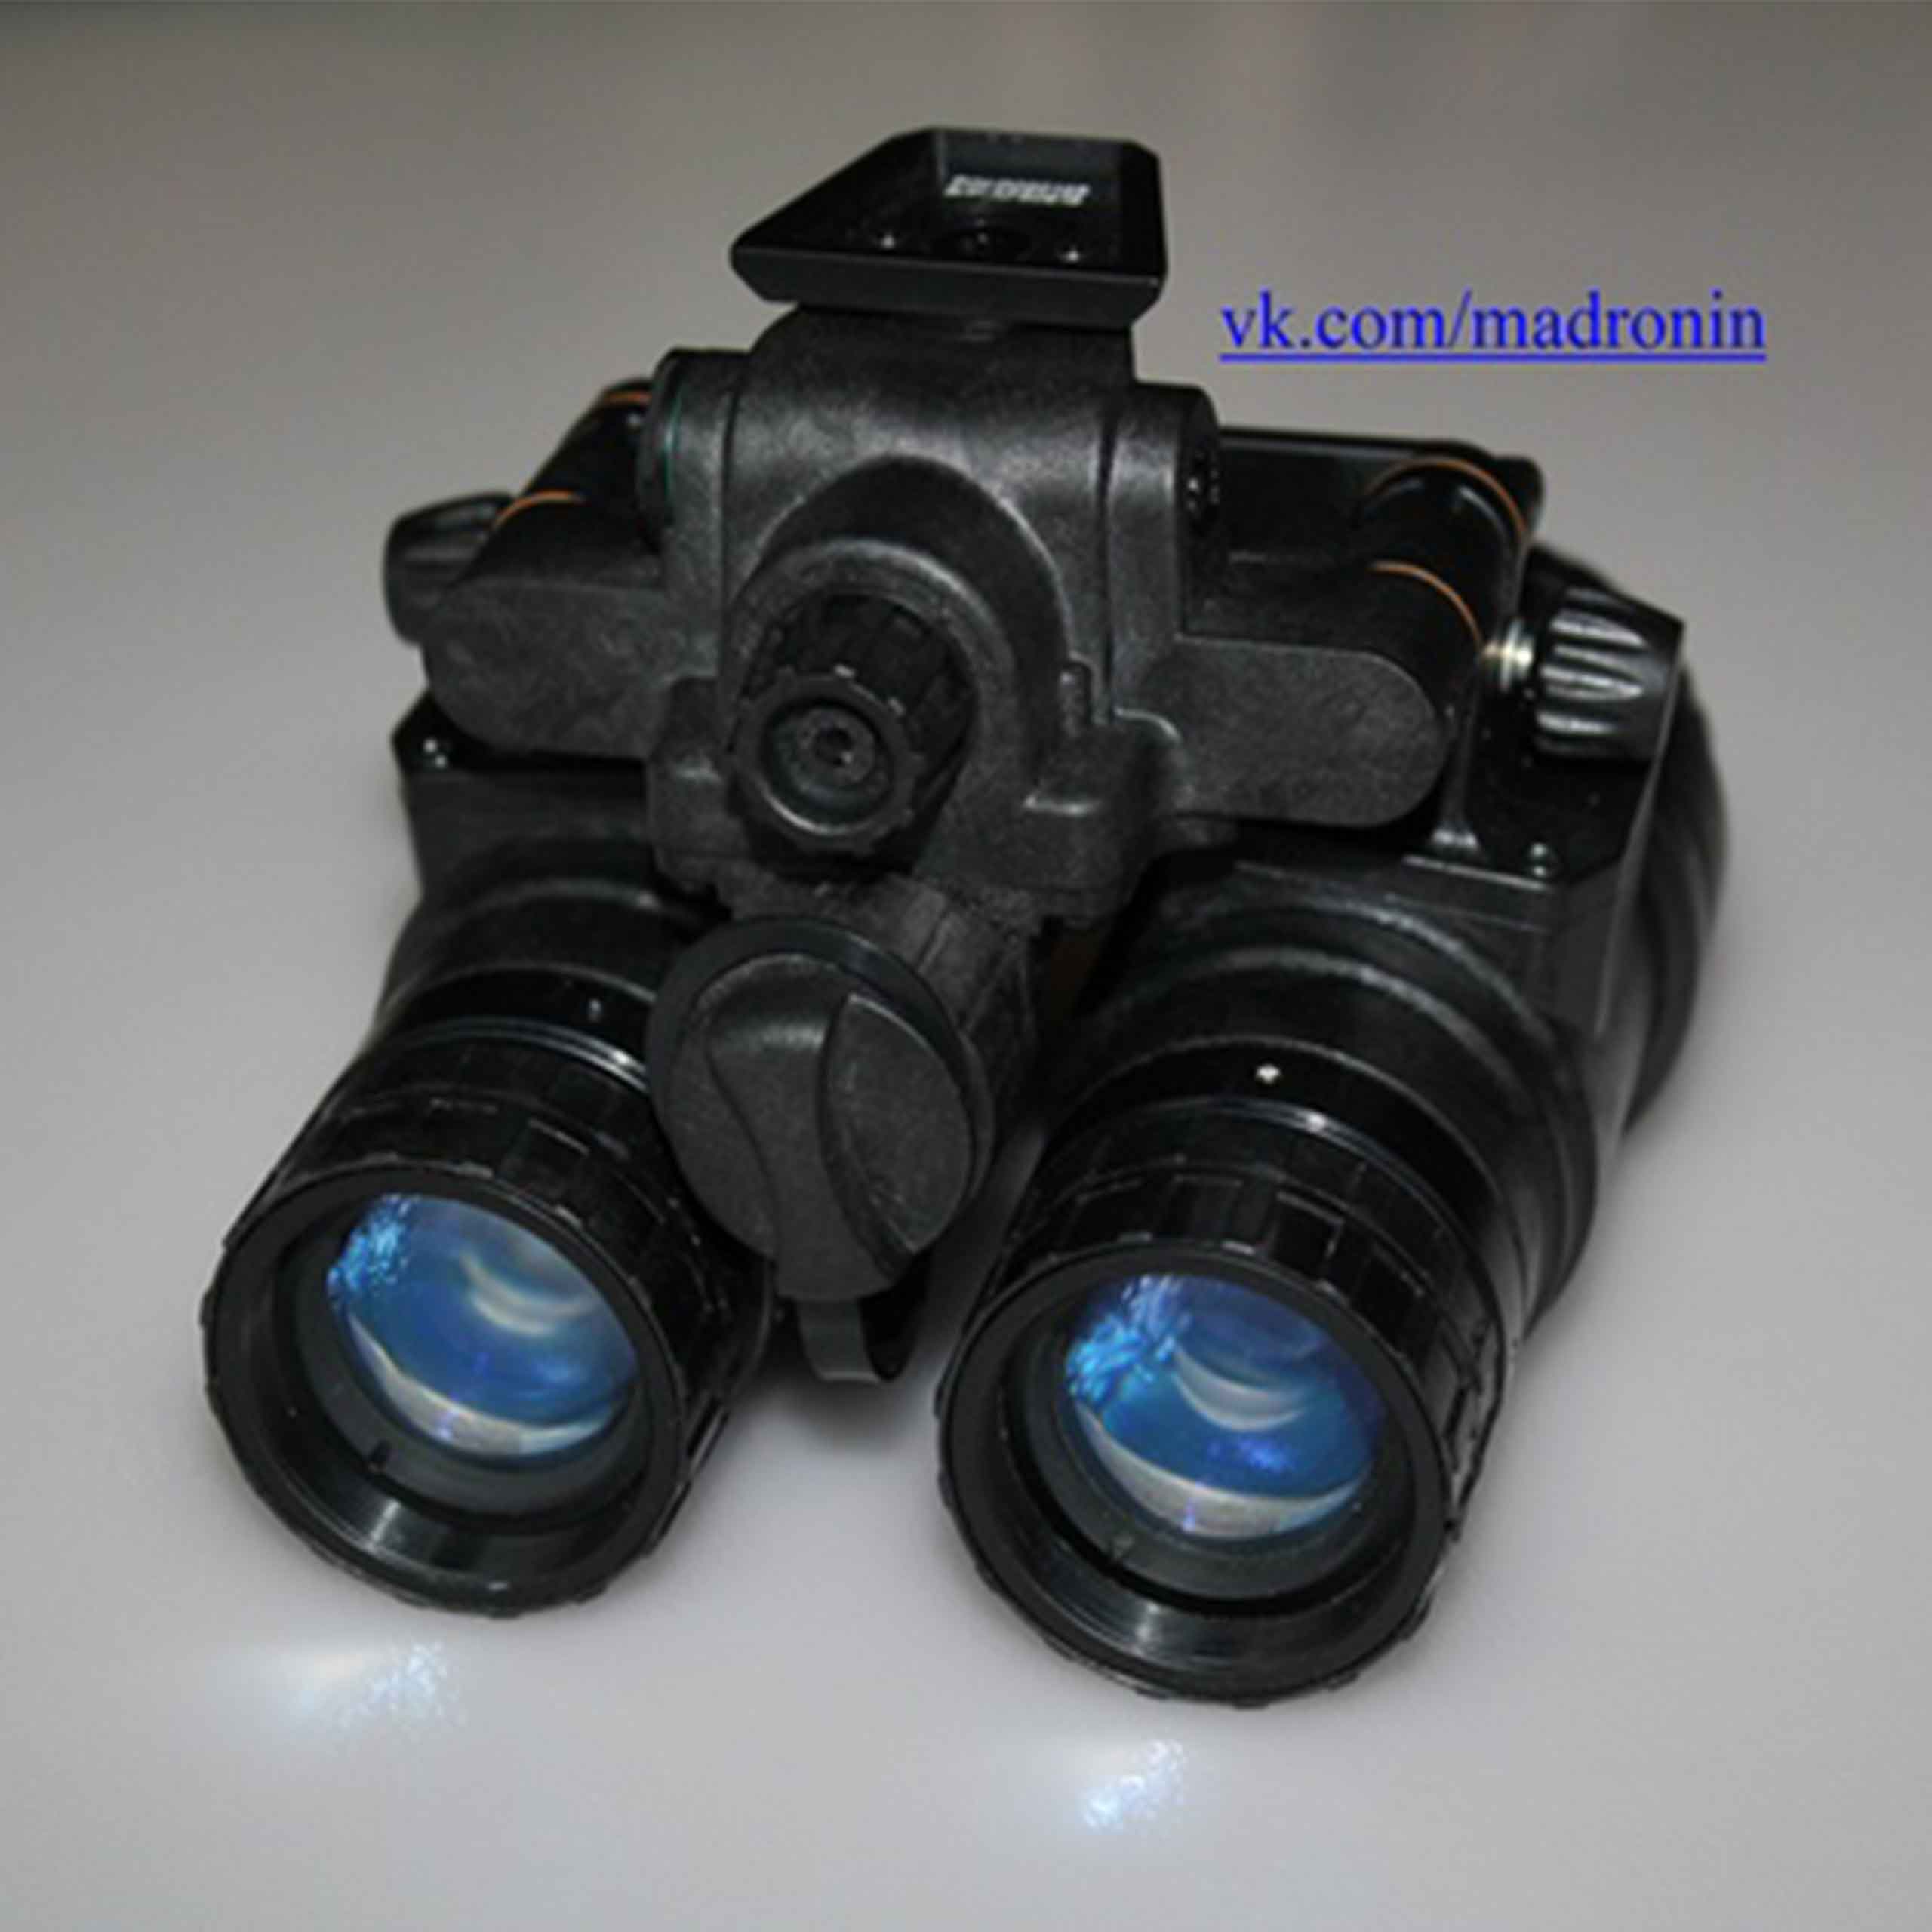
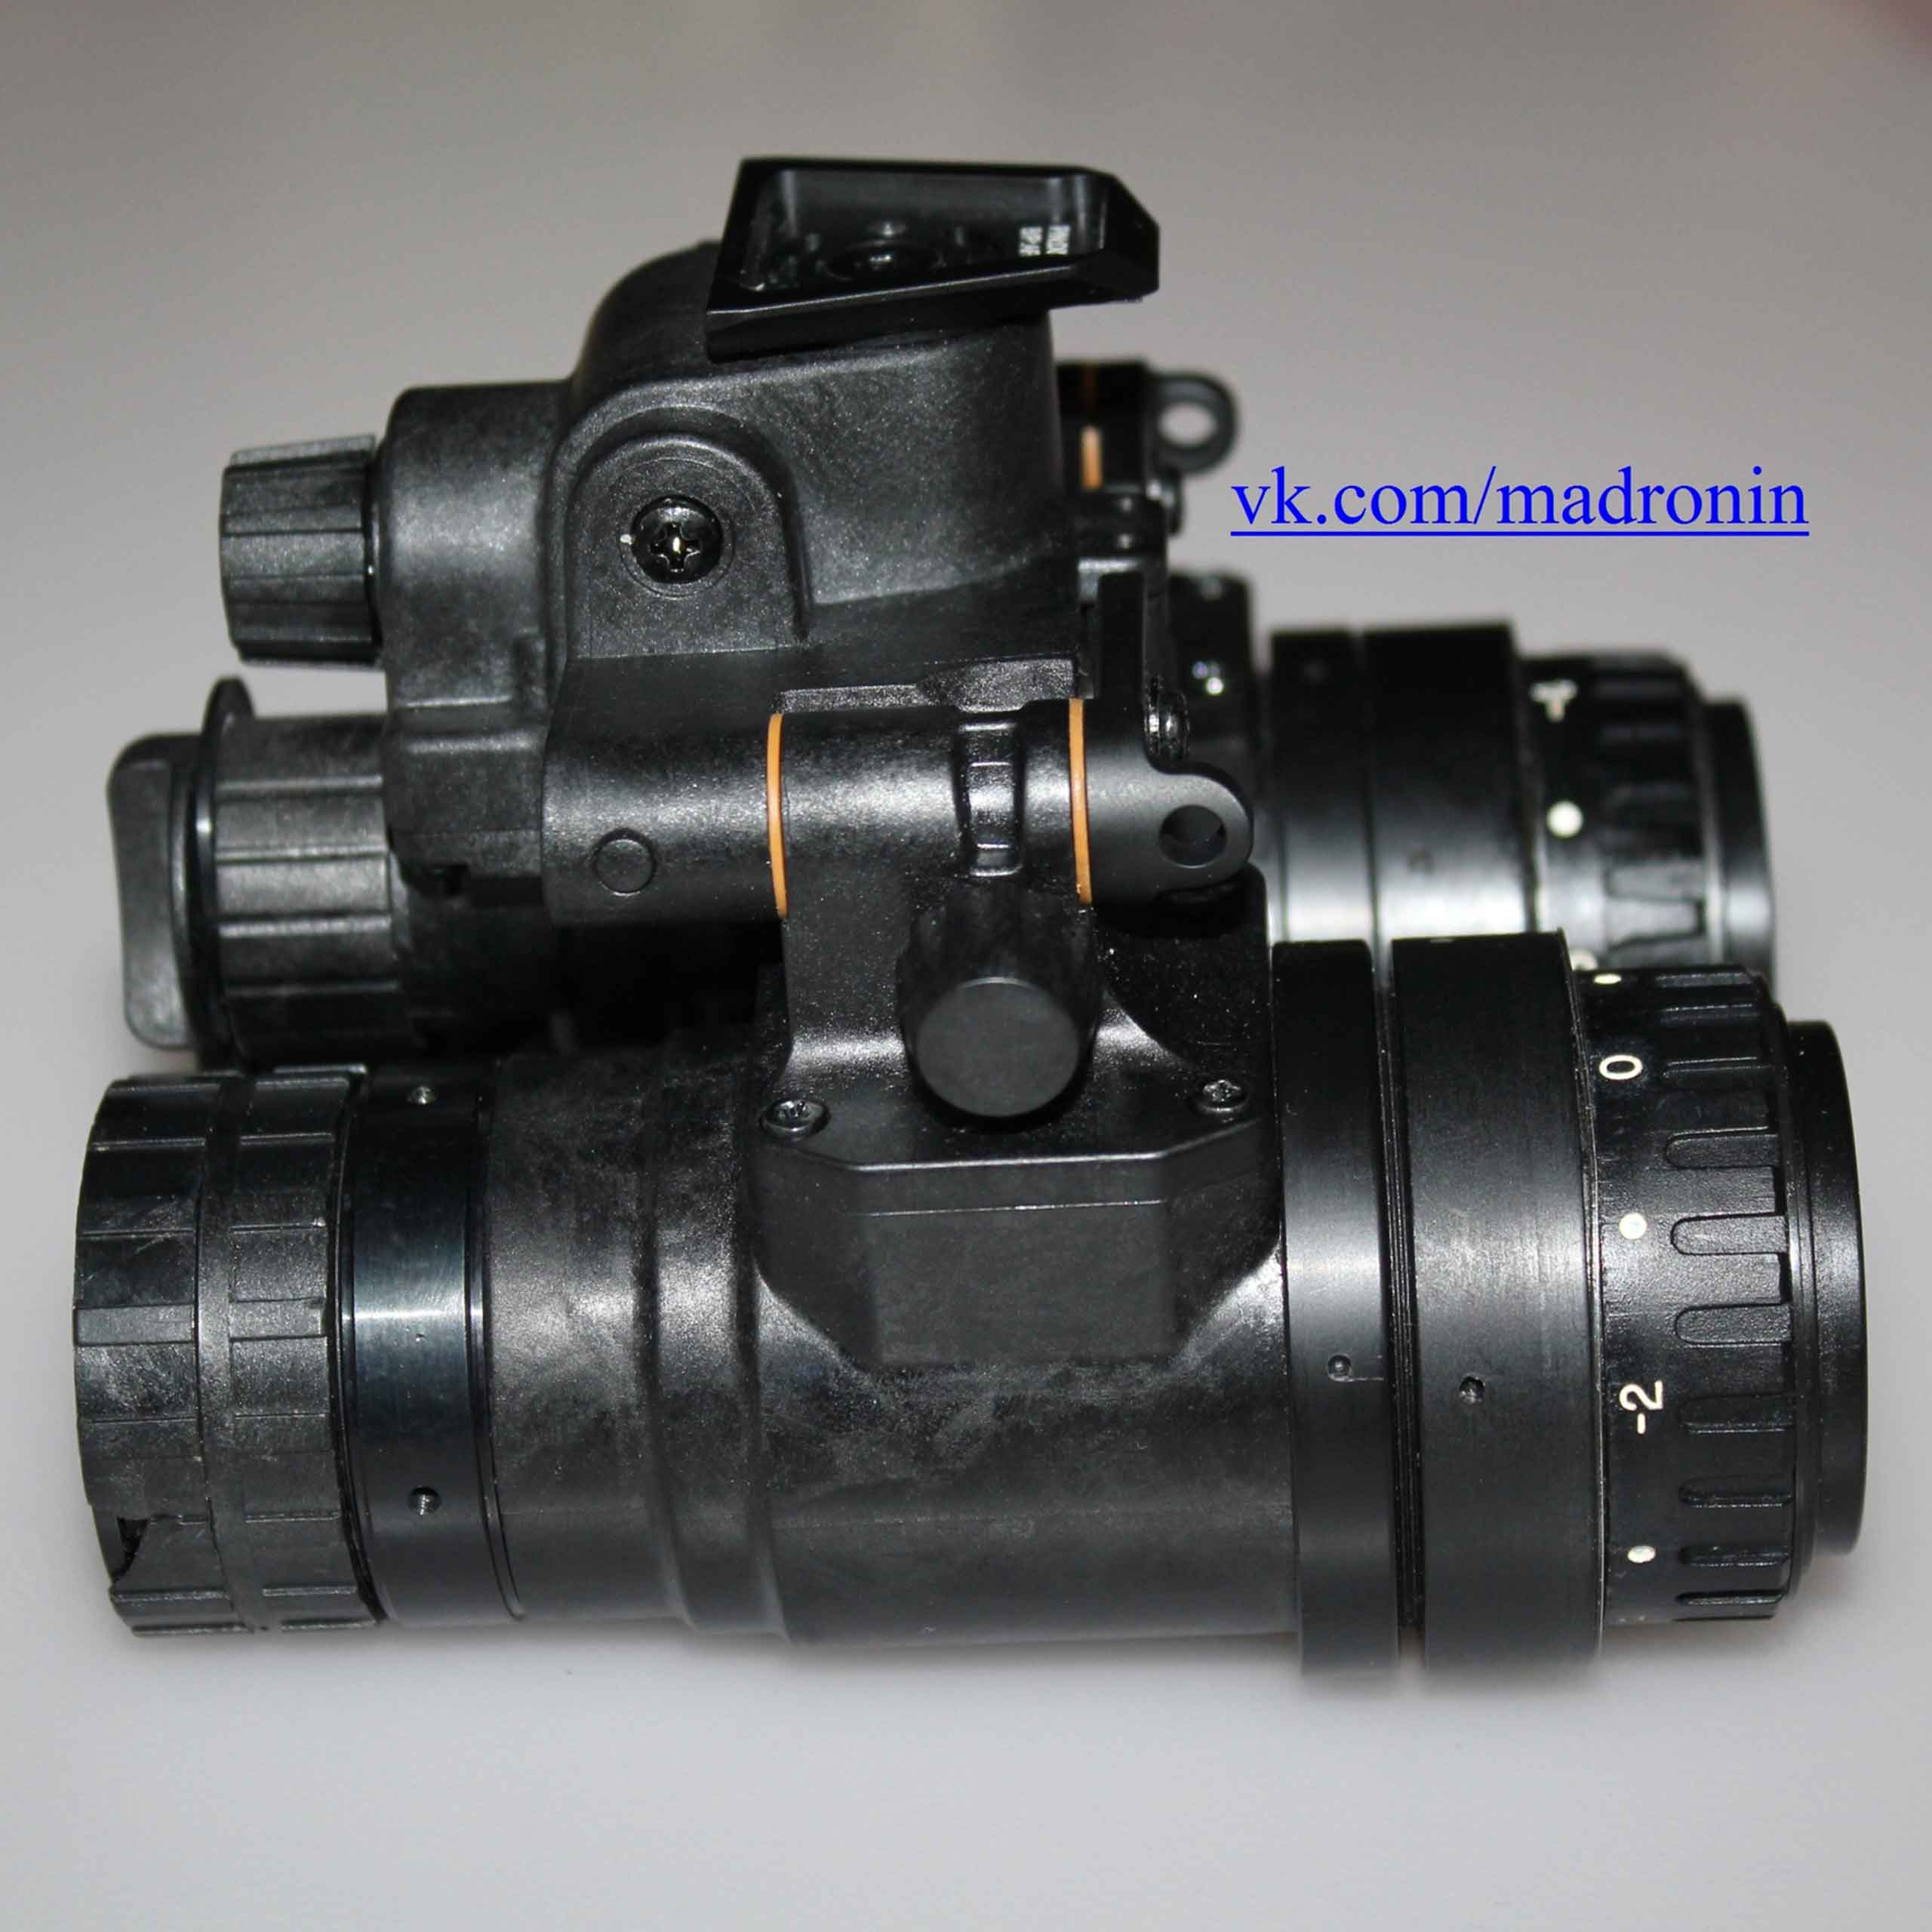
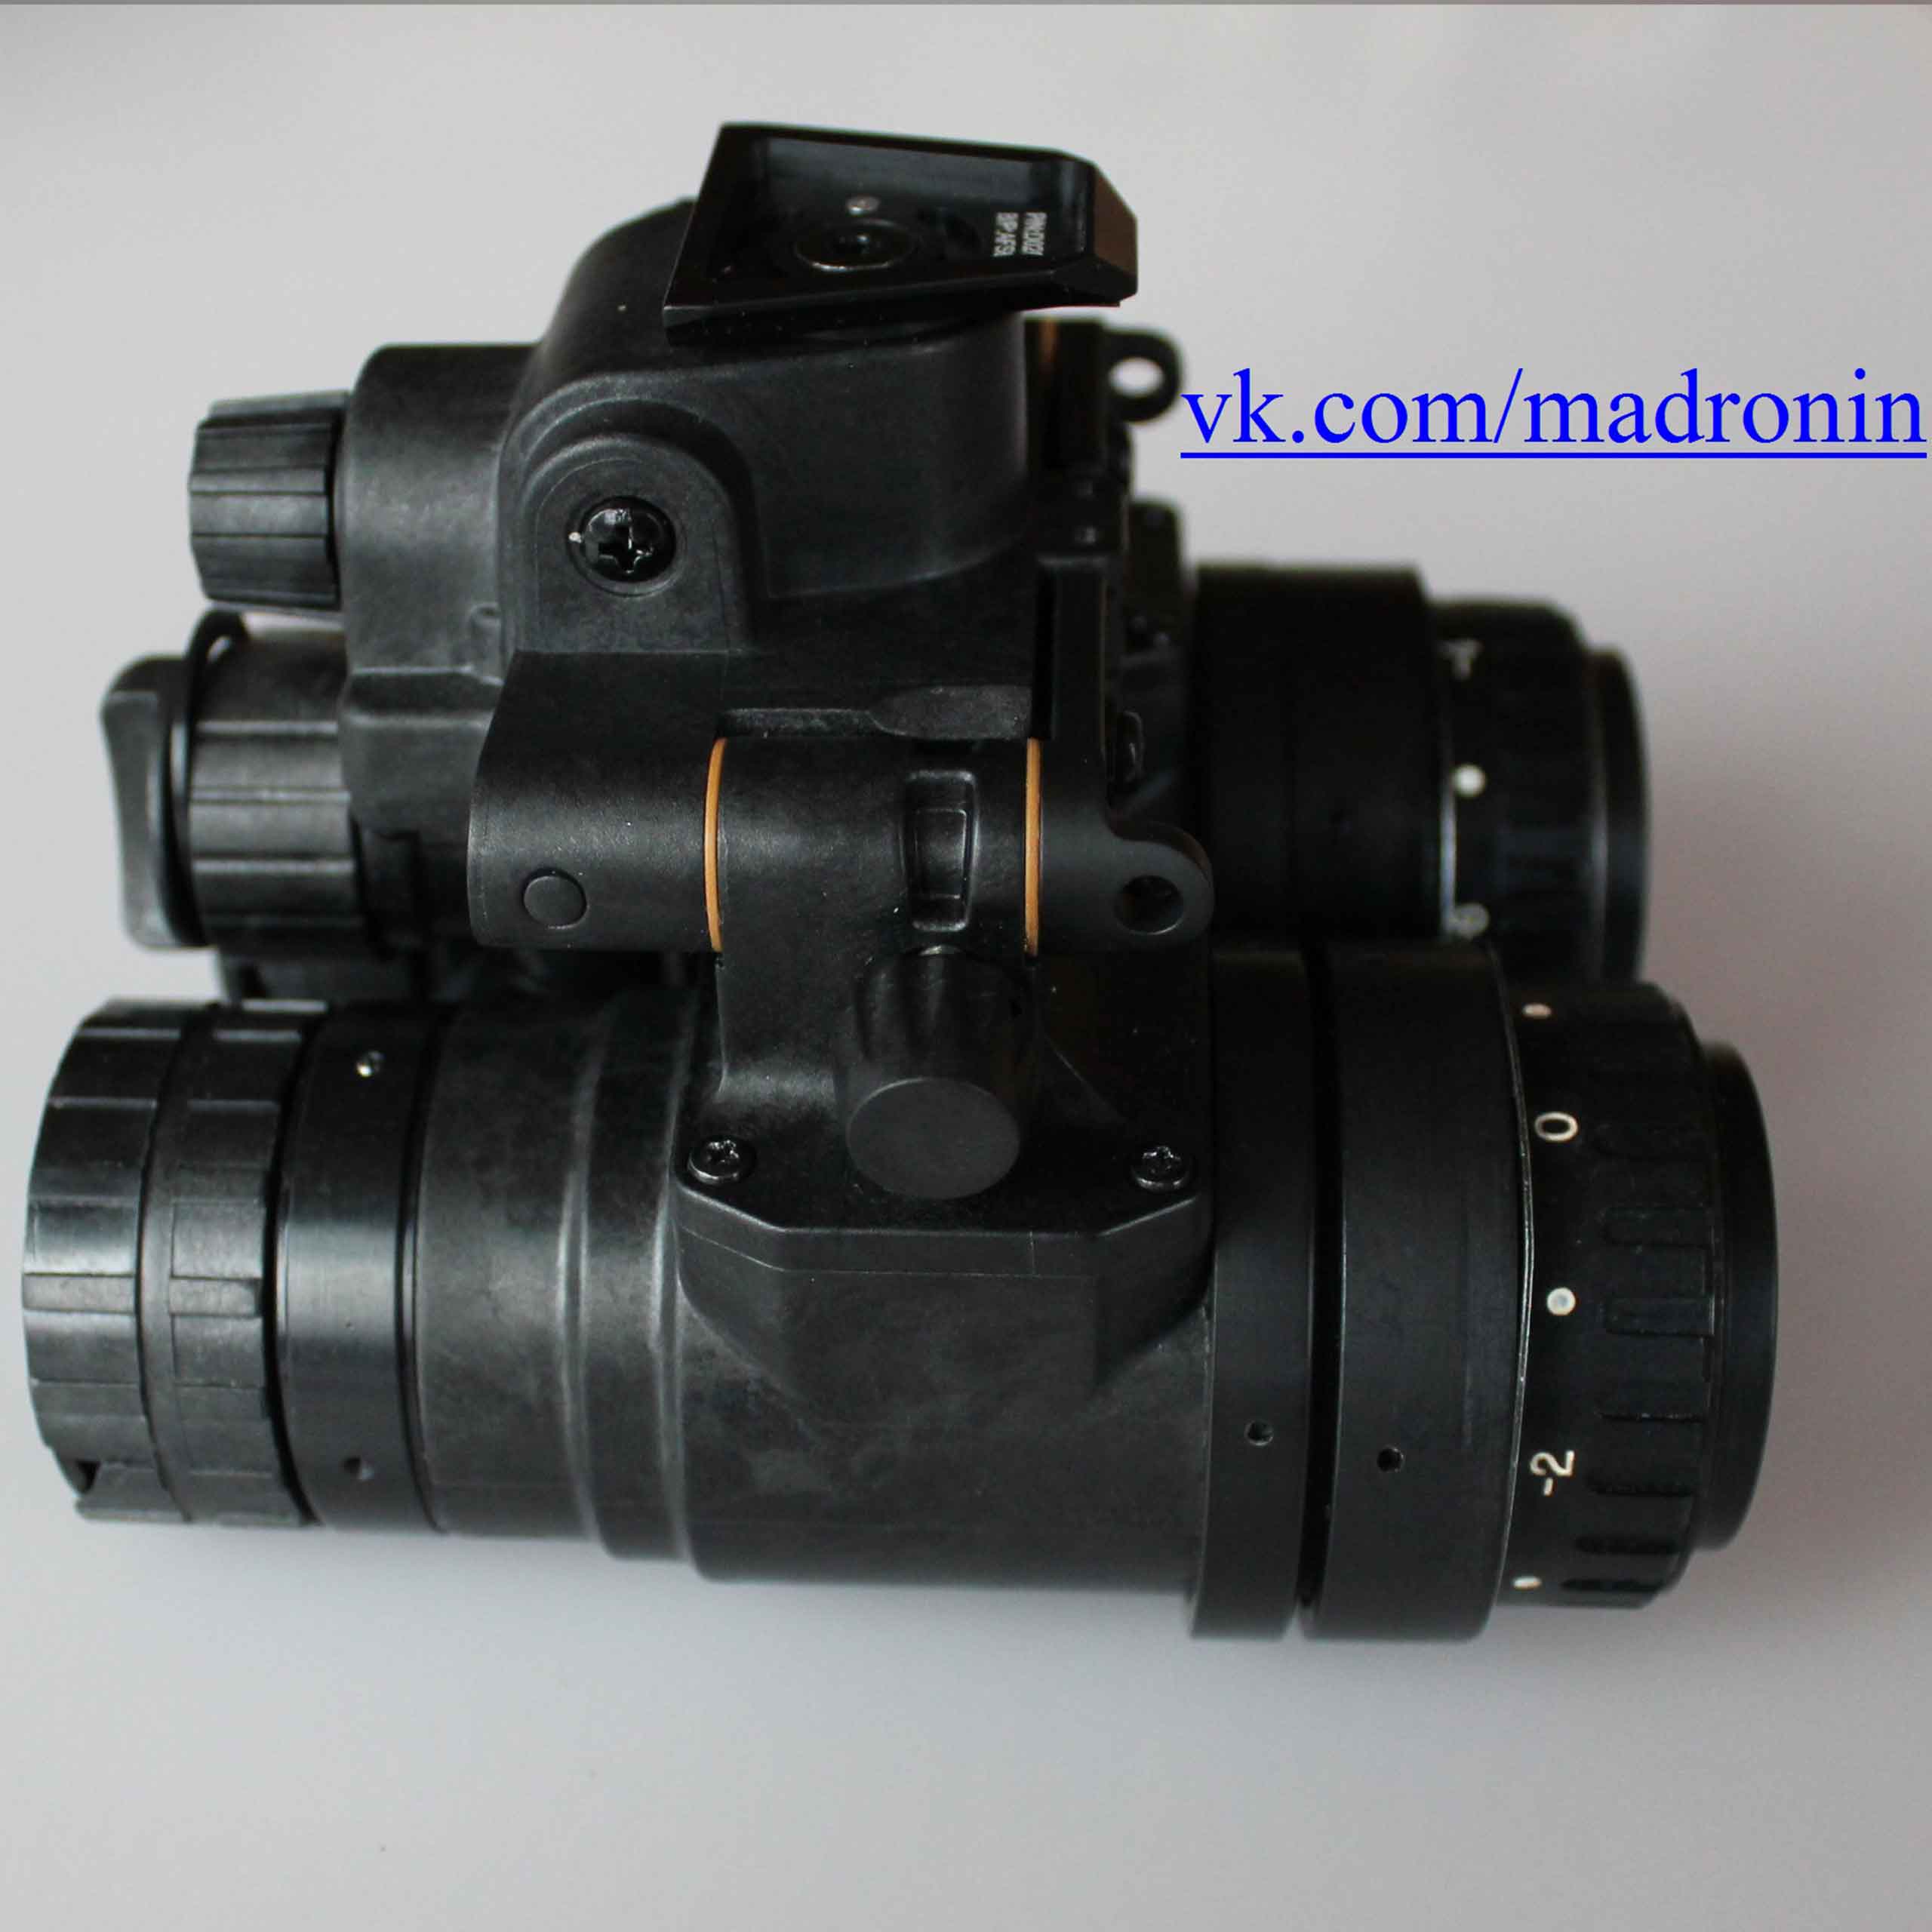
So, let's take a closer look at the device. The manufacturer tried to repeat the original as accurately as possible and, as I see it, he did it well.
 |
 |
 |
 |
 |
 |
 |
 |
 |
 |
 |
Differences from the original, which were installed:
- Hausing mounts are biased back. Due to this, the center of mass is shifted closer to the helmet and there is no need to extend the mount basket to the maximum, which should be more convenient in general.
- screws securing the huazings to the bridge. In the original, they are hexagonal, on this device - a Phillips screwdriver.
I would be glad to share other differences found in the comments.
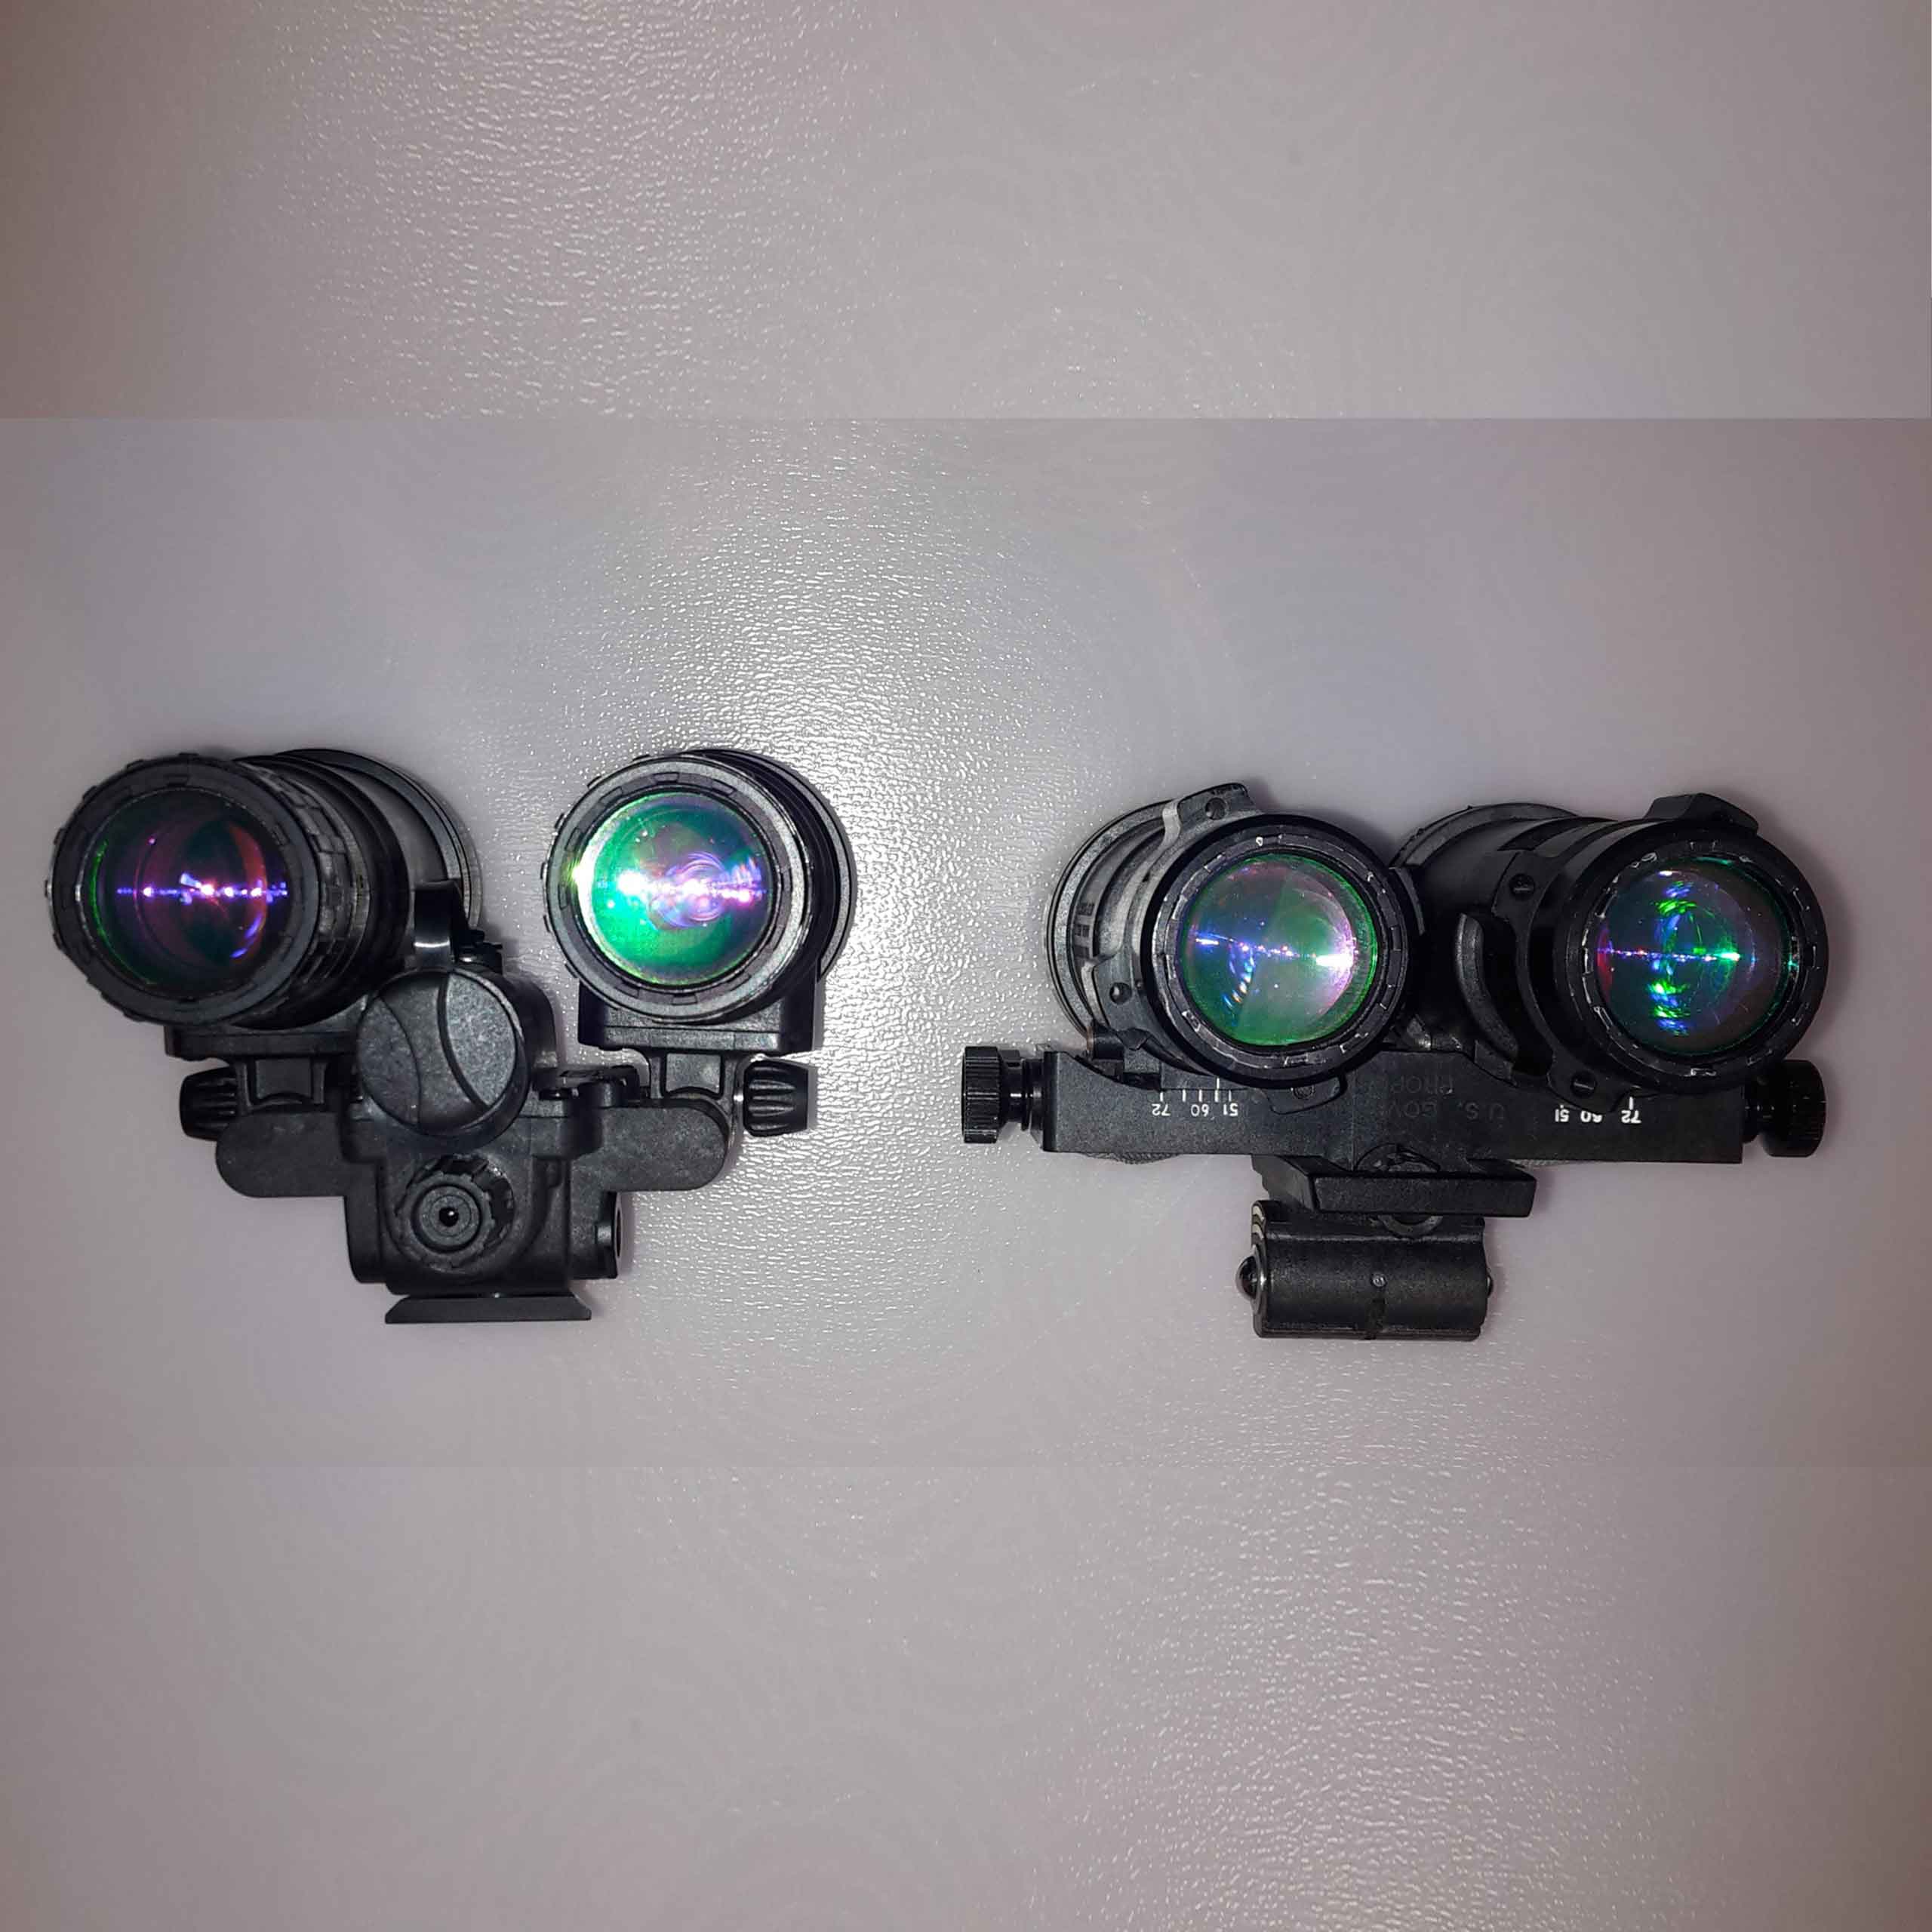
The shape and external dimensions of the case visually correspond to the prototype, which we can evaluate in the photo.
Original instrument on the left, copy on the right.
The plastic of which the case is made is externally and tactilely similar to that used in the original PVS-14 (its case is presumably from ITT).
 |
 |
 |
VS-31-14 left, original PVS-14 right
In general, the device gives the impression of a solidly made thing.
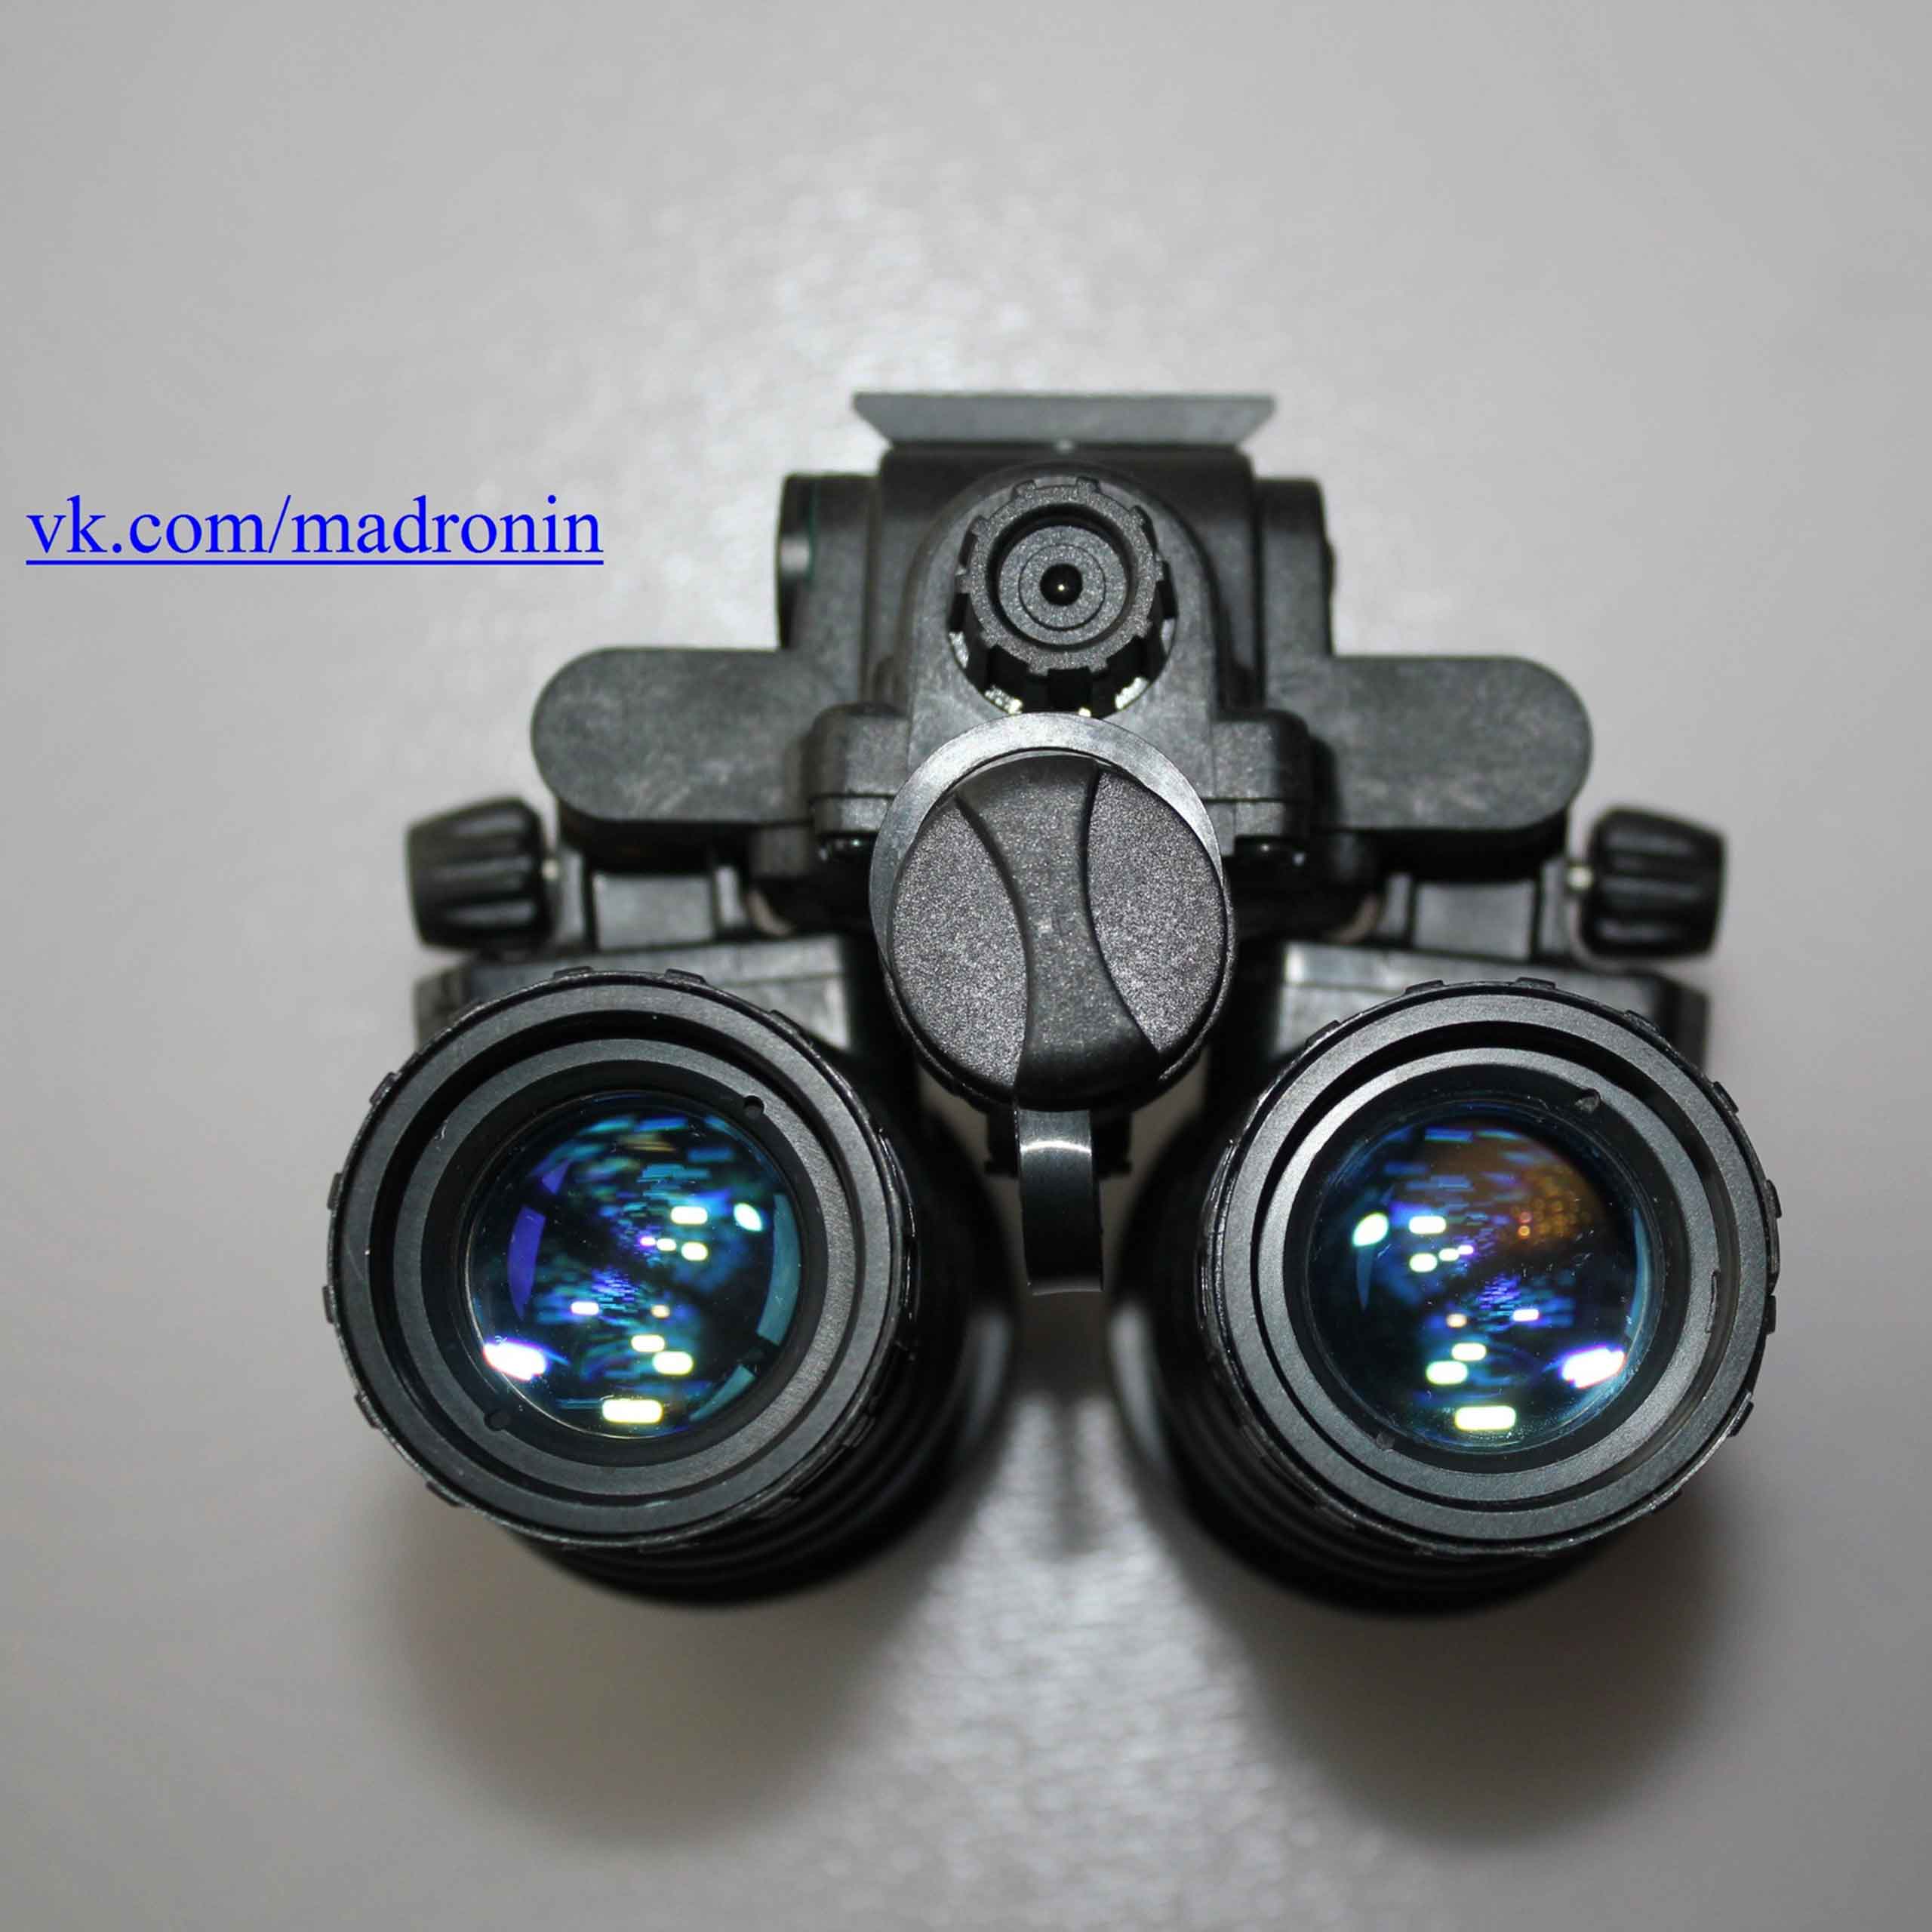
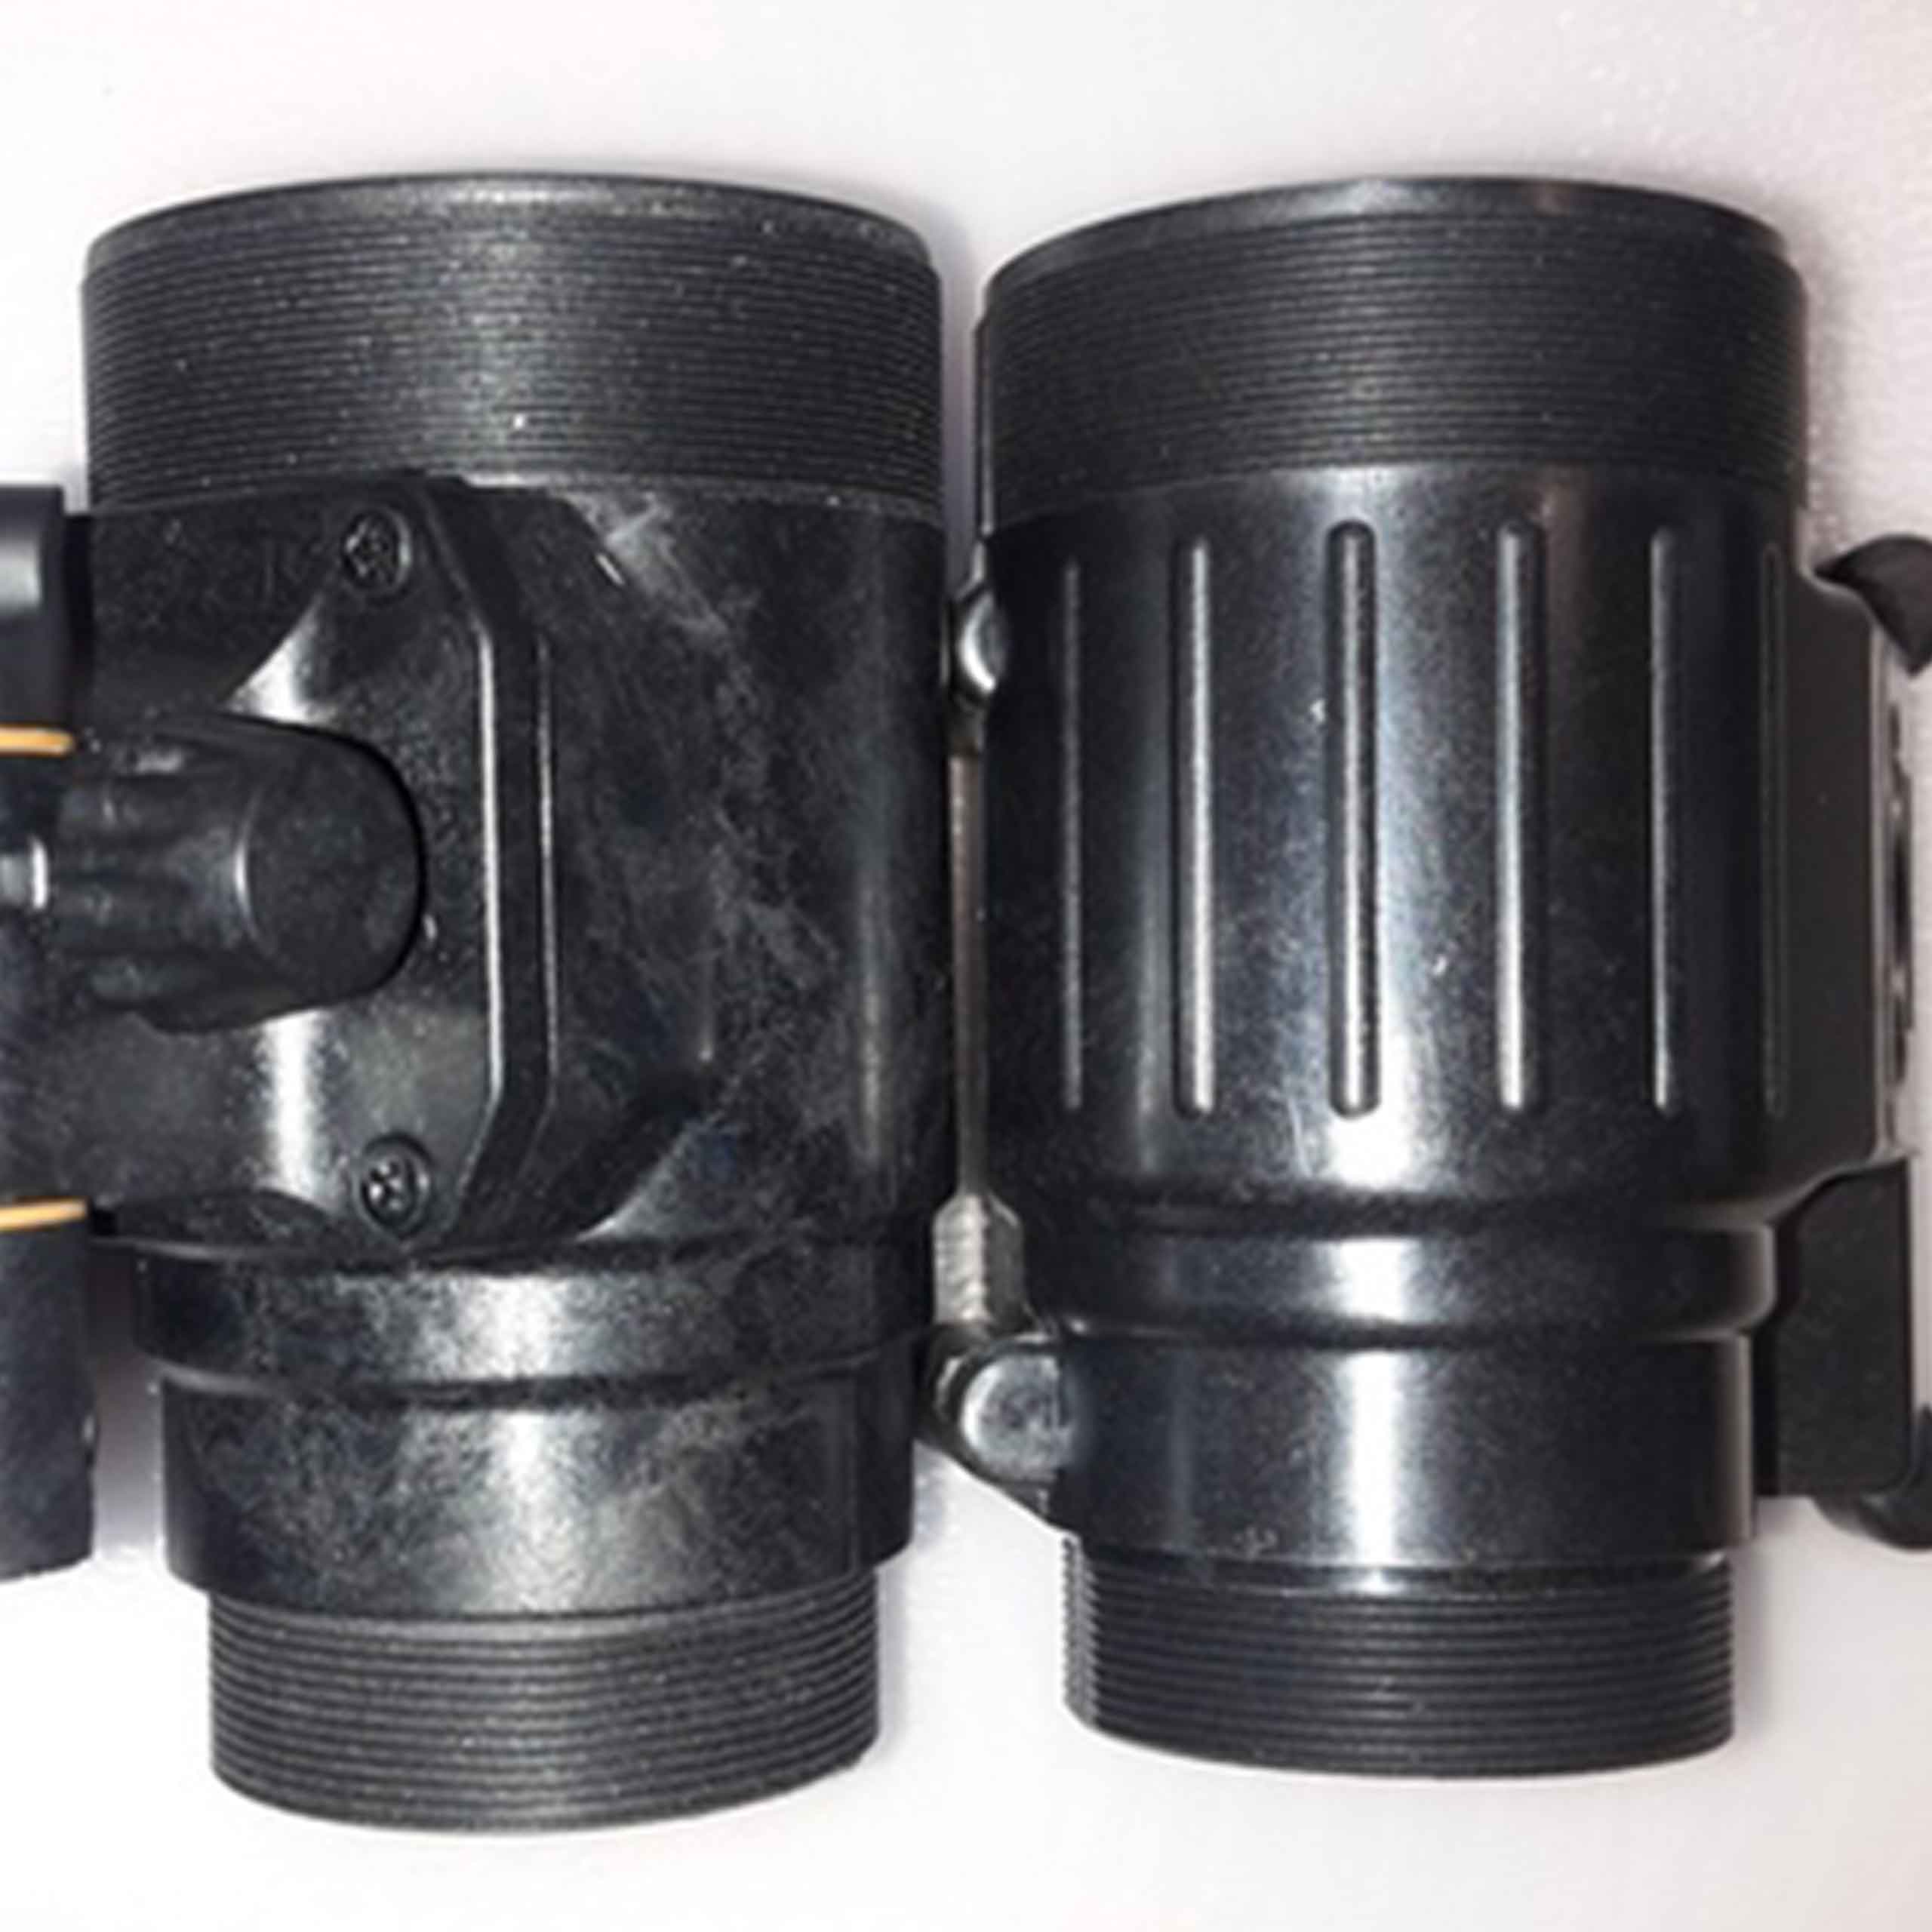
Controls and external parts of the device
According to ergonomics and controls, the device also corresponds to the prototype.
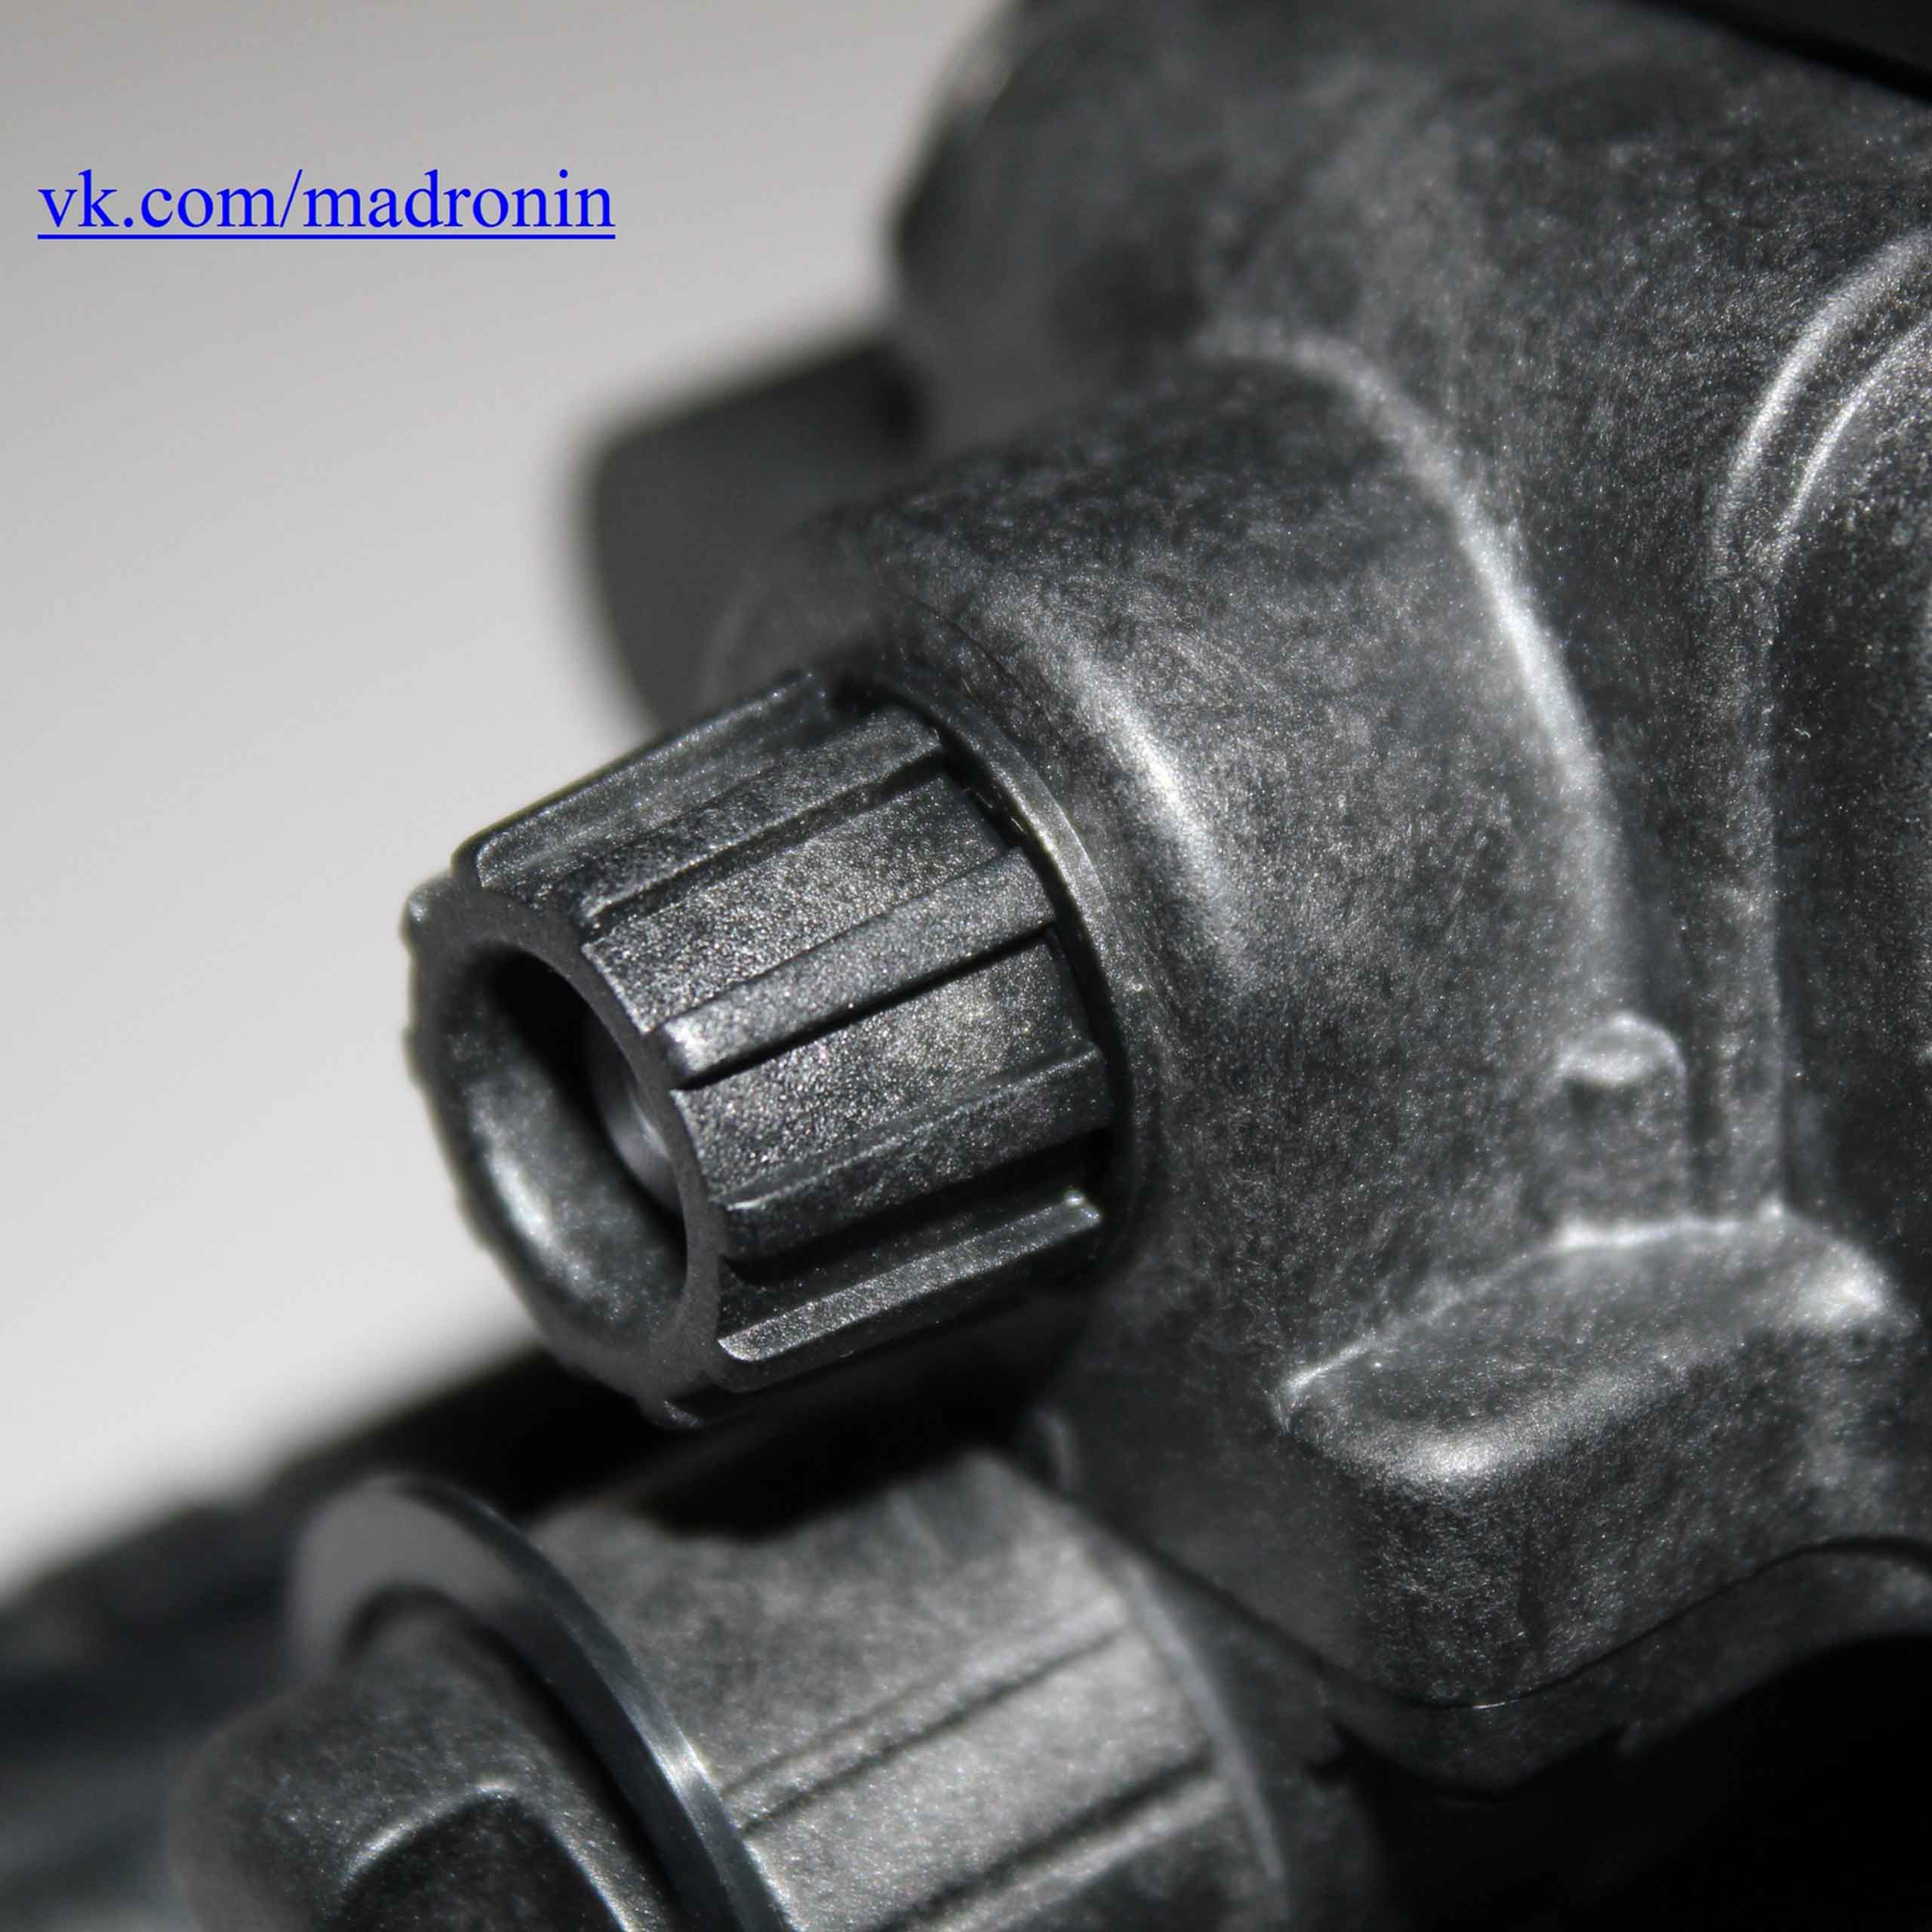
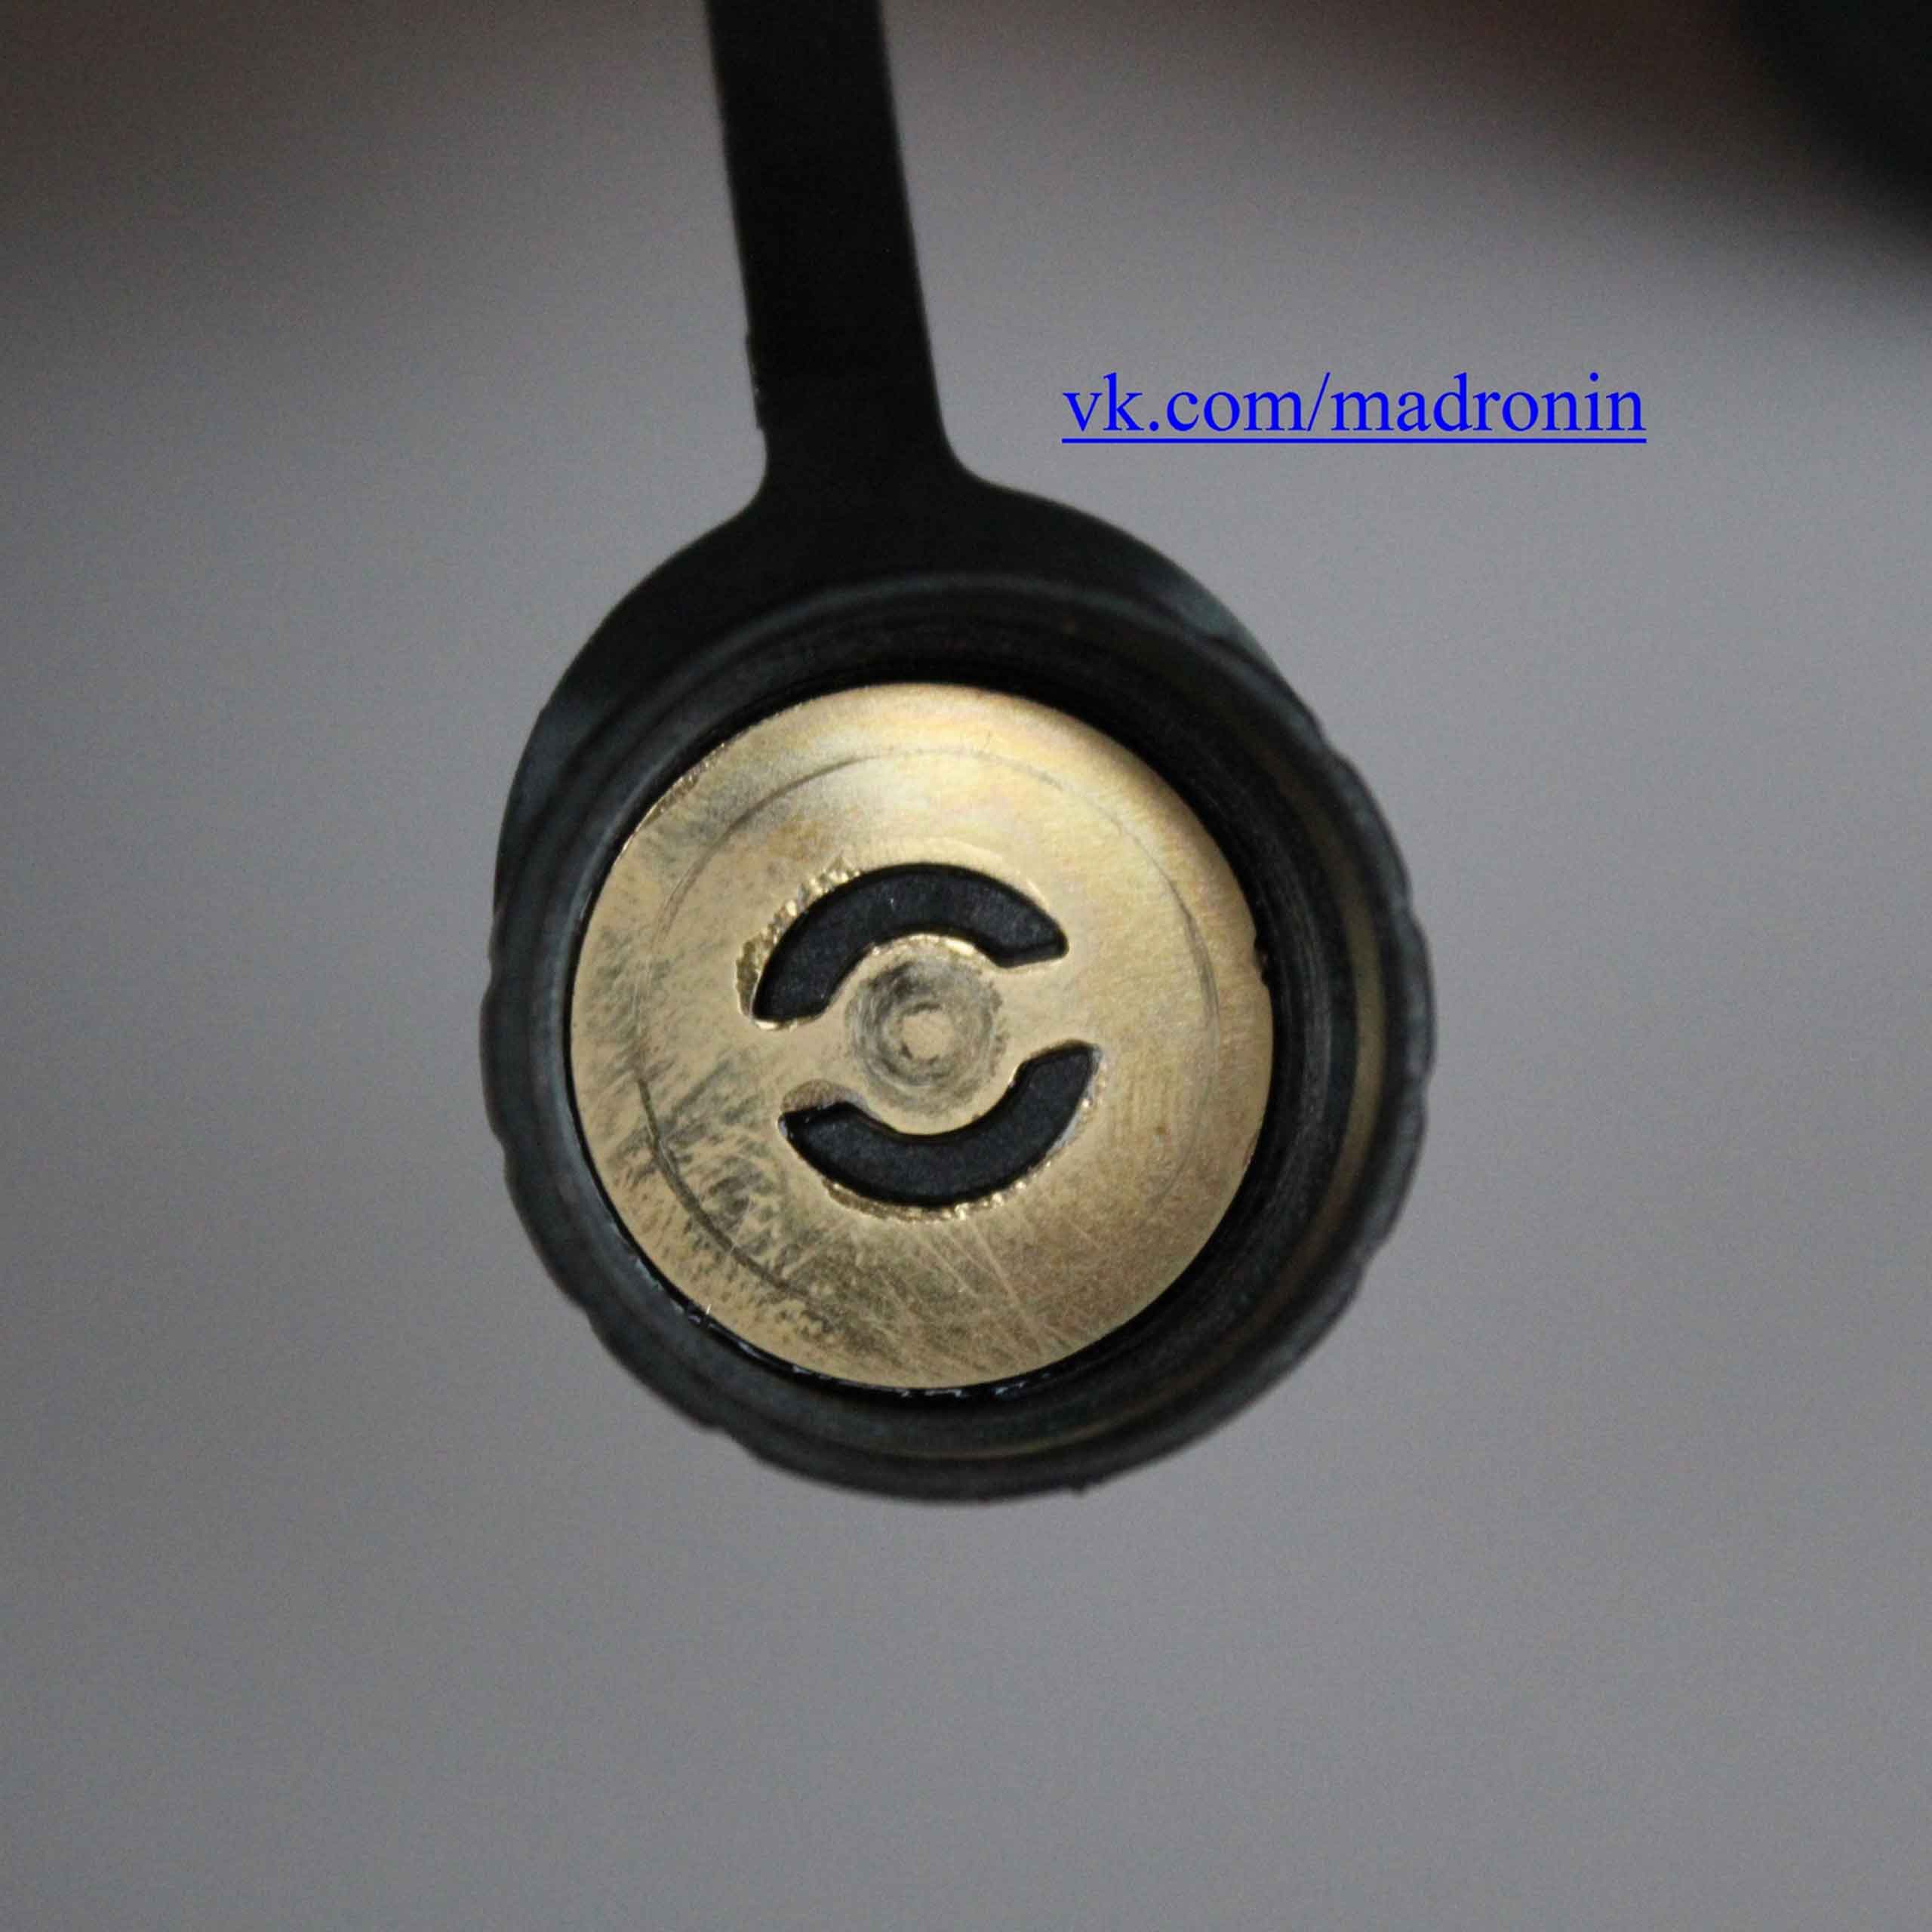
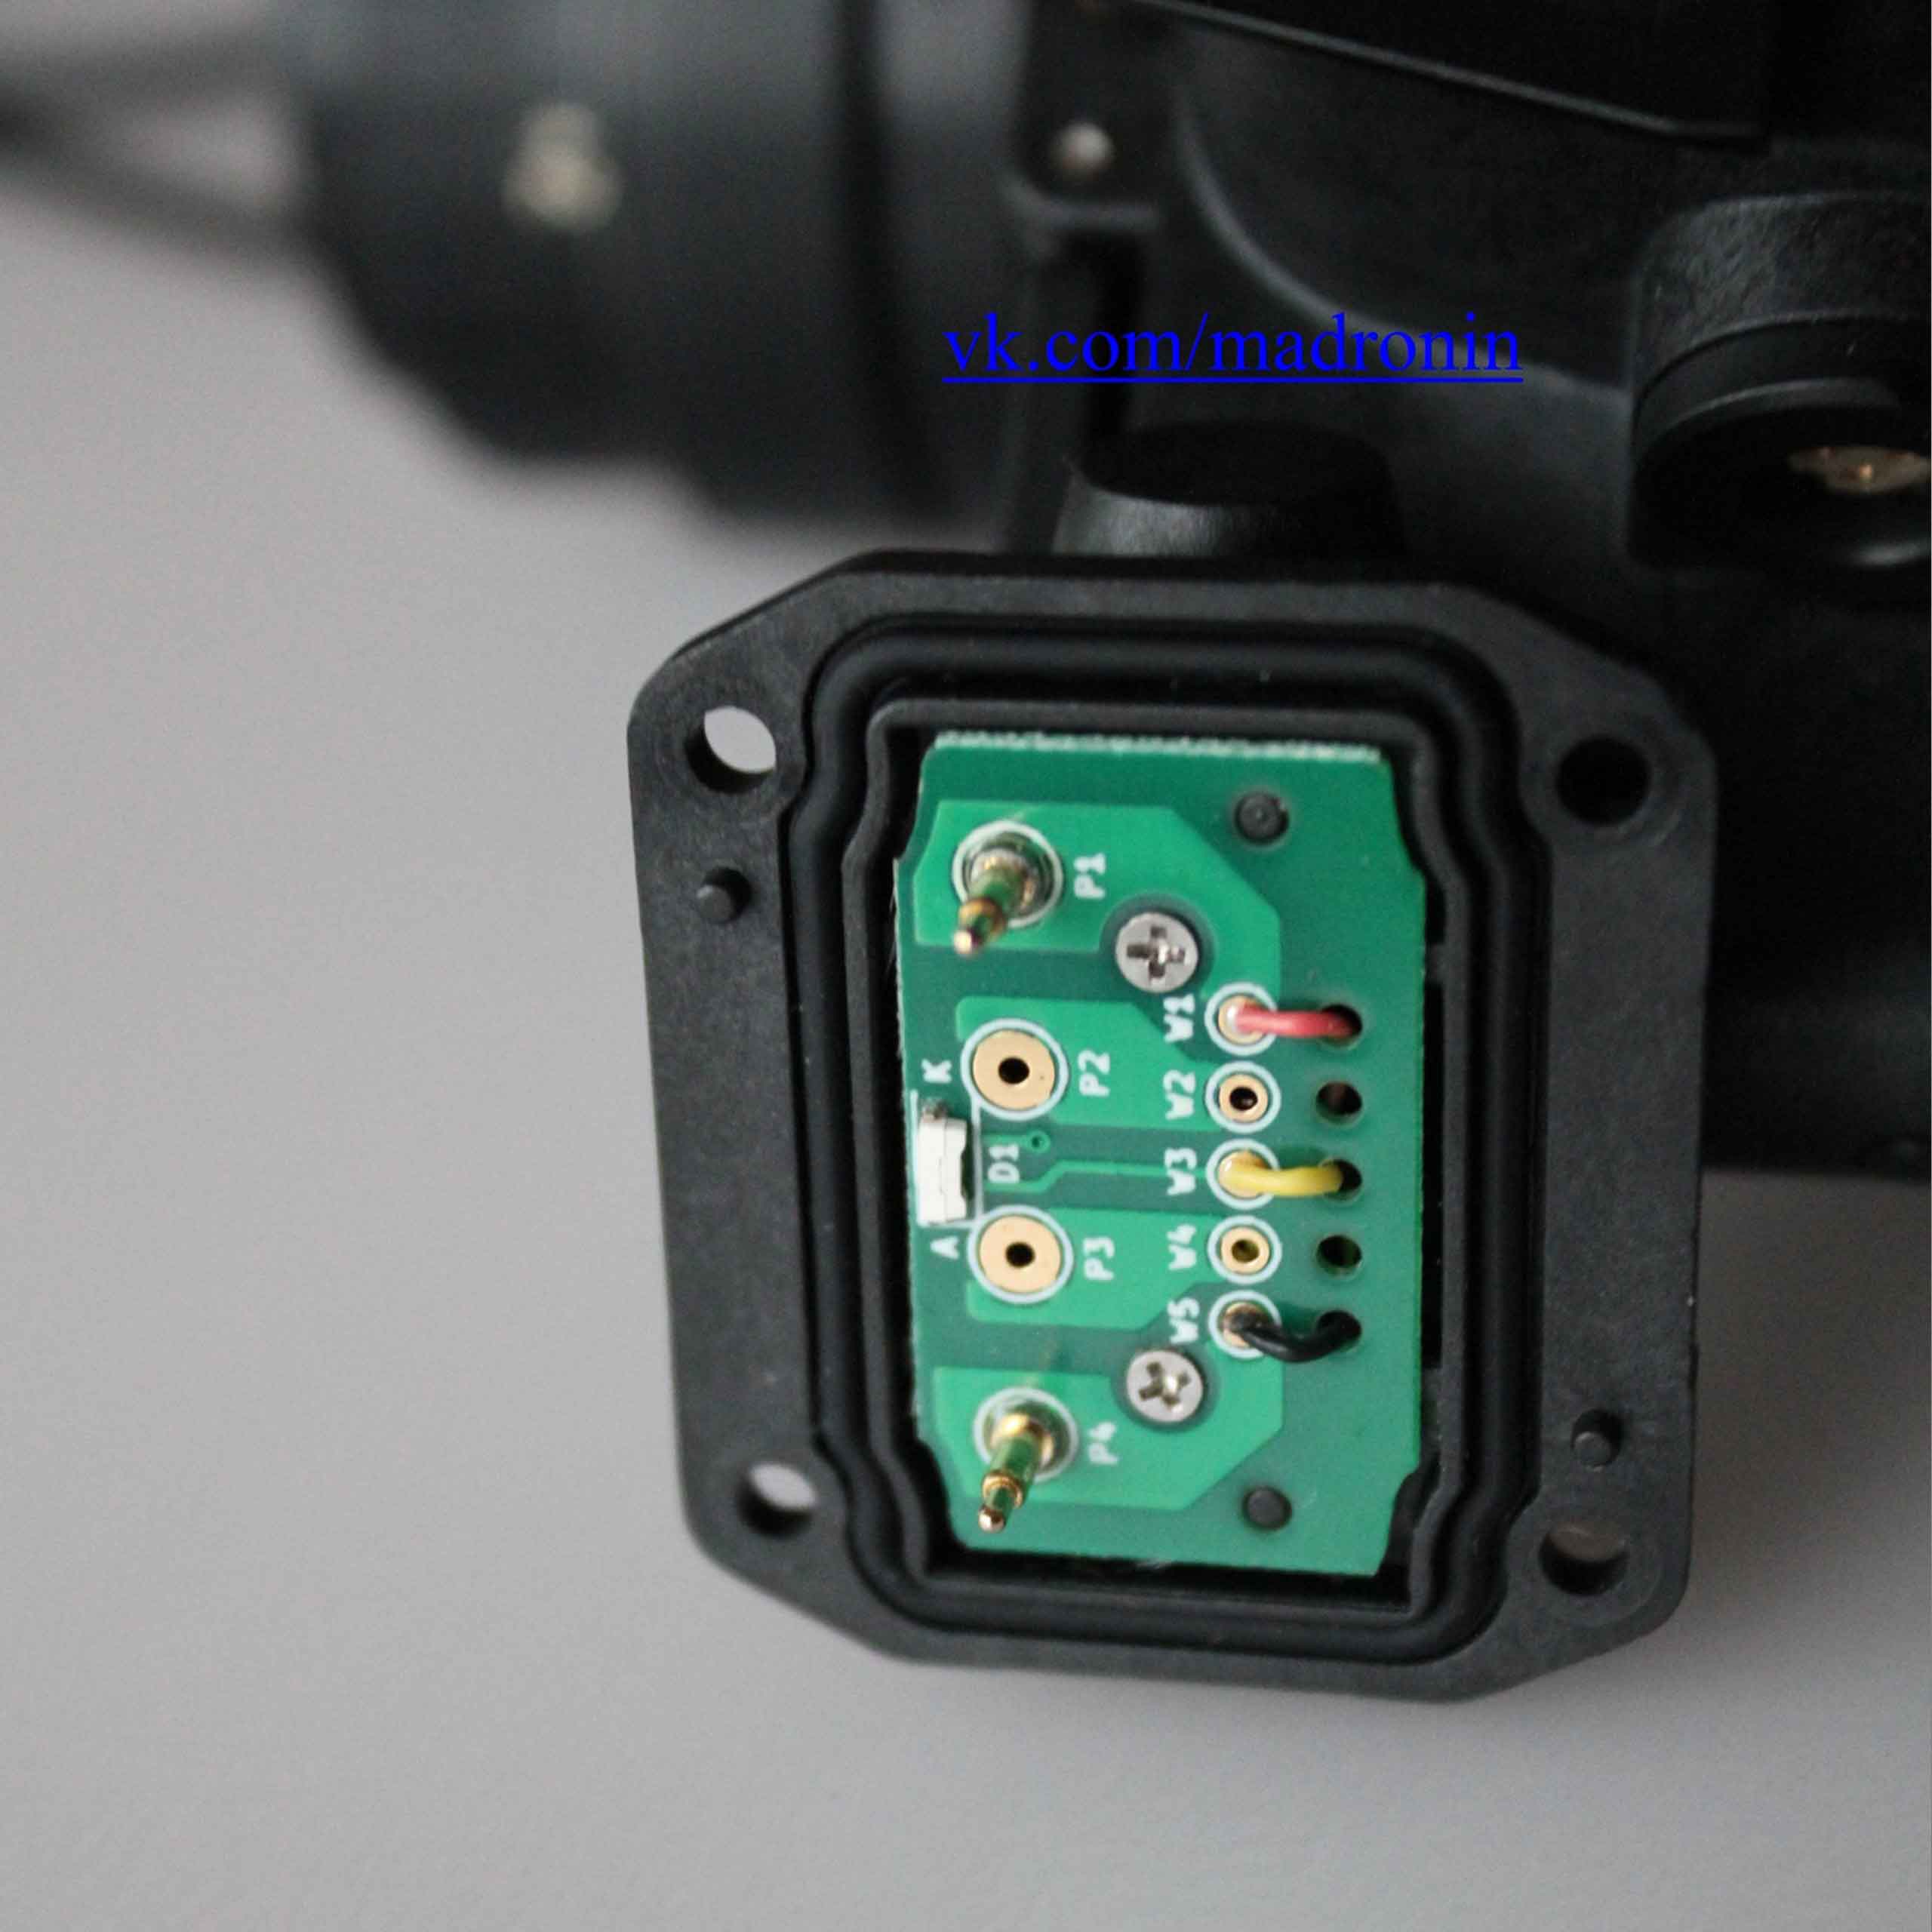
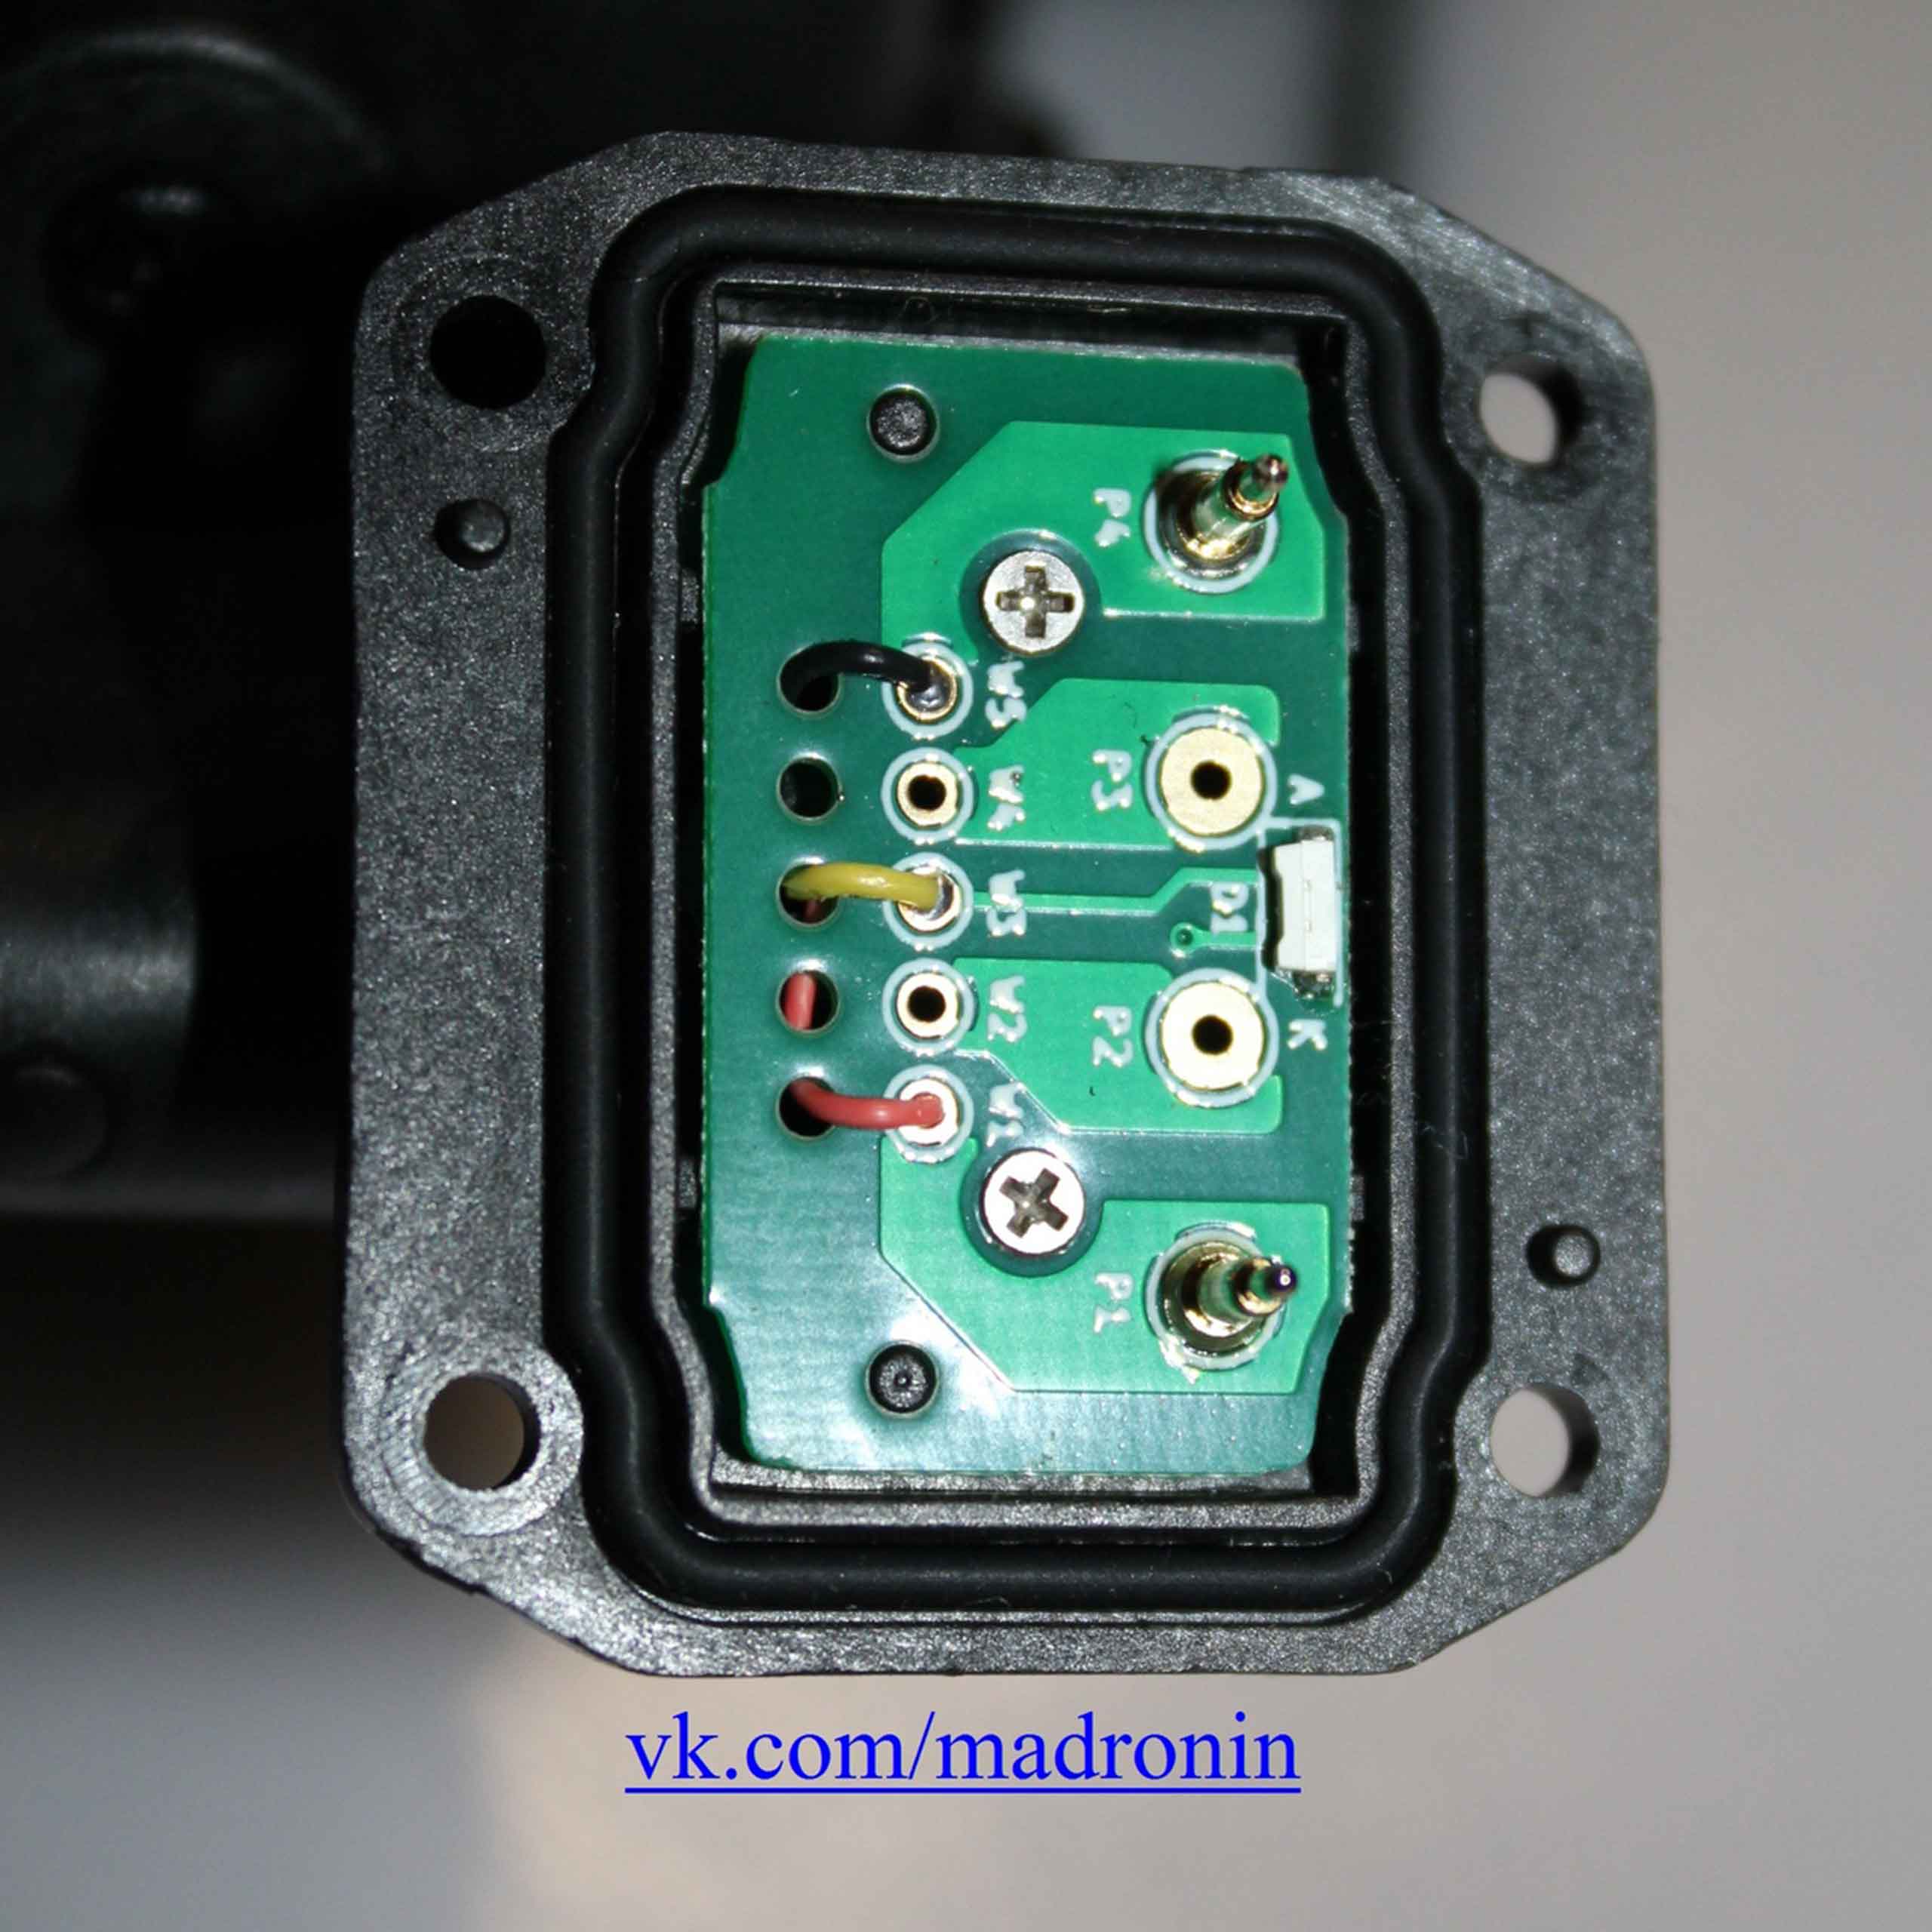
1. Power button above the battery cover. The button turns on the device with a long press (about 1.5-2 seconds), and also allows you to configure the device to turn off automatically when it is tilted up on the rhino mount. The button itself rotates, as on the original, however, as I understand it, it does not allow to adjust the brightness of the image intensifier tubes, unlike the original. On the board there are only two contacts for the image intensifier tube.
 |
 |
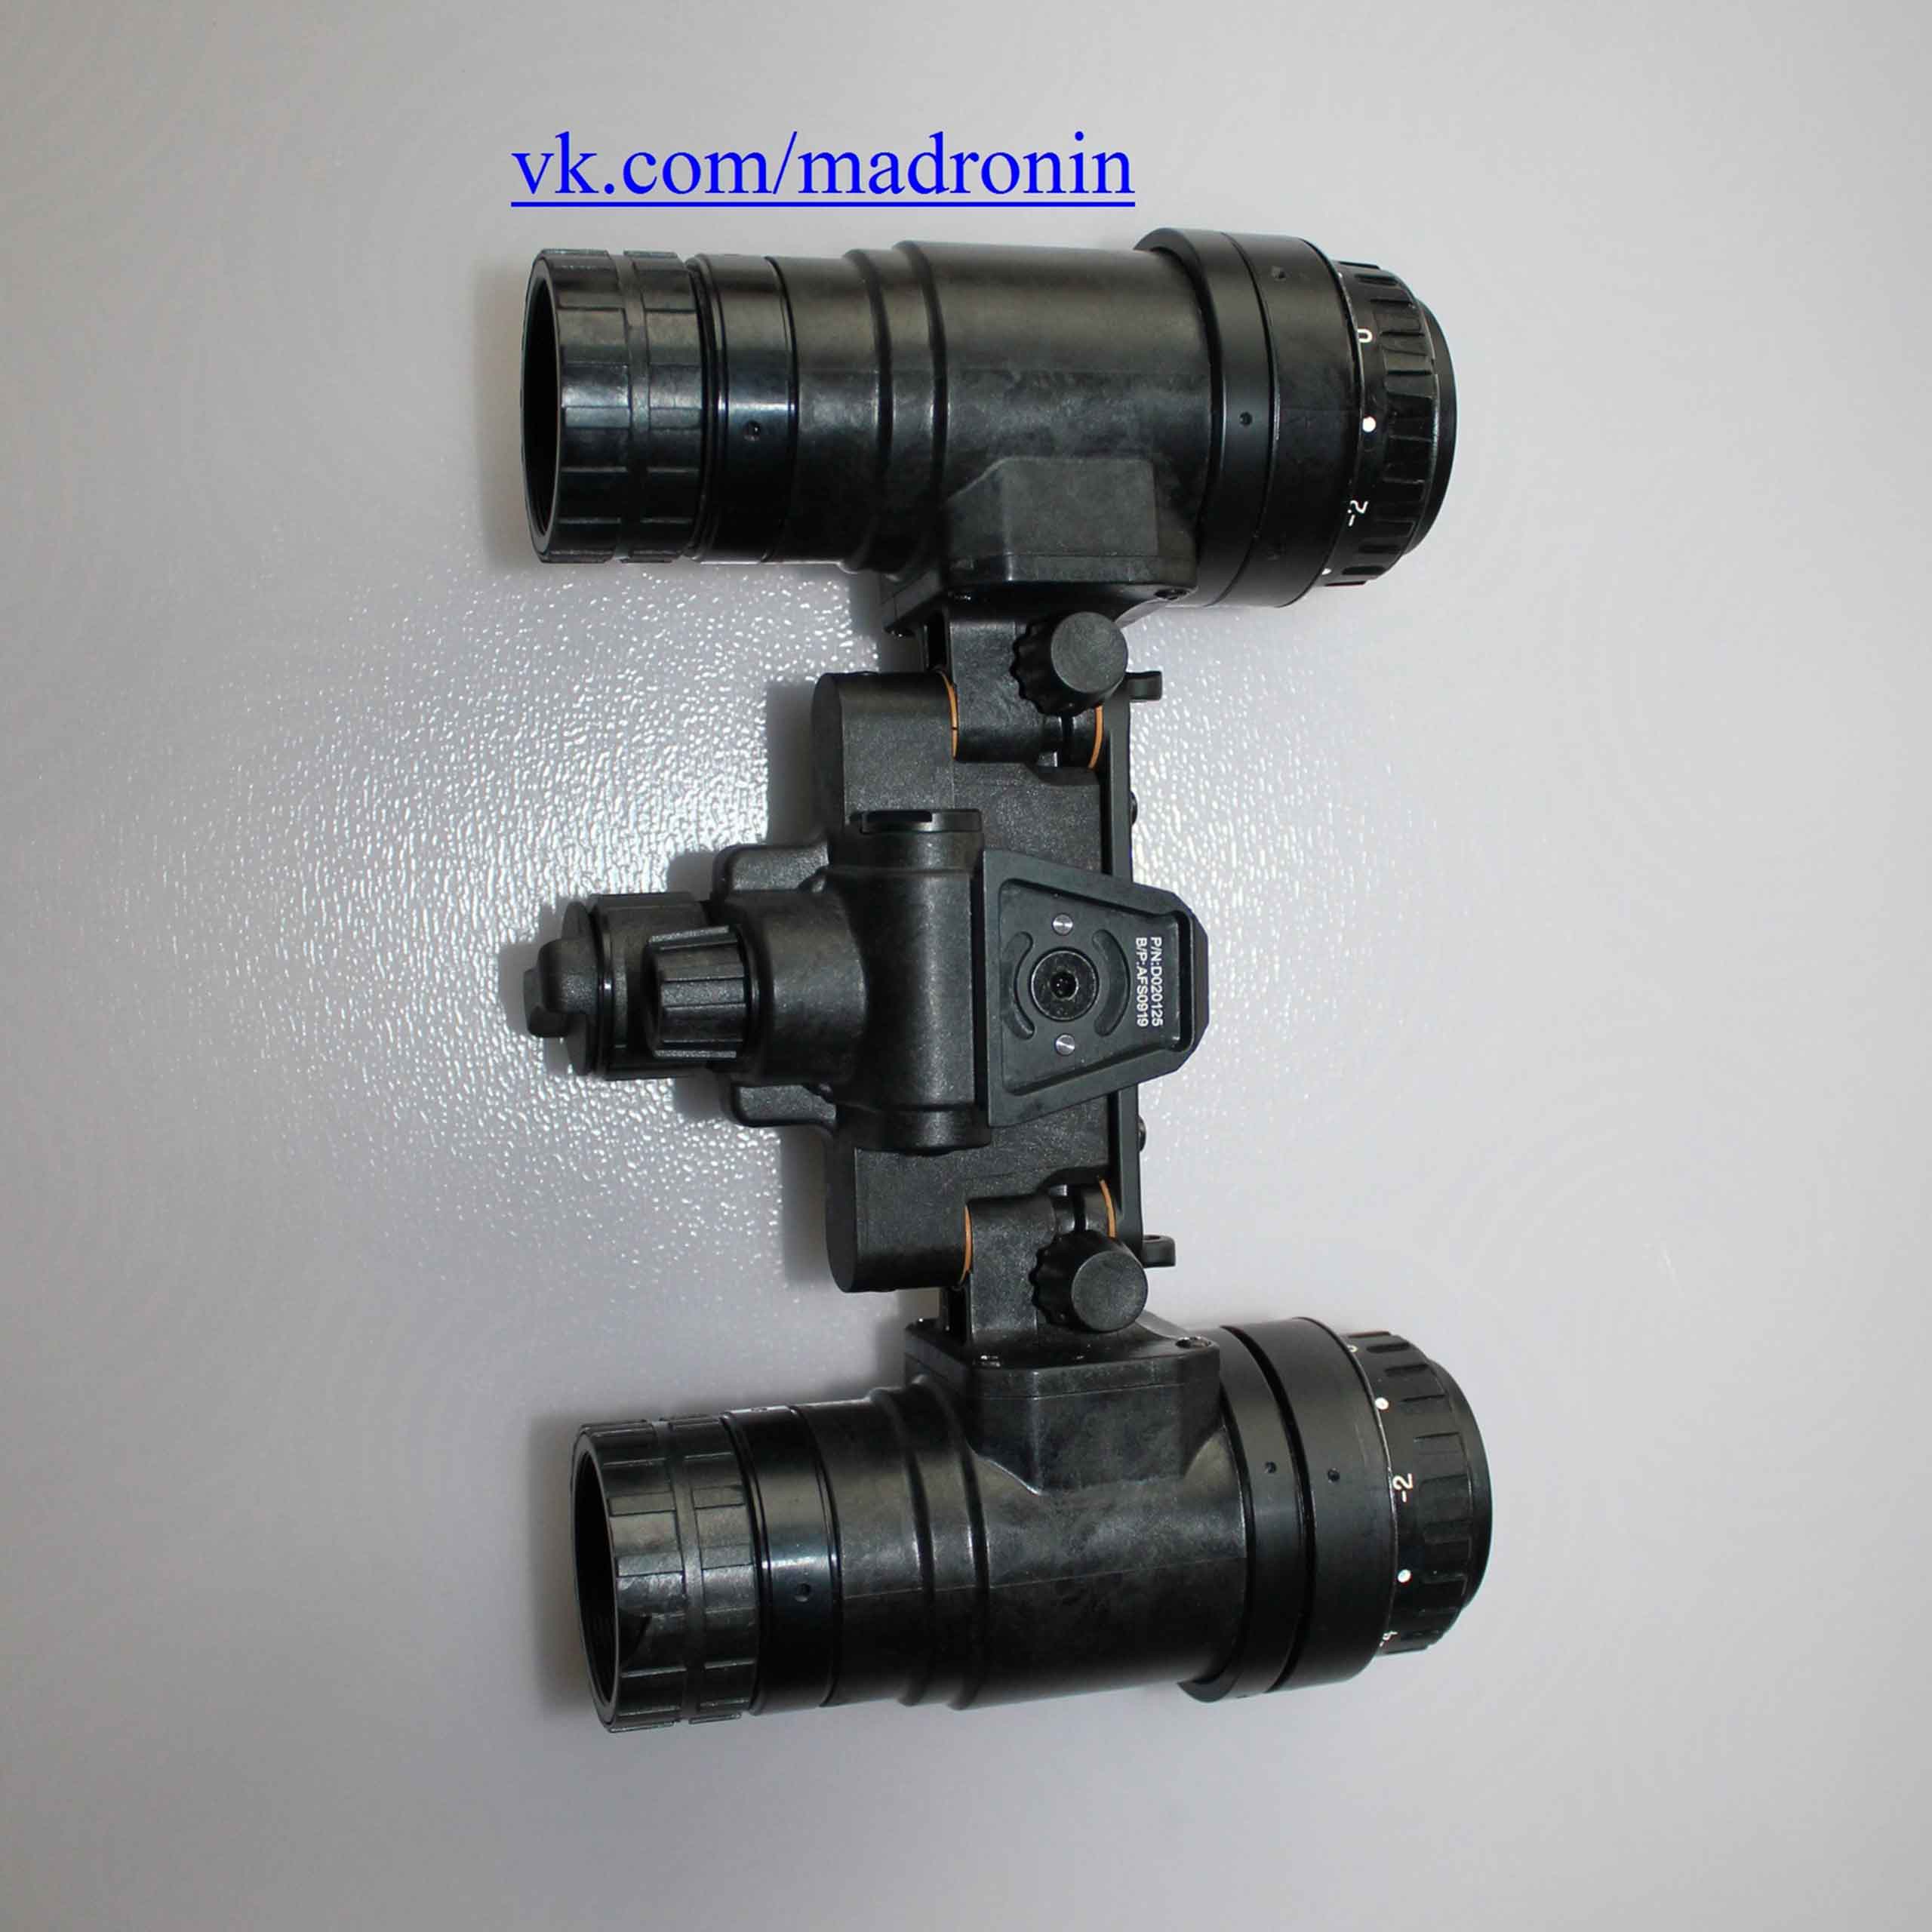
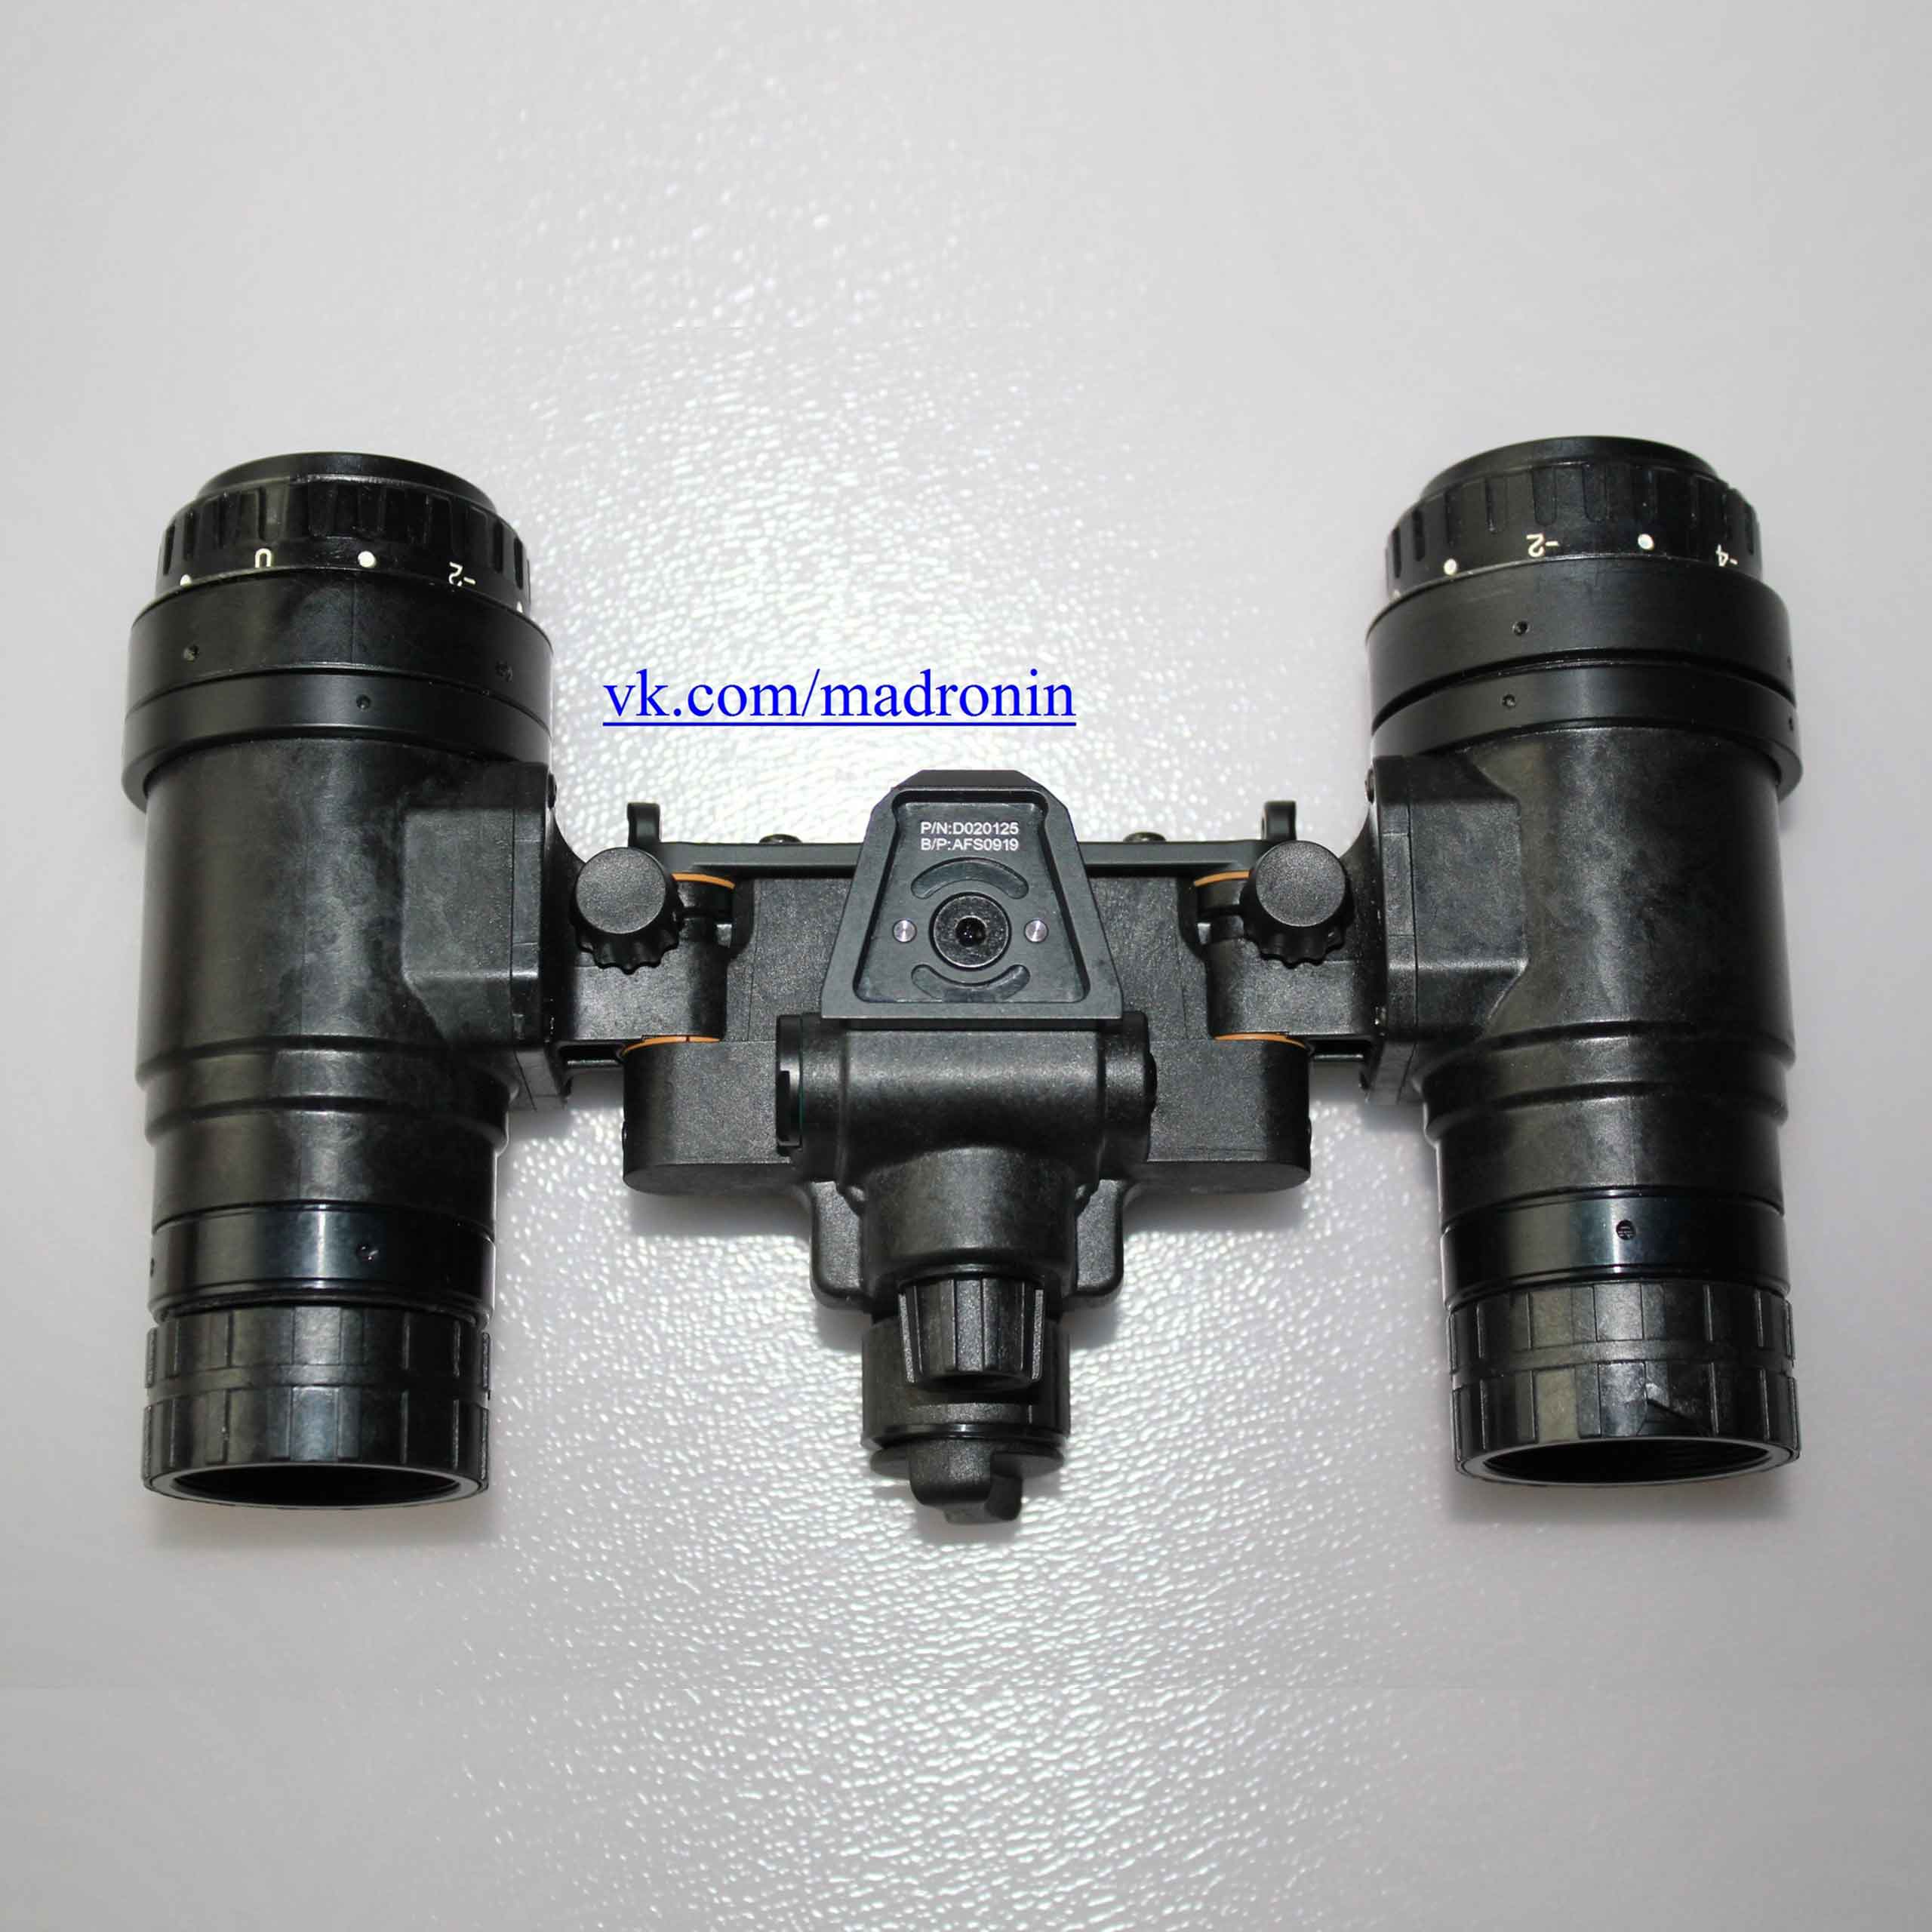
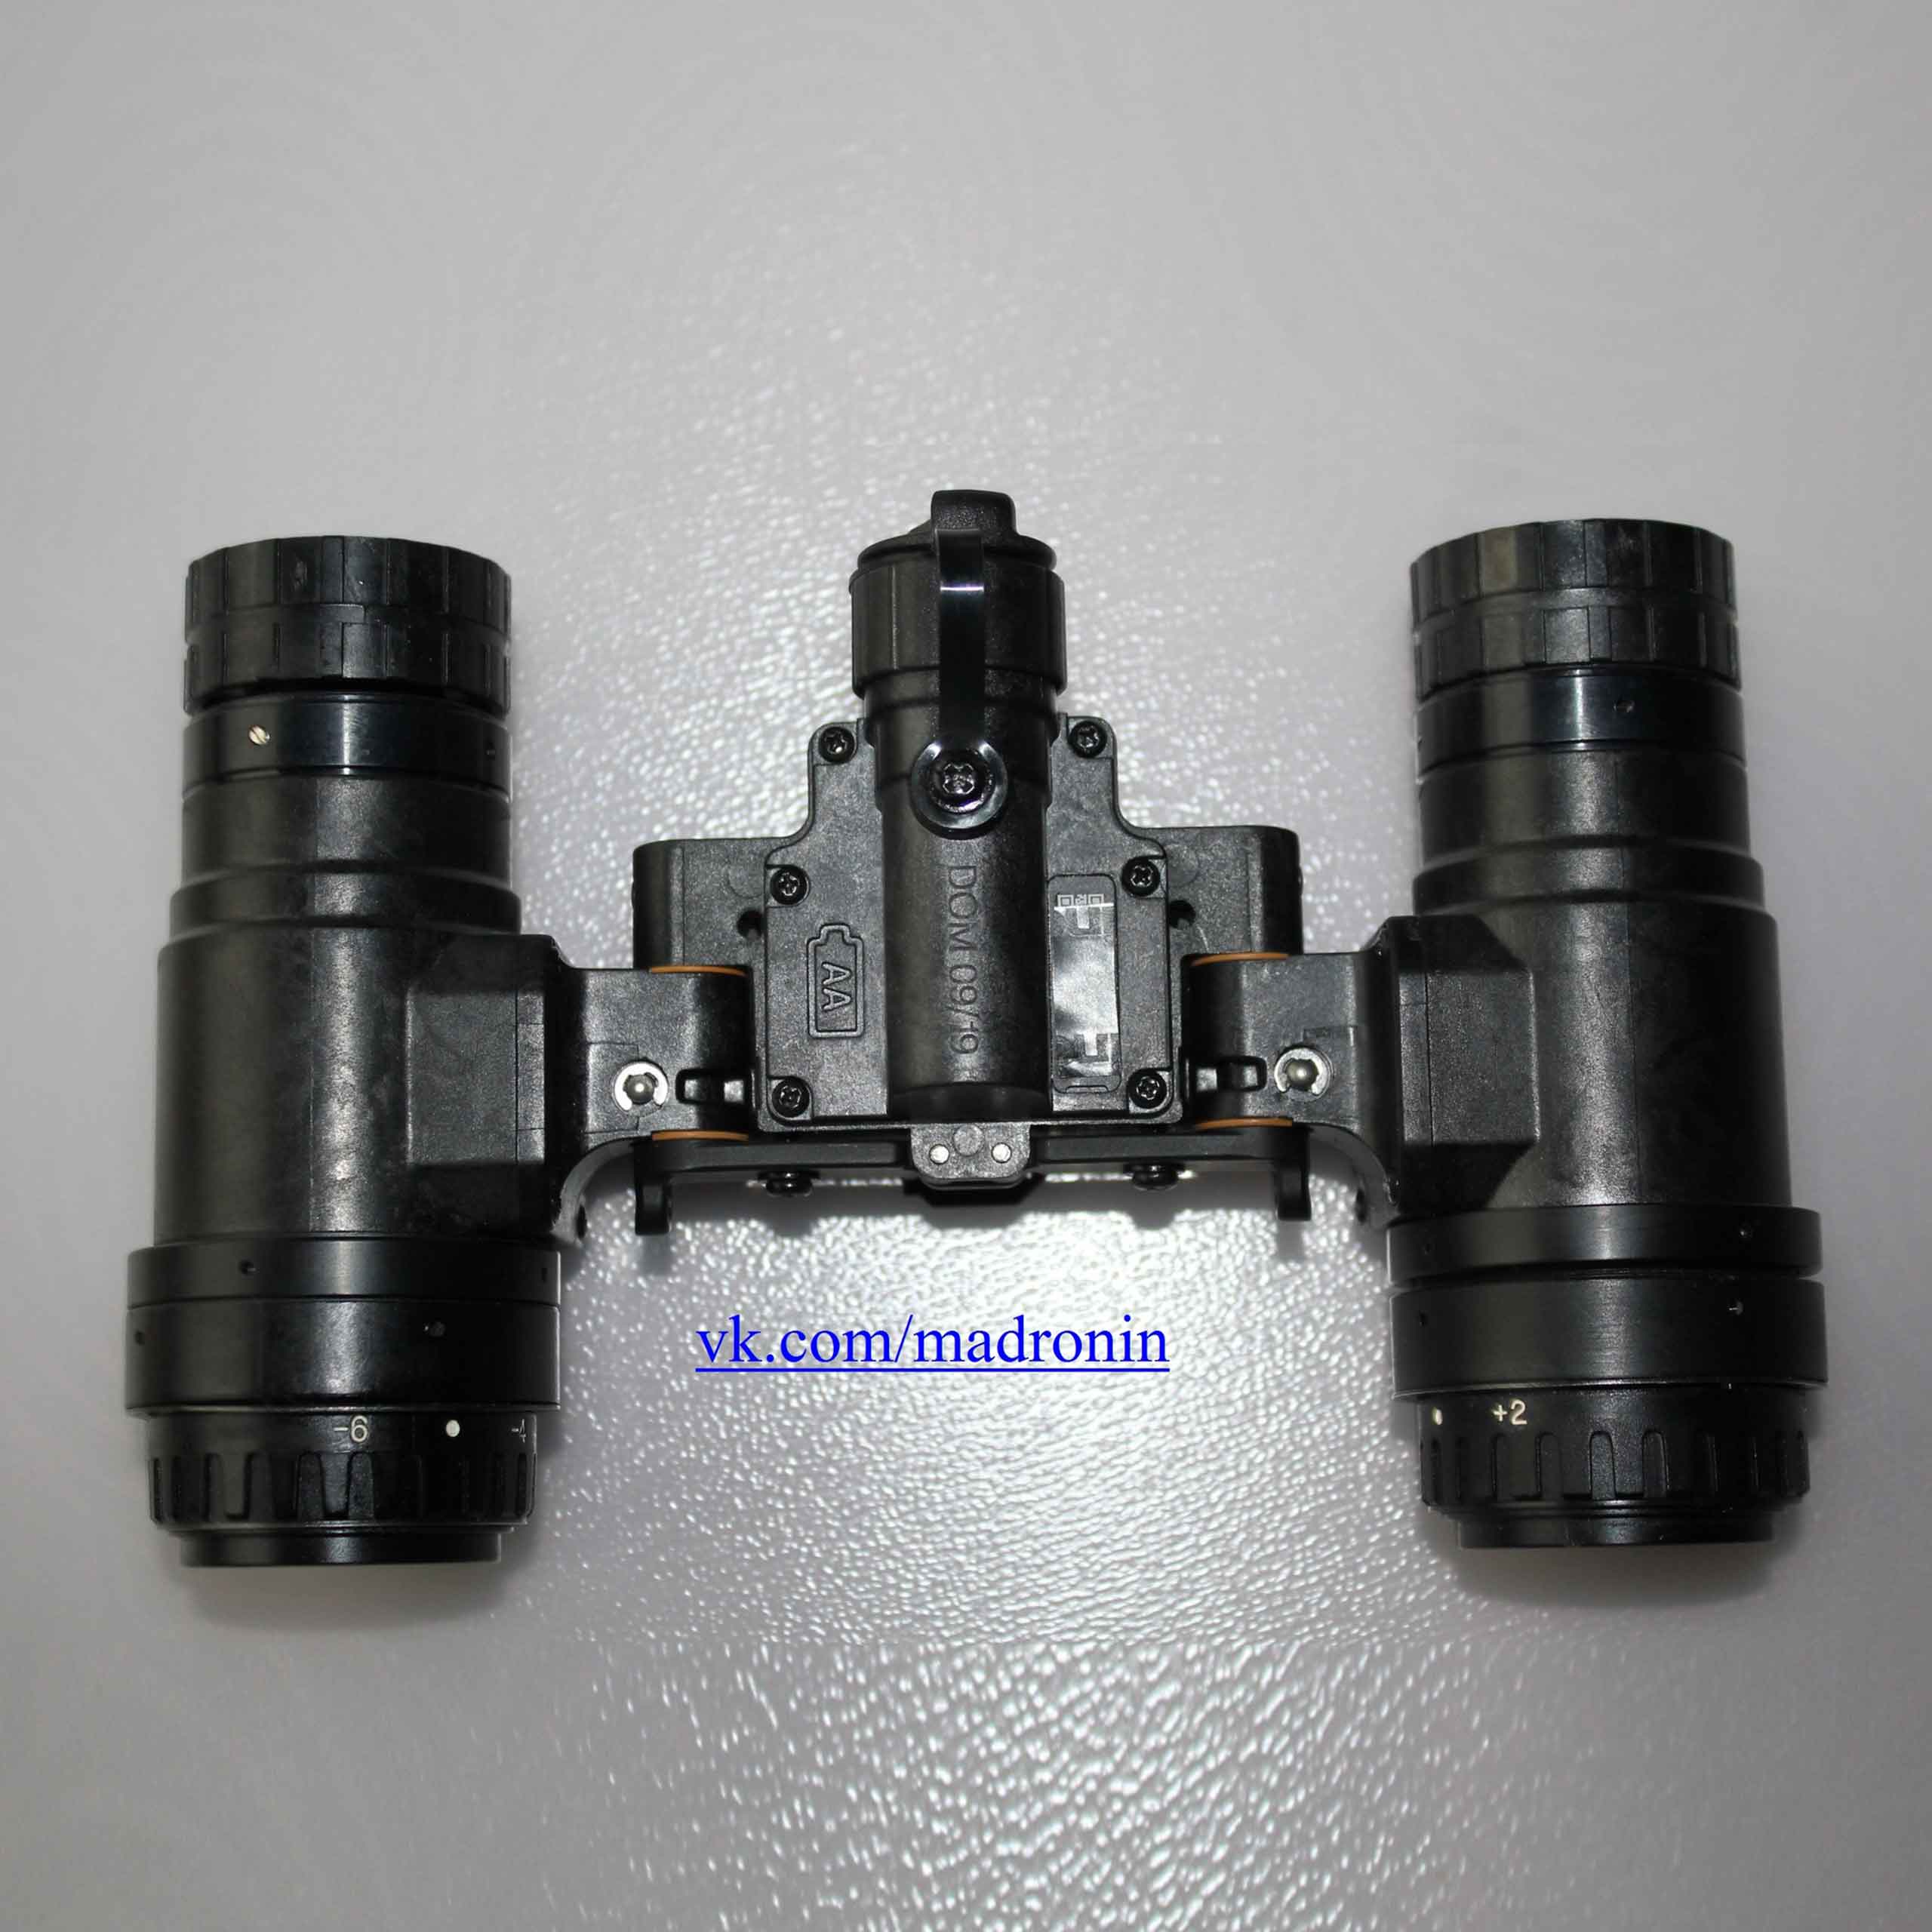
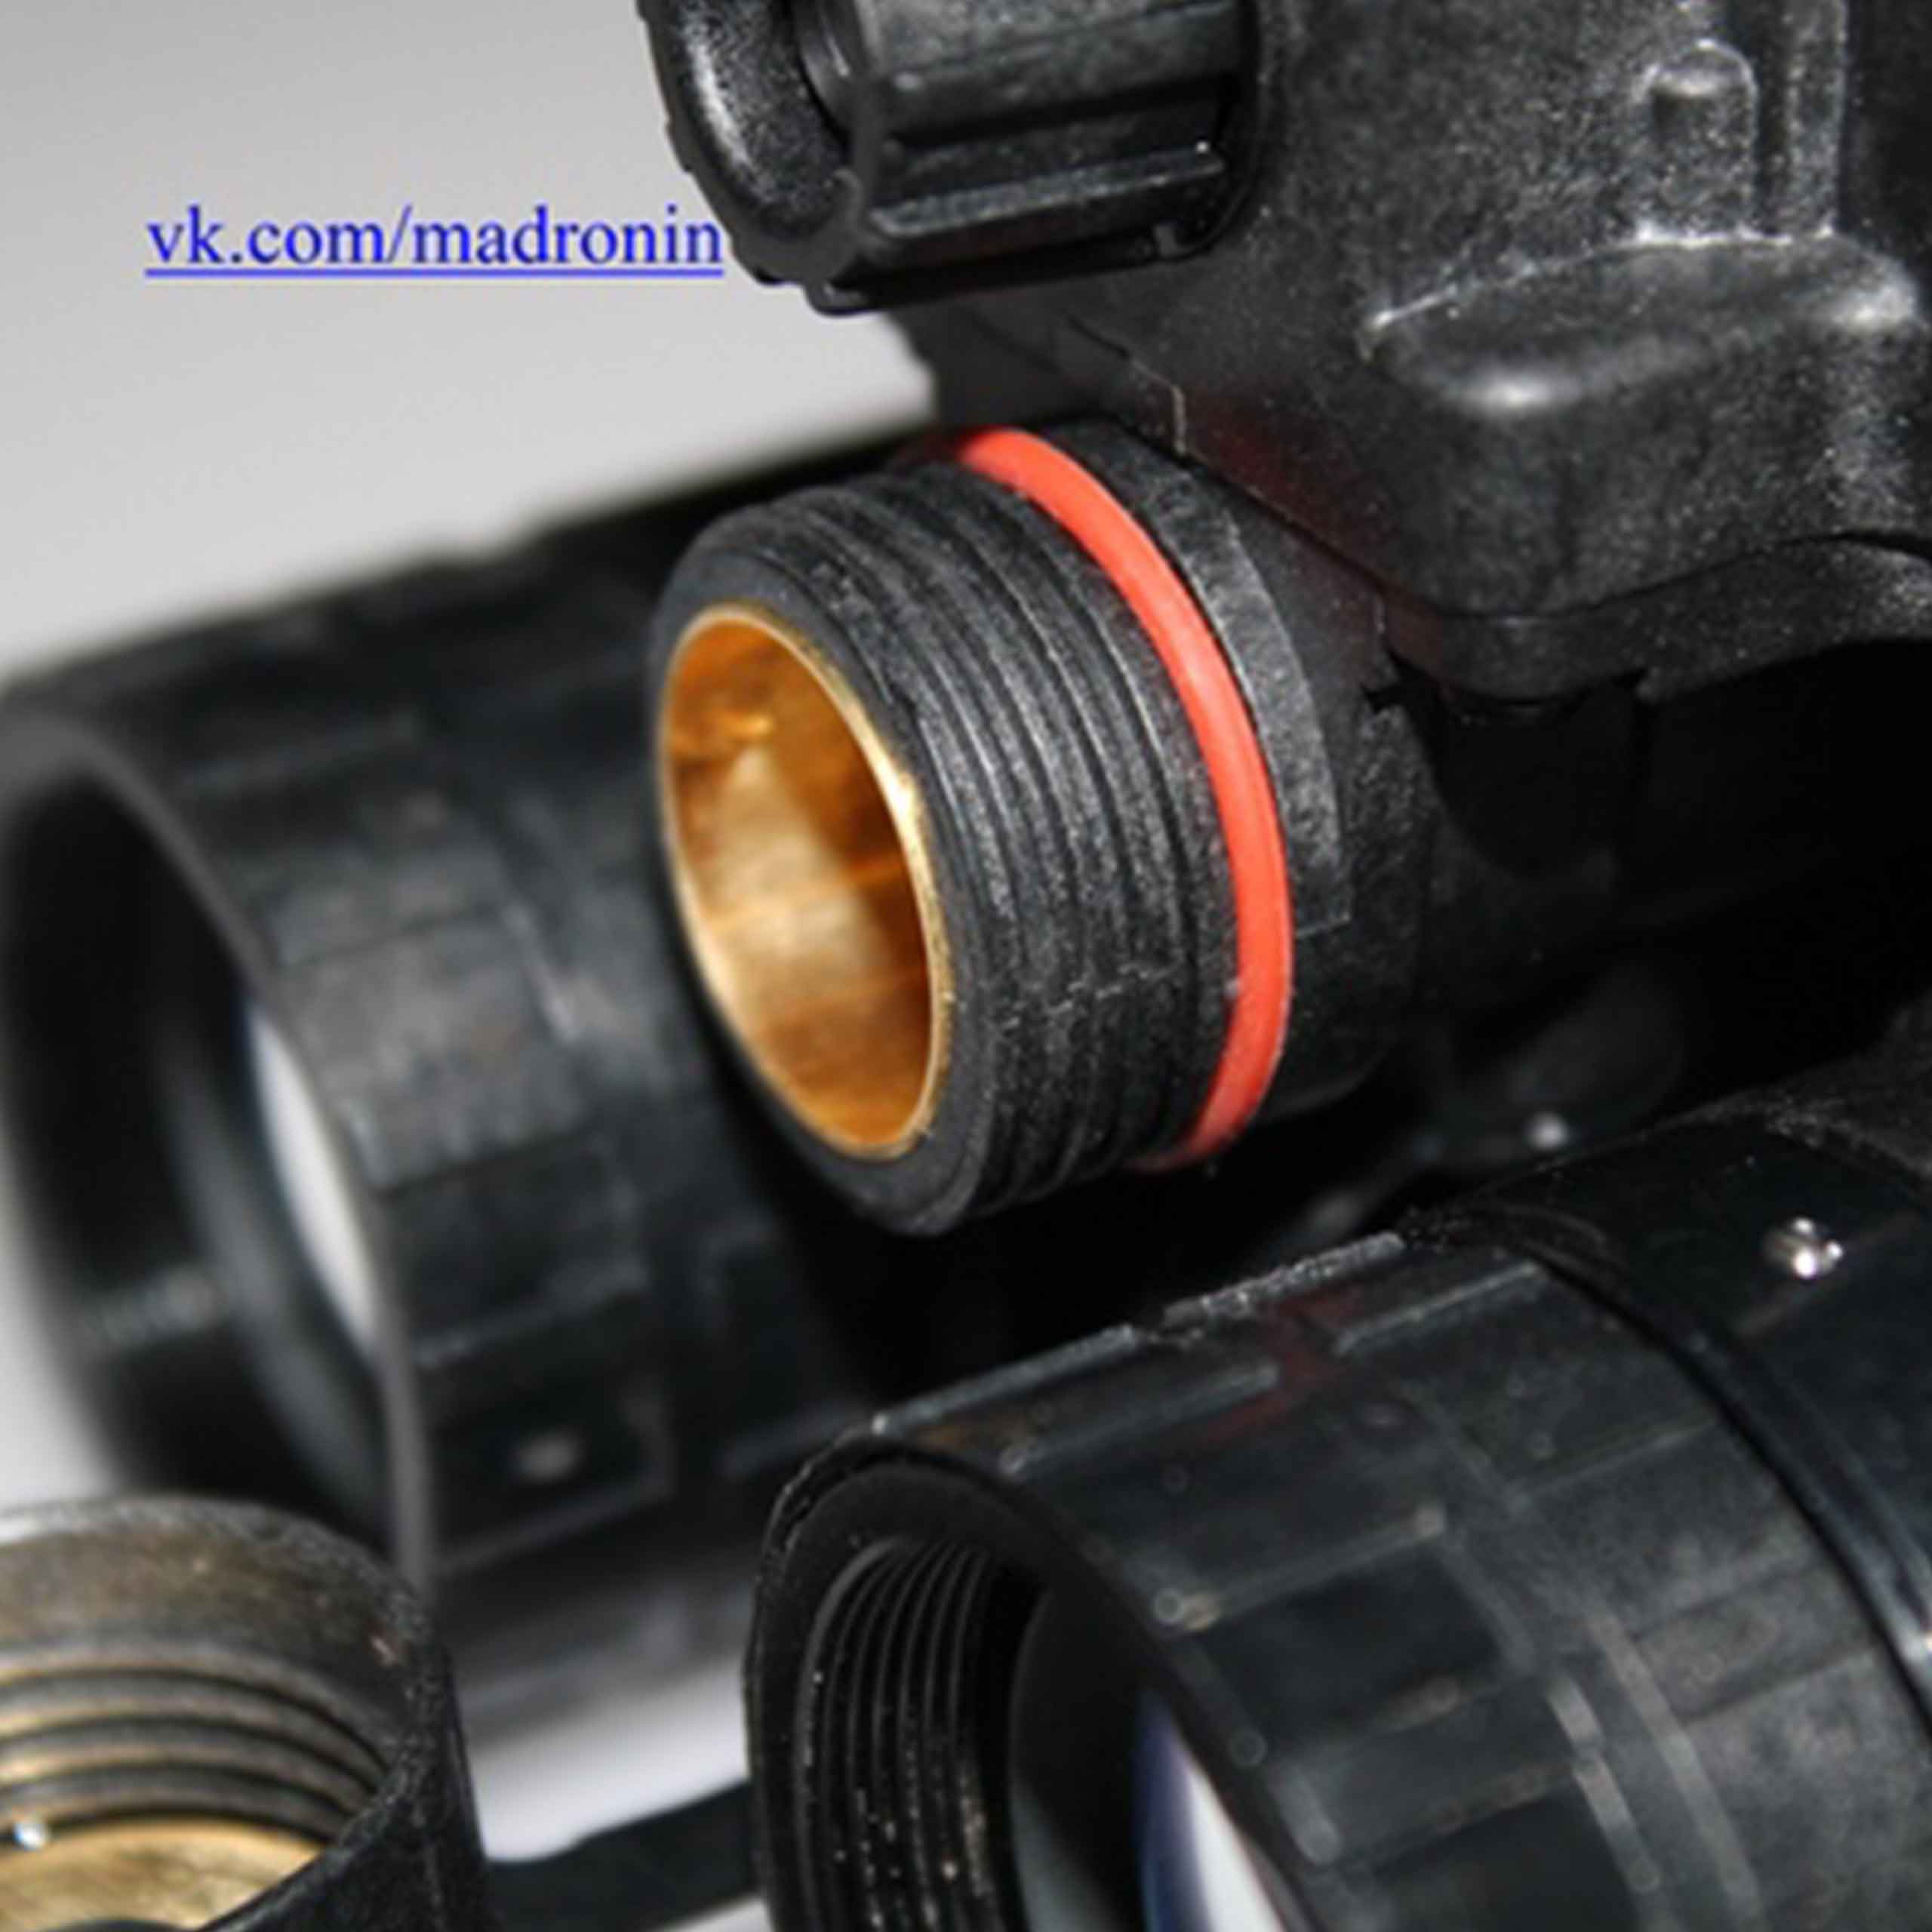
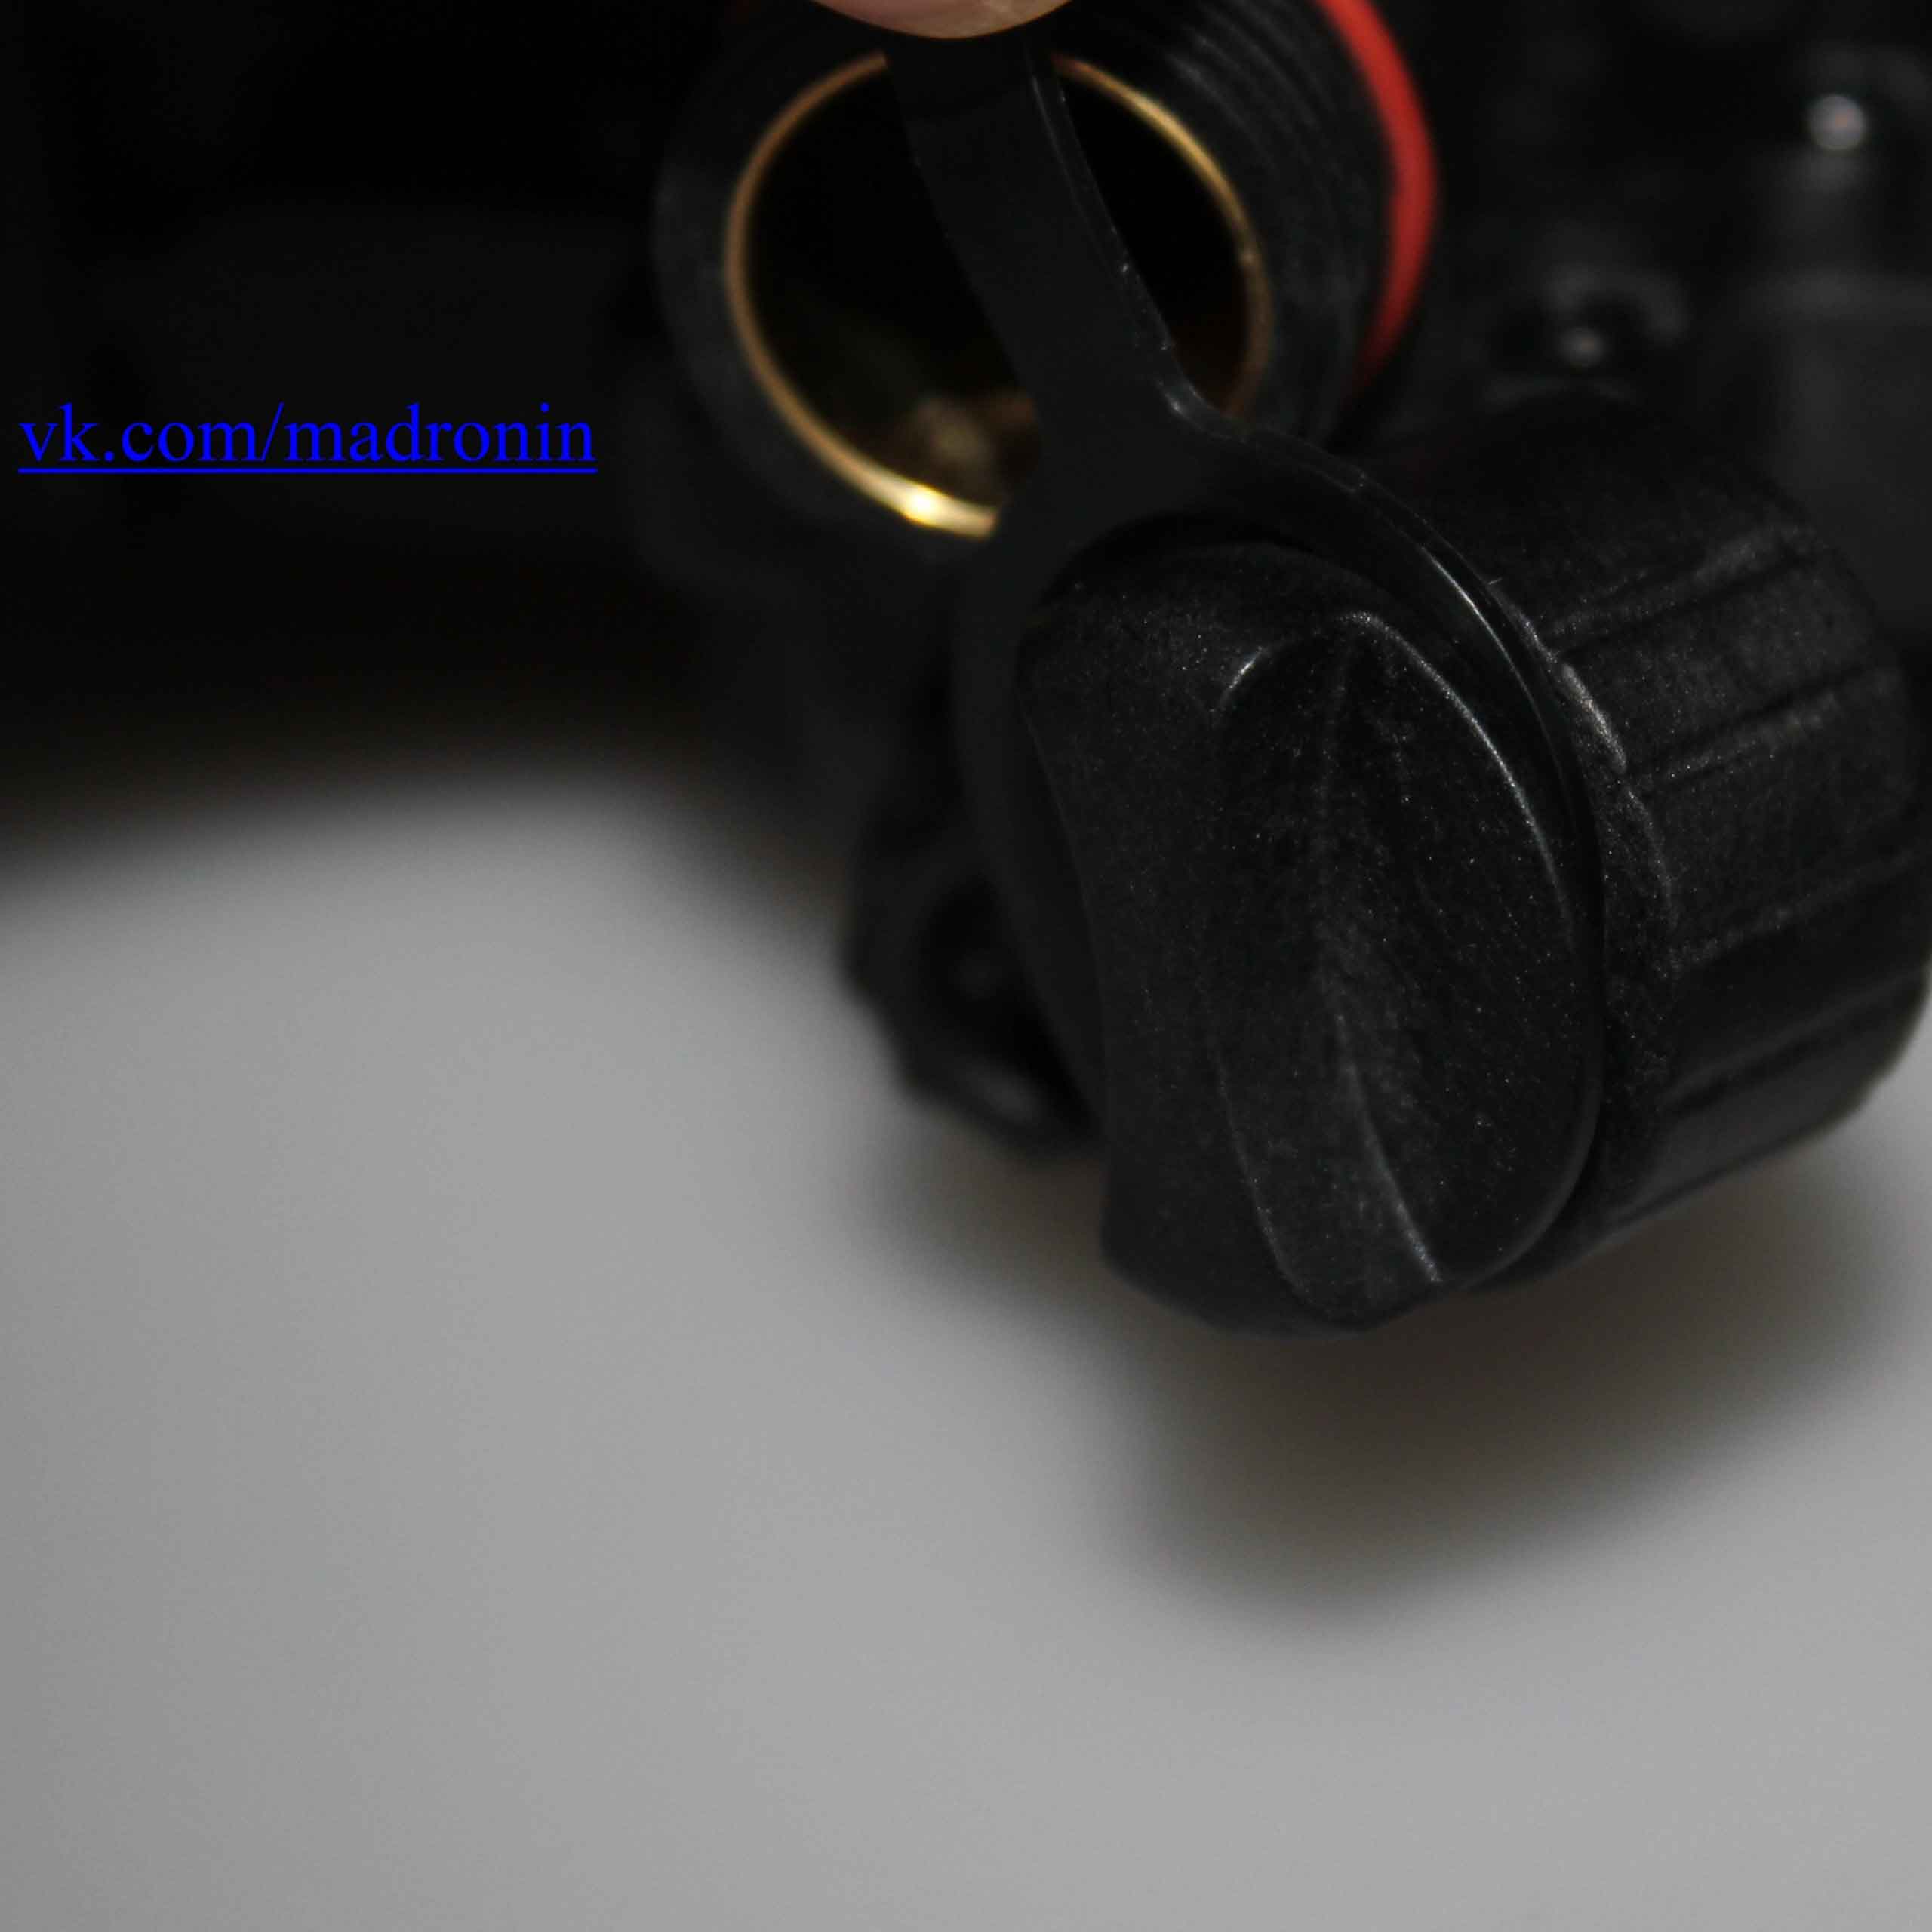
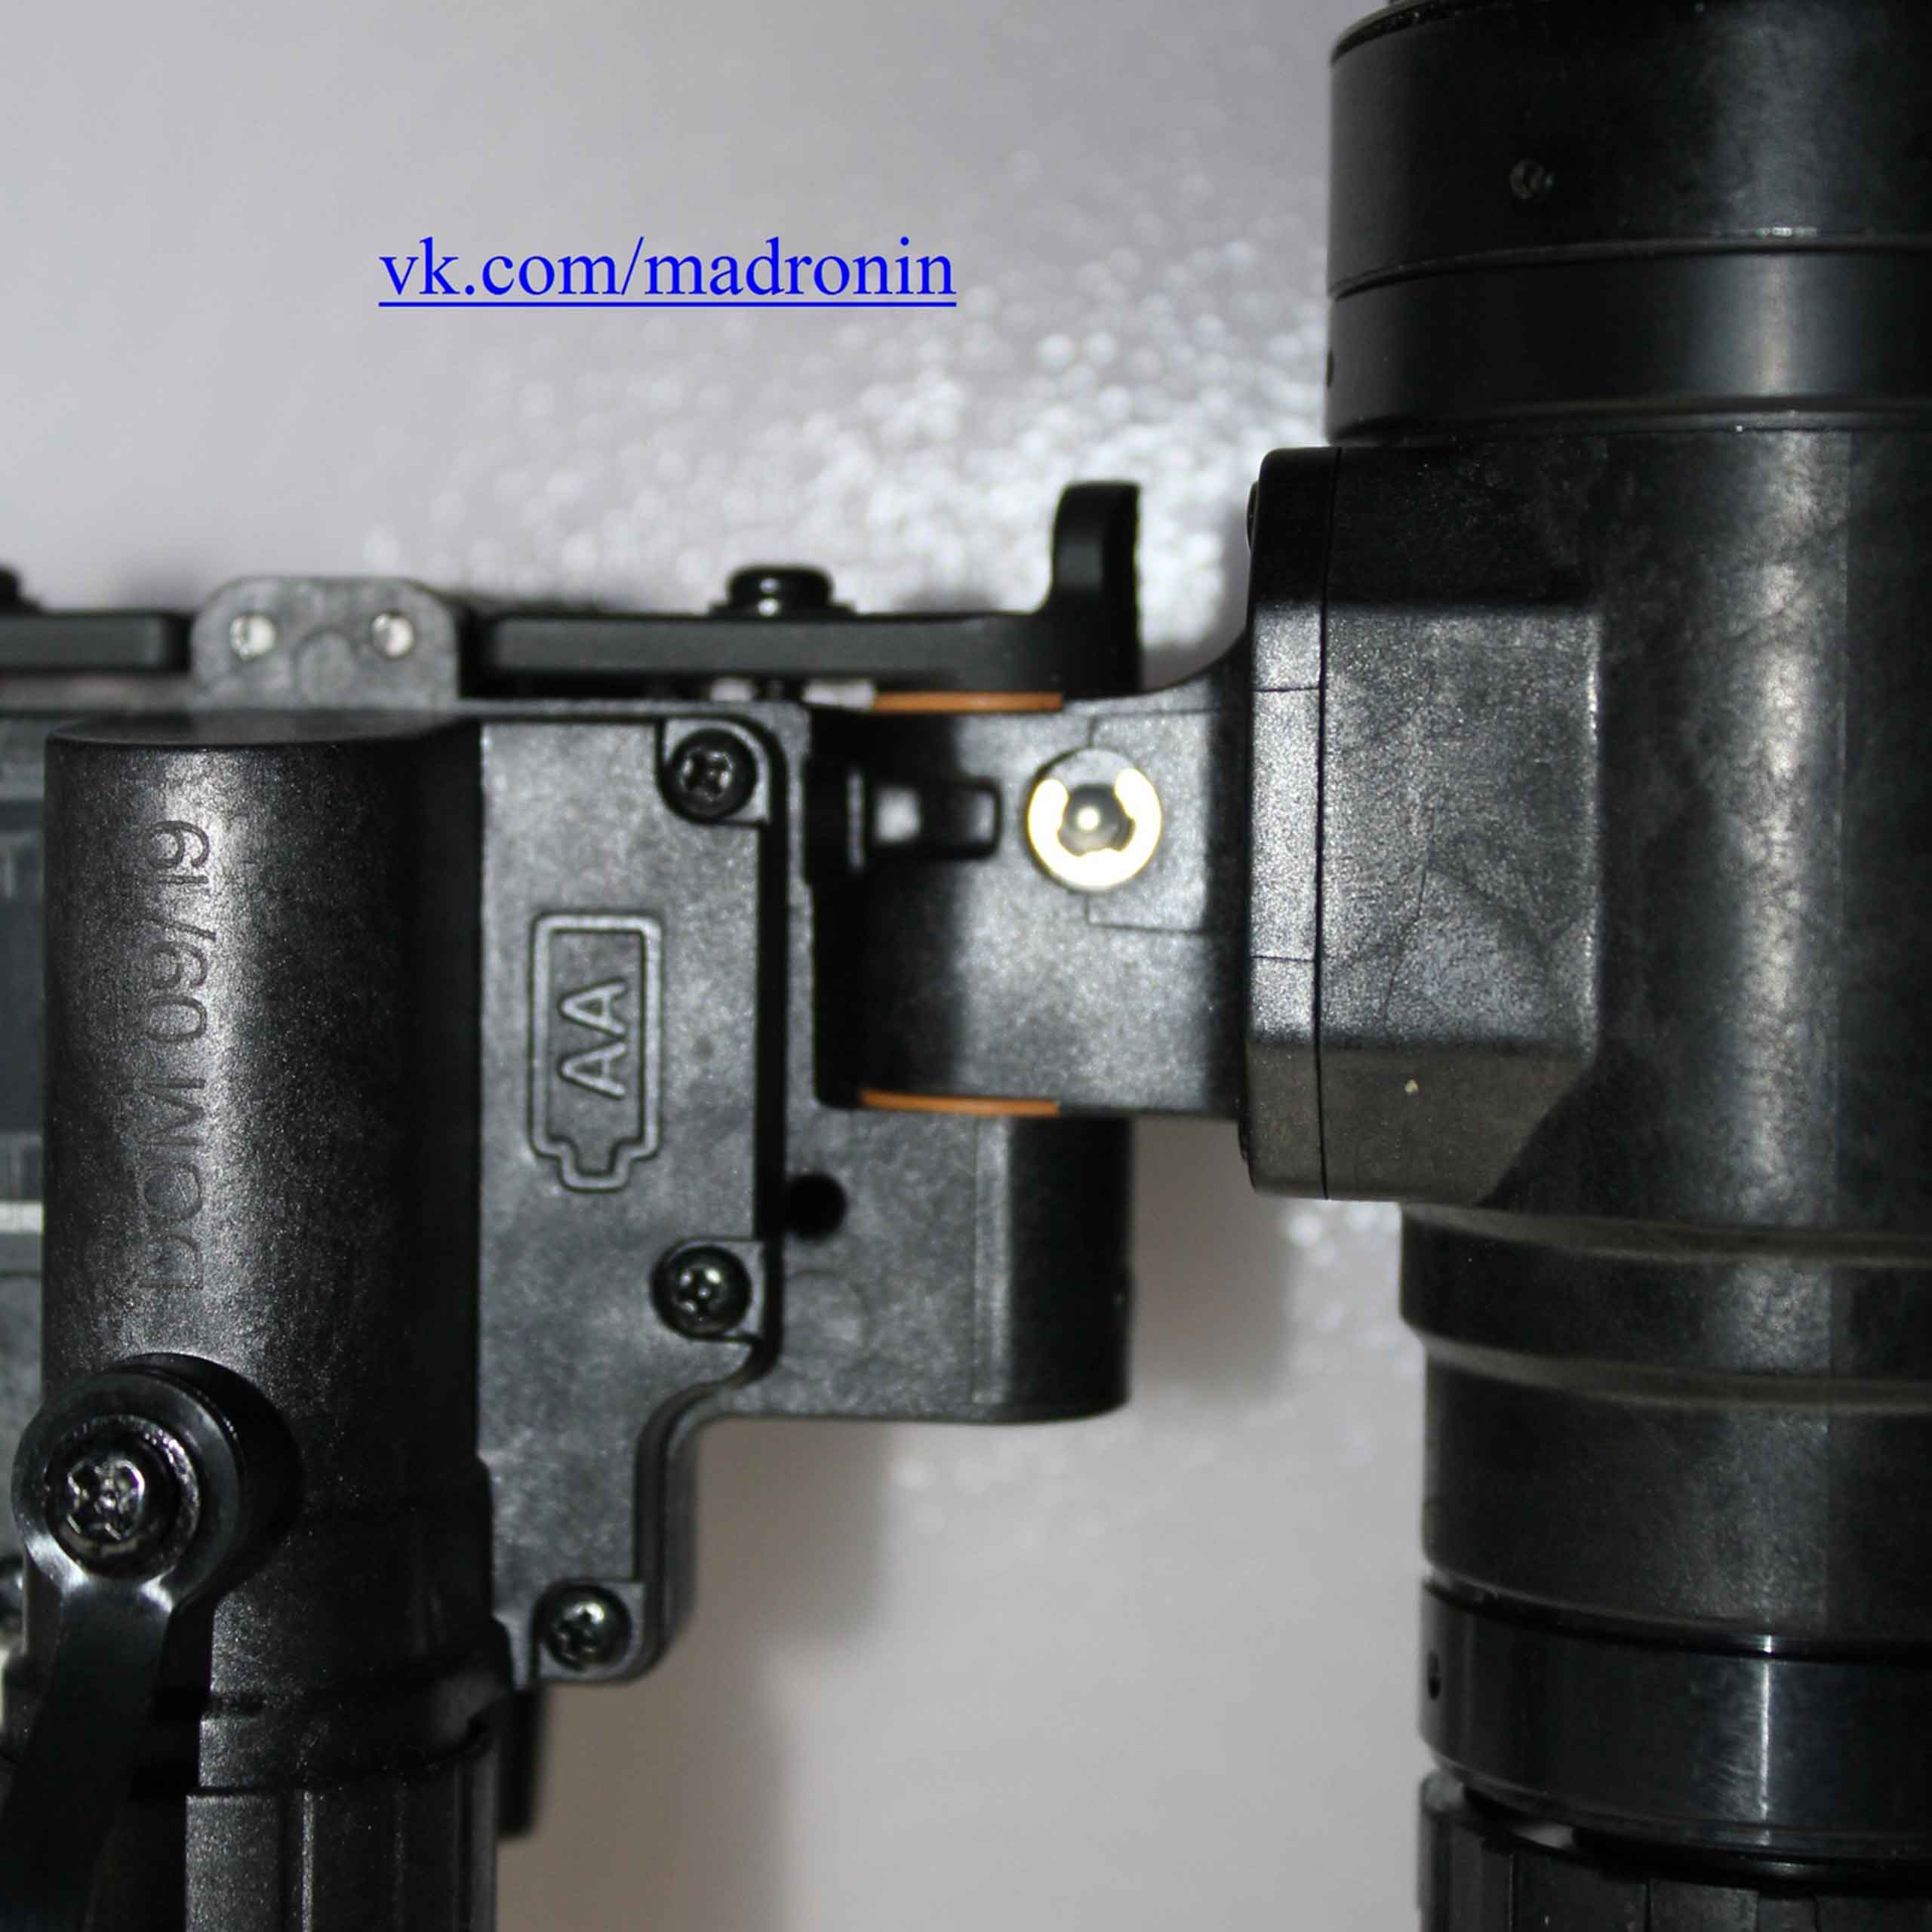
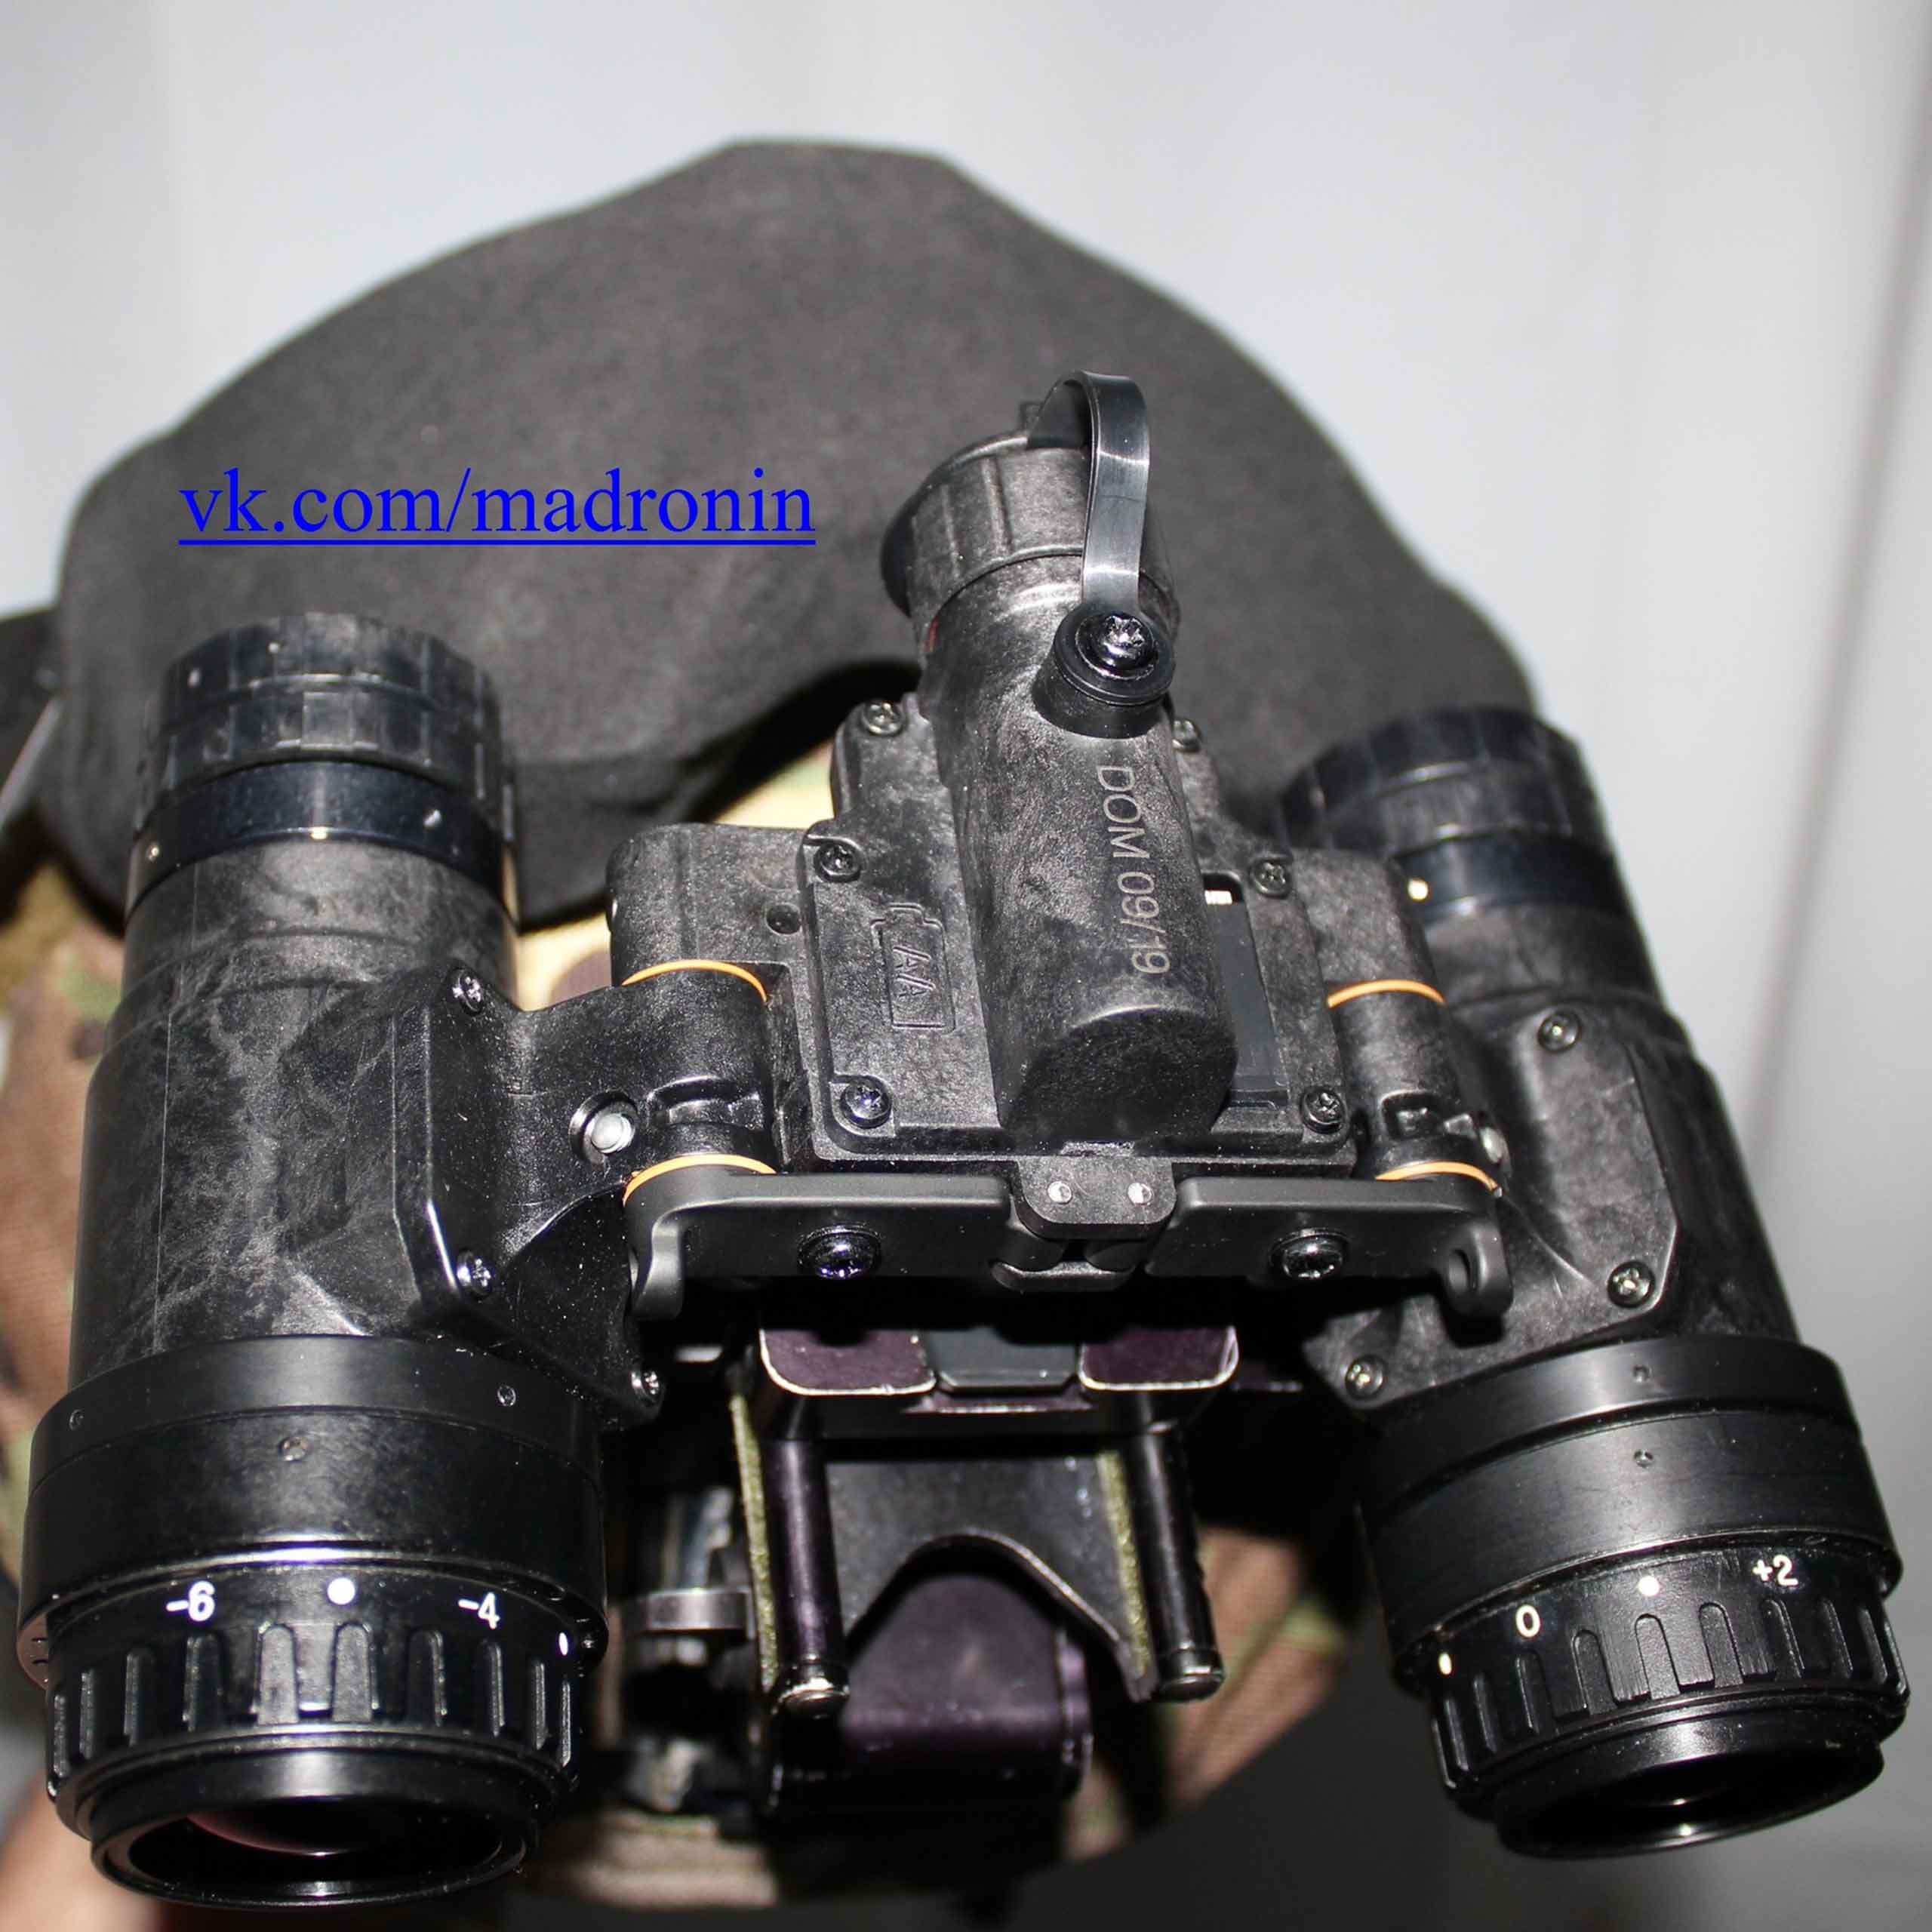
2. Battery compartment for one AA battery (finger-type, LR6). The battery cover is made of the same plastic as the device itself - apparently, in order to minimize weight. In my opinion, the decision is controversial: a cover made of an aluminum alloy would not greatly increase the weight, while significantly increasing the margin of safety. The battery cover is held on a plastic “leash”, the counterpart of the compartment has an o-ring. On the bottom of the battery compartment, as in the original, the date of manufacture is marked (in my case, “DOM 09/19”). There is an icon next to the bat compartment block on the case that indicates the polarity of the battery installation.
 |
 |
 |
 |
 |
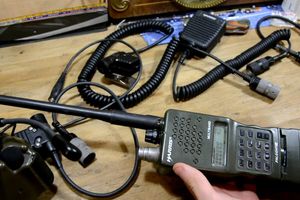
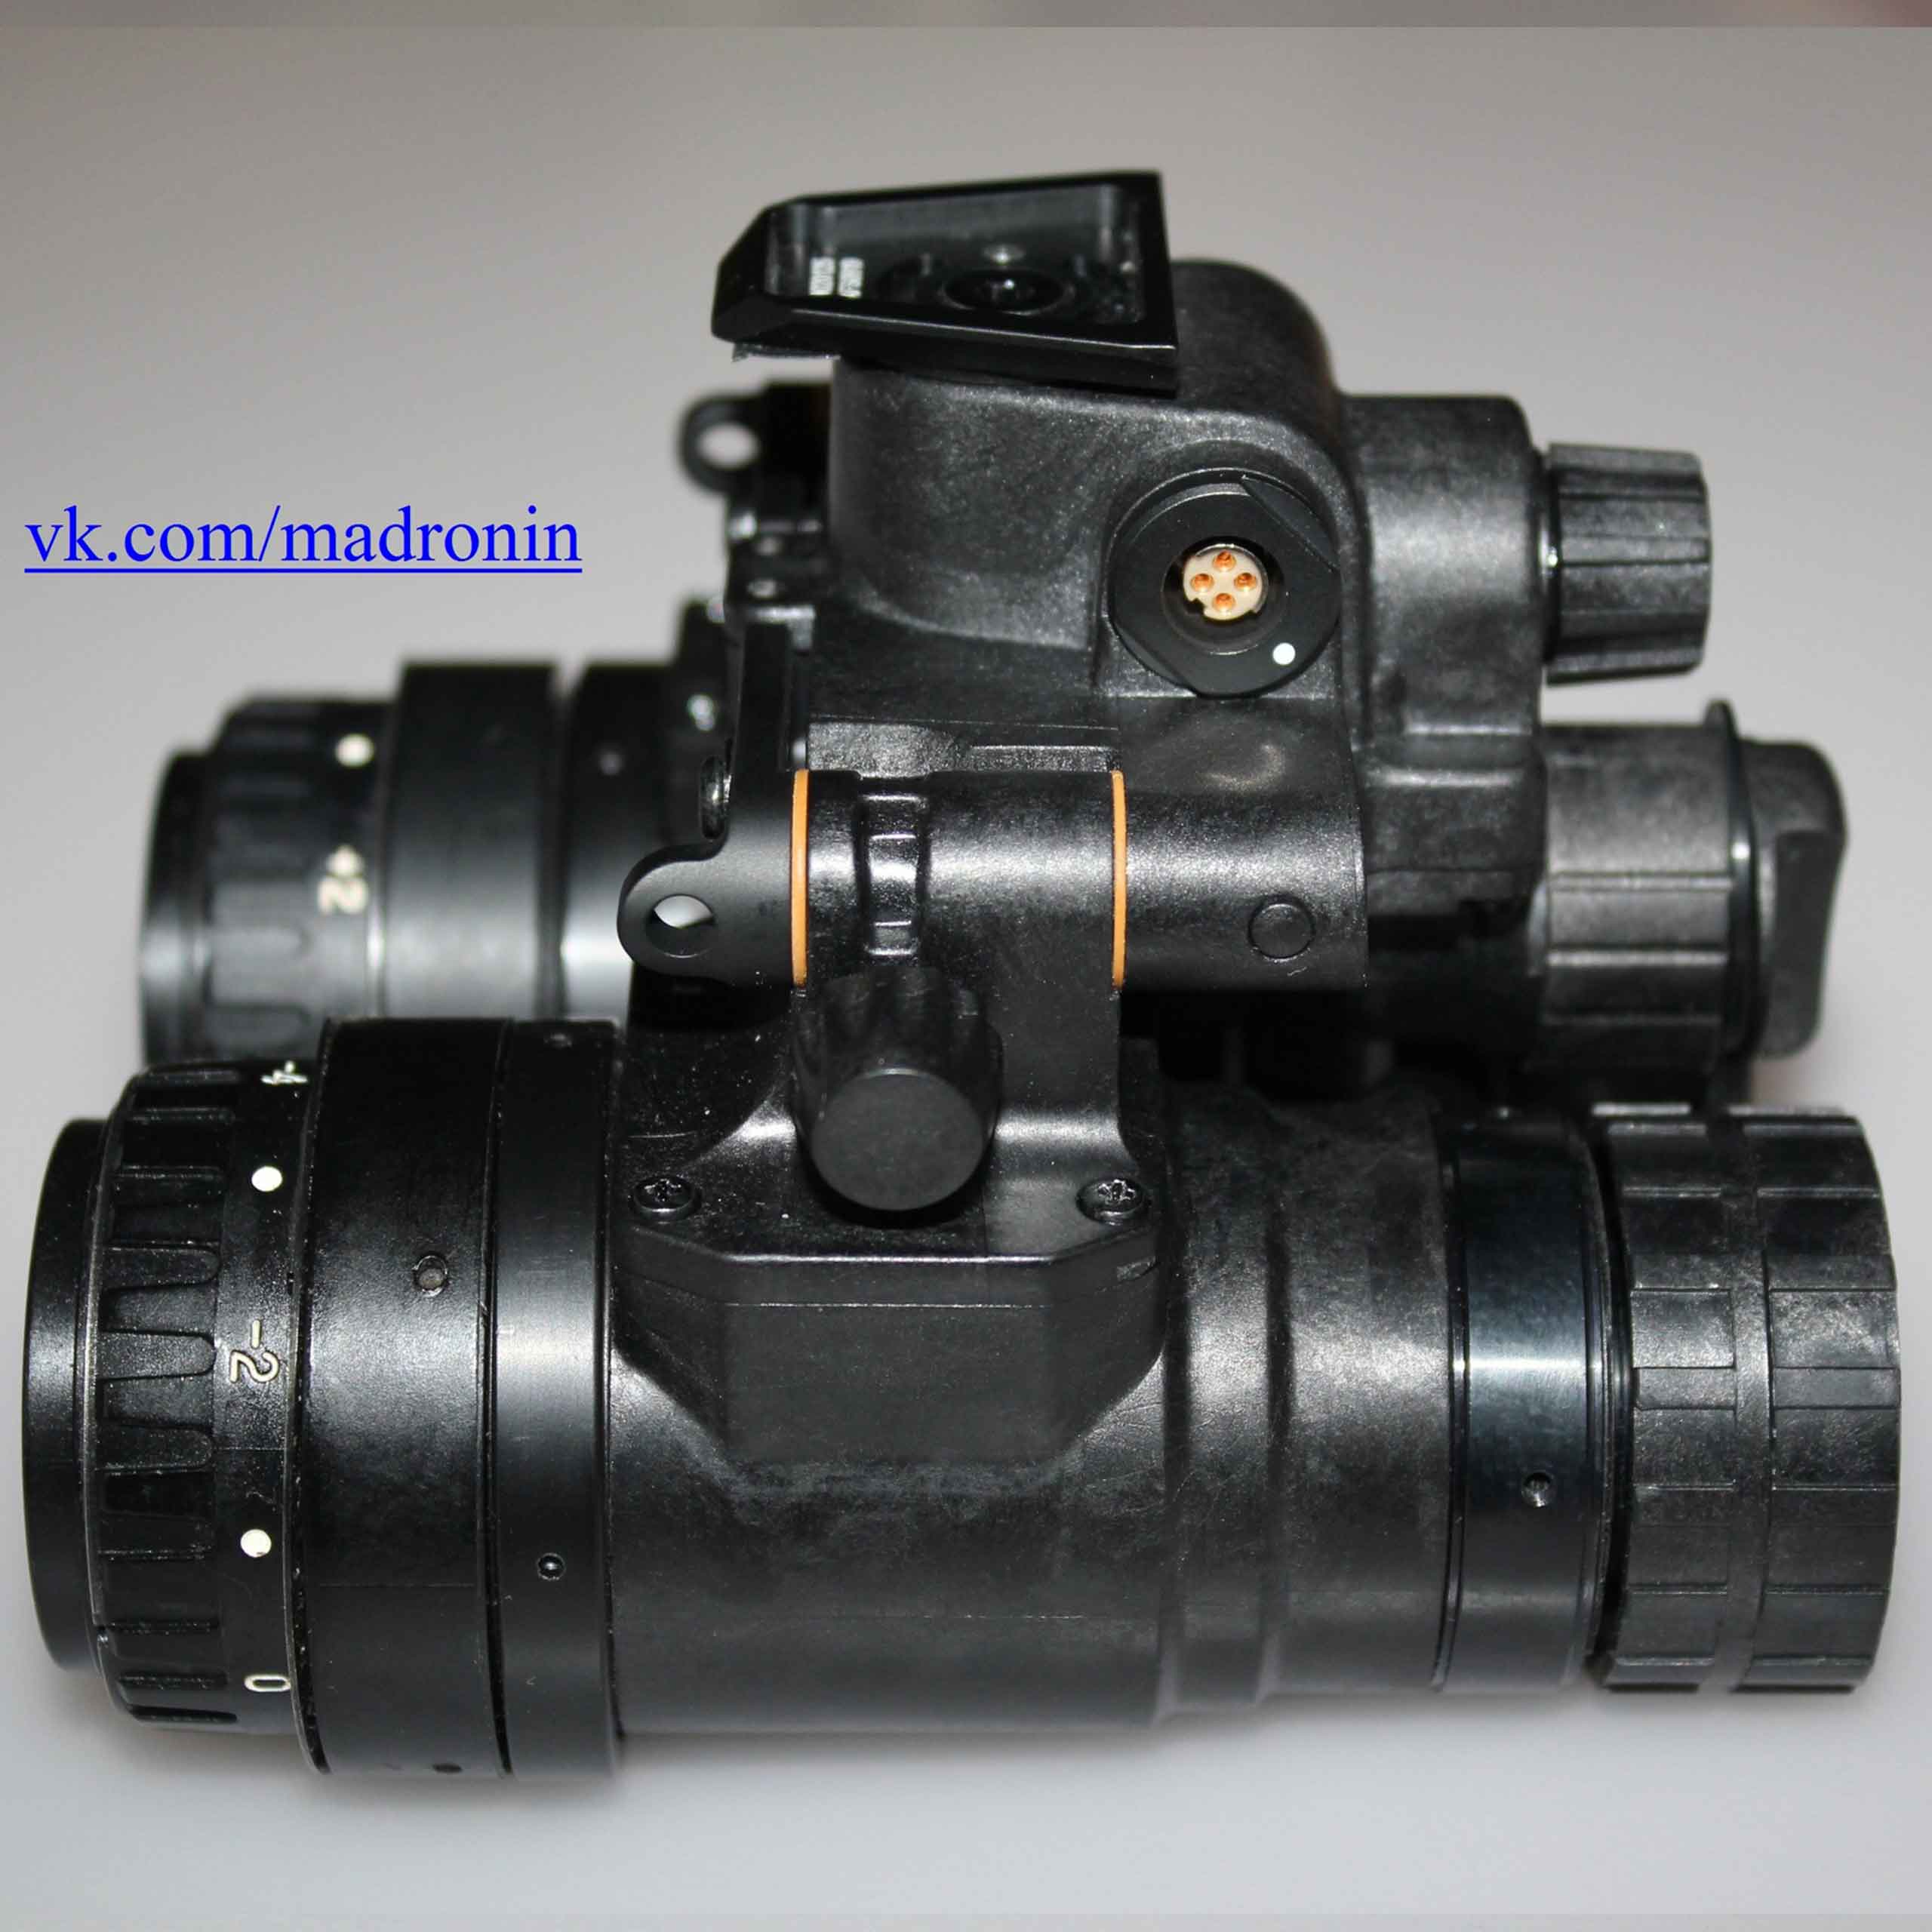
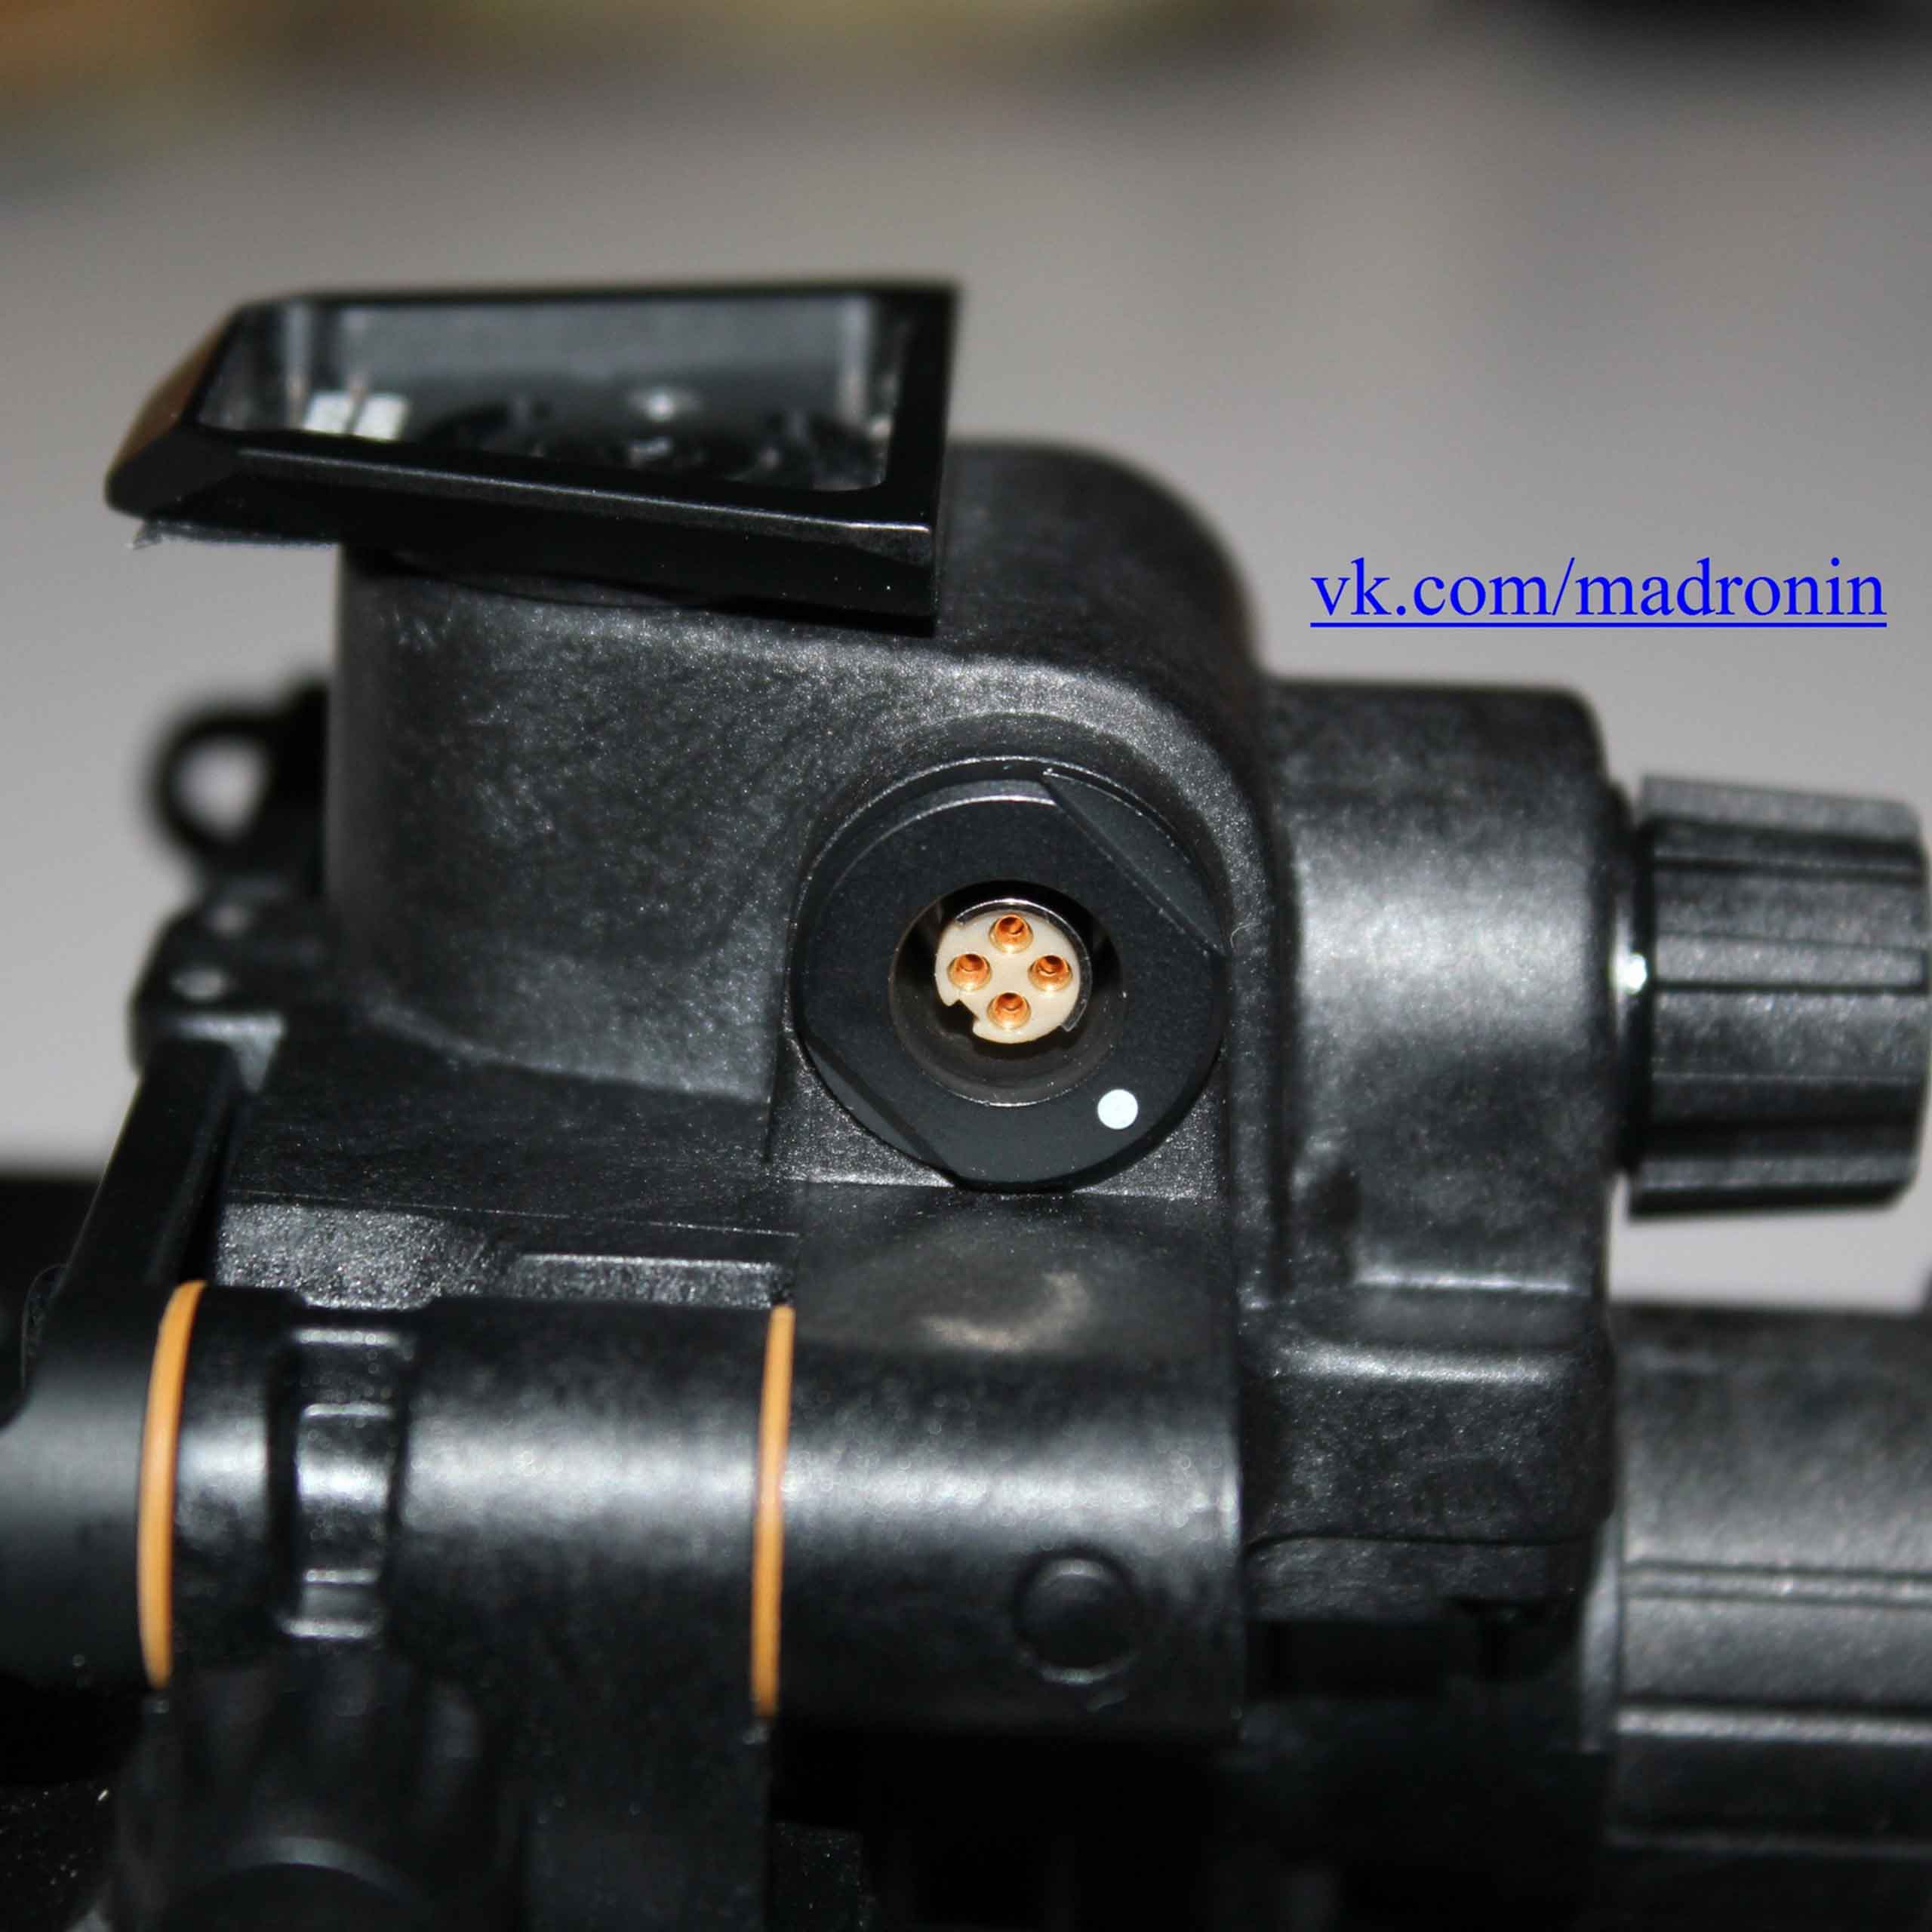
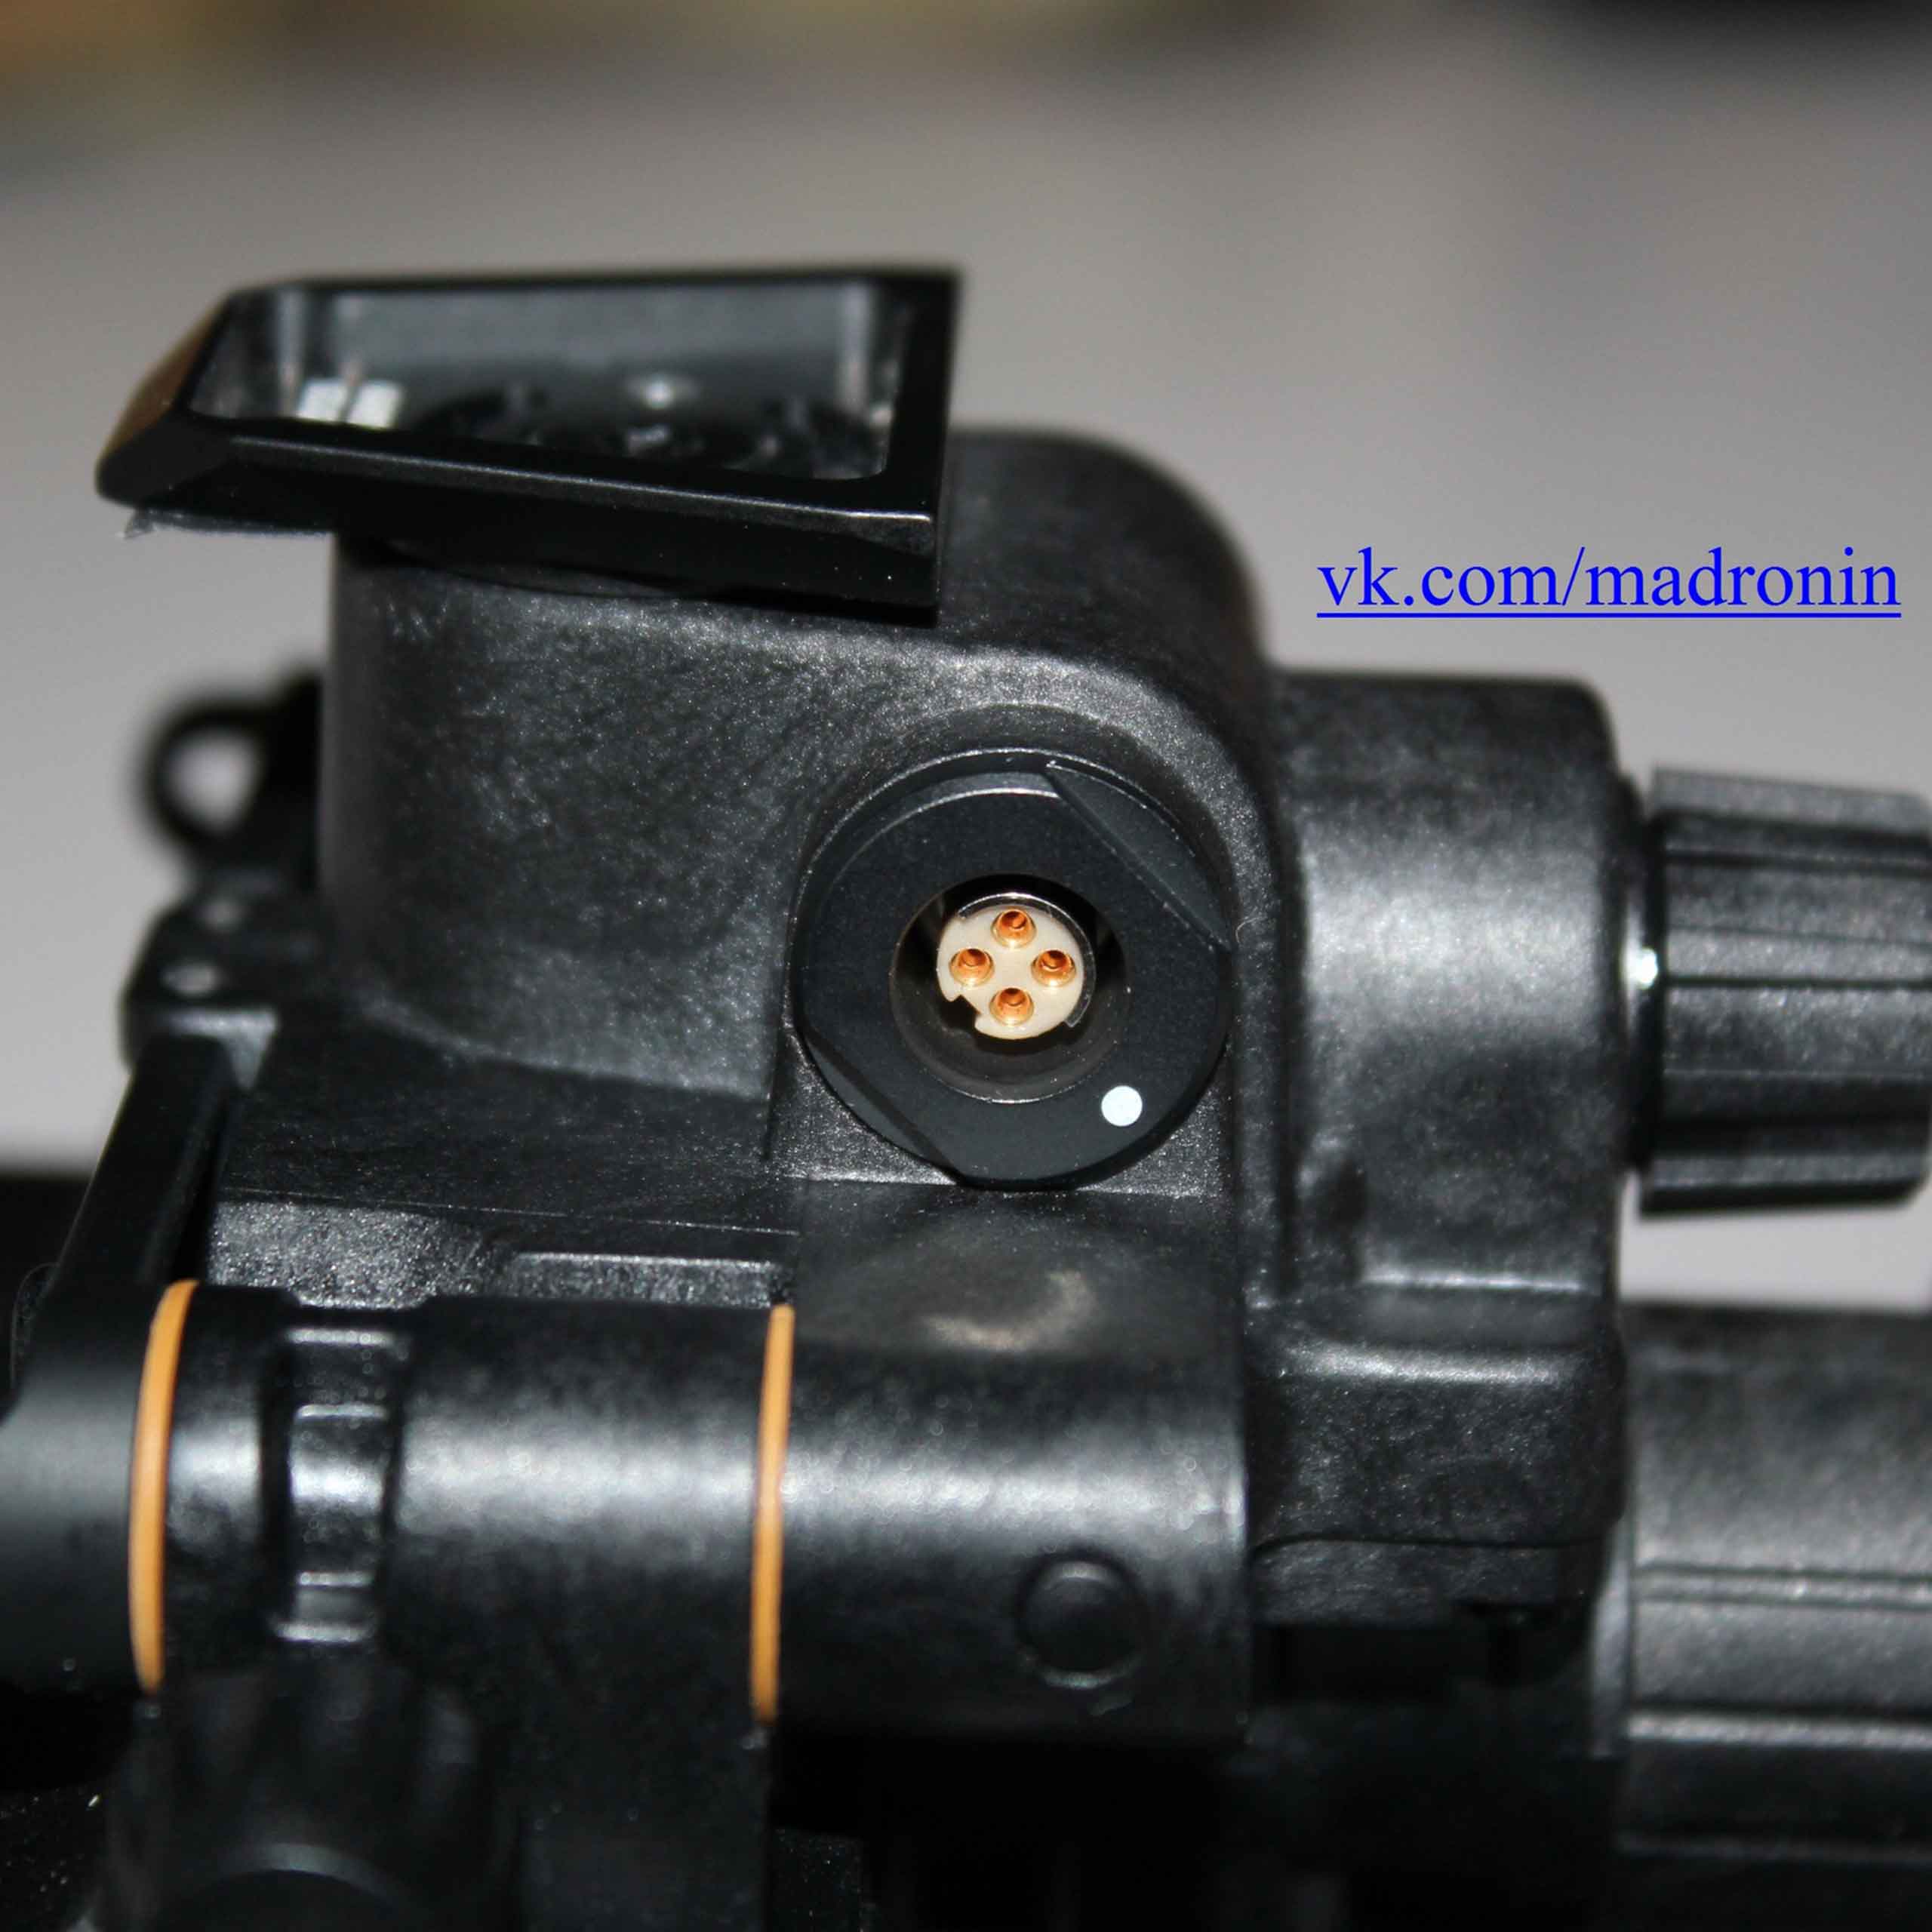
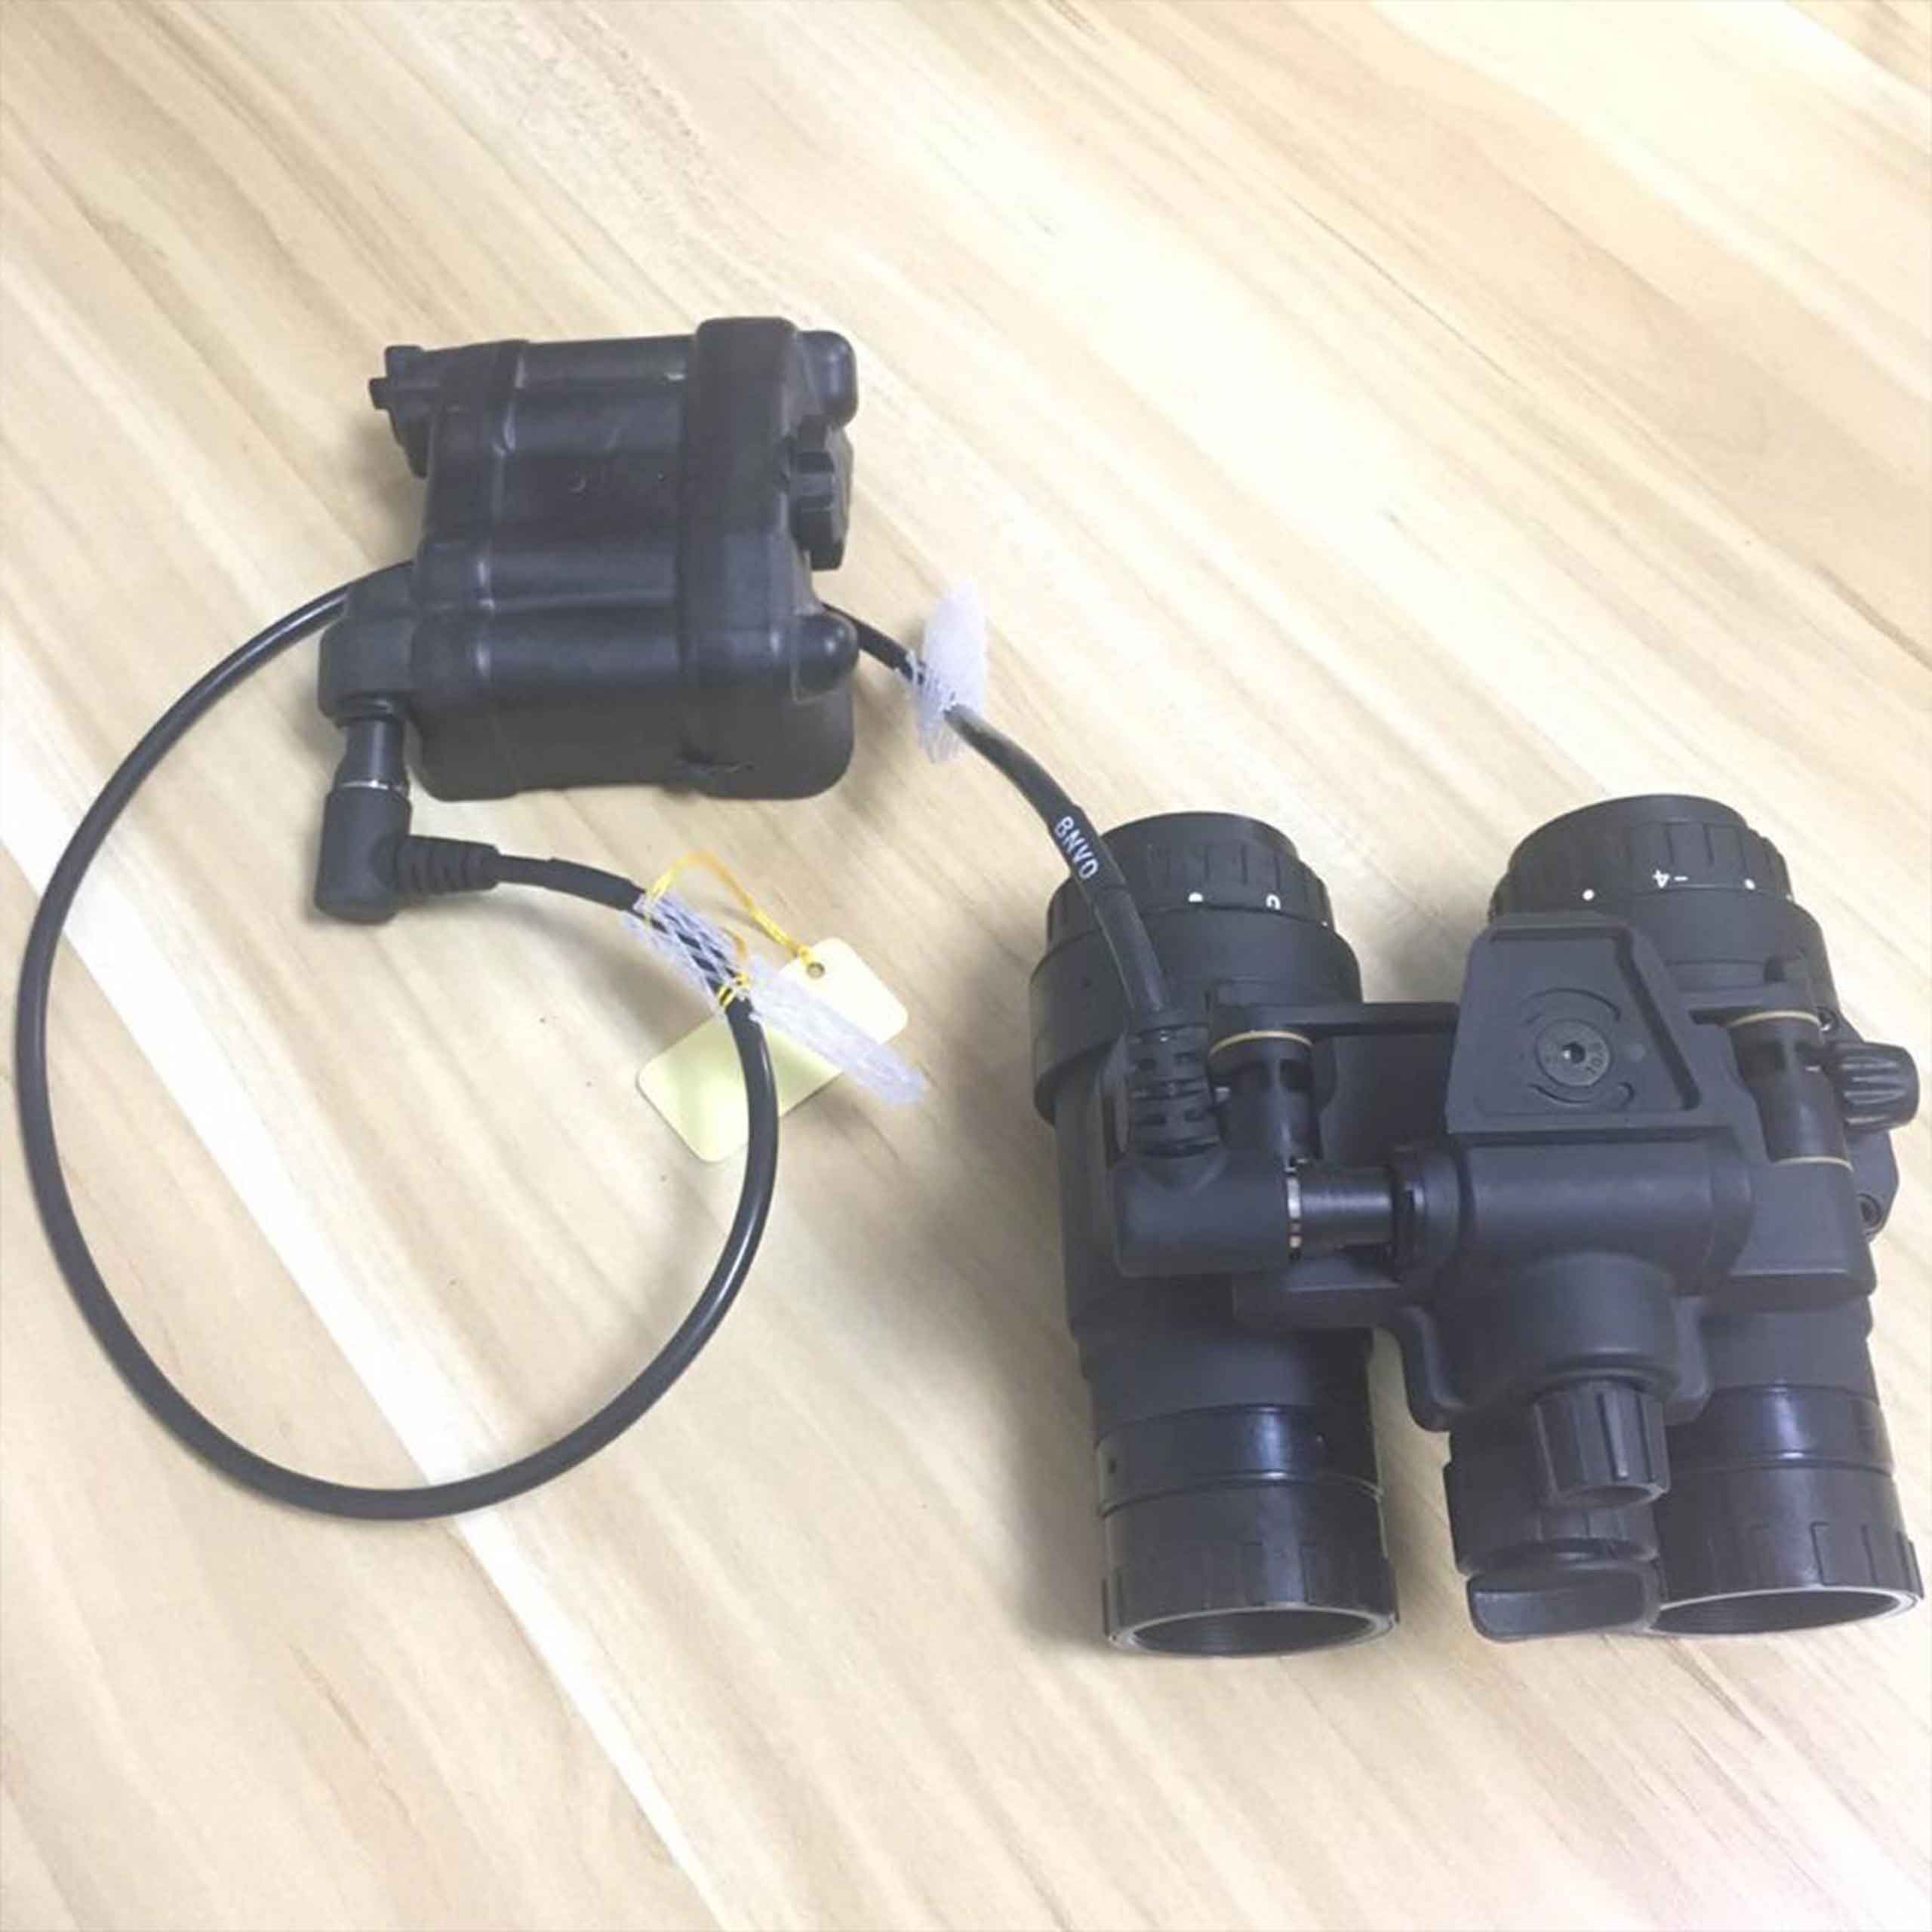
3. On the case on the right there is a connector for connecting an external power supply. According to the manufacturer, the device is suitable for both the original L3HARRIS BATTERY POWER SUPPLY power supply unit and its production units (also maximally copied from the original). Unfortunately, I do not have either one or the other block, and I am deprived of the opportunity to check how everything works. Third-party blocks FMA, Elite gear and other copies, the manufacturer does not recommend using, as they can damage the device. I did not take risks :)
 |
 |
 |
A connector for connecting an external power supply with an original connector.
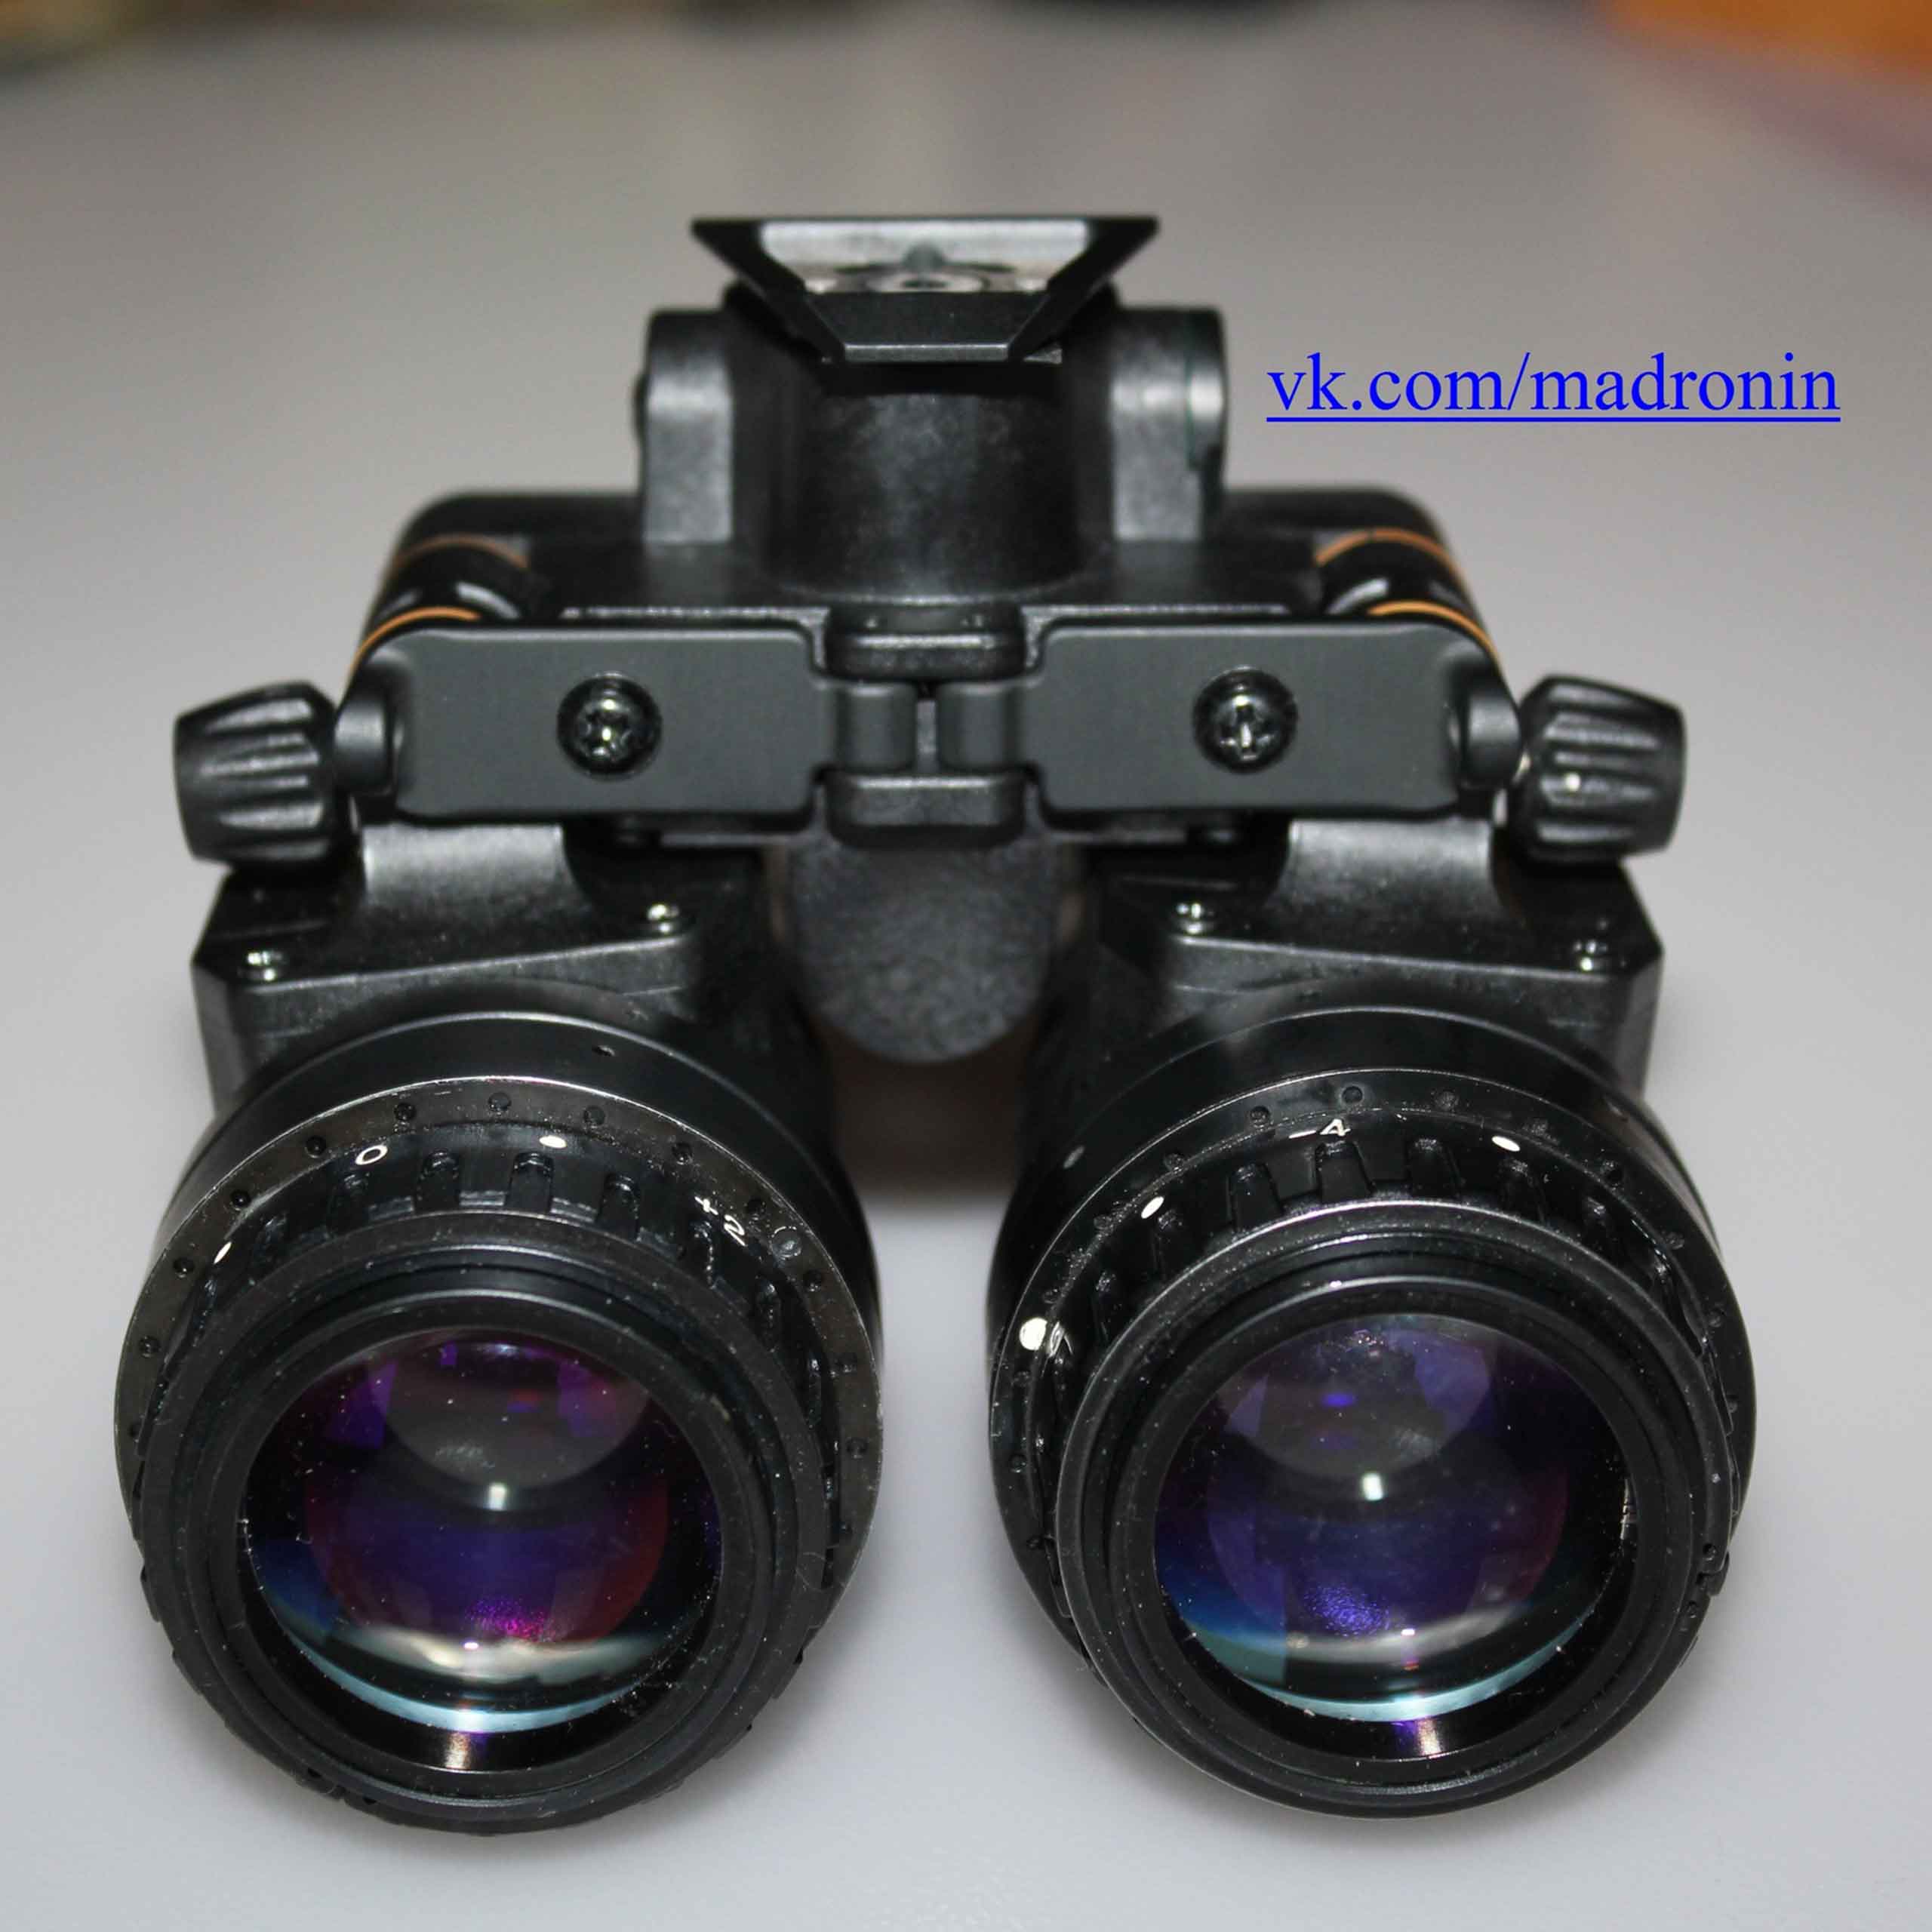
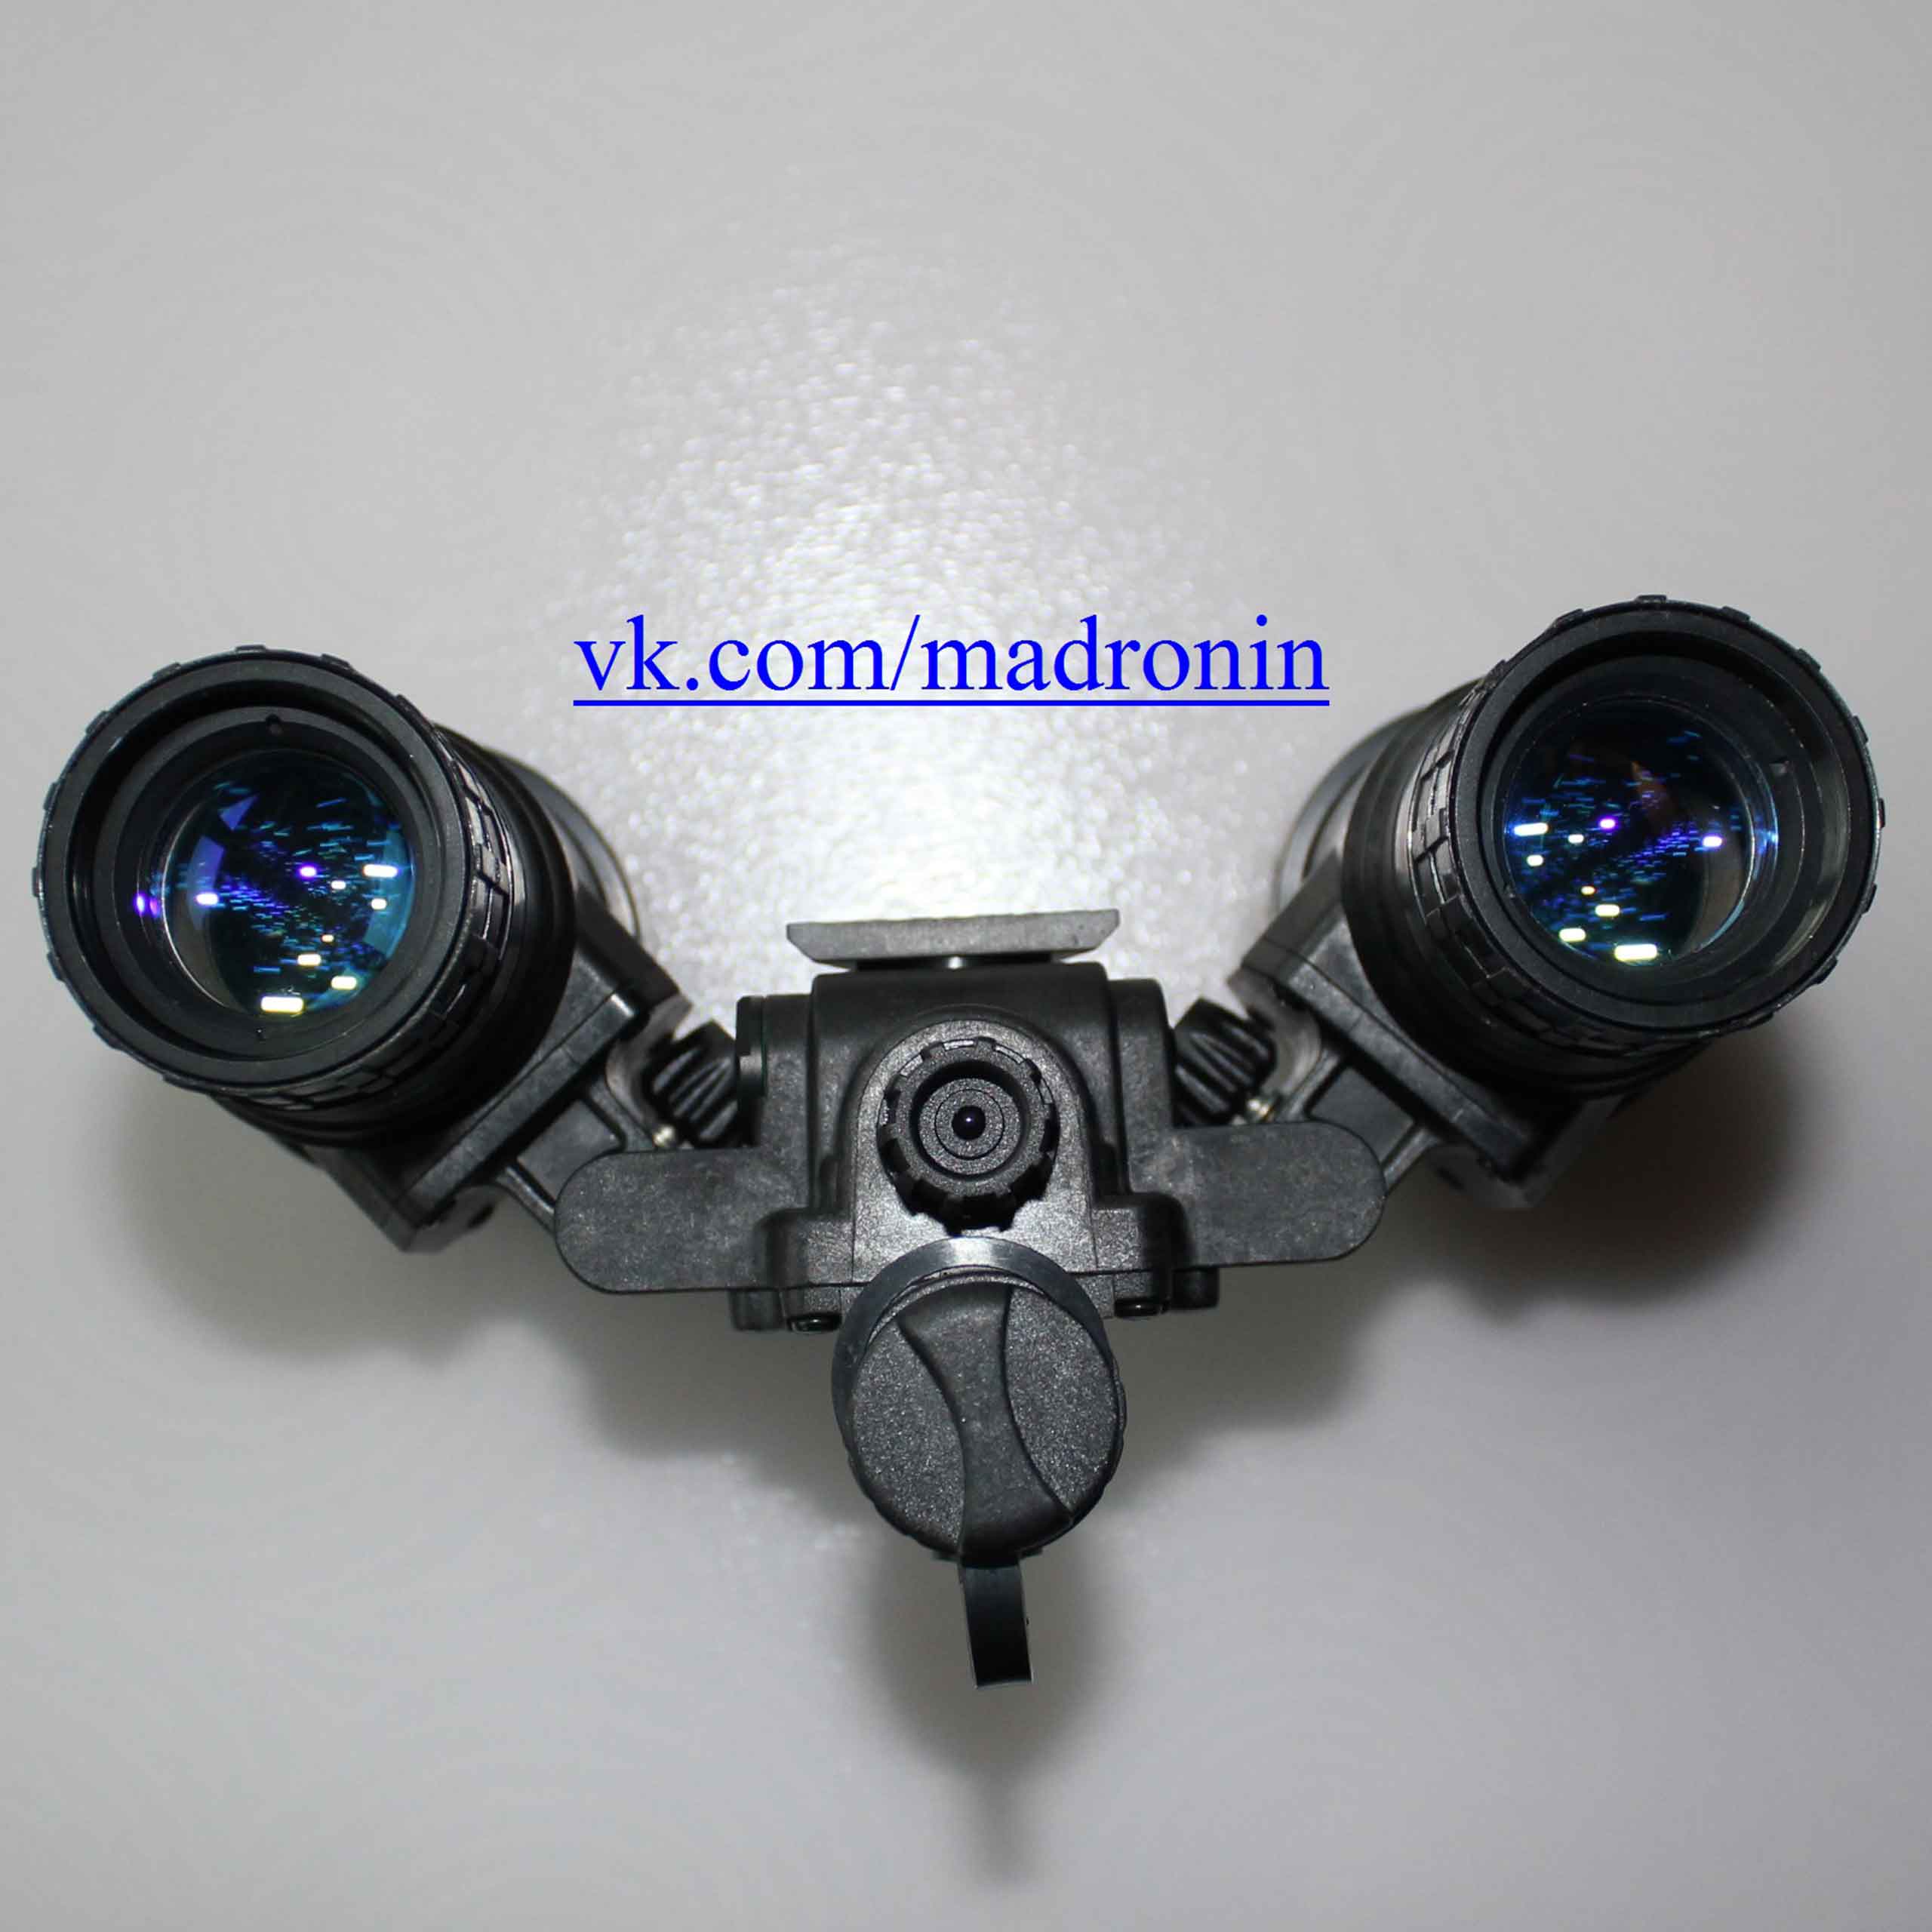
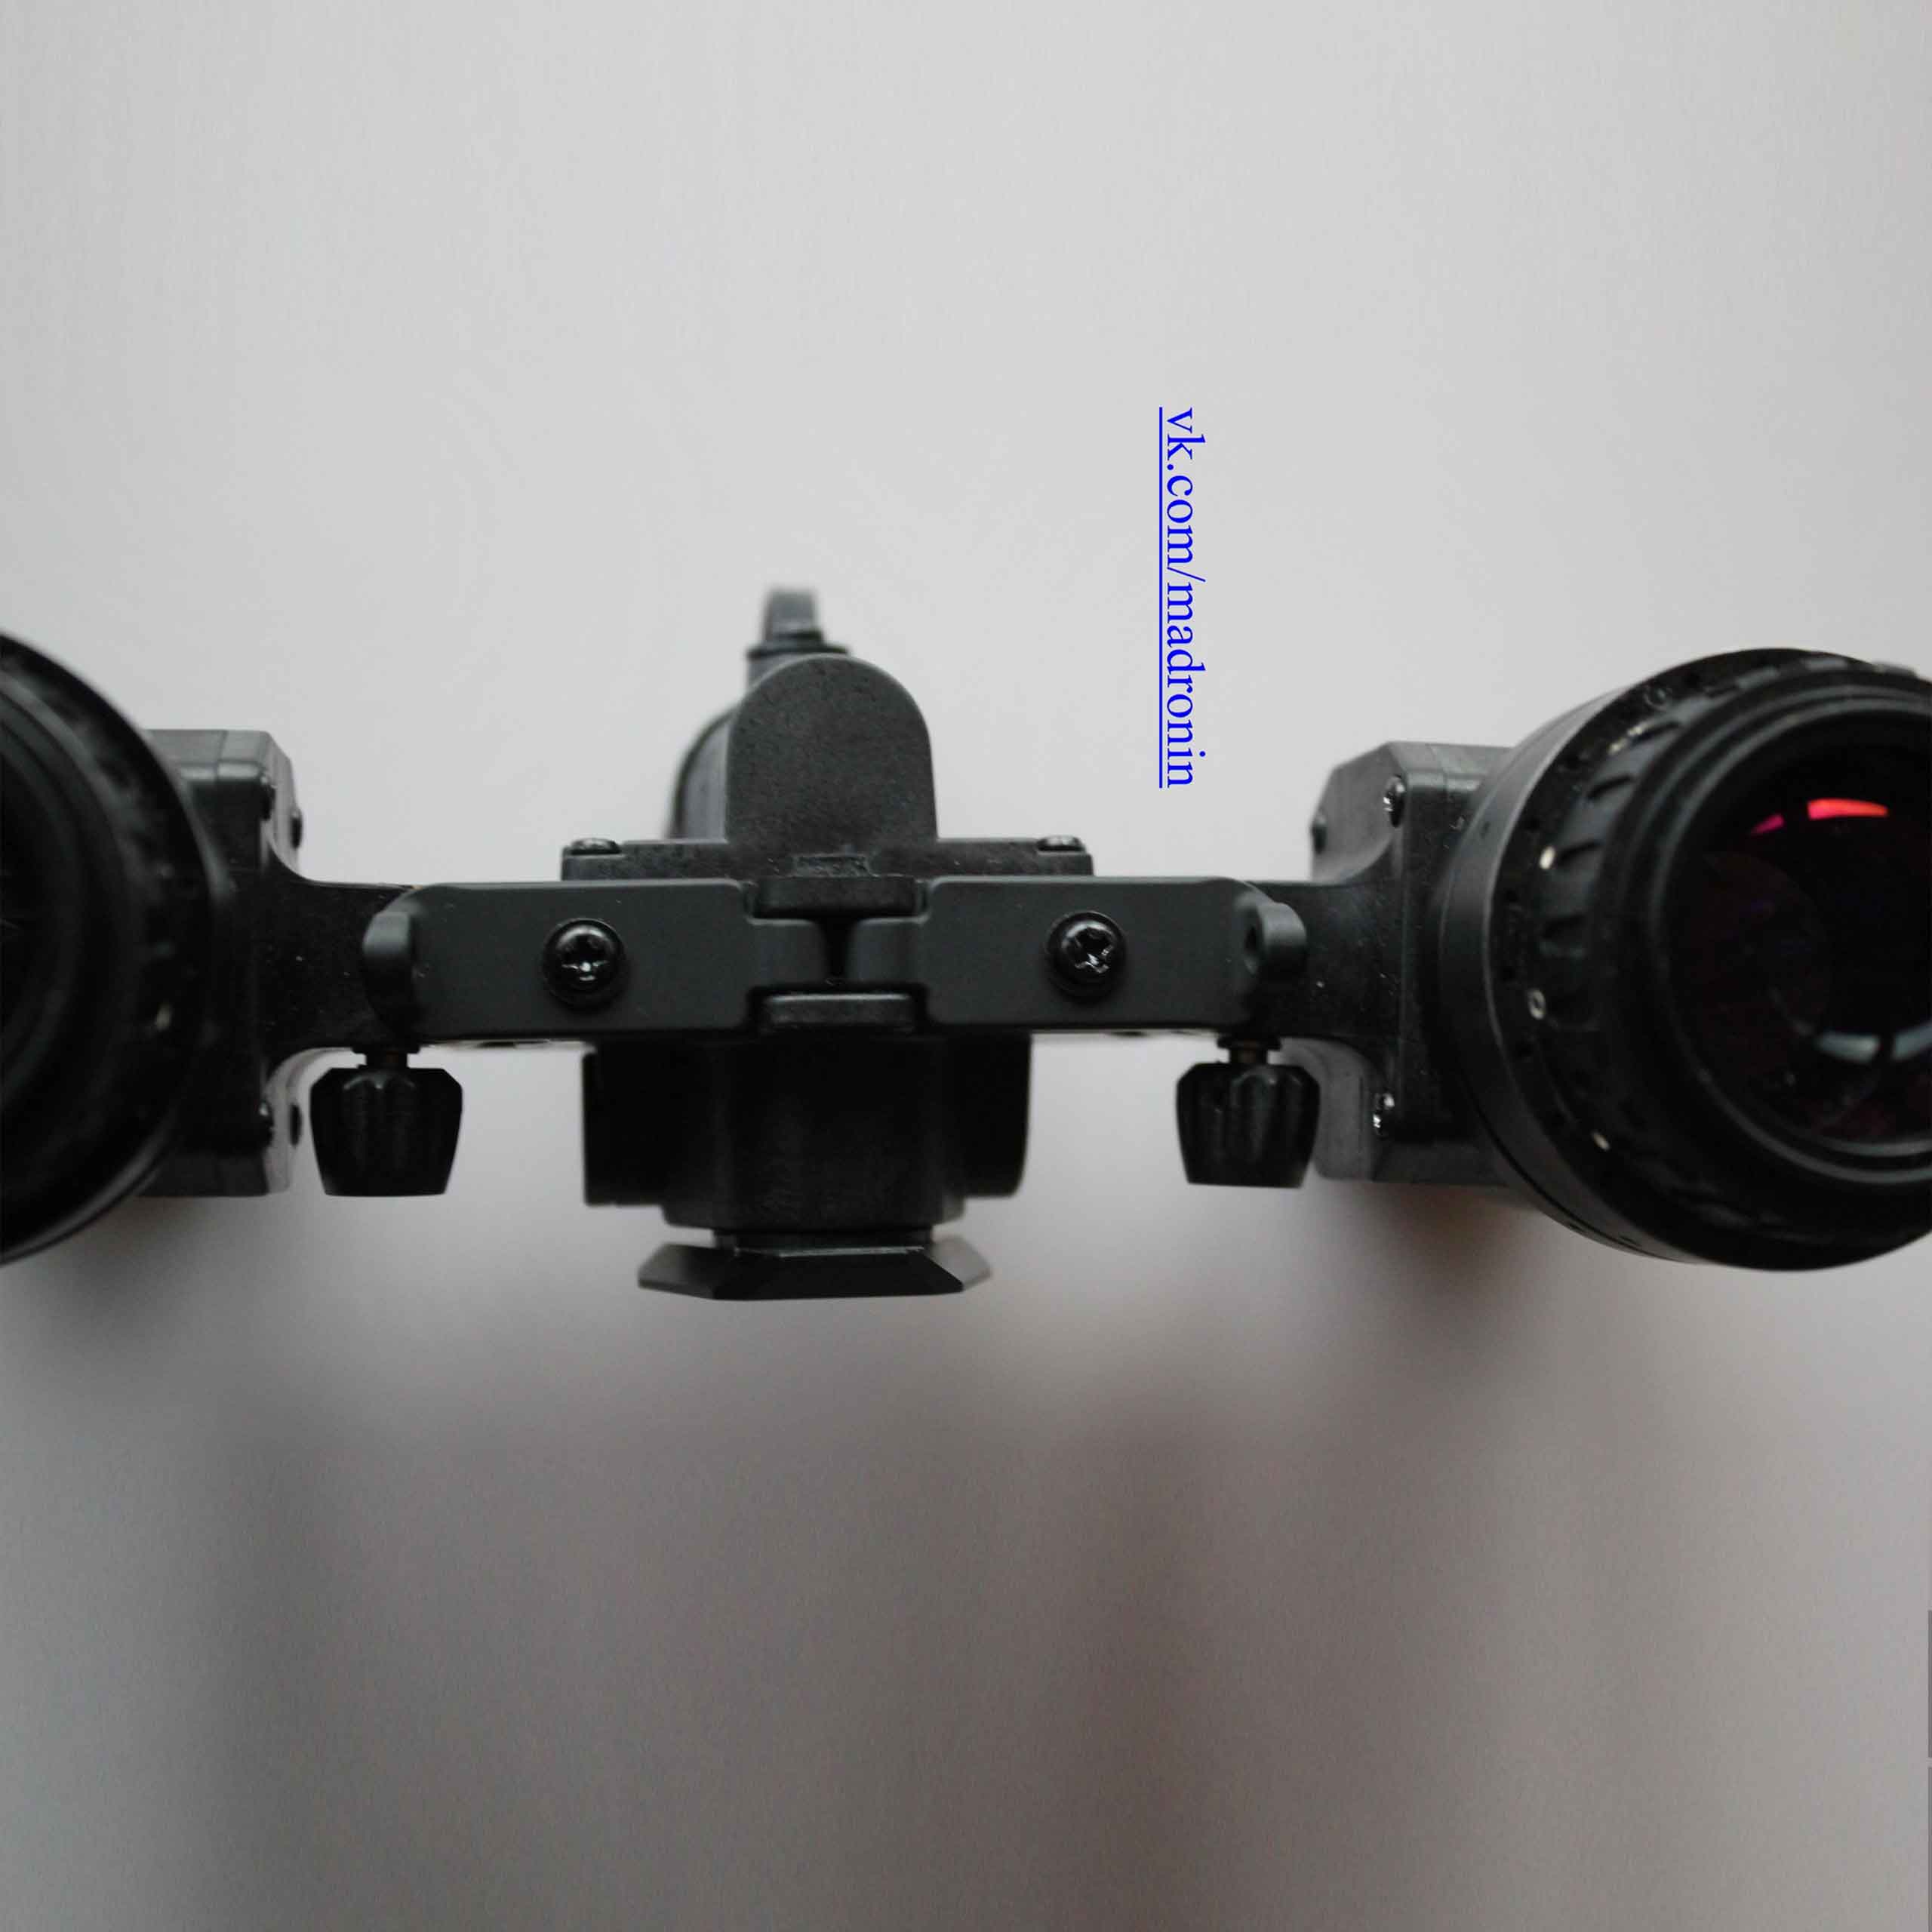
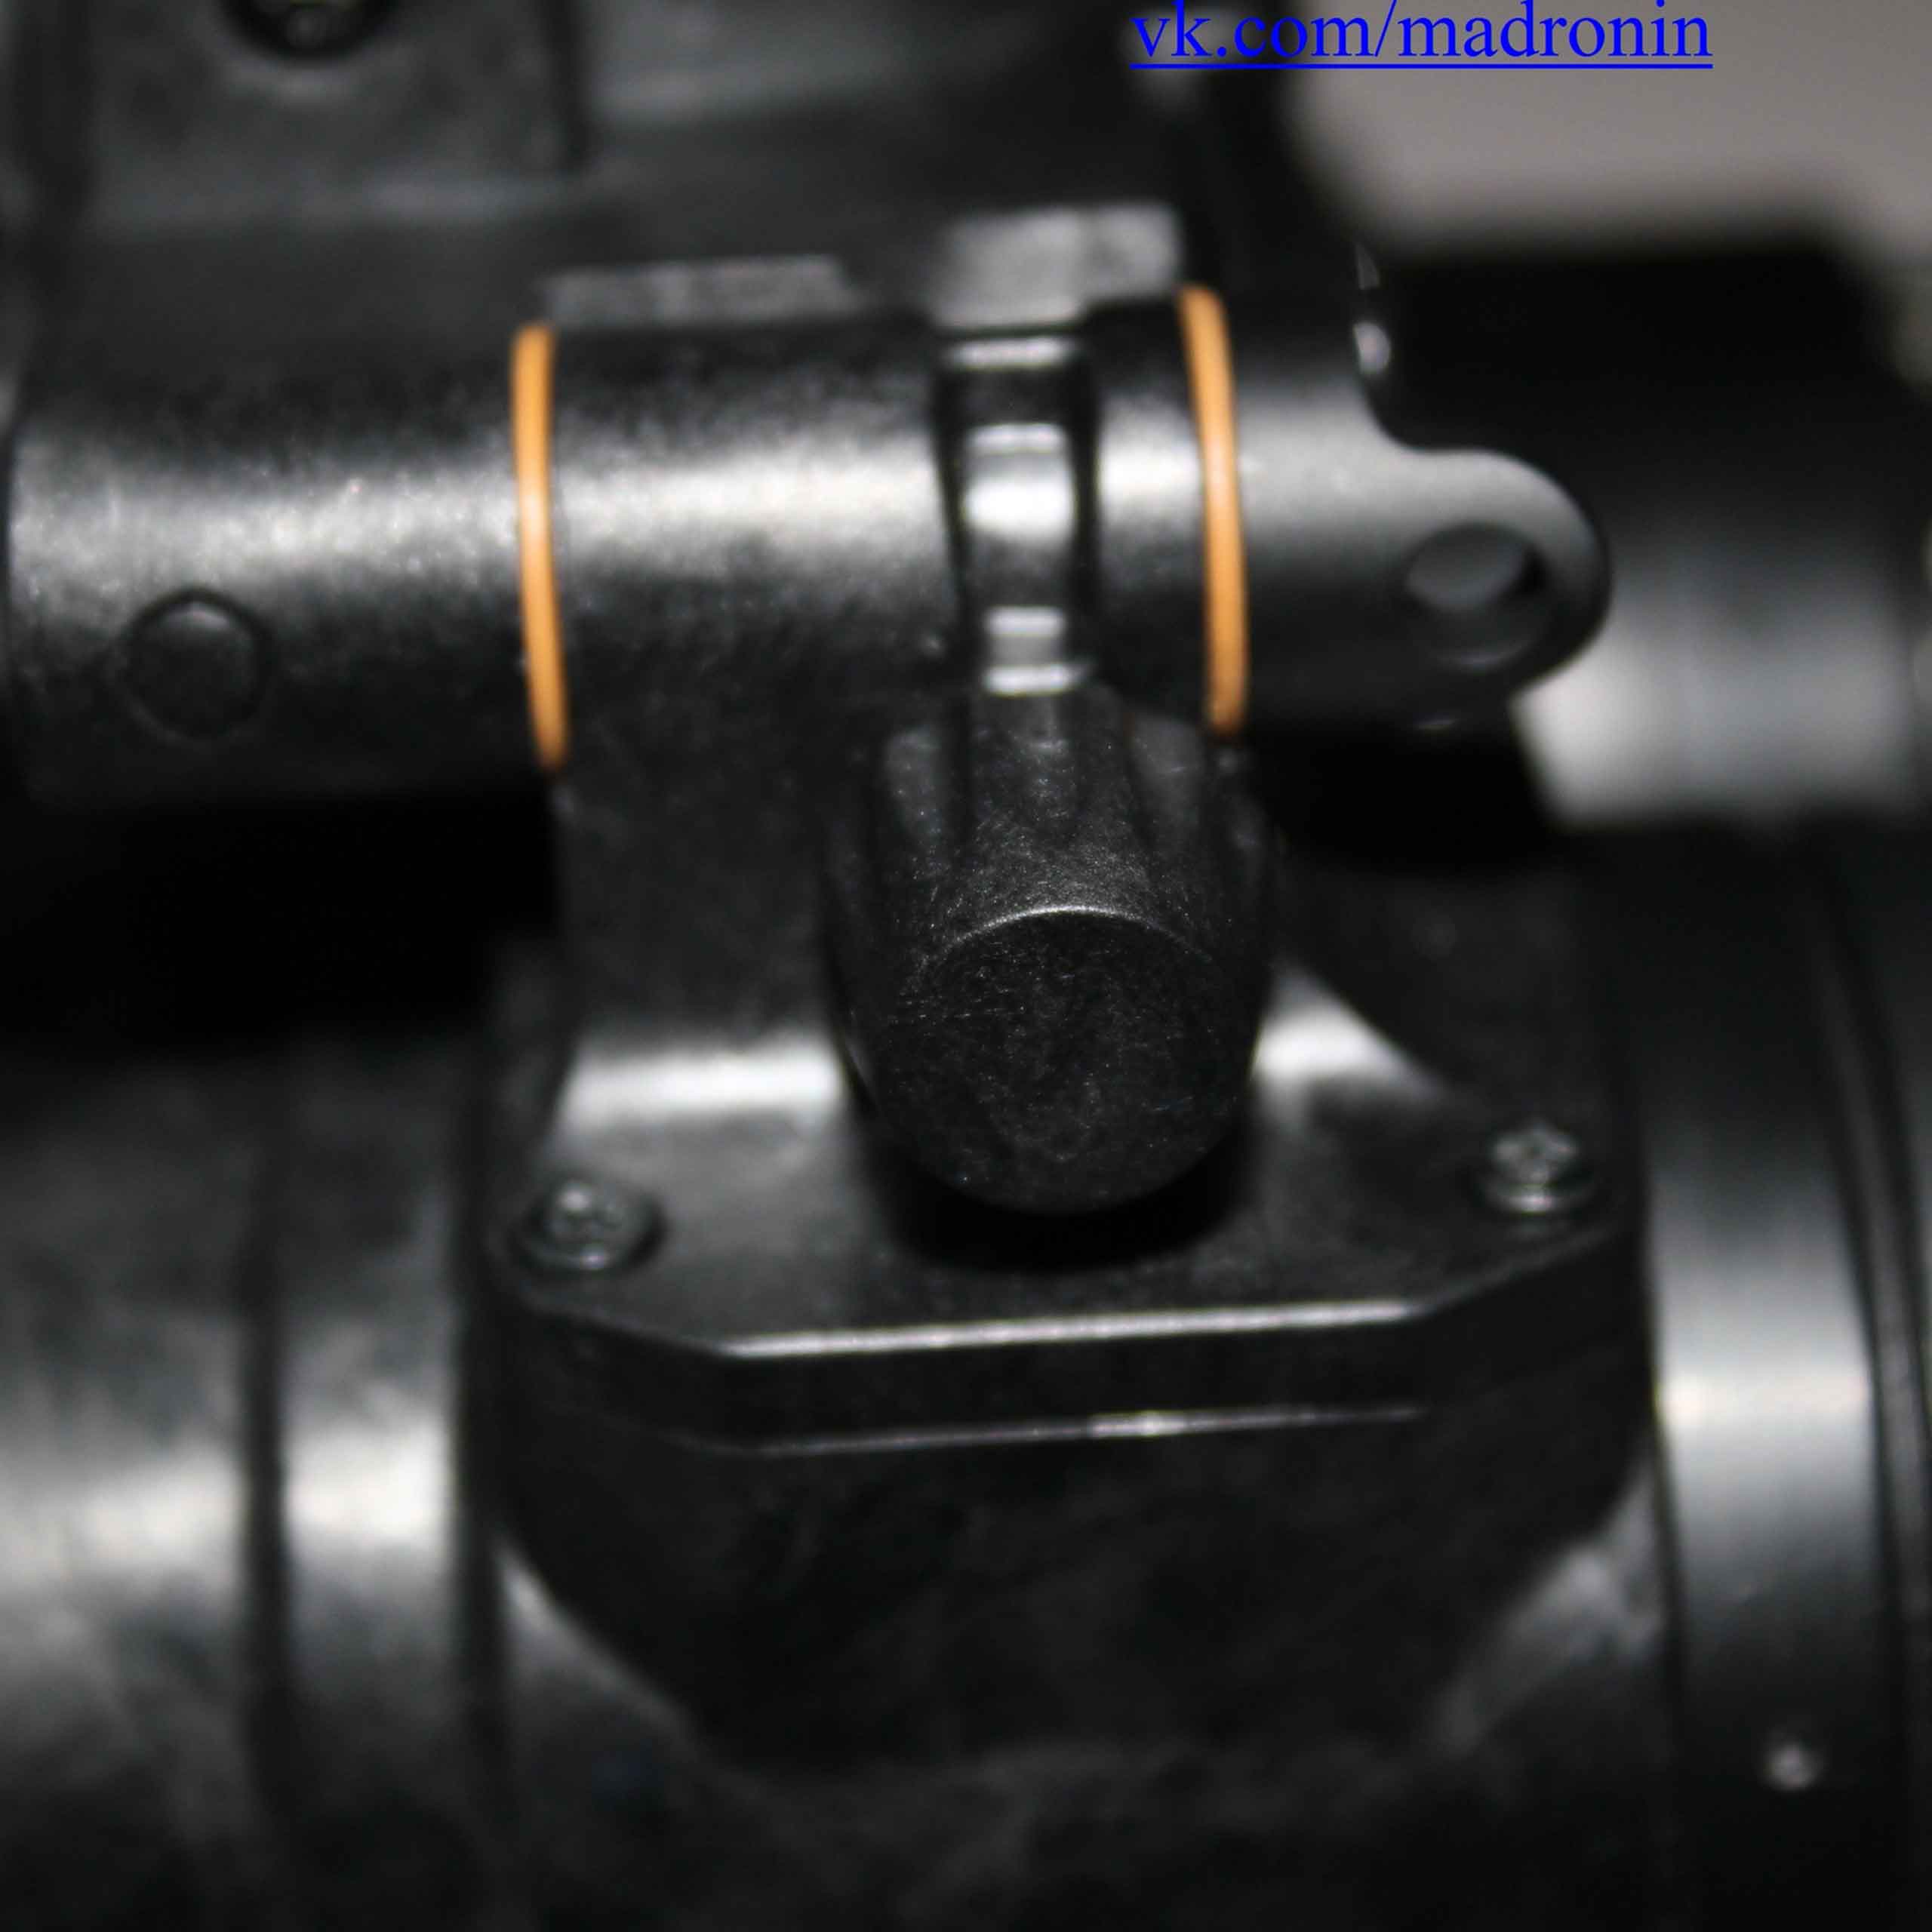
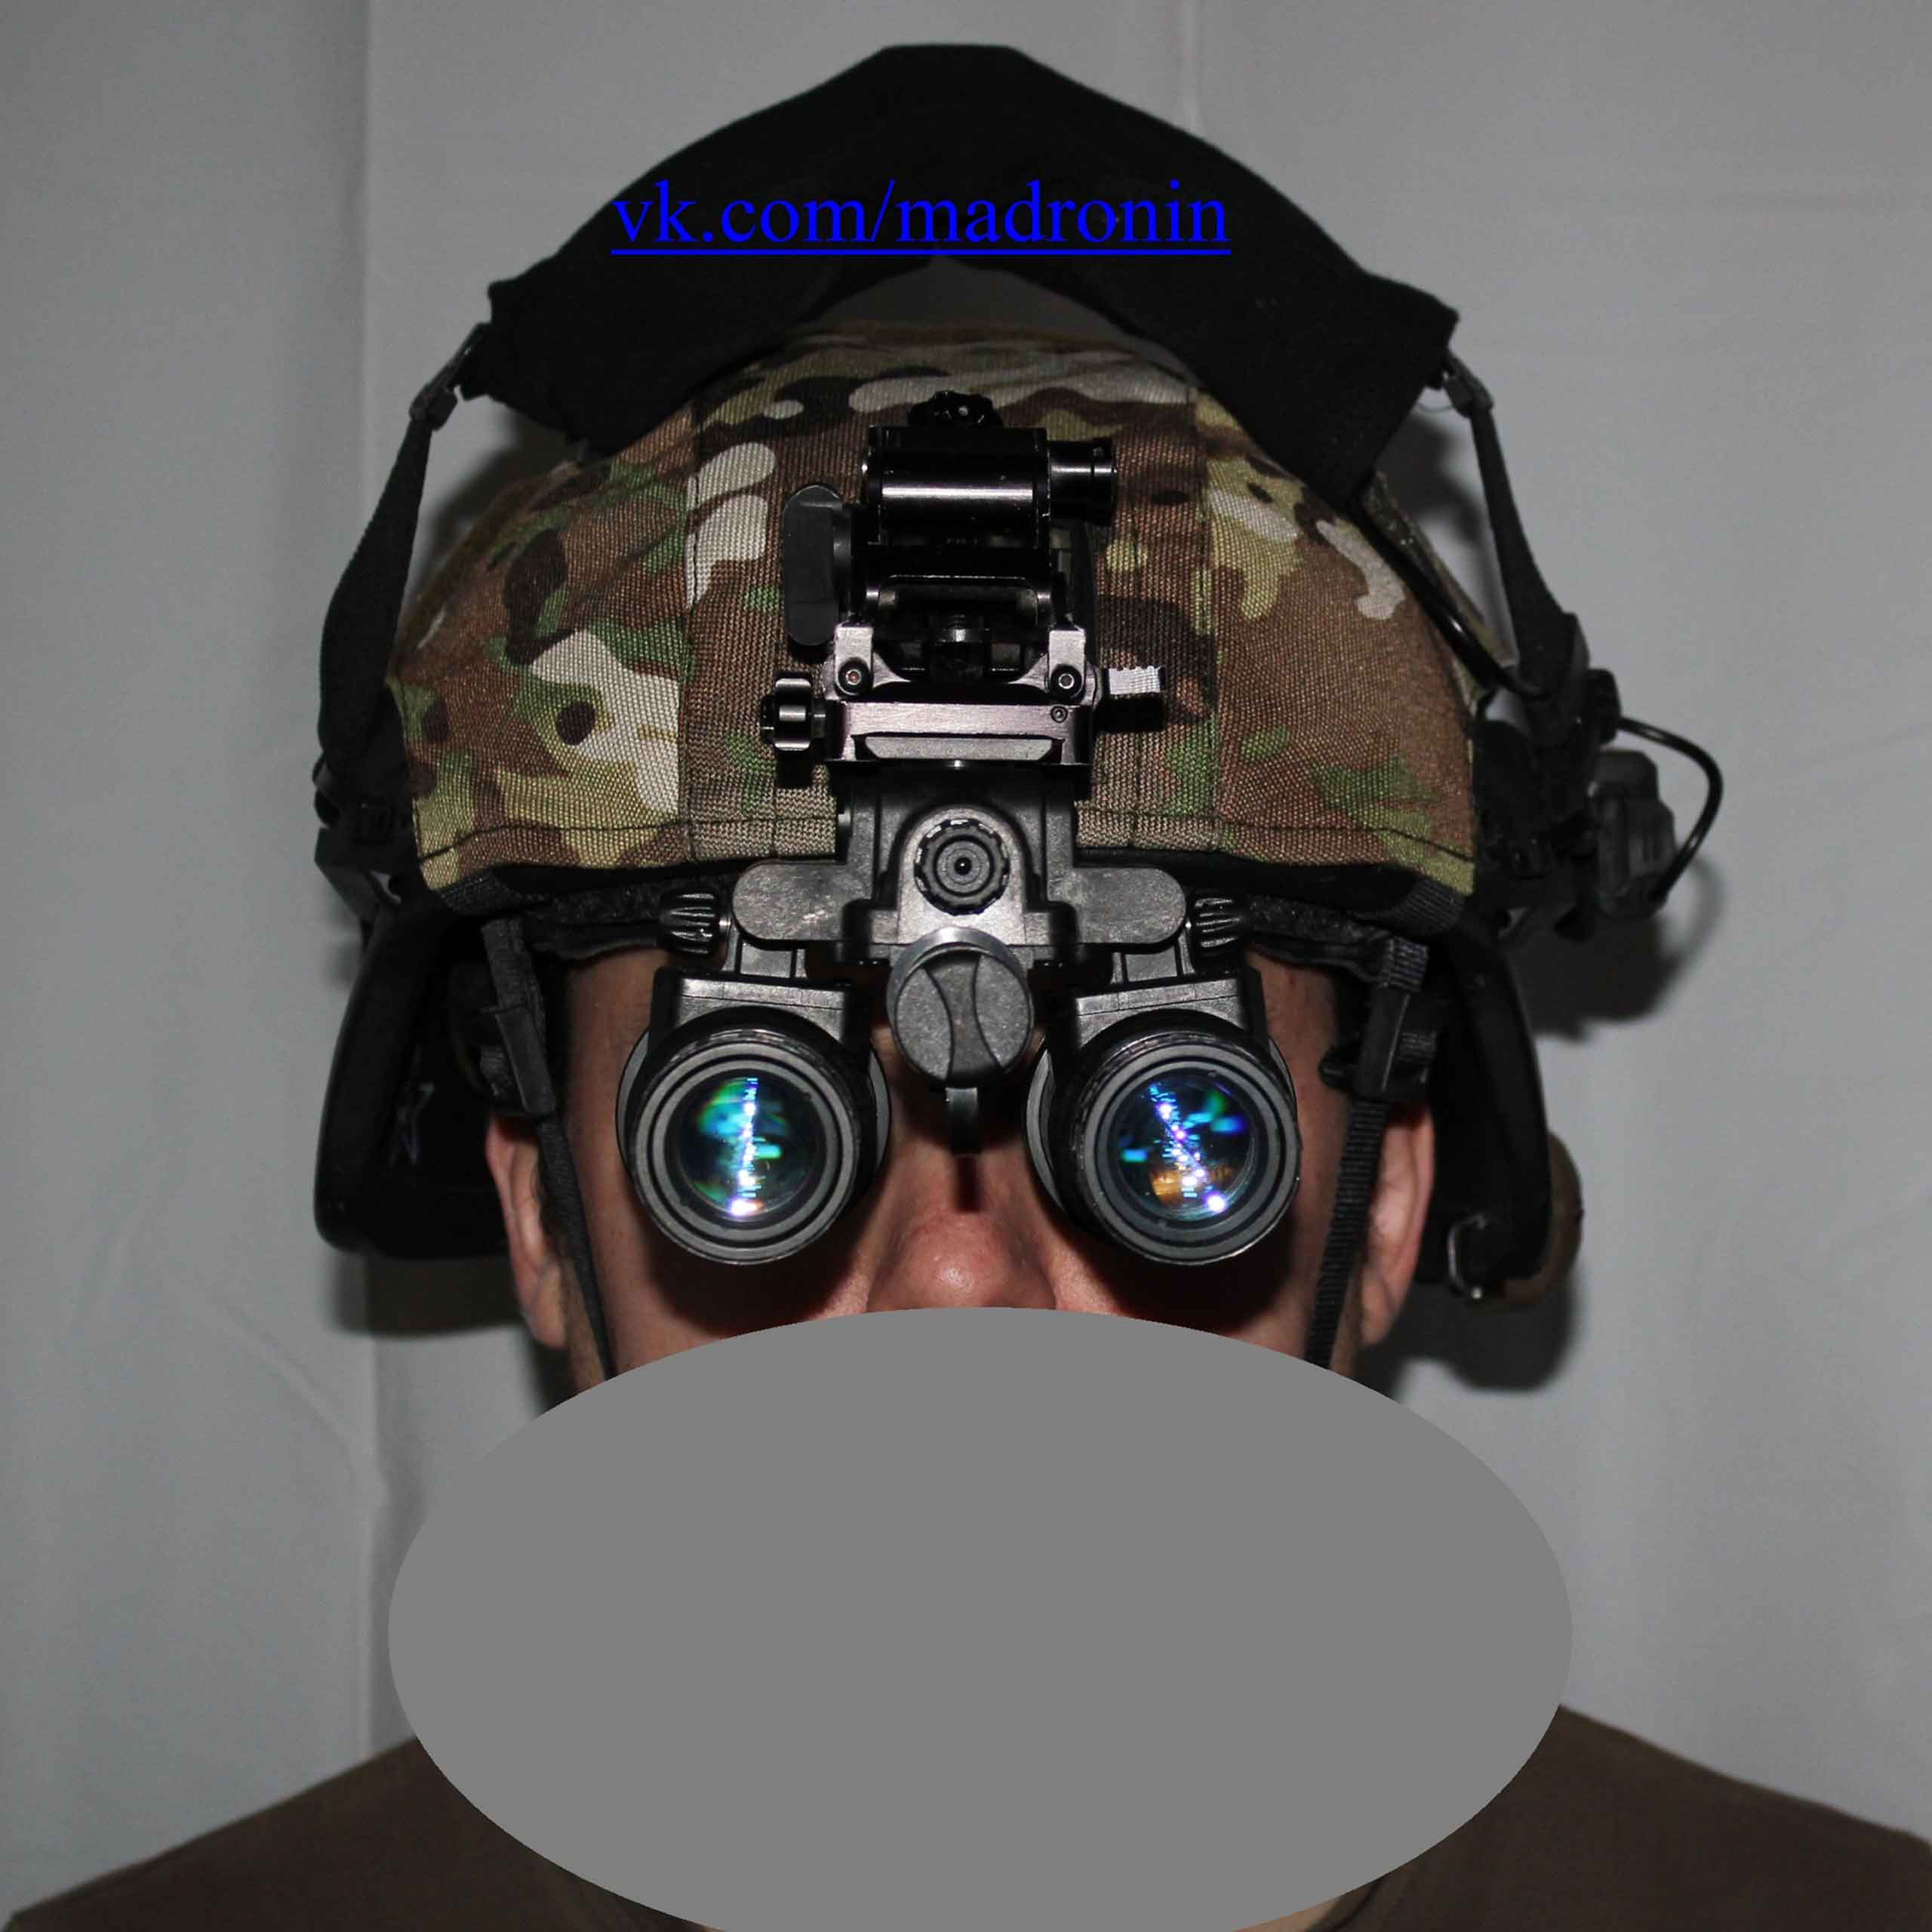
4. Housings have the ability to most accurately build the center distance (interpupillary? :)) for themselves thanks to two screws installed at the junction of the houses with the bridge. Adjustment is approximately 4-5 millimeters in each direction.
 |
 |
 |
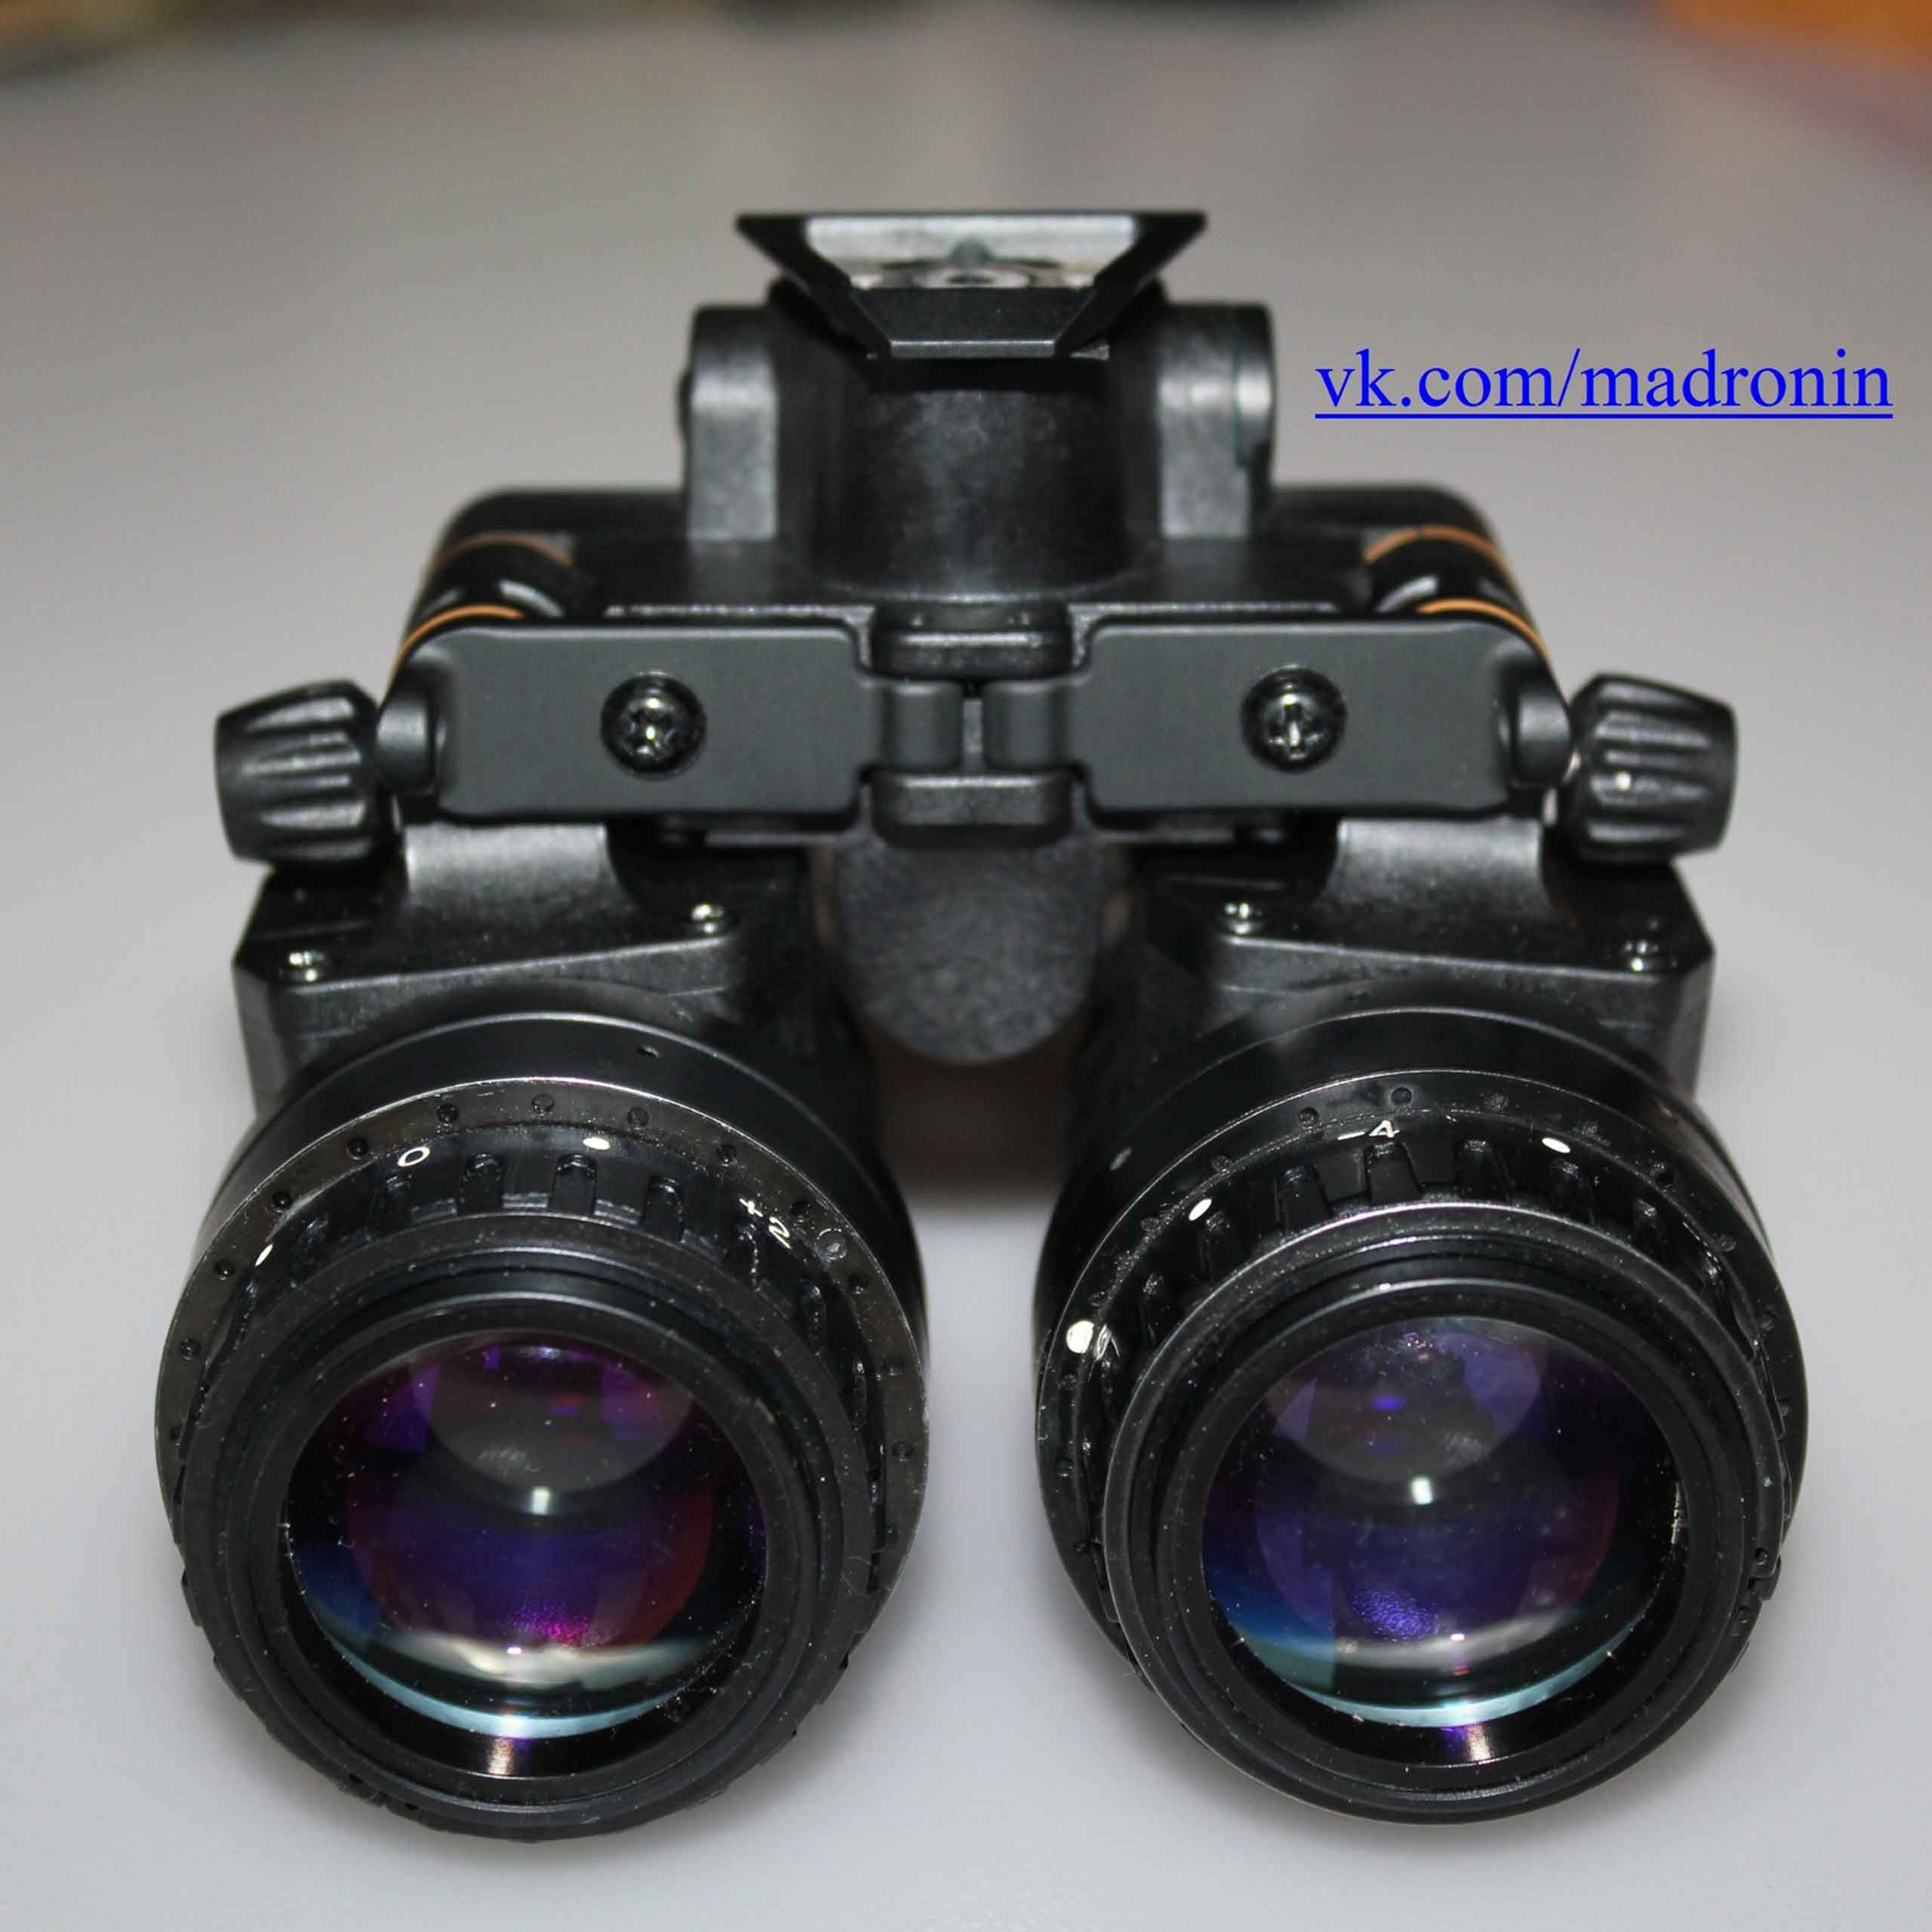
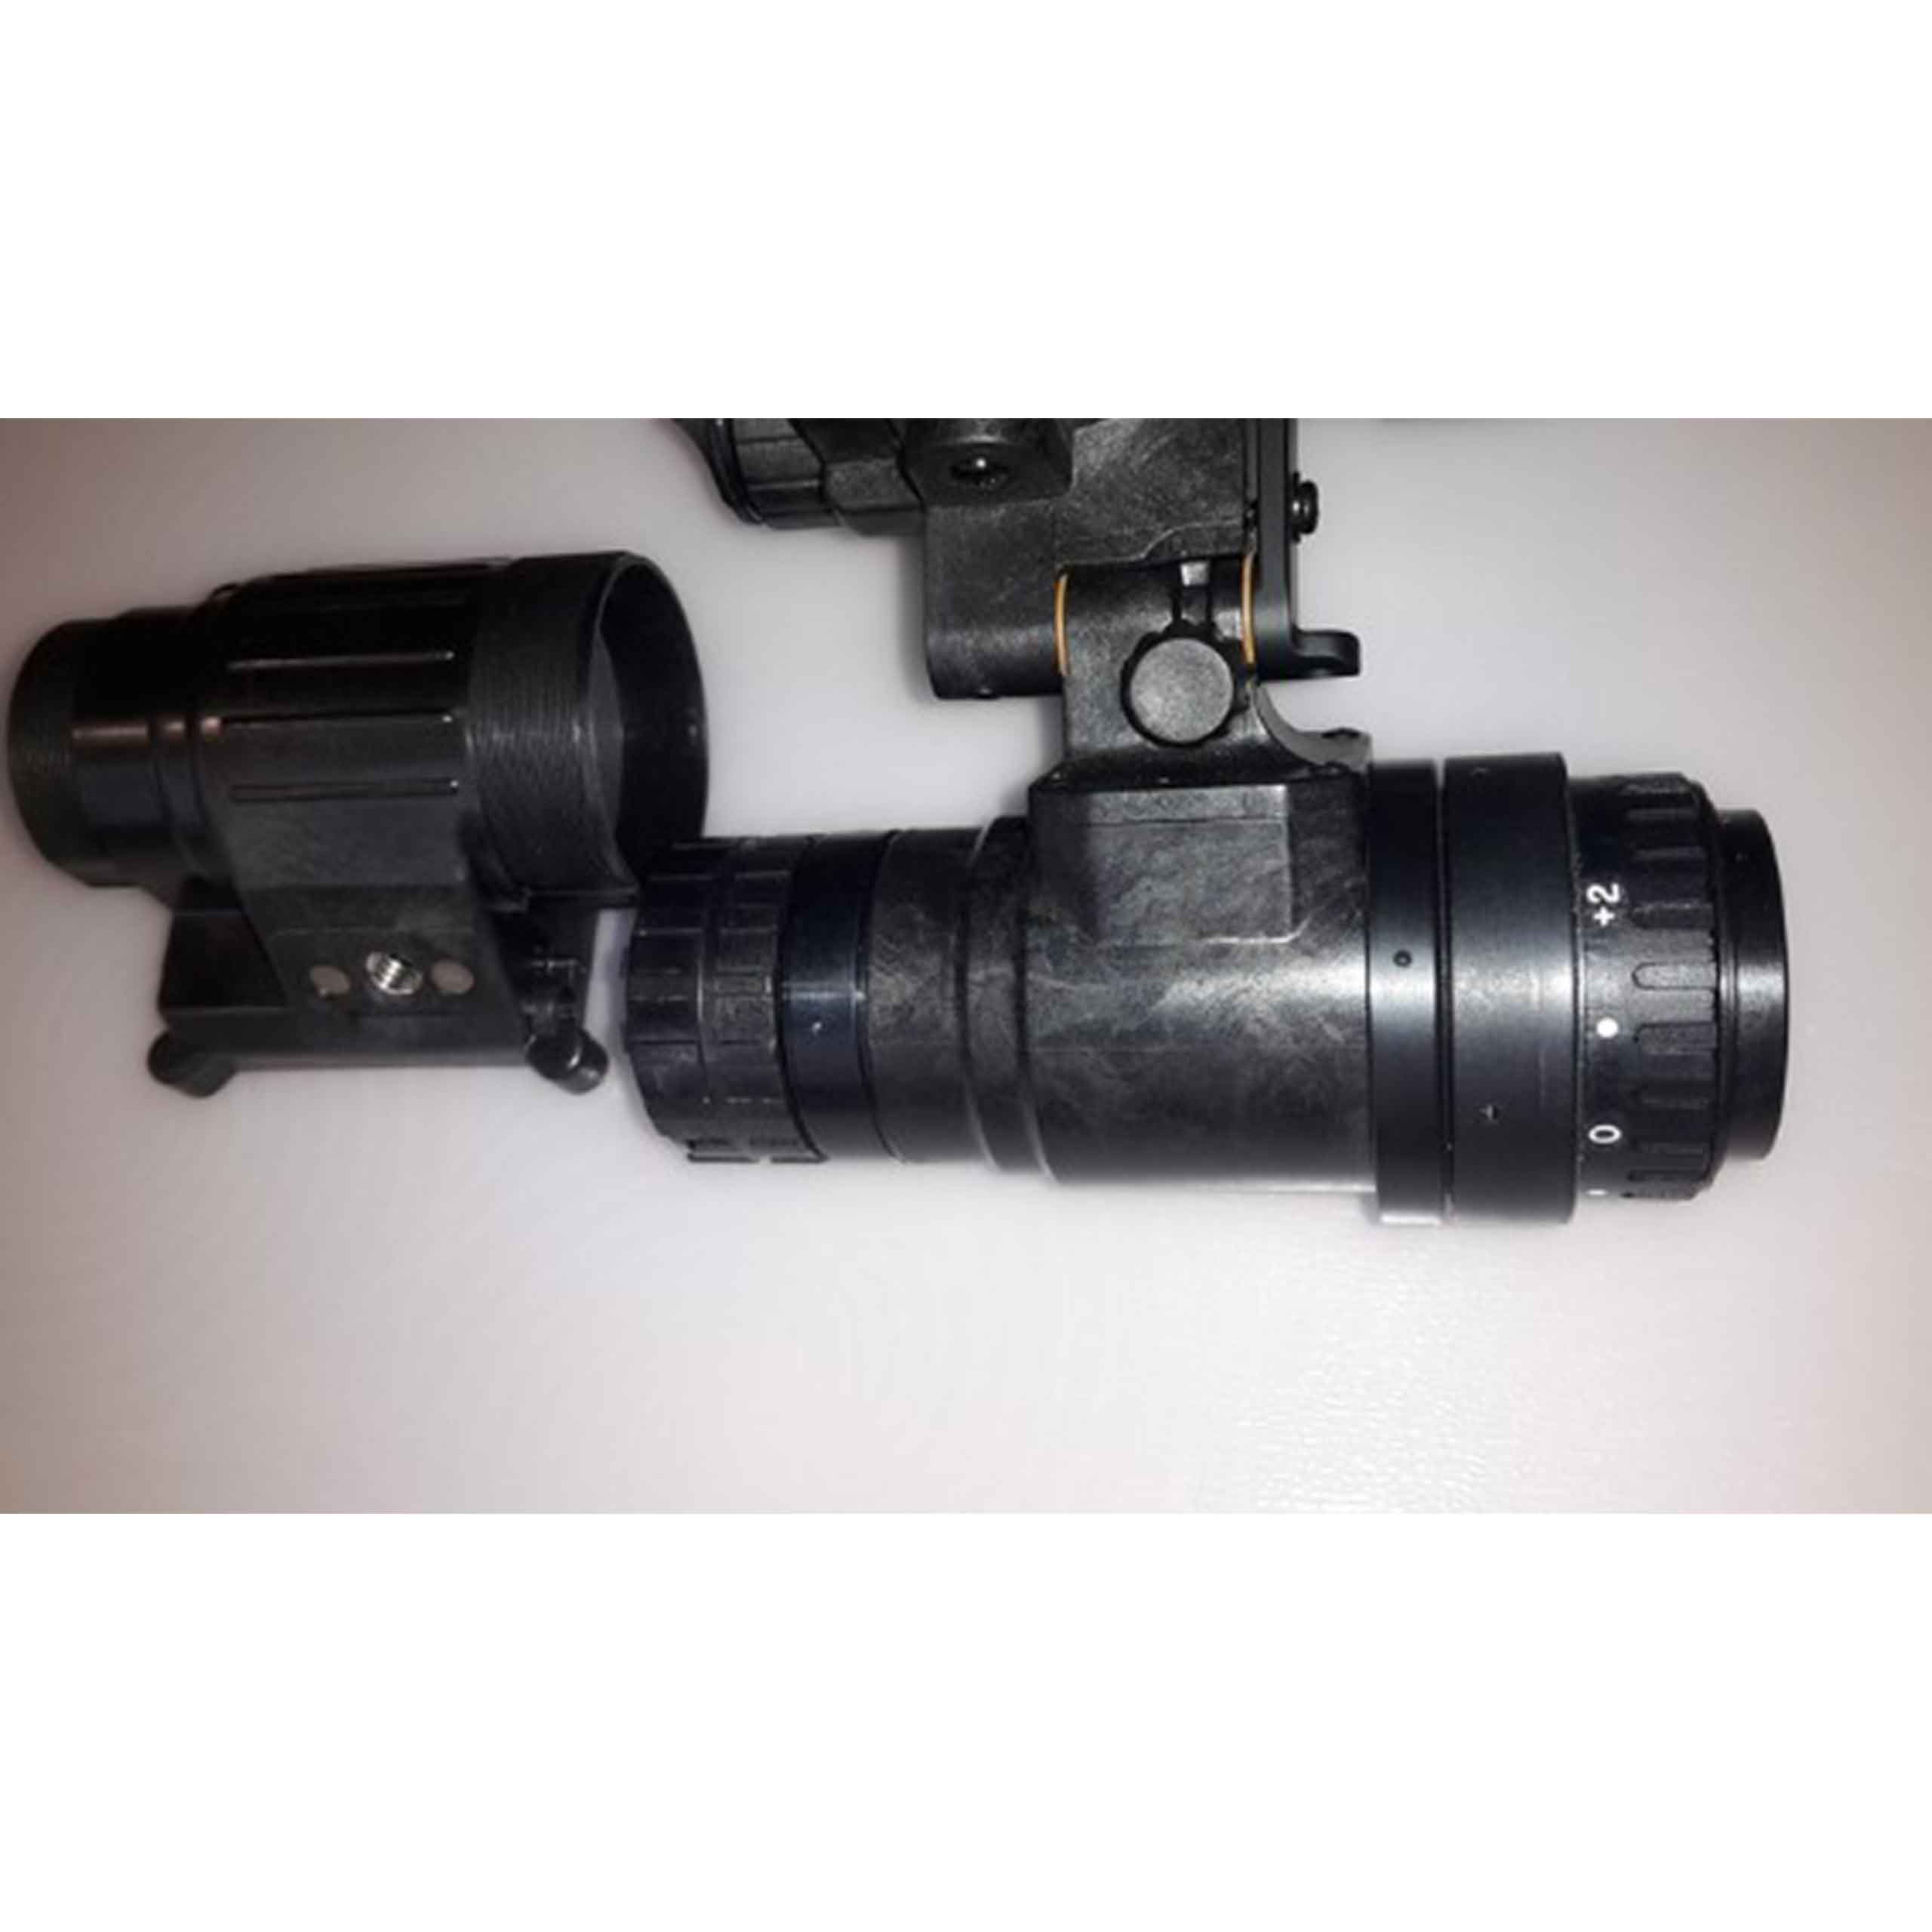
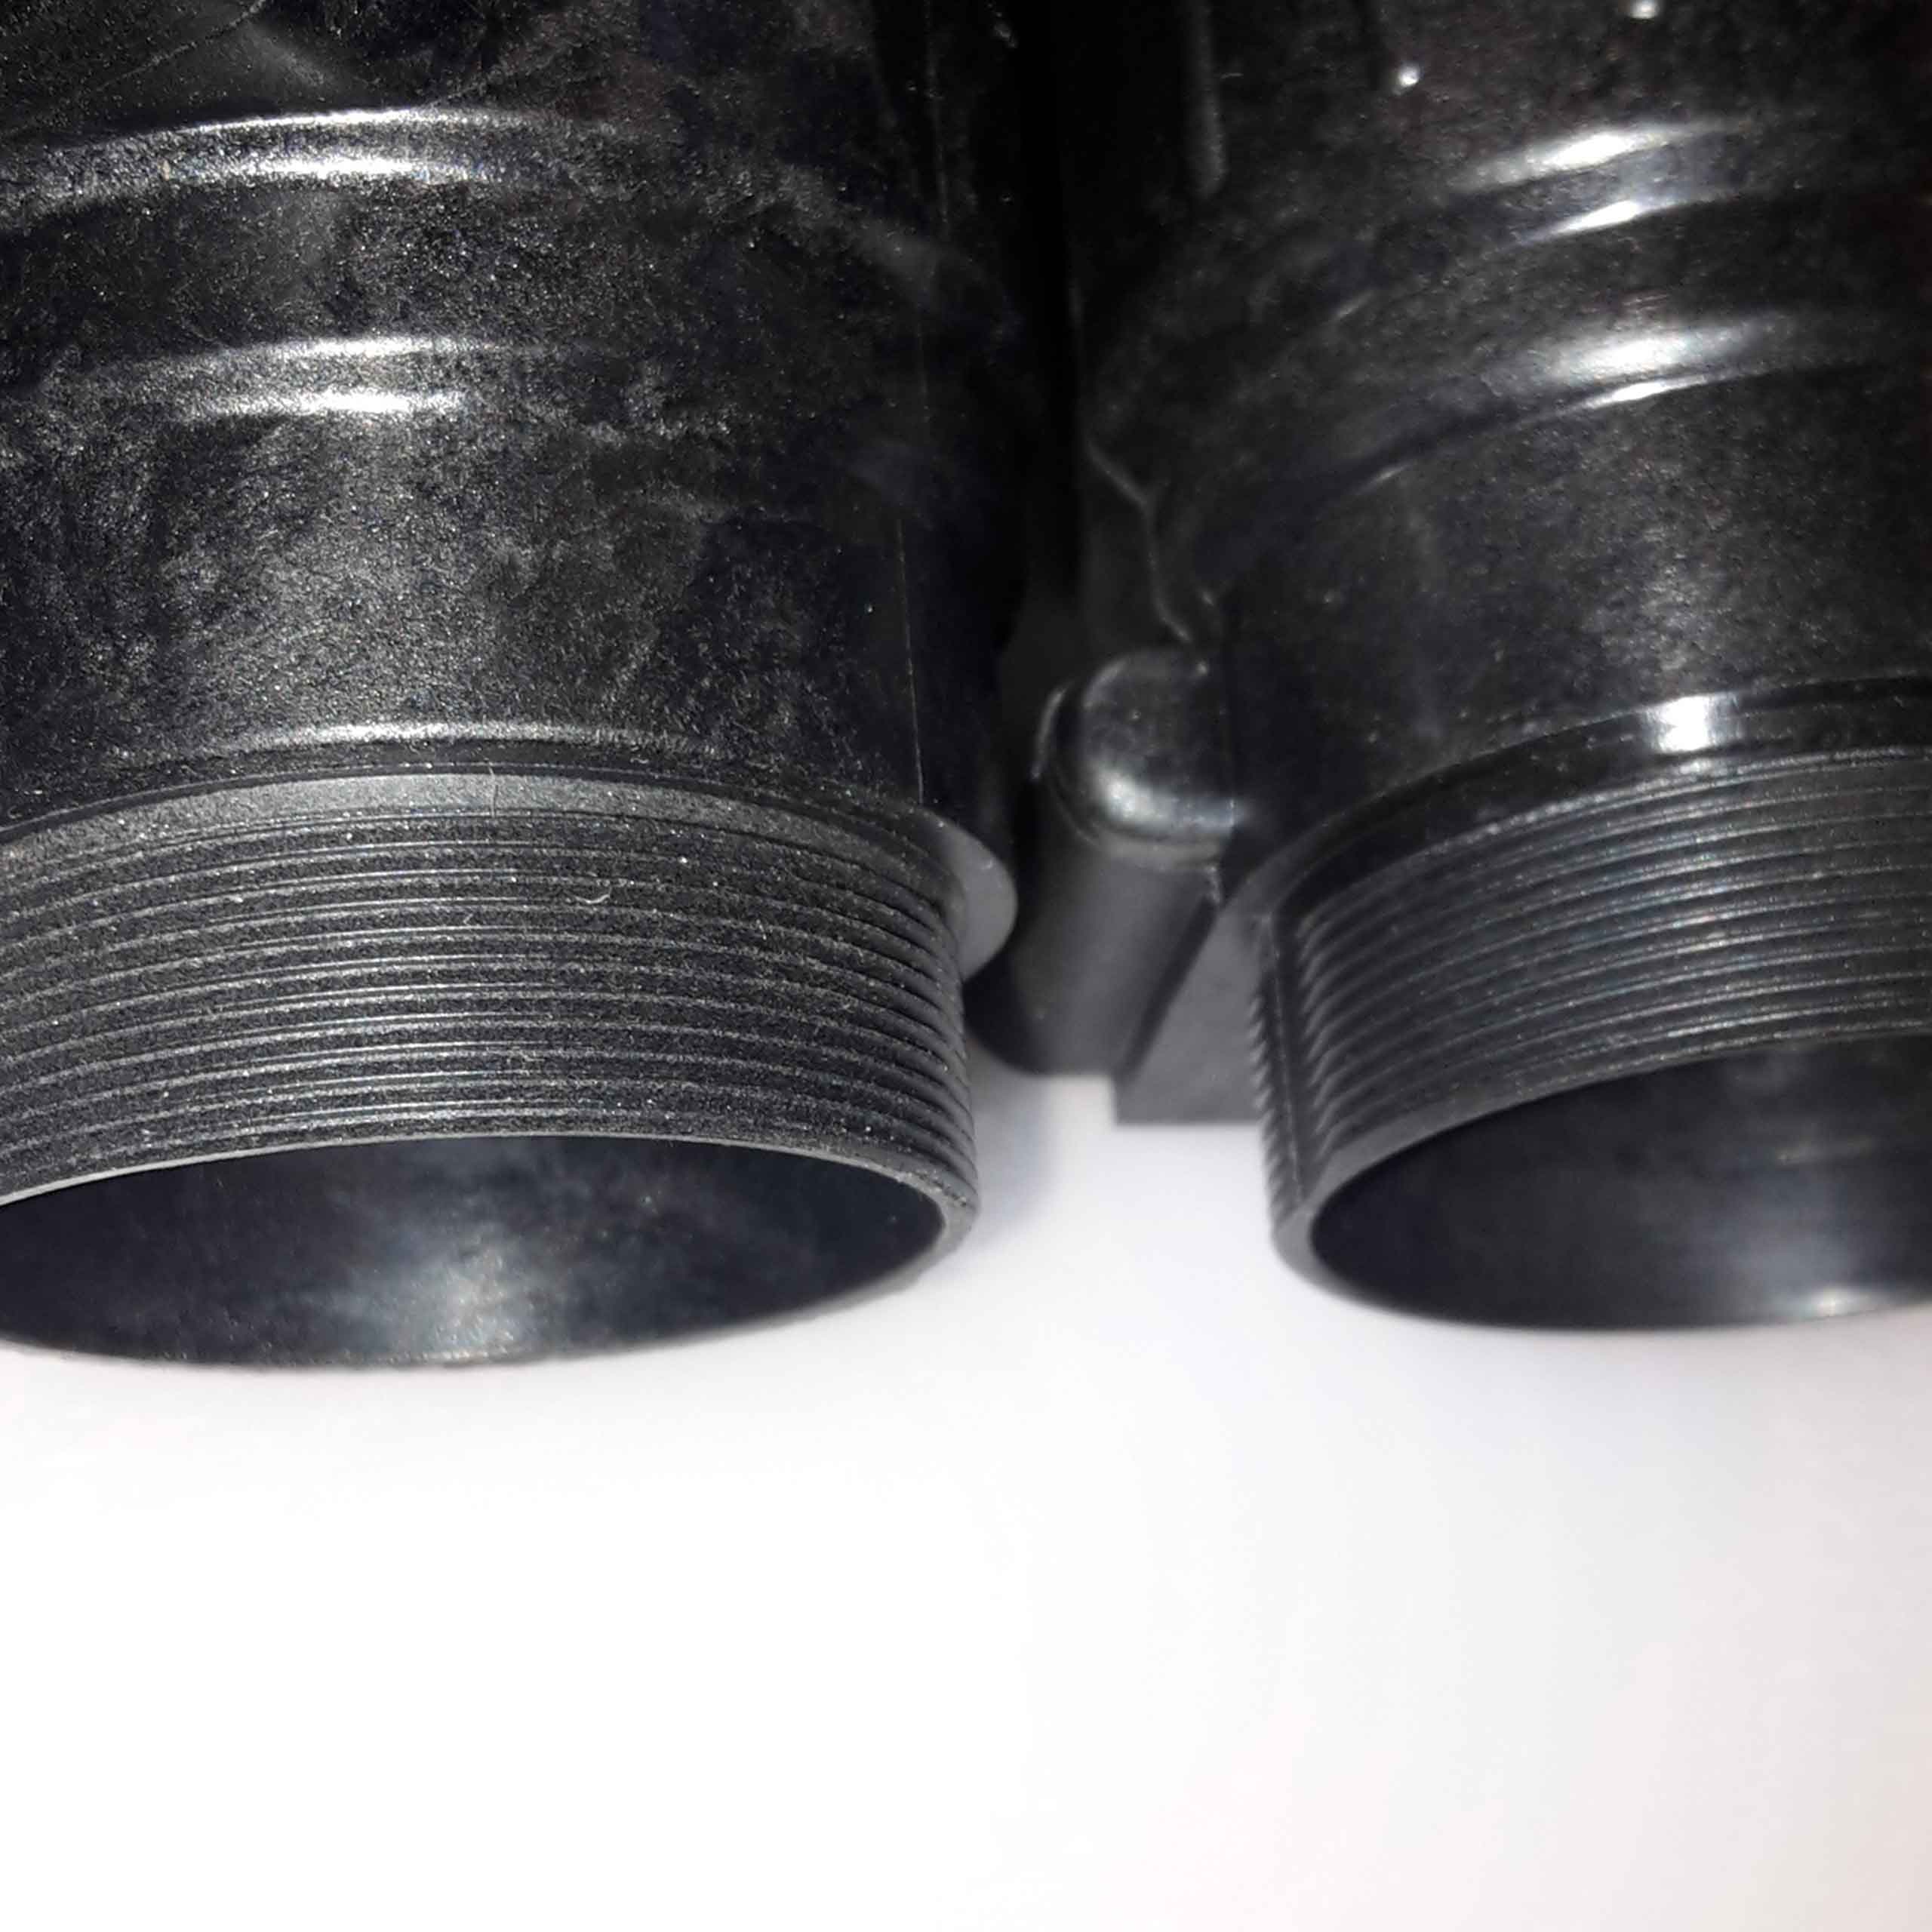
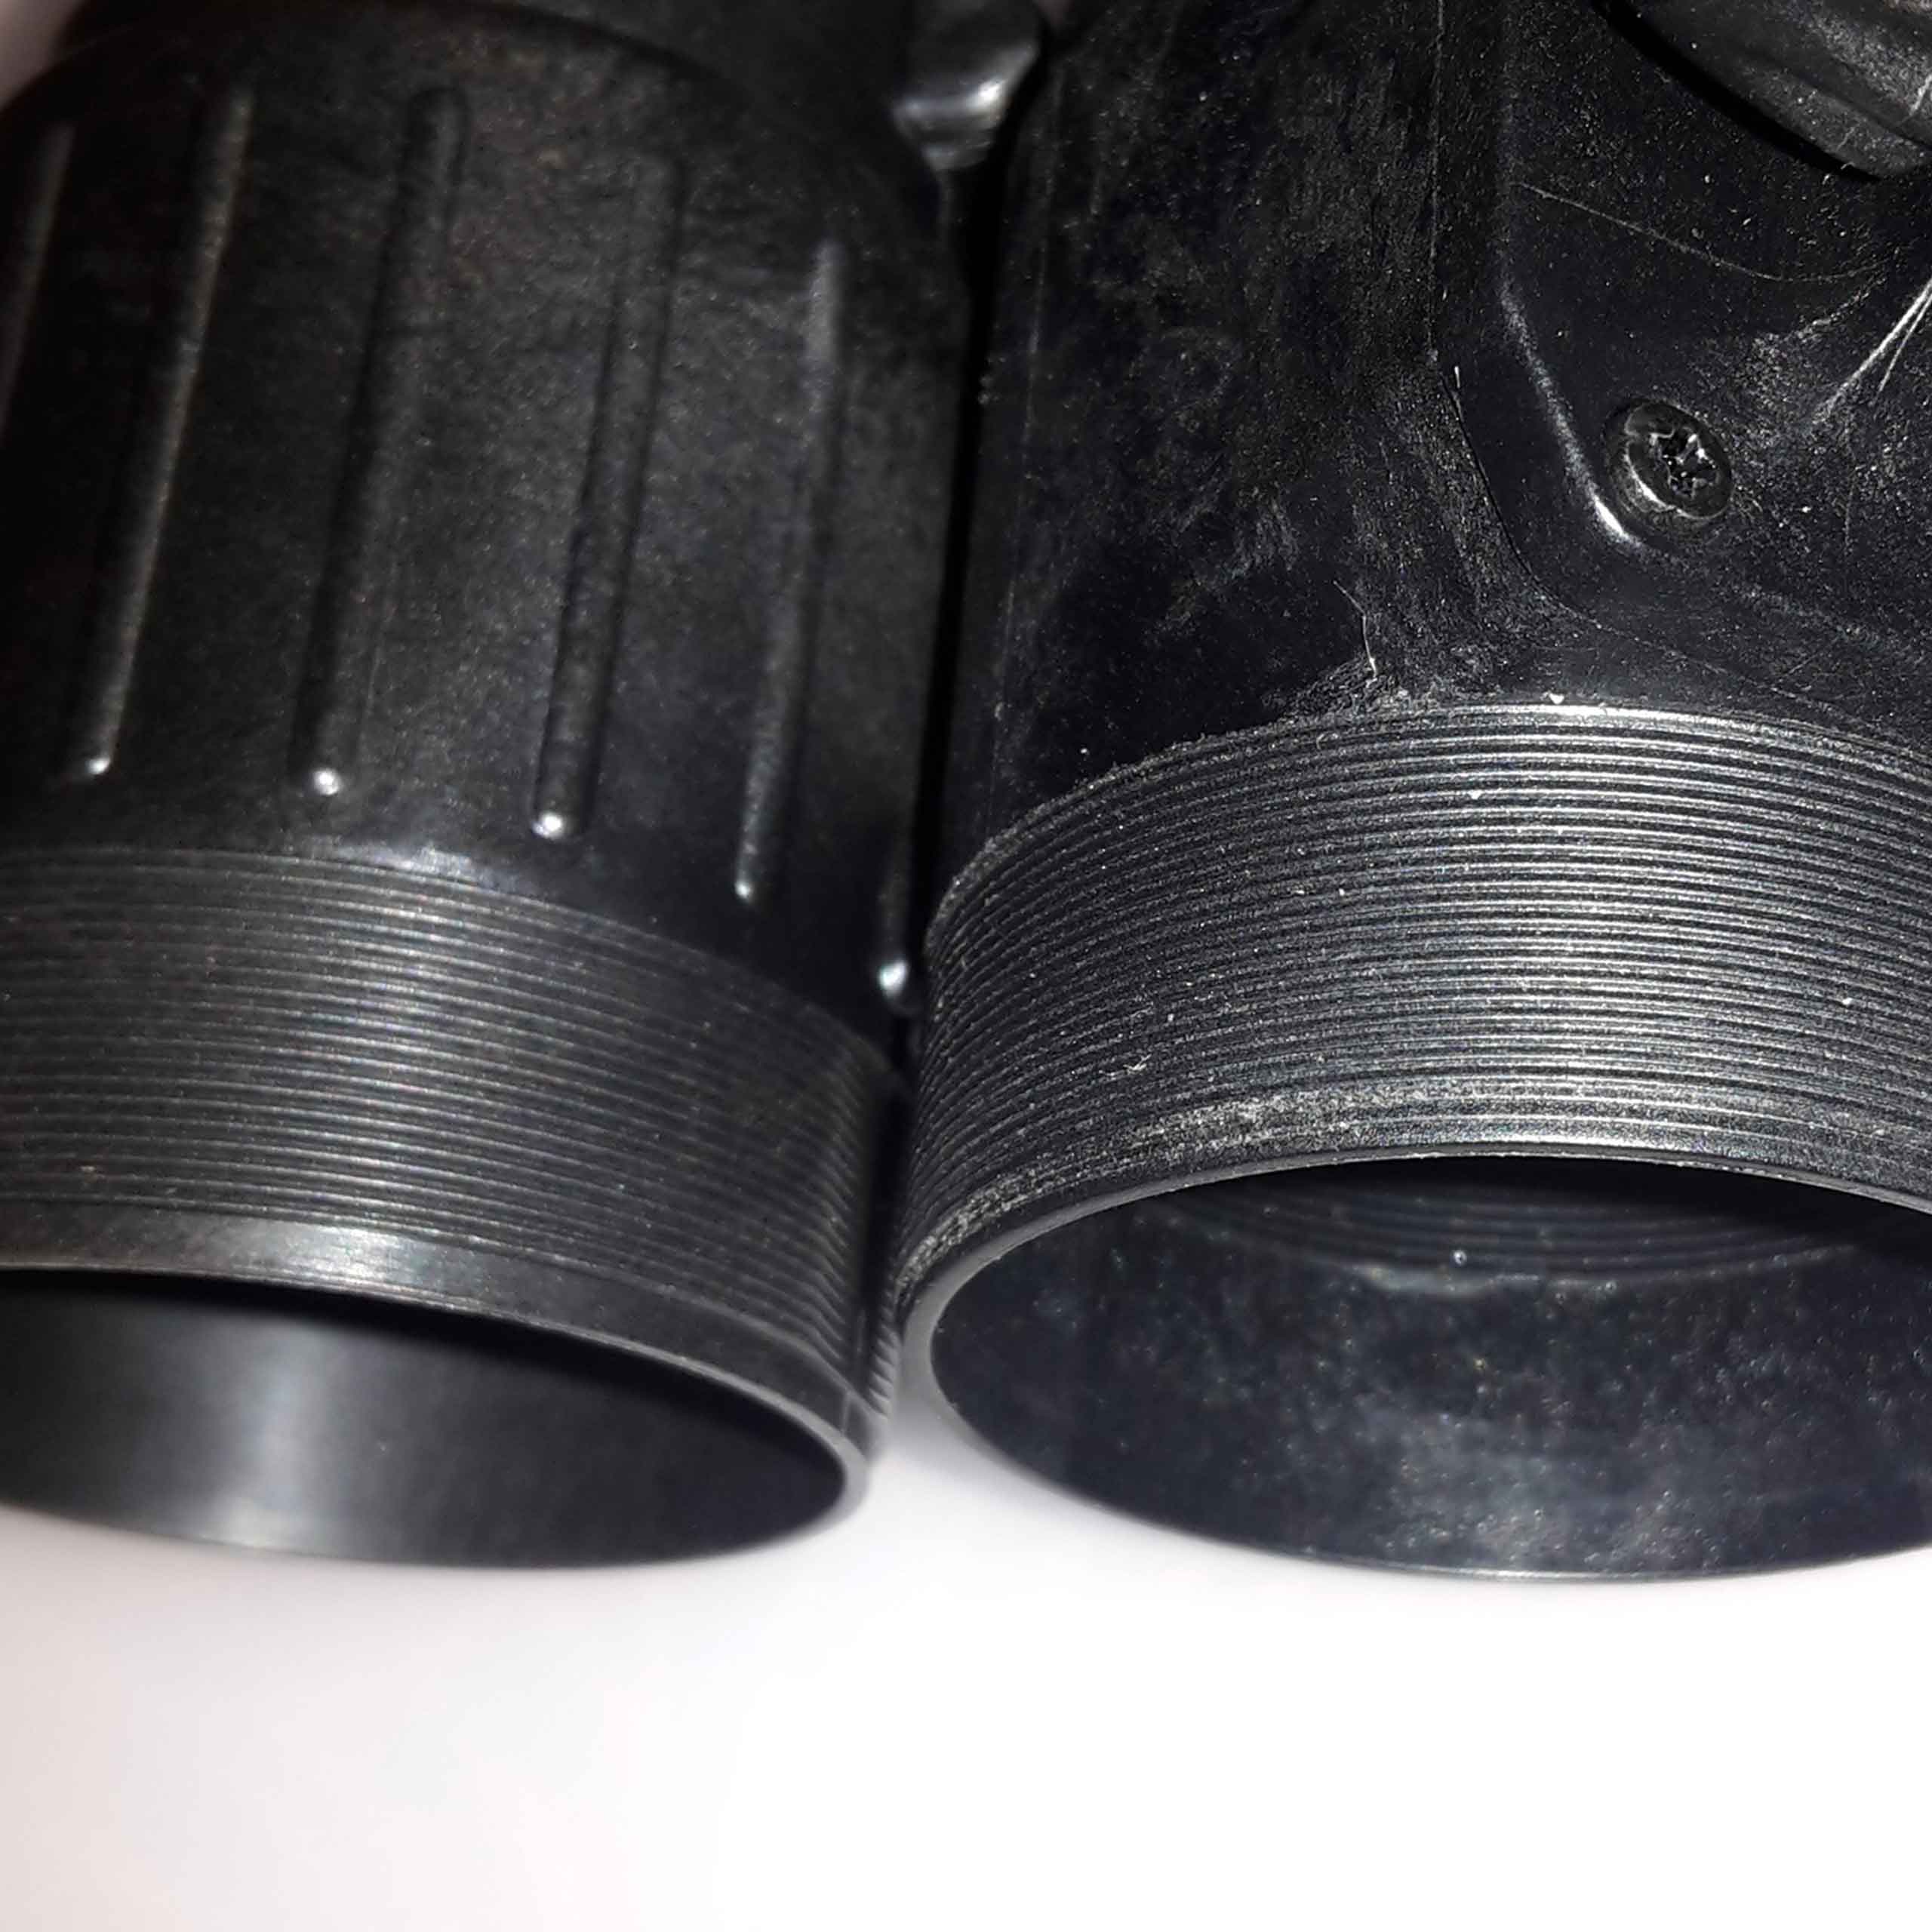
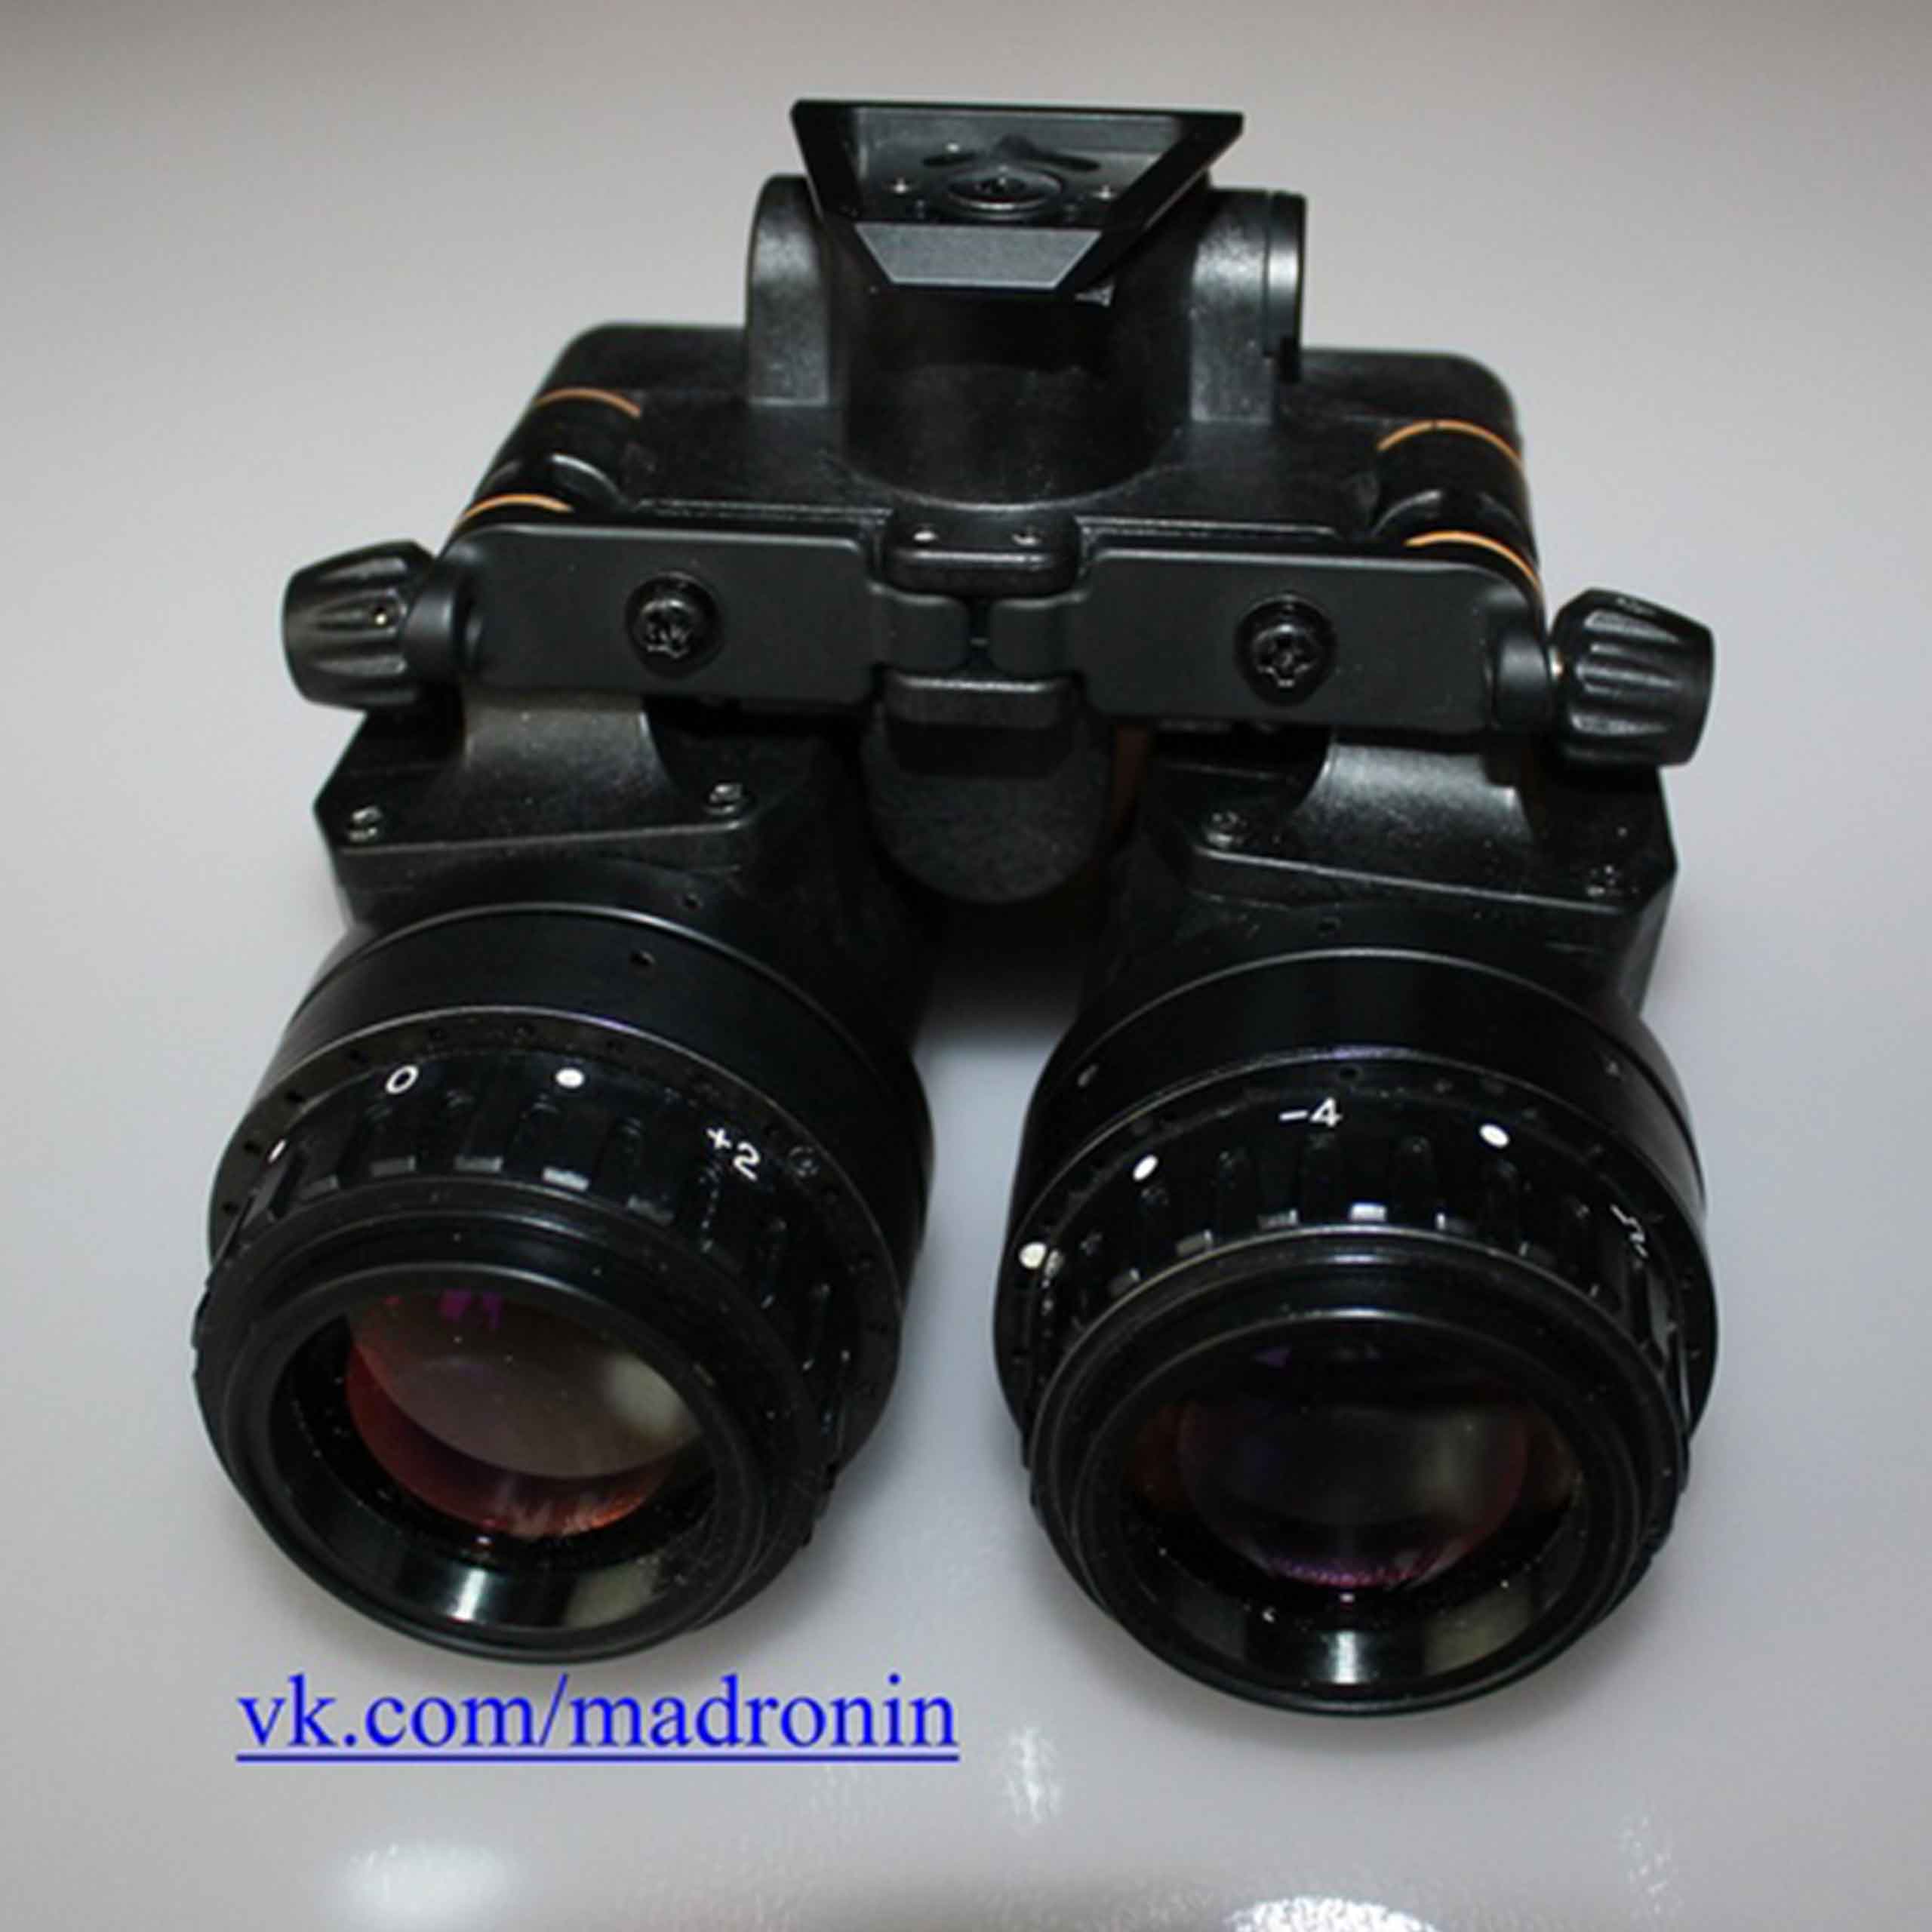
5. Lenses (front lenses) are installed from PVS-14 (original, Mil-Spec, presumably from ITT) and have the same functionality. The thread for installing the lens is made at a high level.
 |
 |
 |
 |
Comparison of the original PVS-14 and PVS-31-14
According to many respected people, PVS14 lenses in their functional characteristics (enlightenment, angles and others) are not much inferior to the original PVS-31 lenses. The main loss in weight is fully offset by a huge gain in price =) As the saying goes: "If you can’t see the difference, why pay more?" Lenses from different manufacturers PVS14 give a spread of one to two grams. The ITT lens is lighter than the others you had to deal with.
Photos from the lenses.
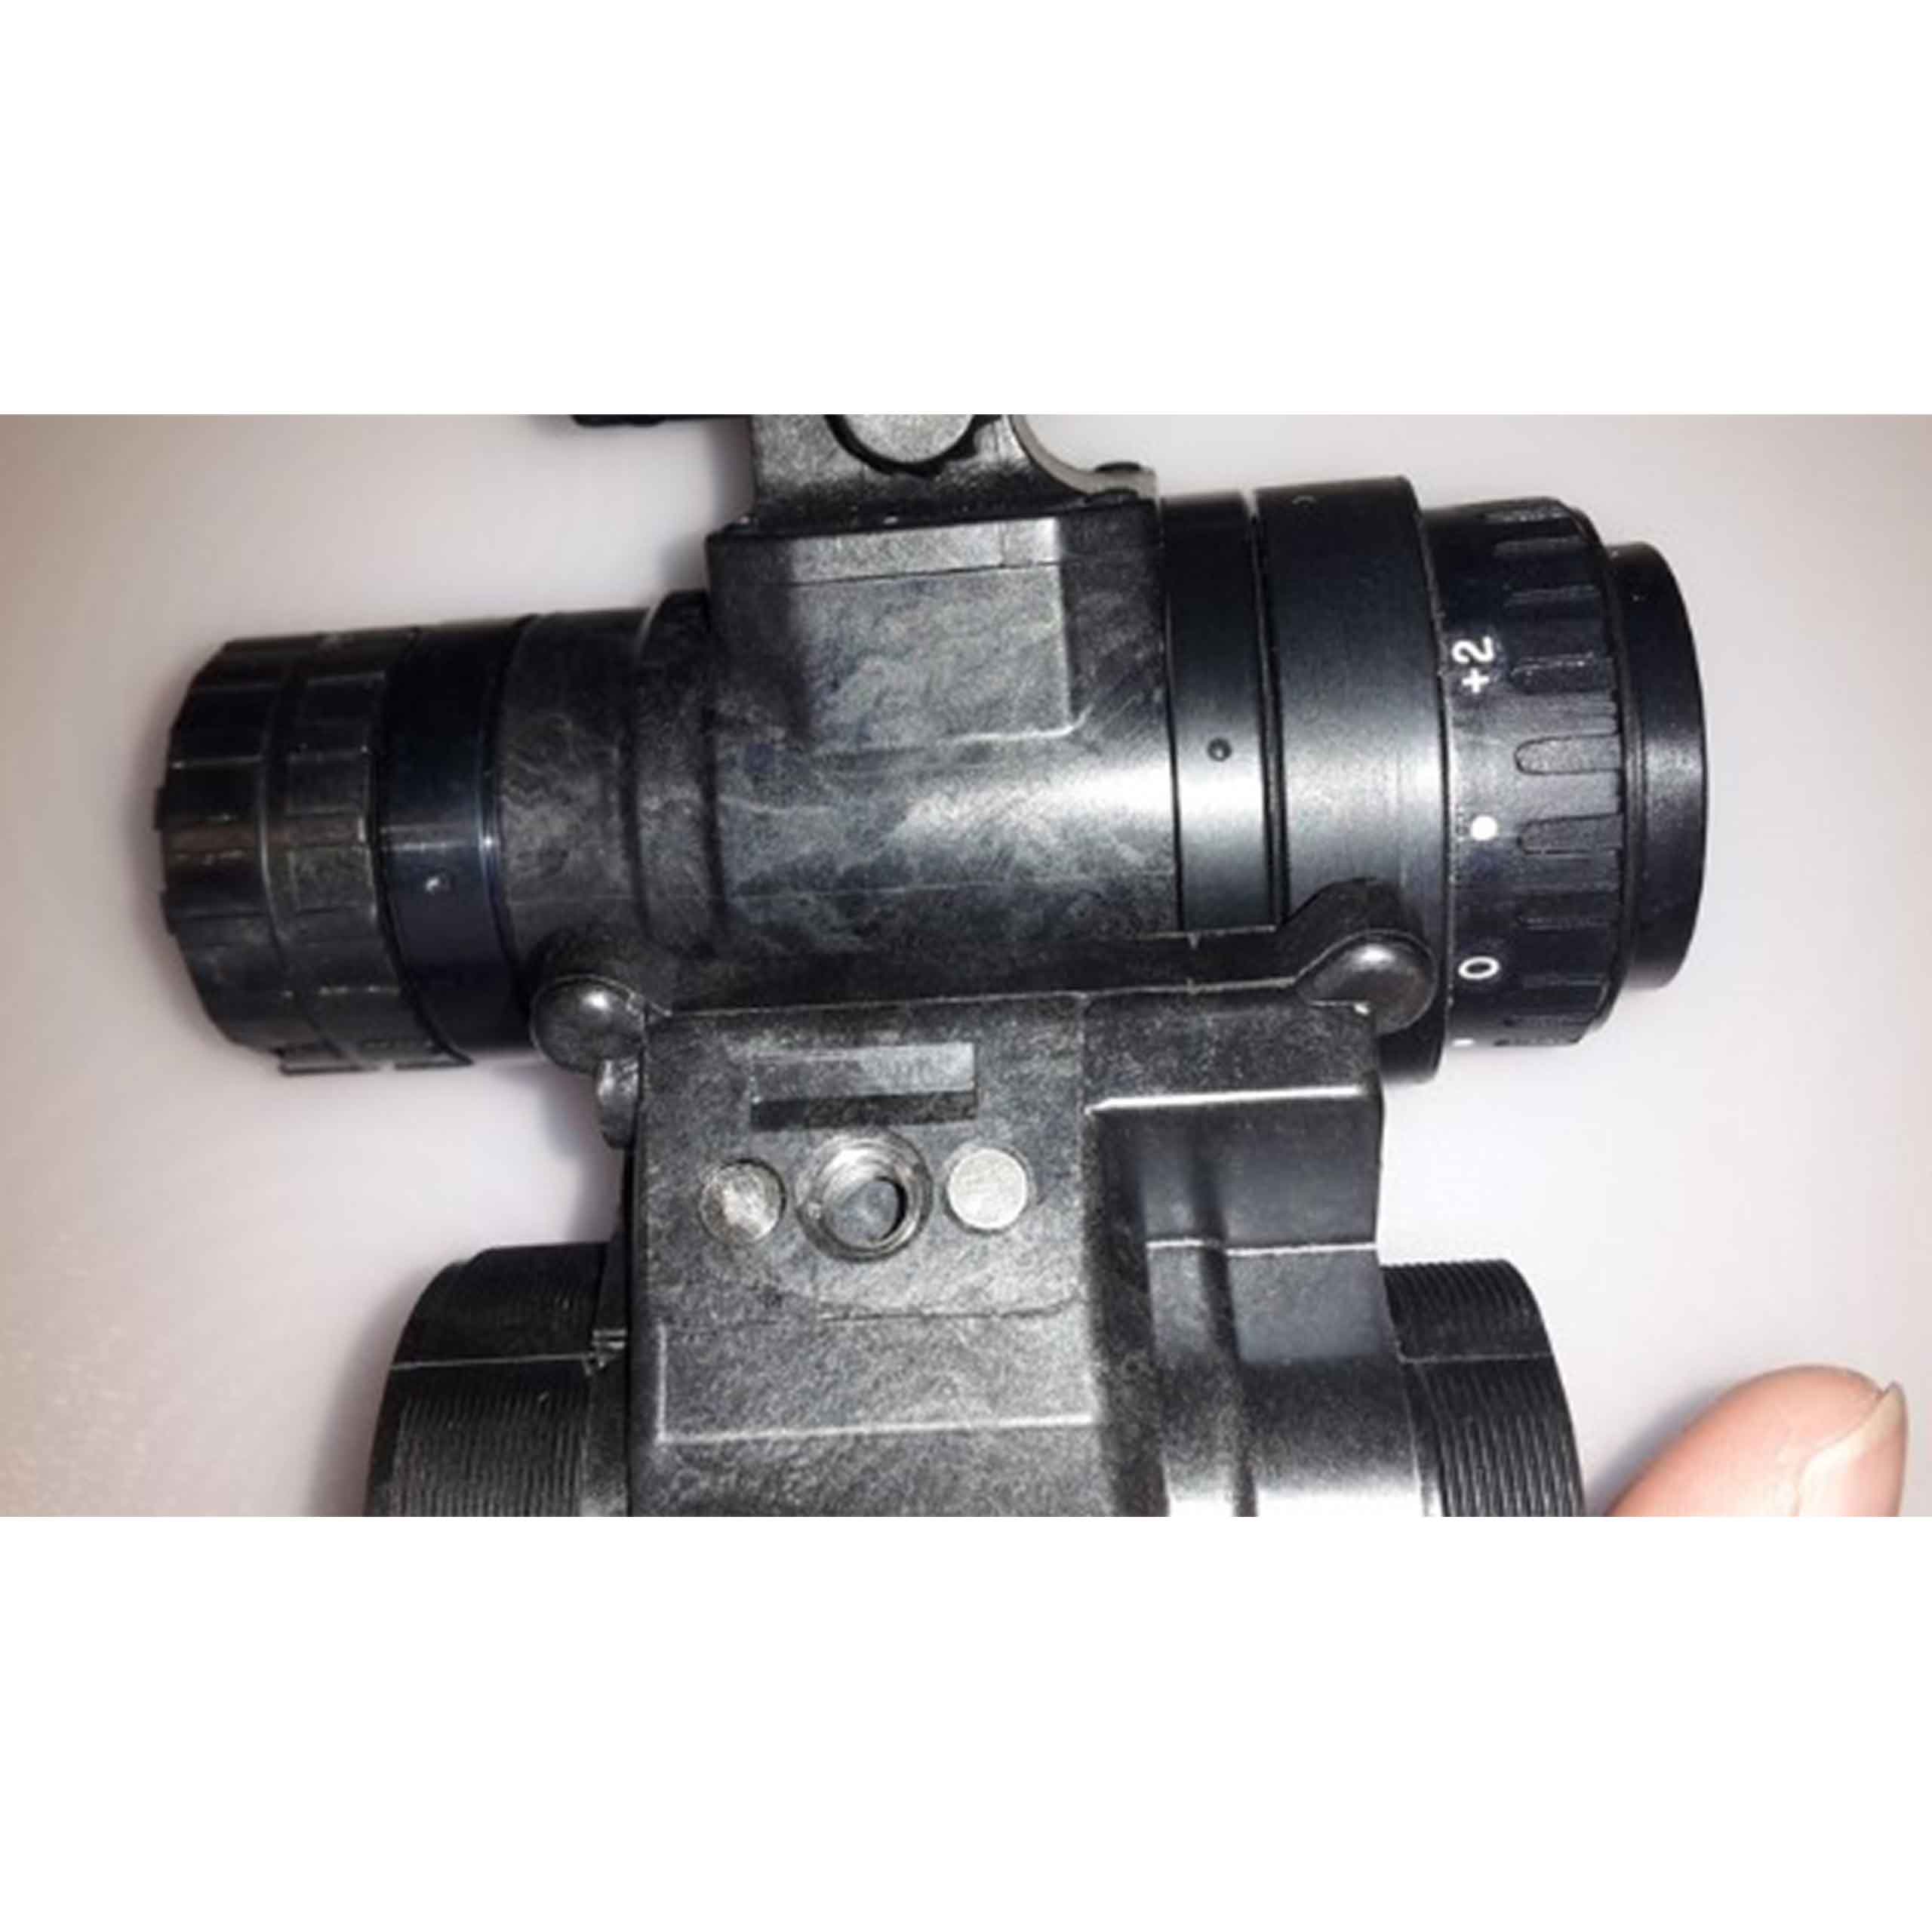
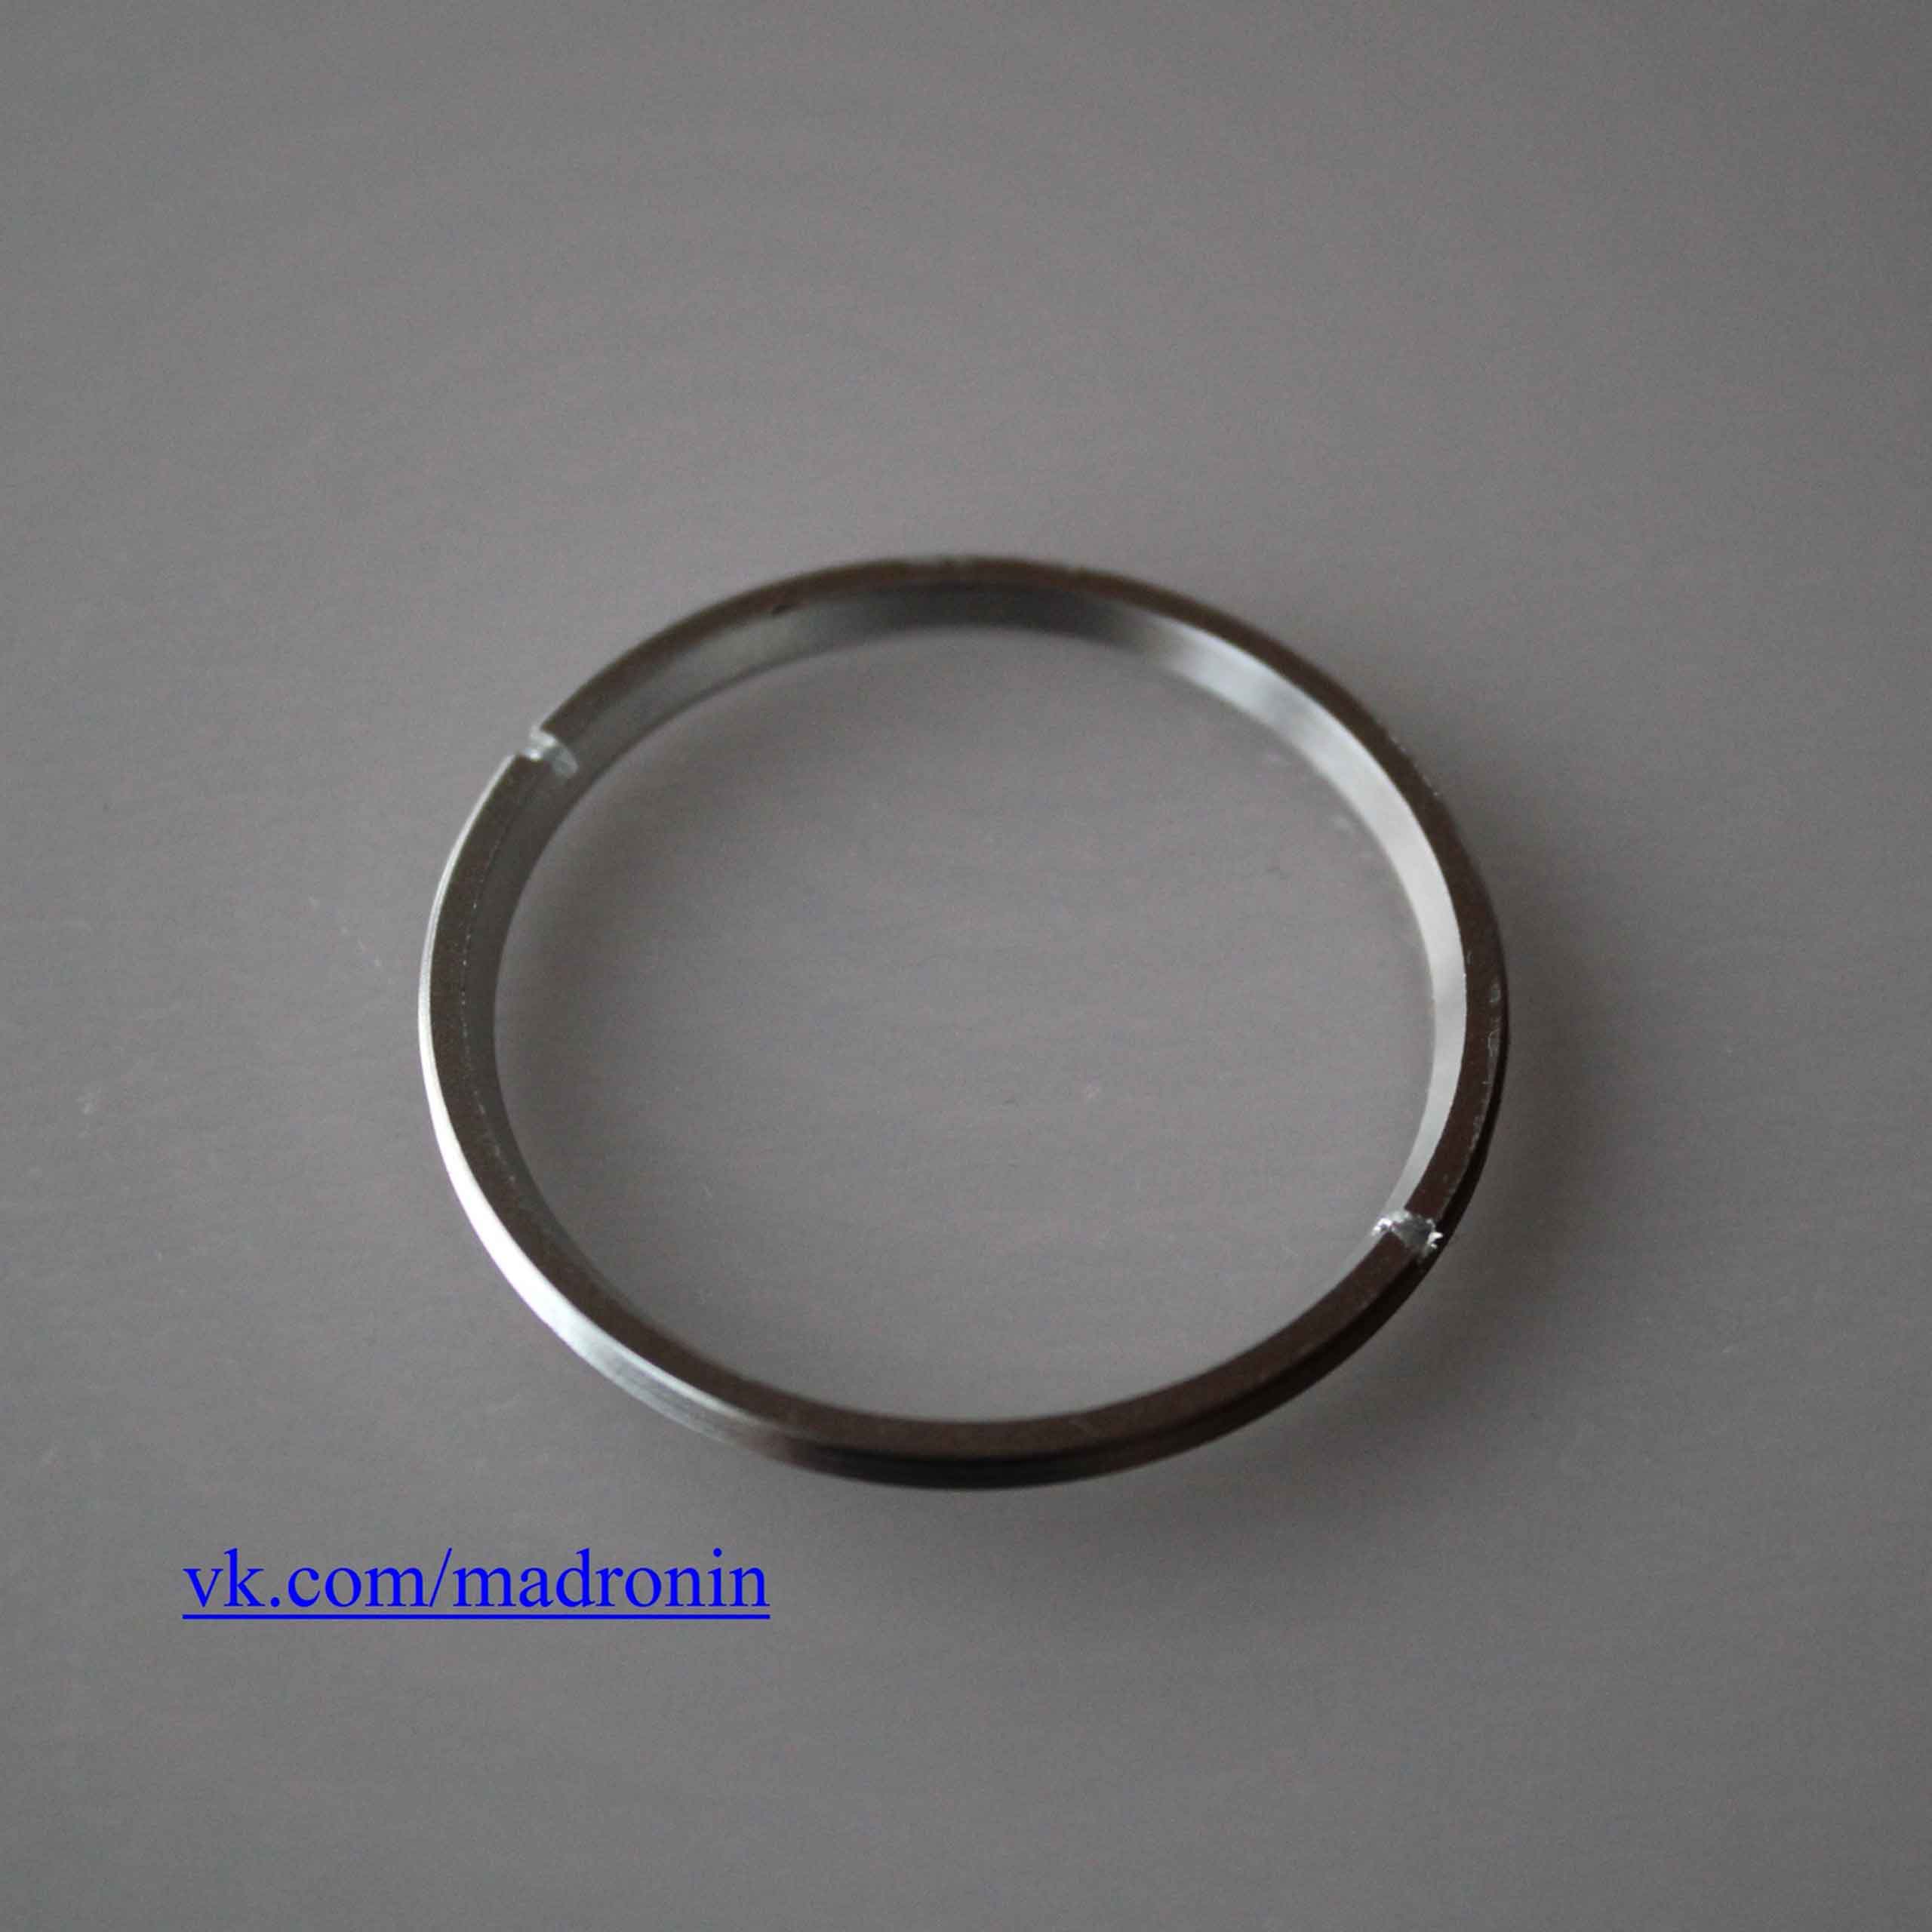
6. Lenses of fixing of focus of a lens (Infinity focus lock ring)
They have a screw for a slotted screwdriver, which allows them to be fixed more firmly. Focusing works similarly to PVS-14, for obvious reasons :)
7. The eyepiece lenses (rear, eyepiece) in our case are installed from ANVIS 6/9, wide (I personally like them more). You can also install narrow lenses ANVIS, the old model, and, of course, standard lenses from PVS-14.
Different lenses can give a scatter of up to 34 grams in a pair (17 grams each), which was found experimentally.
"Wide" lenses from ANVIS 6/9
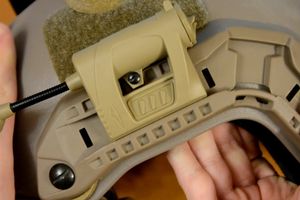
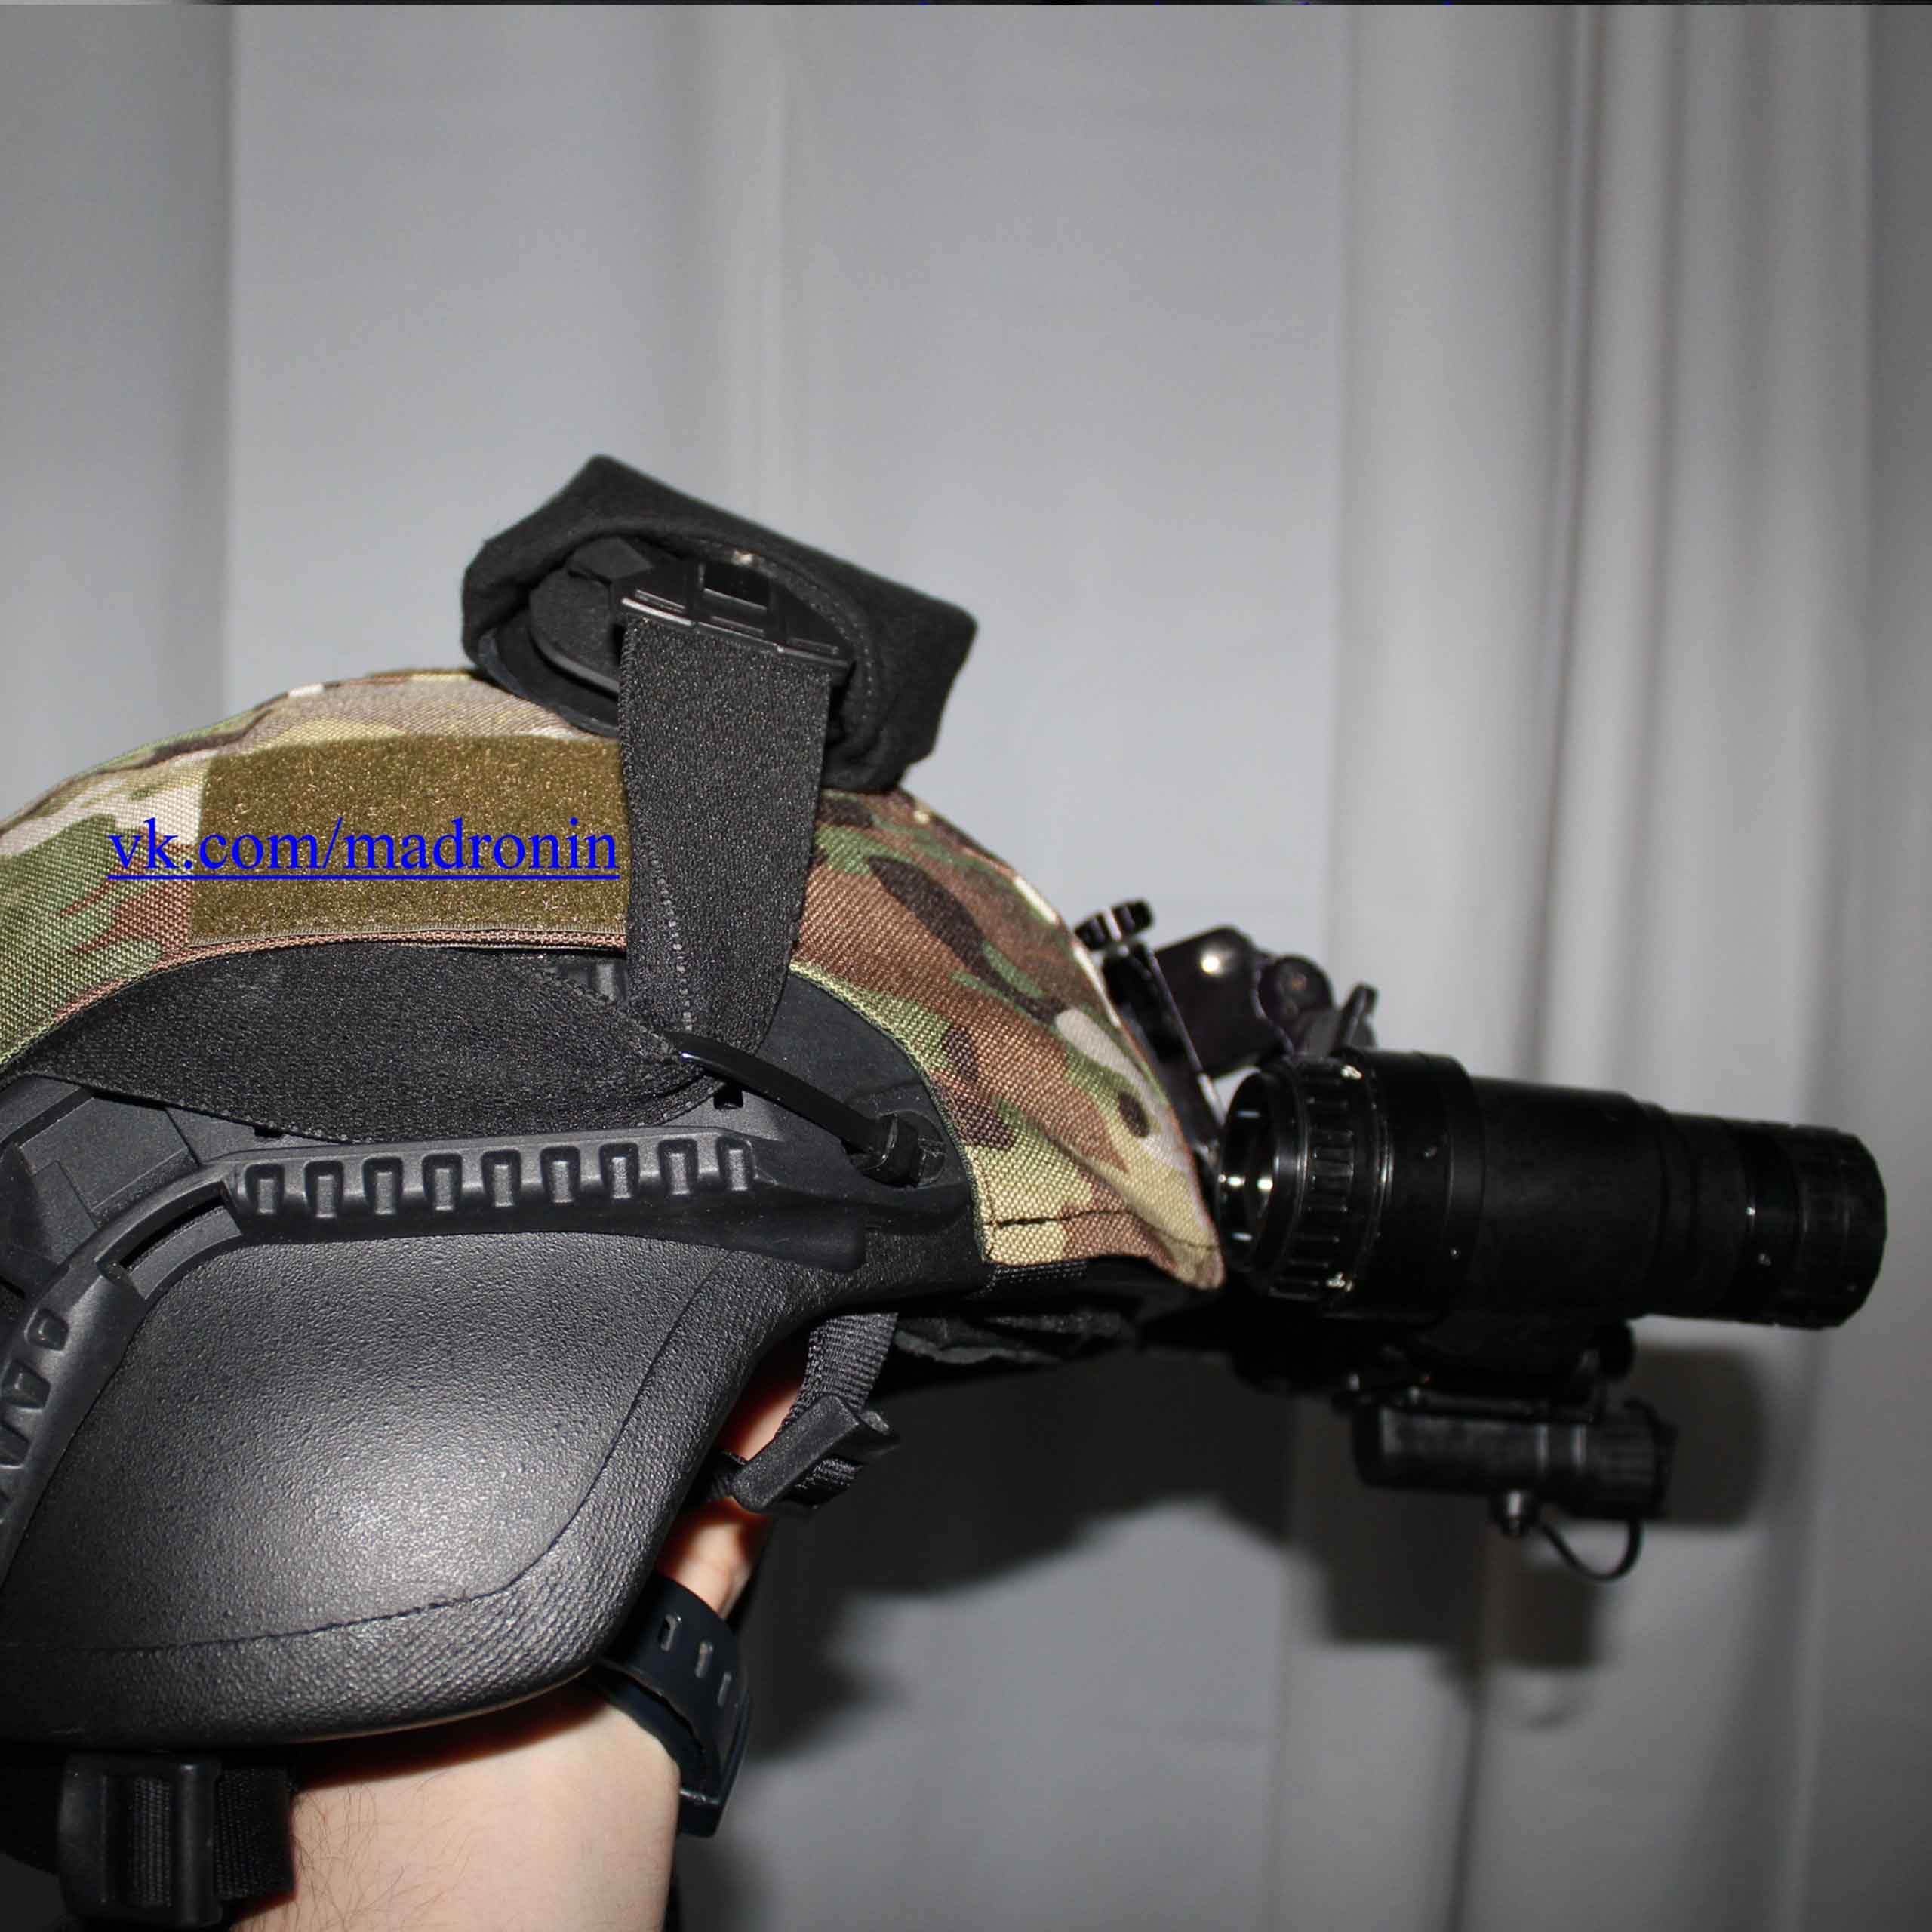
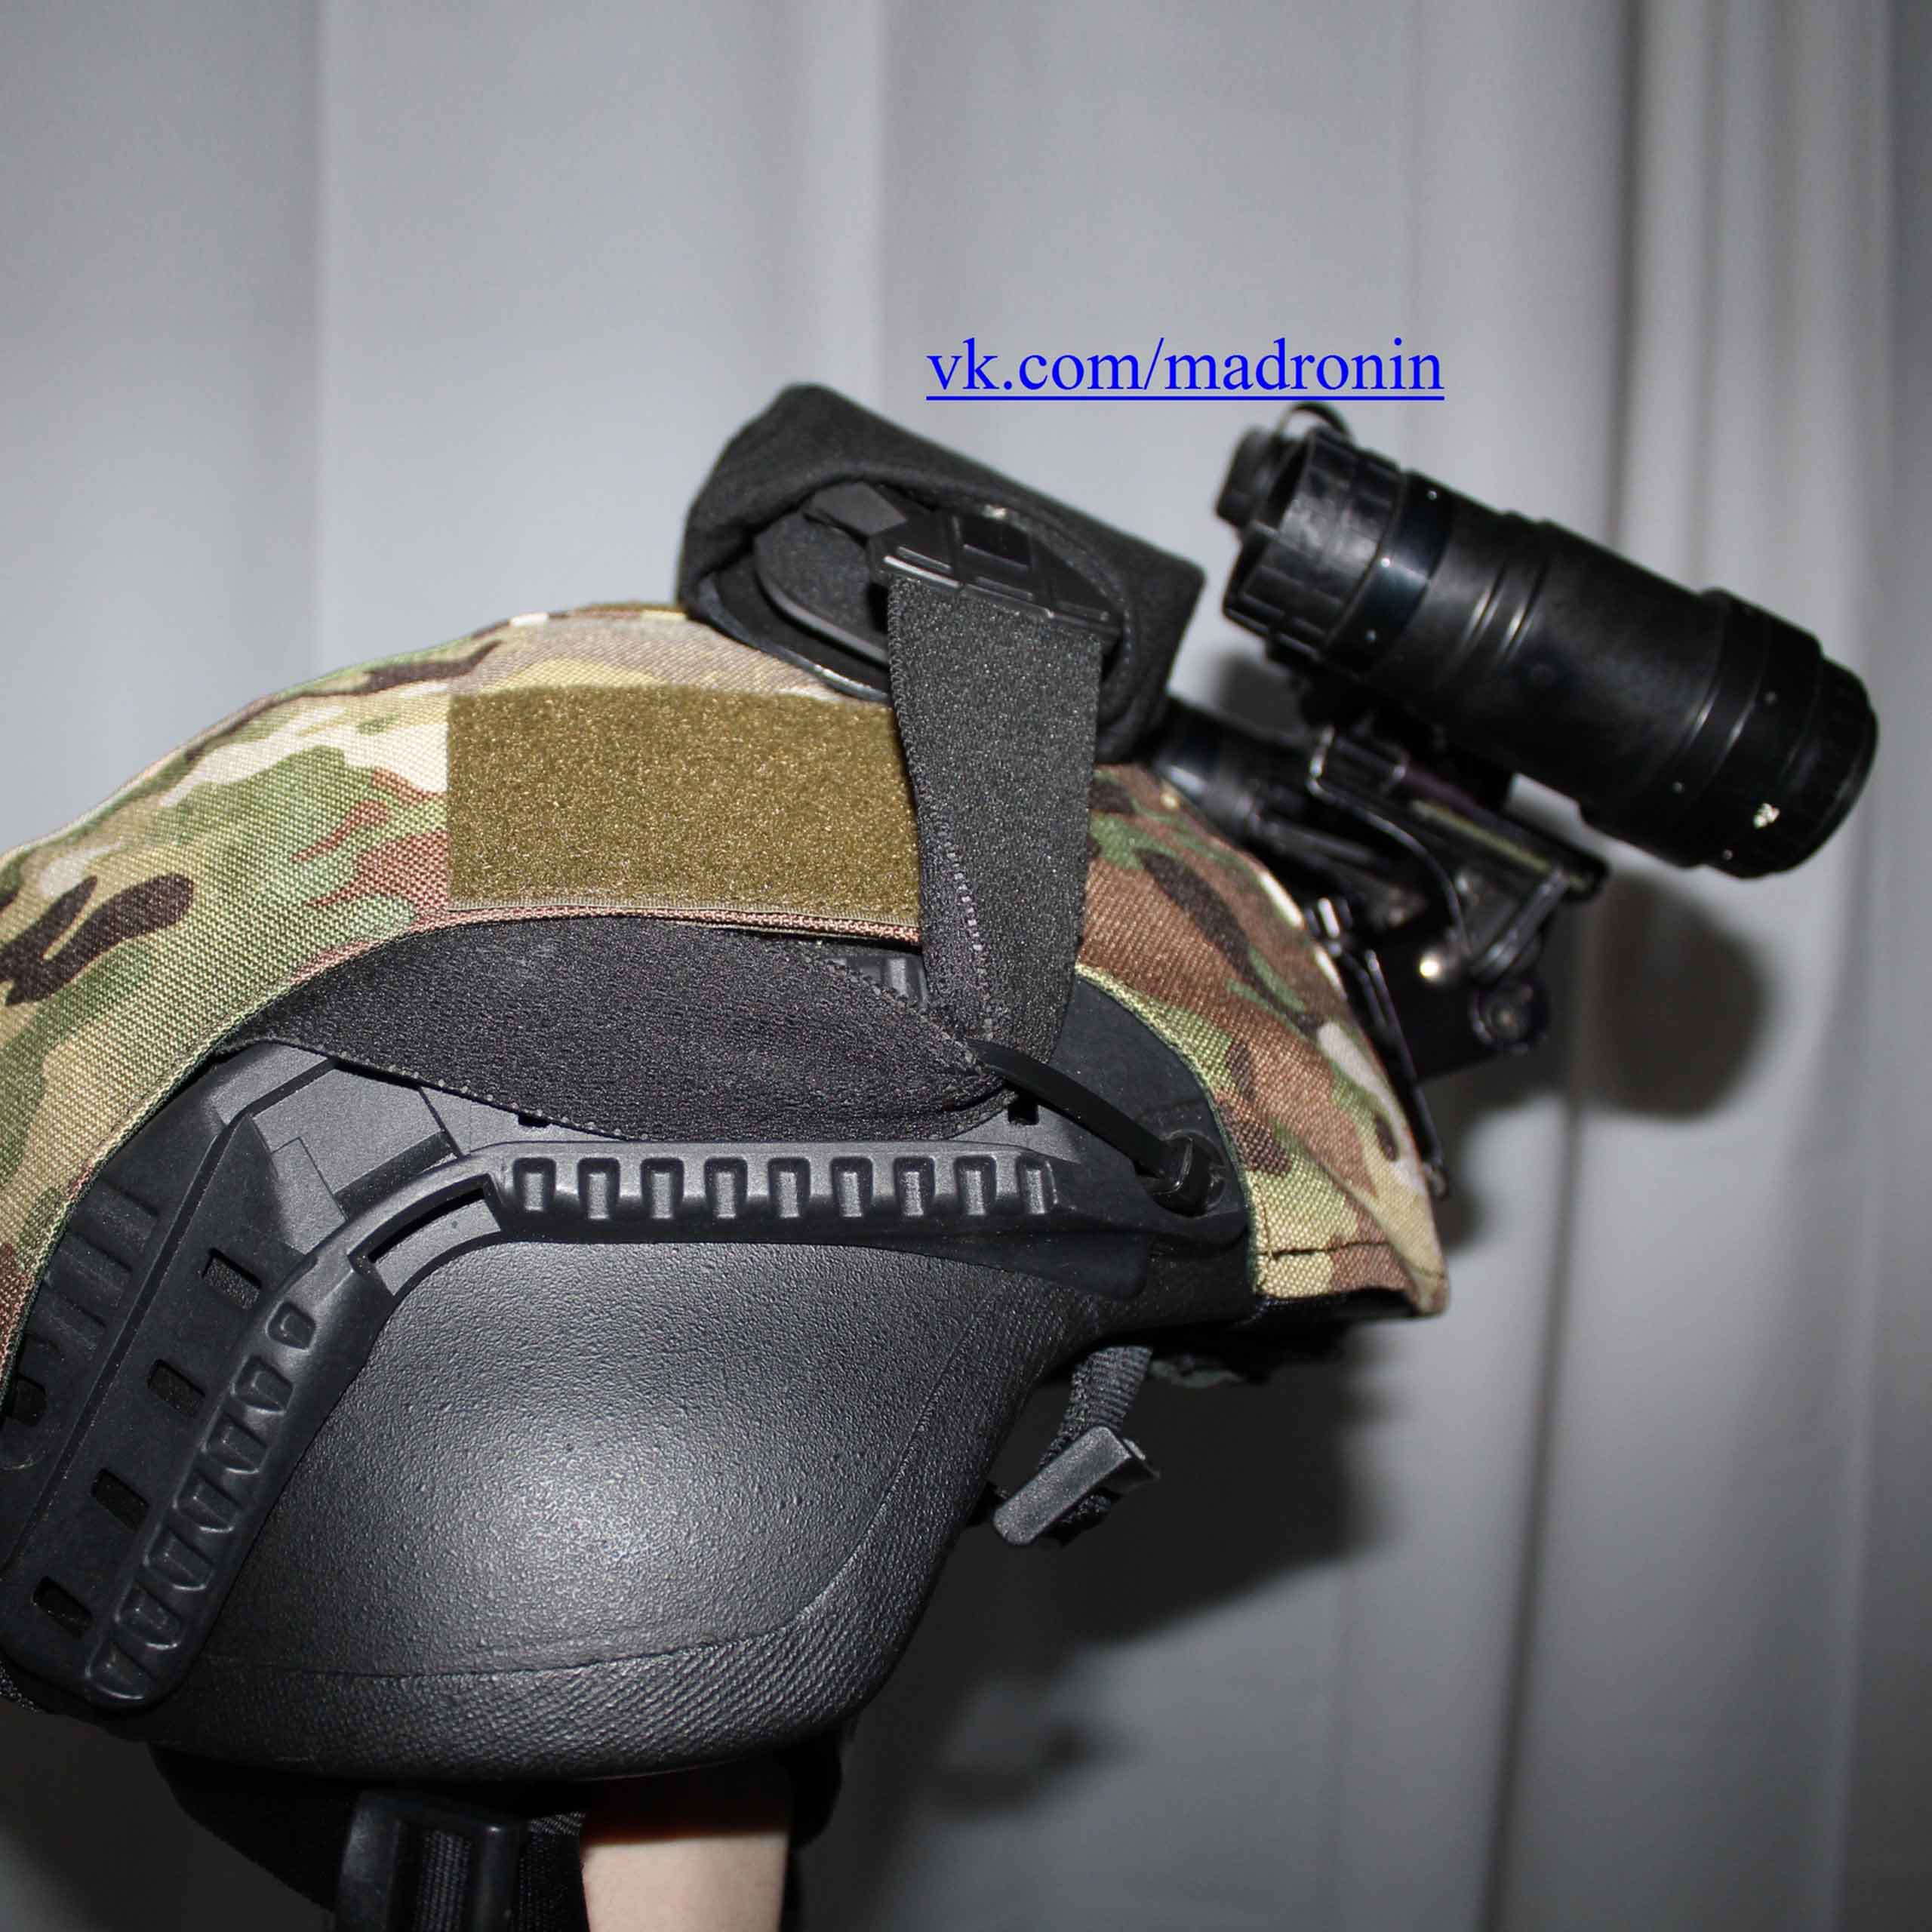
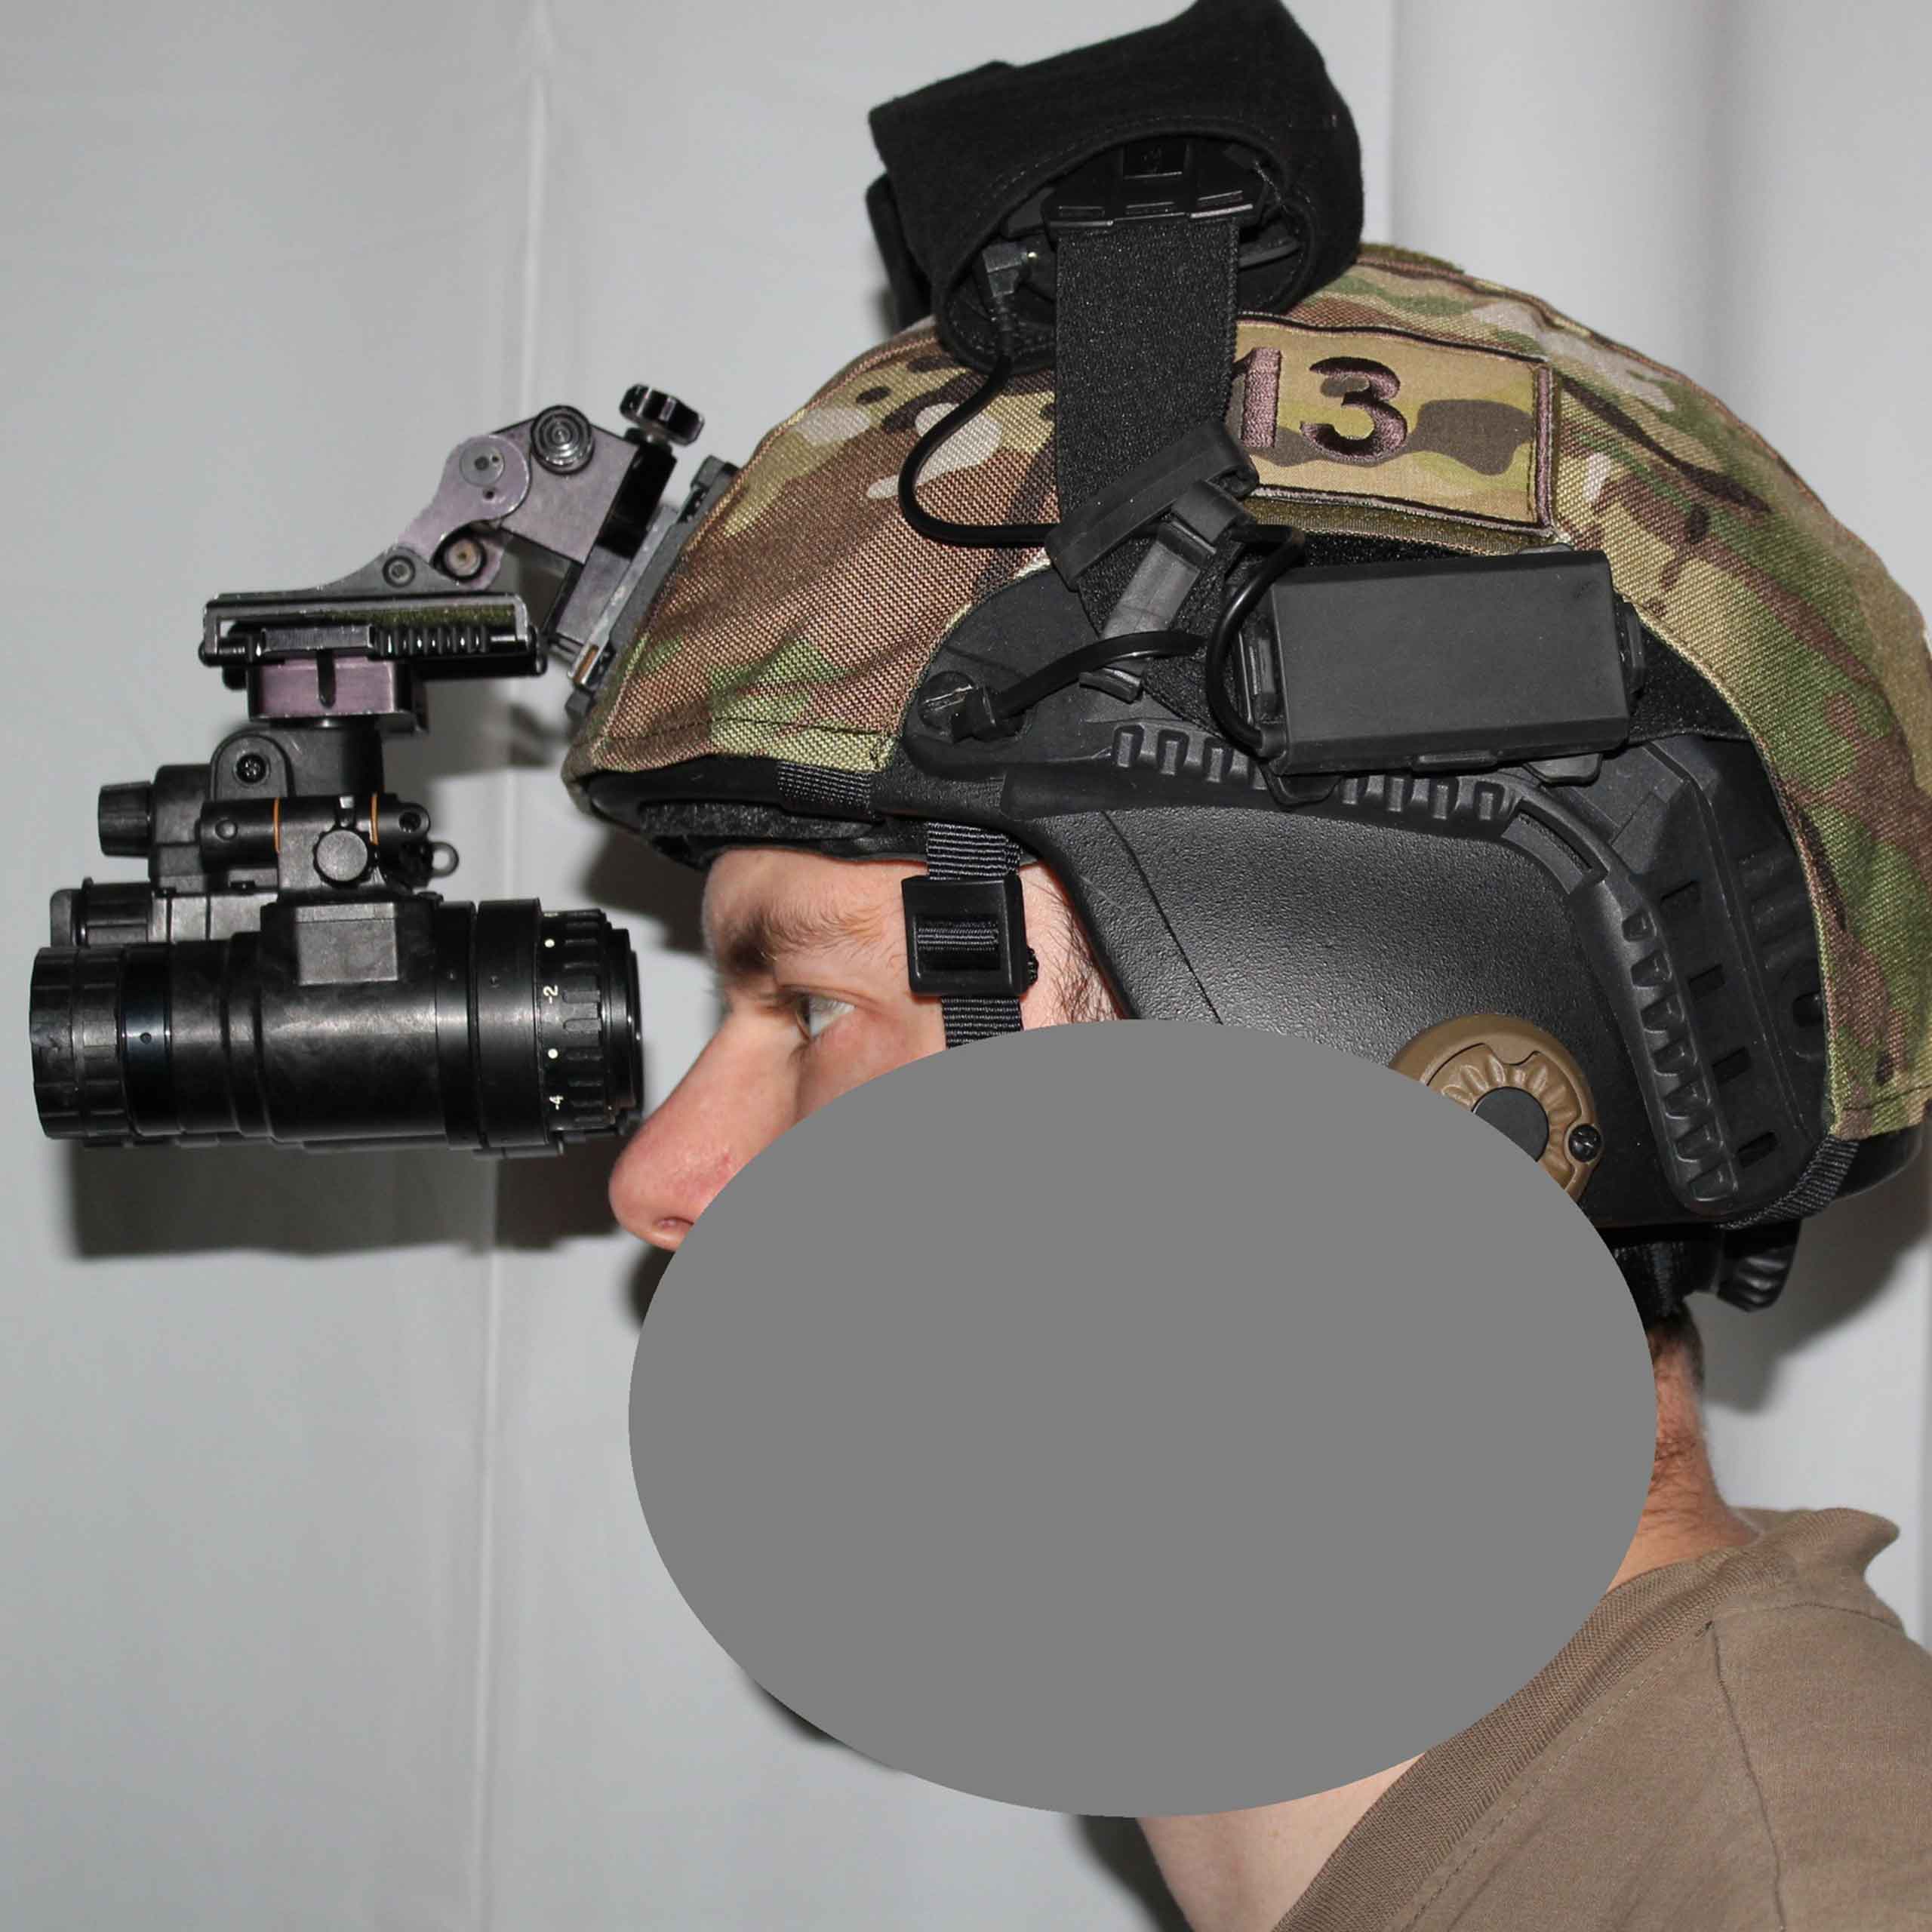
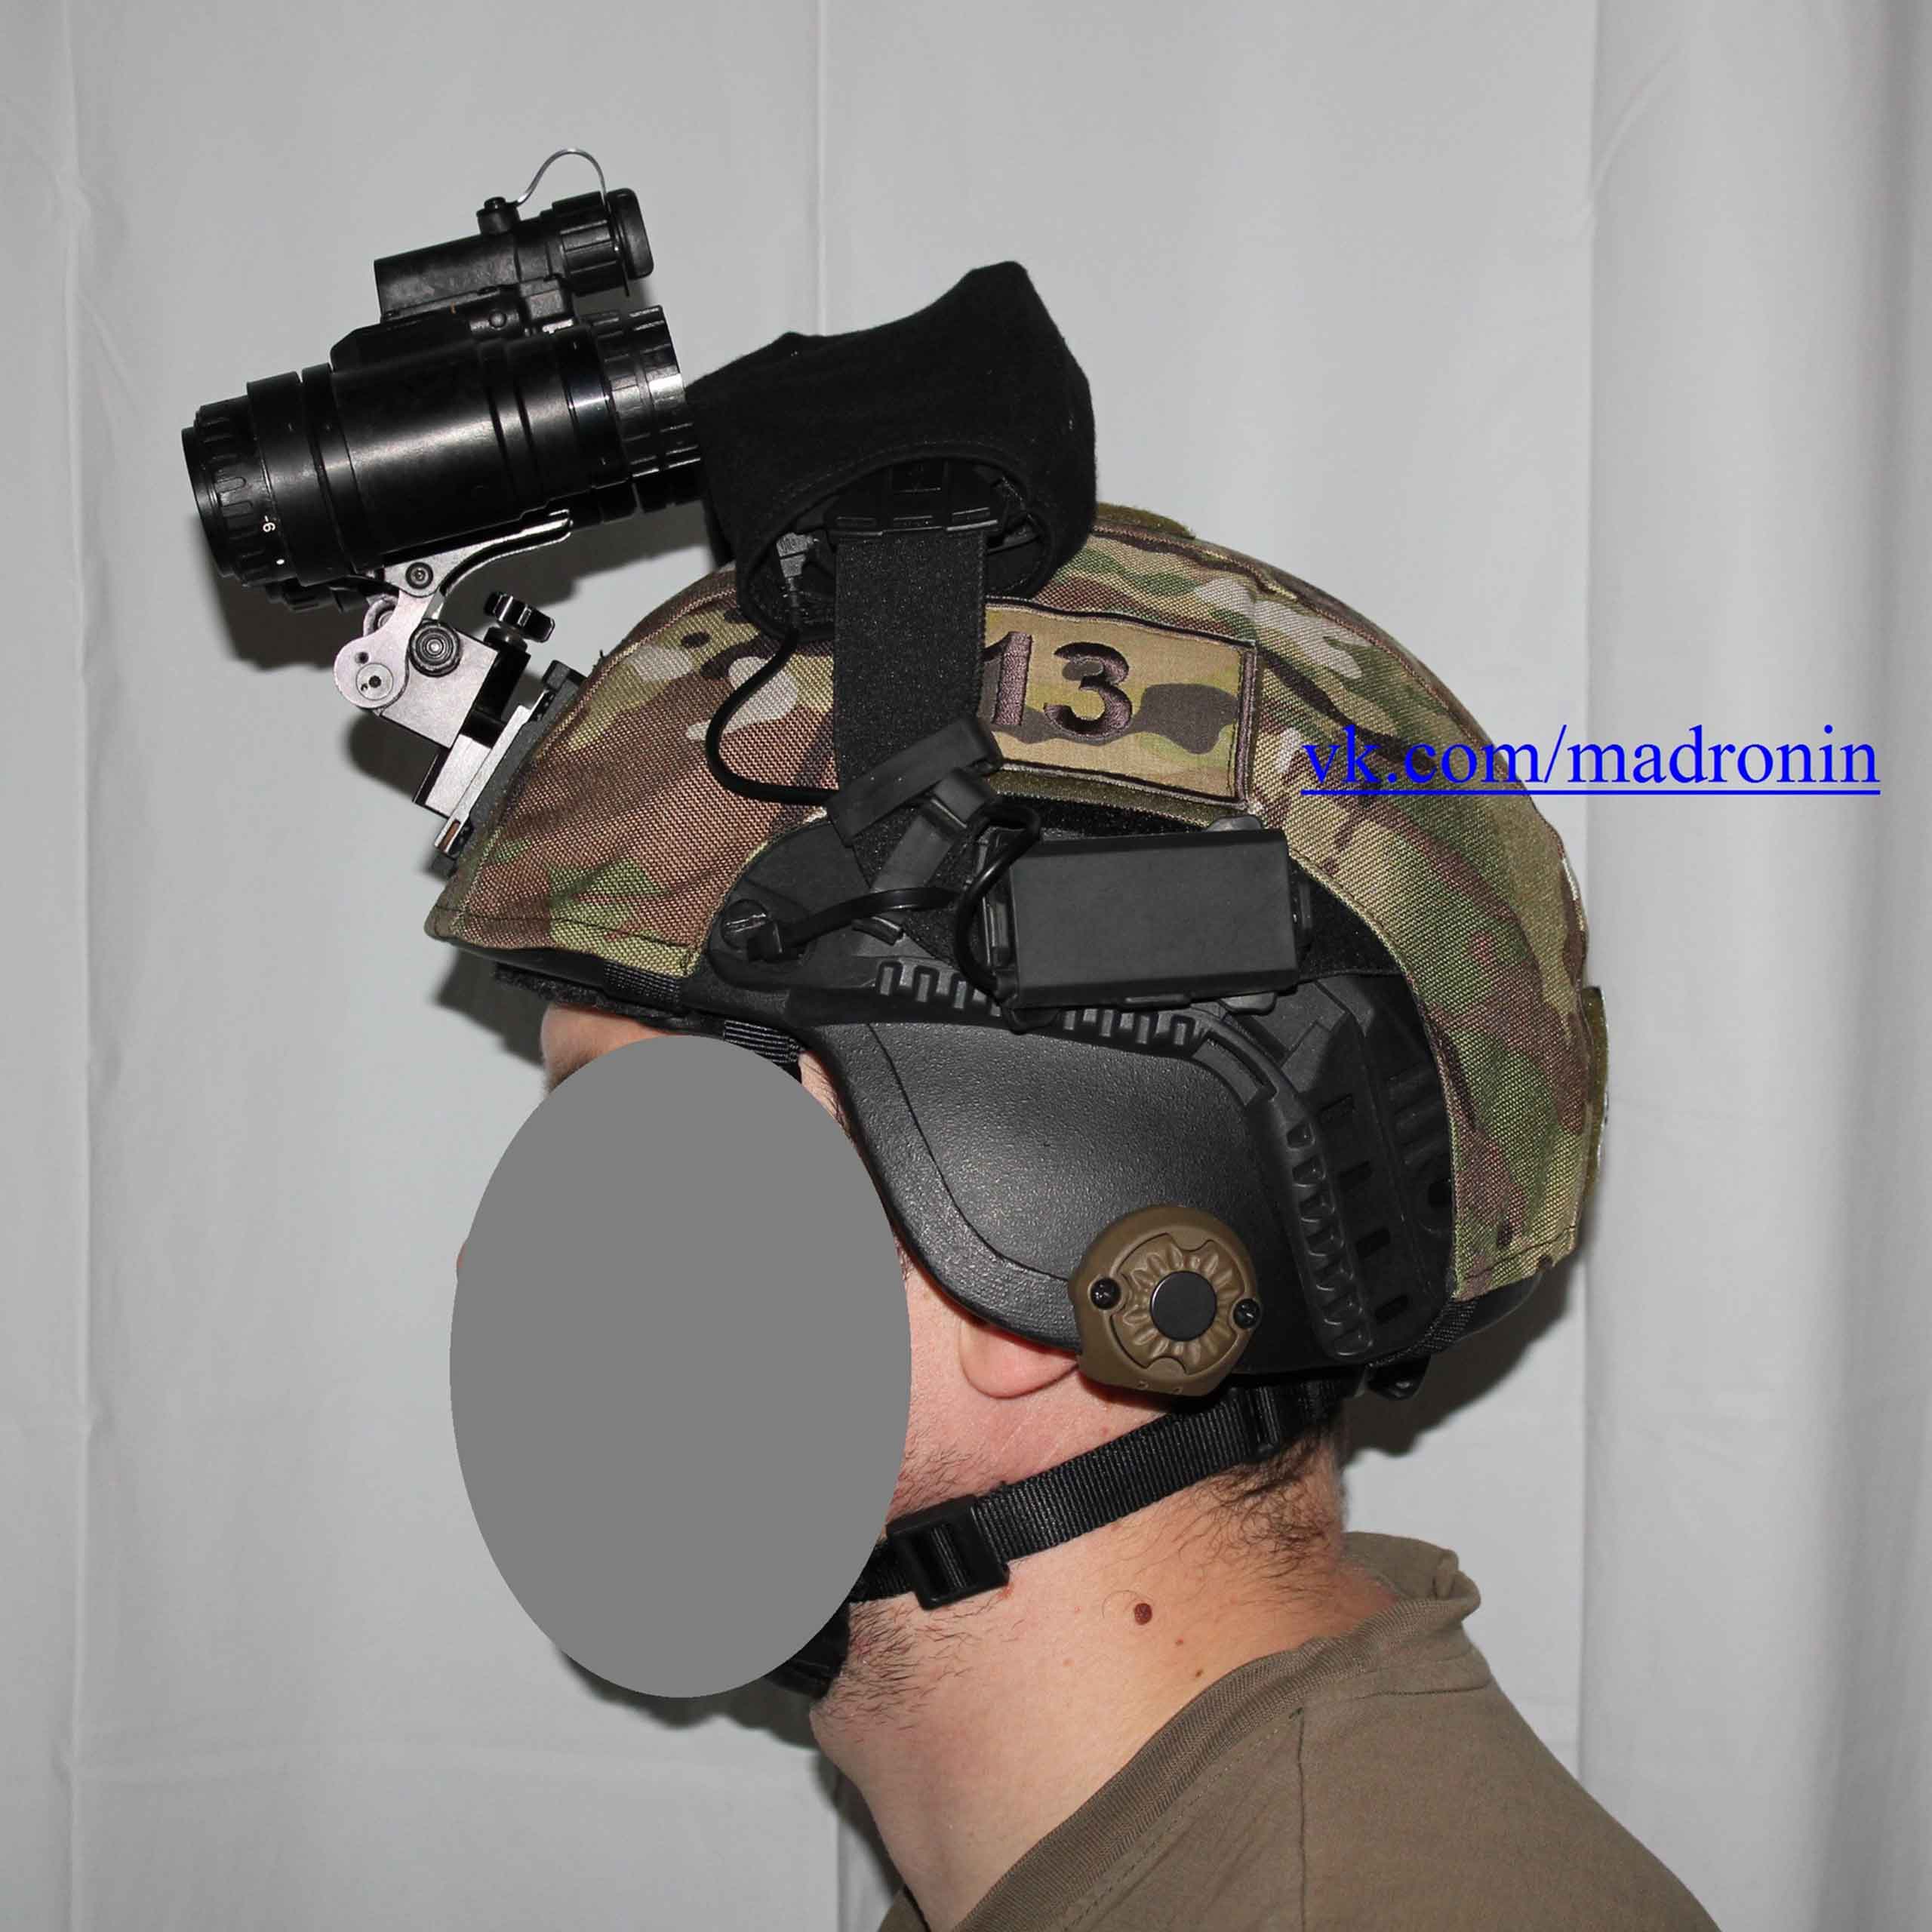
8. The instrument has a Dovetail interface for installation on the Rhino mount. Tested with TATM Long Arm: it sits very tight in it, I did not notice any backlash at all. In "Fork" from EG, backlash is quite strong. As I get the original “Plug”, I’ll try for backlashes in it.
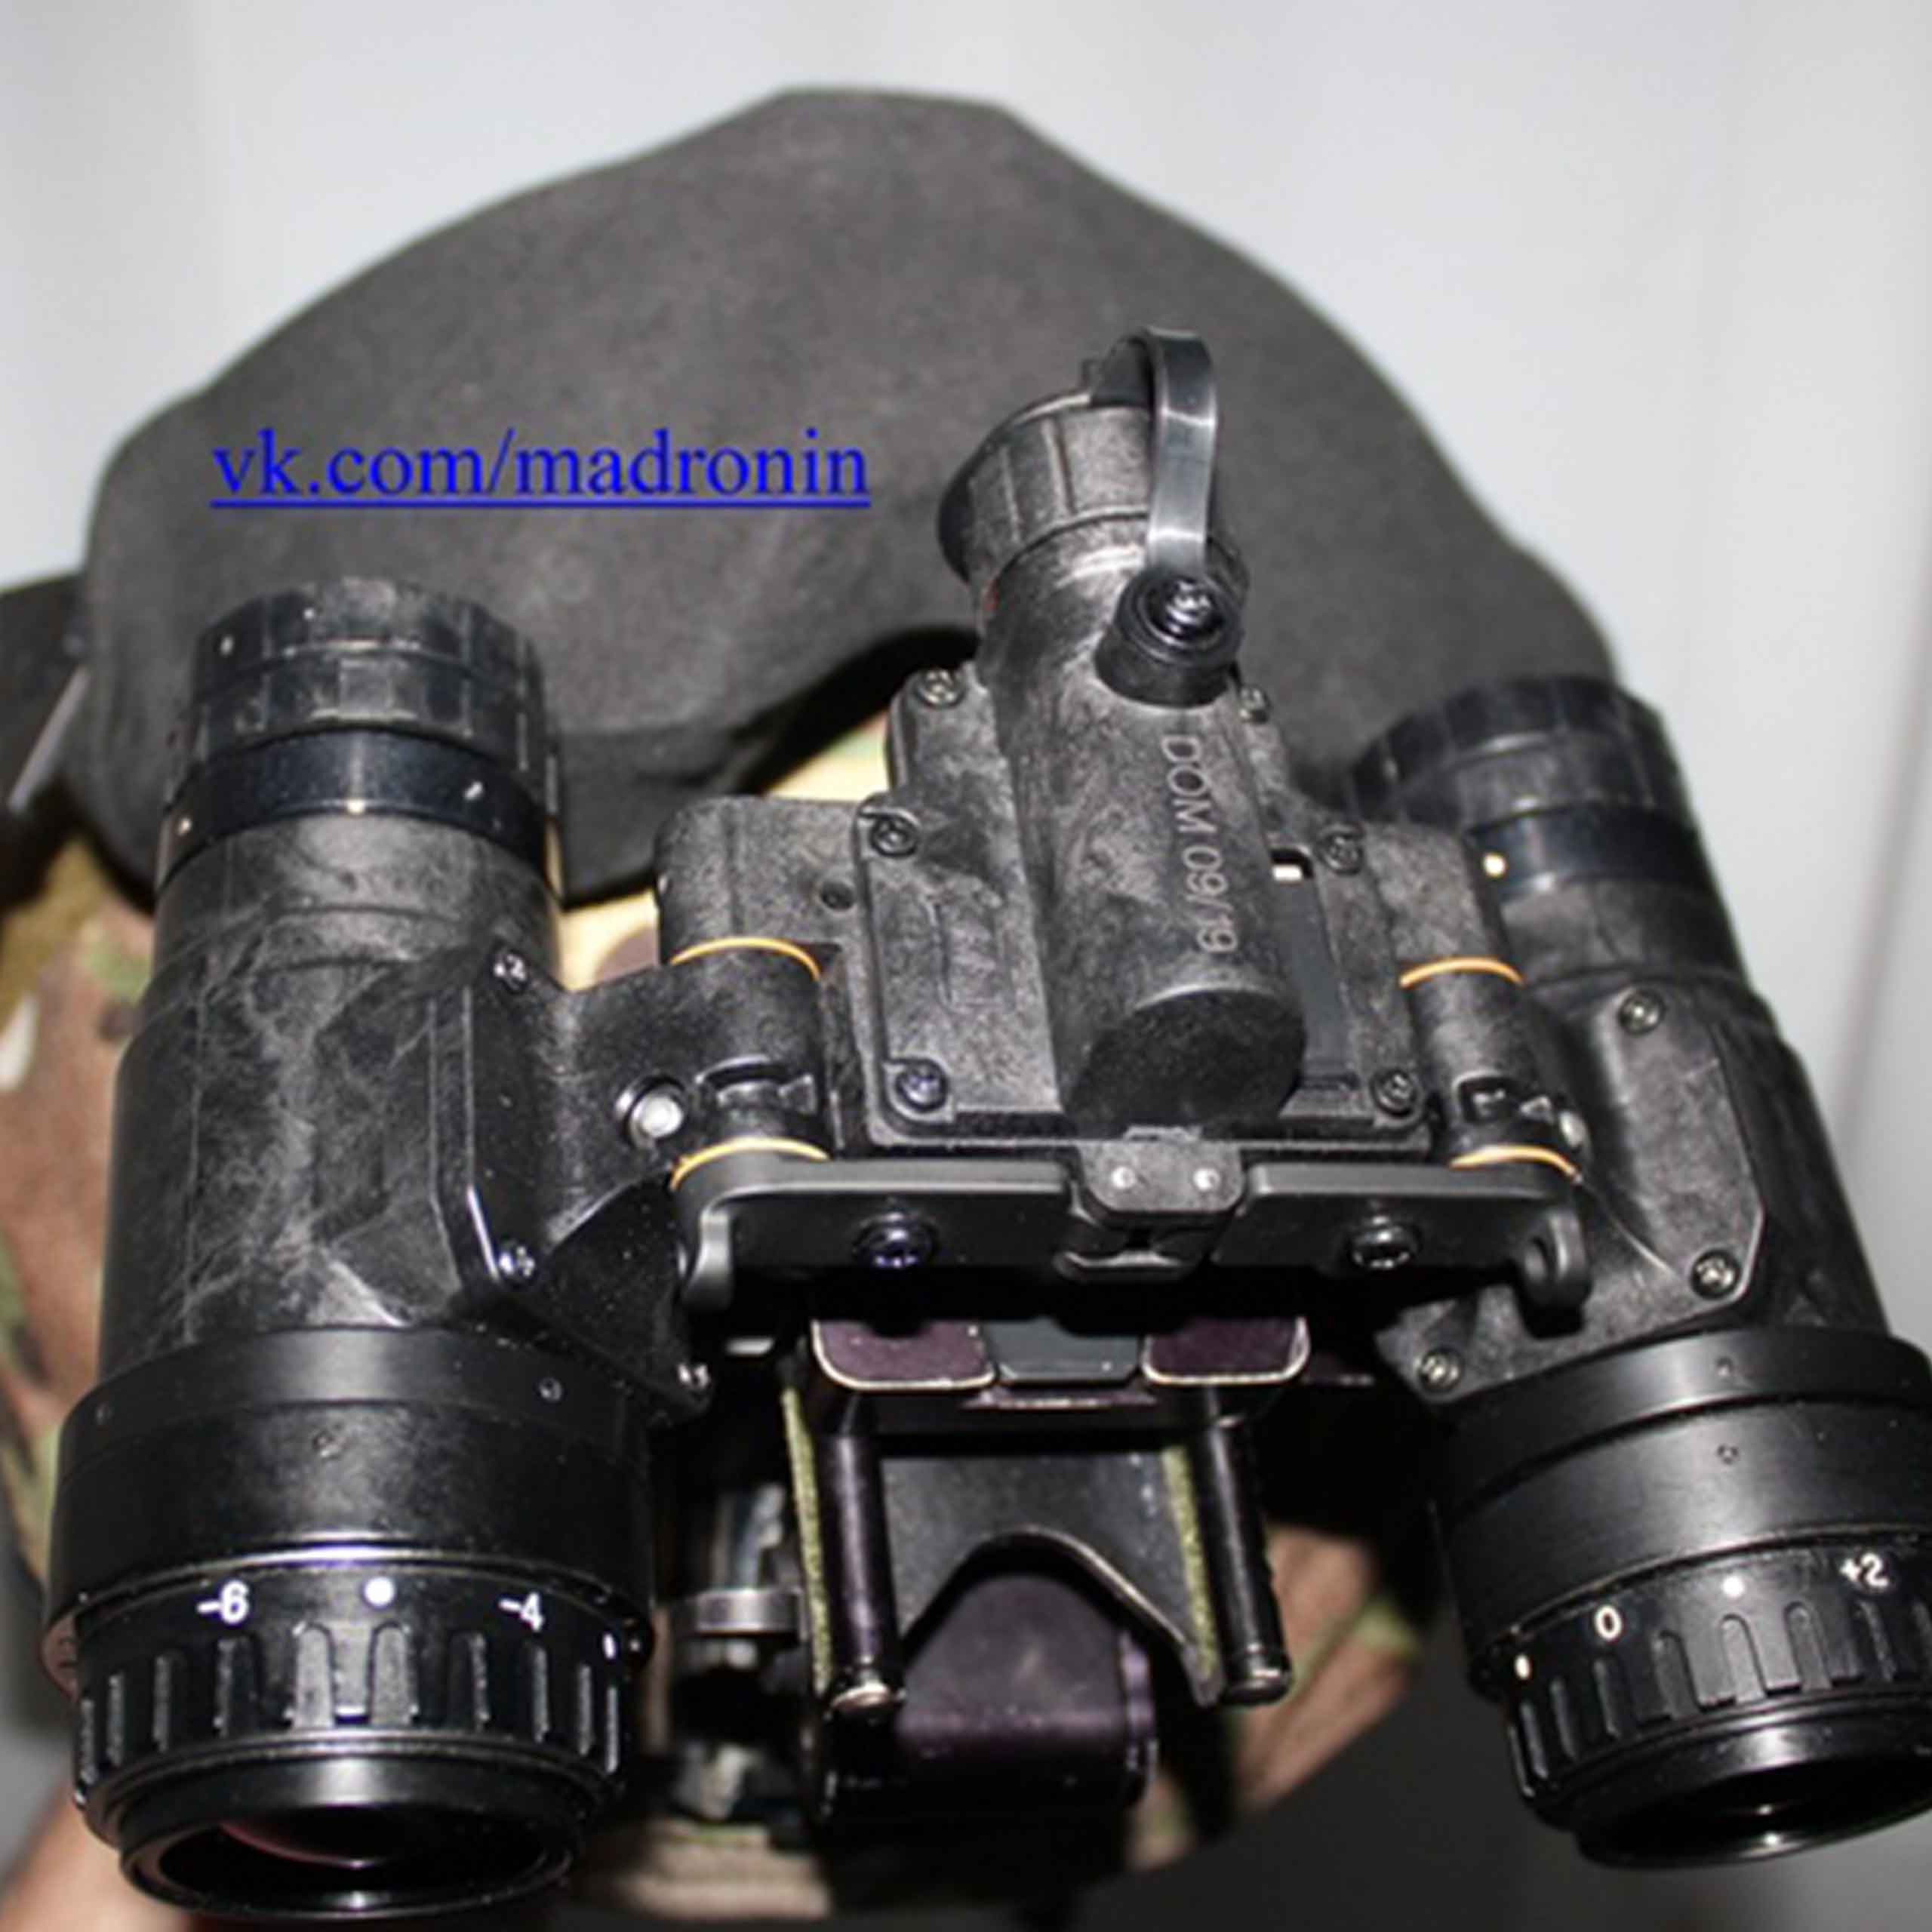
The device is installed on Norotos Tatm rhino mount
9. The device does not have built-in IR illumination, as on the original.
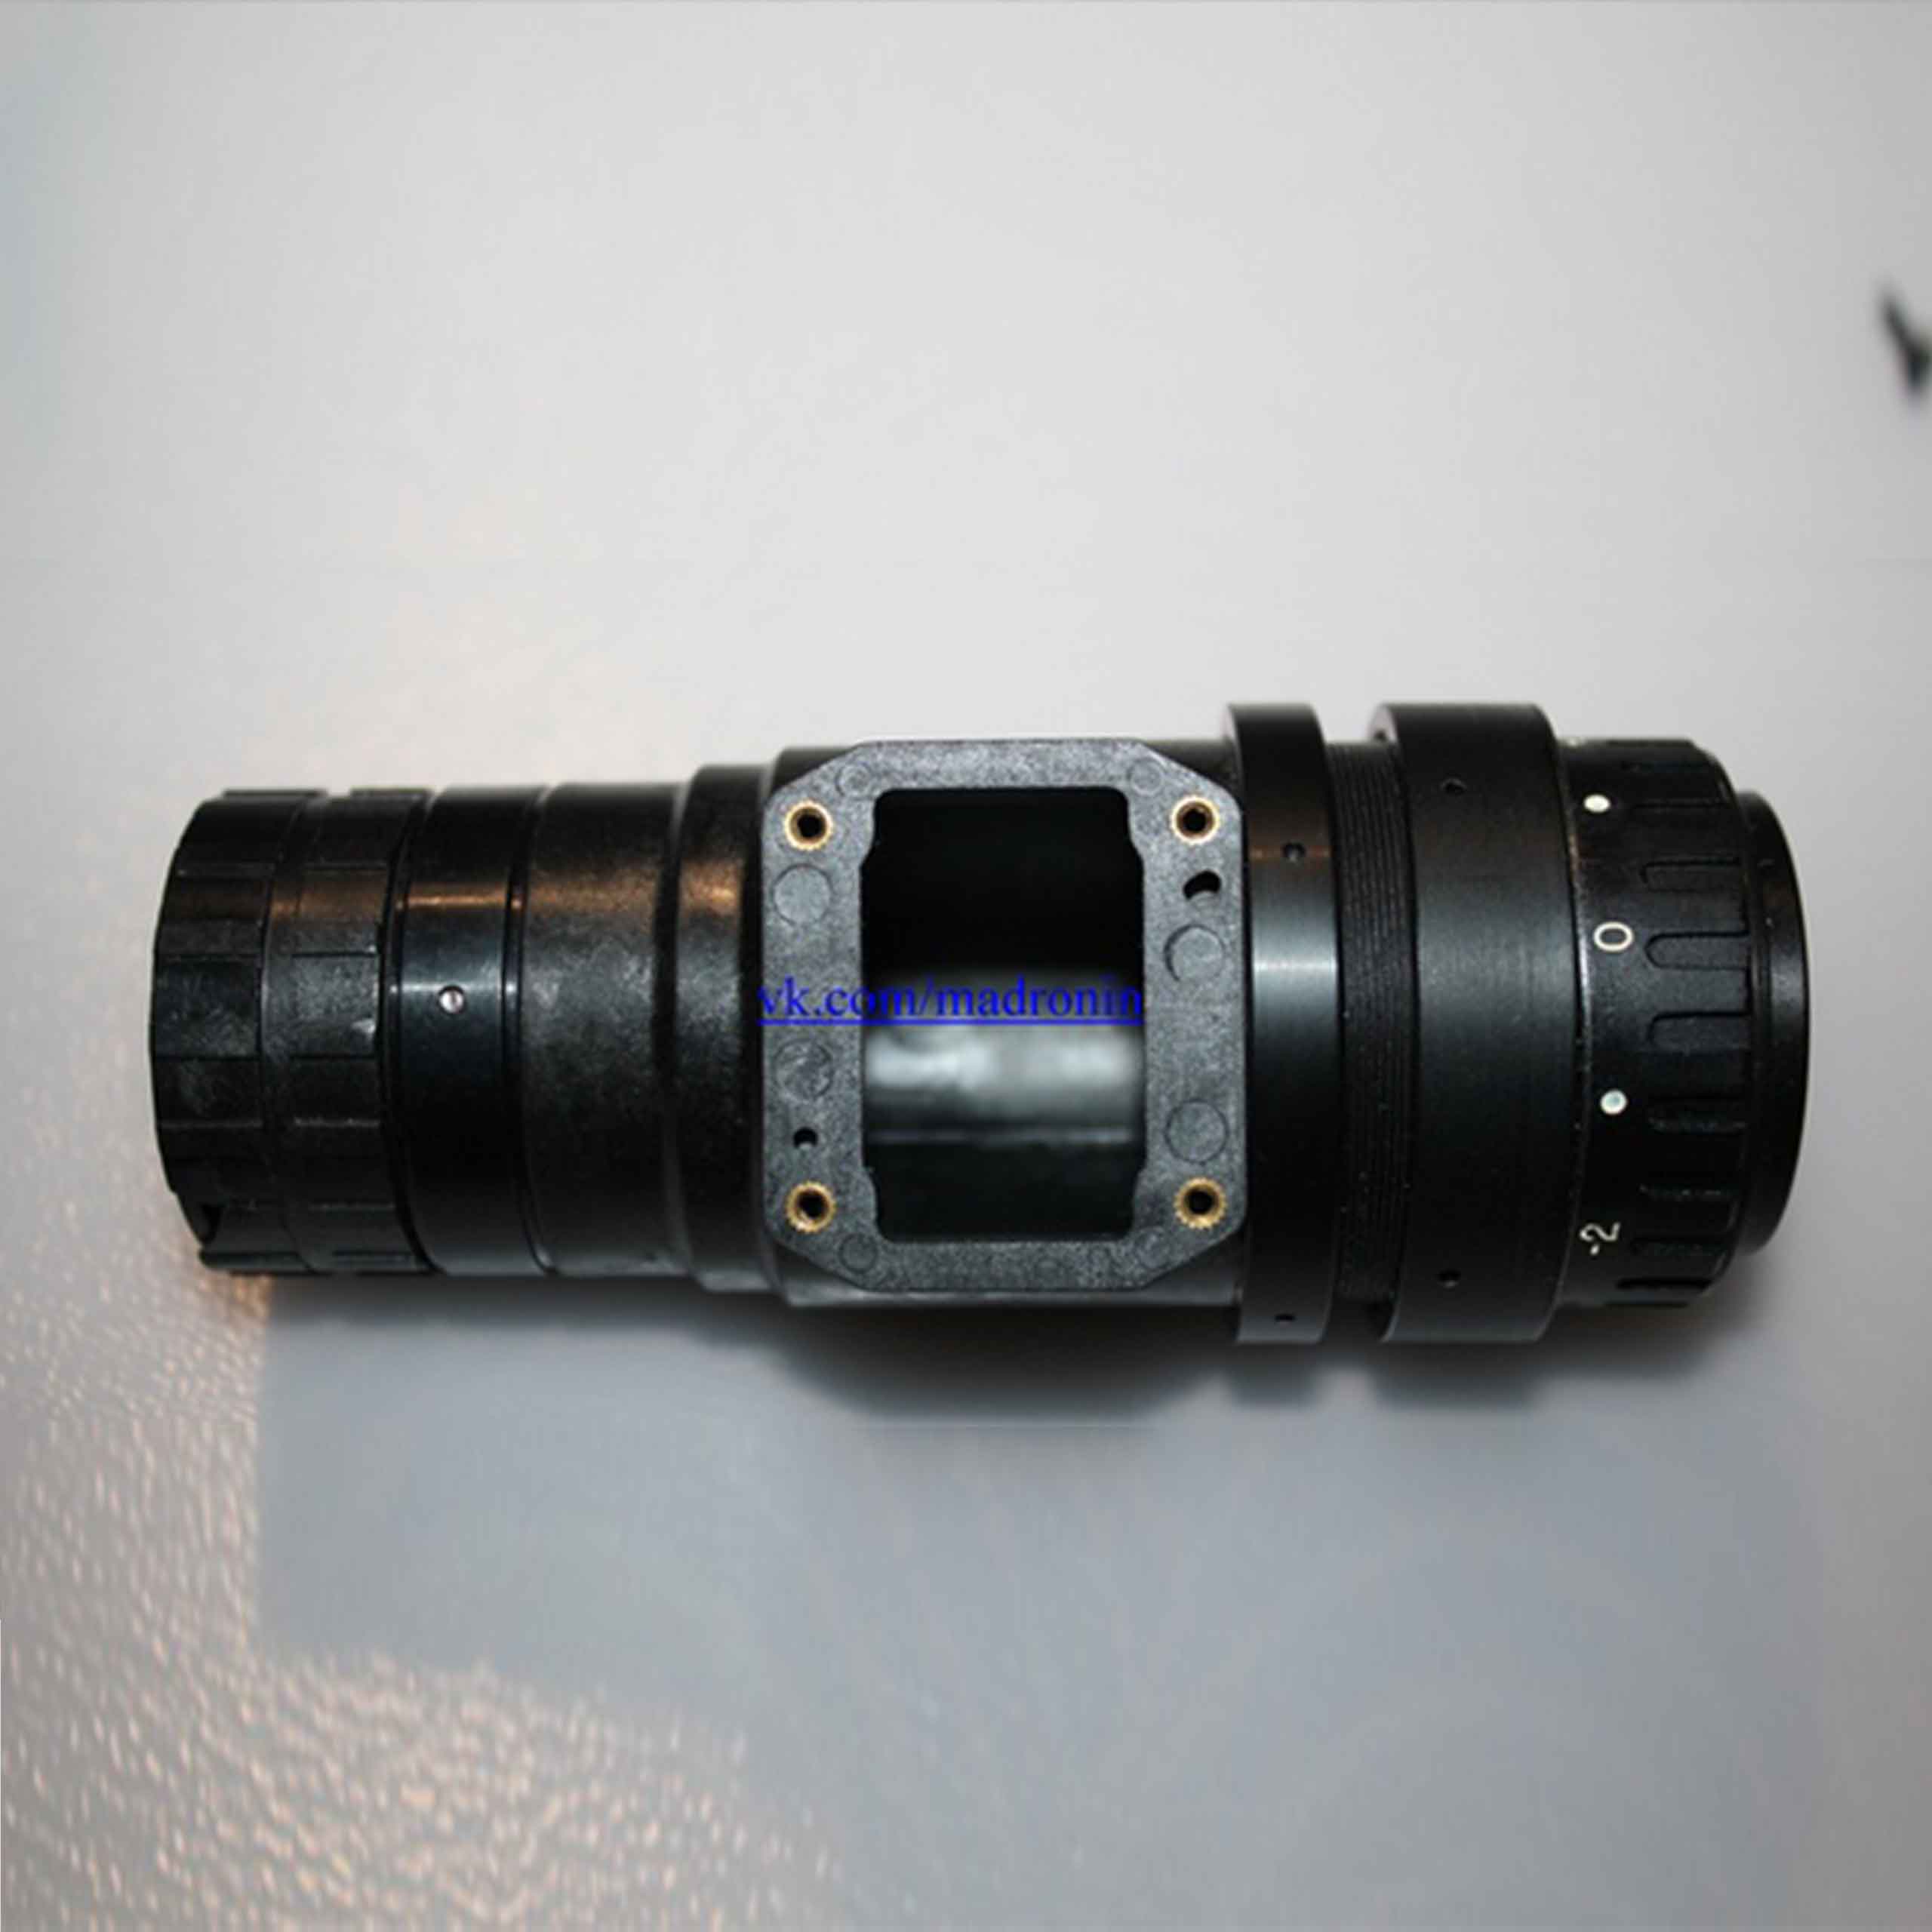
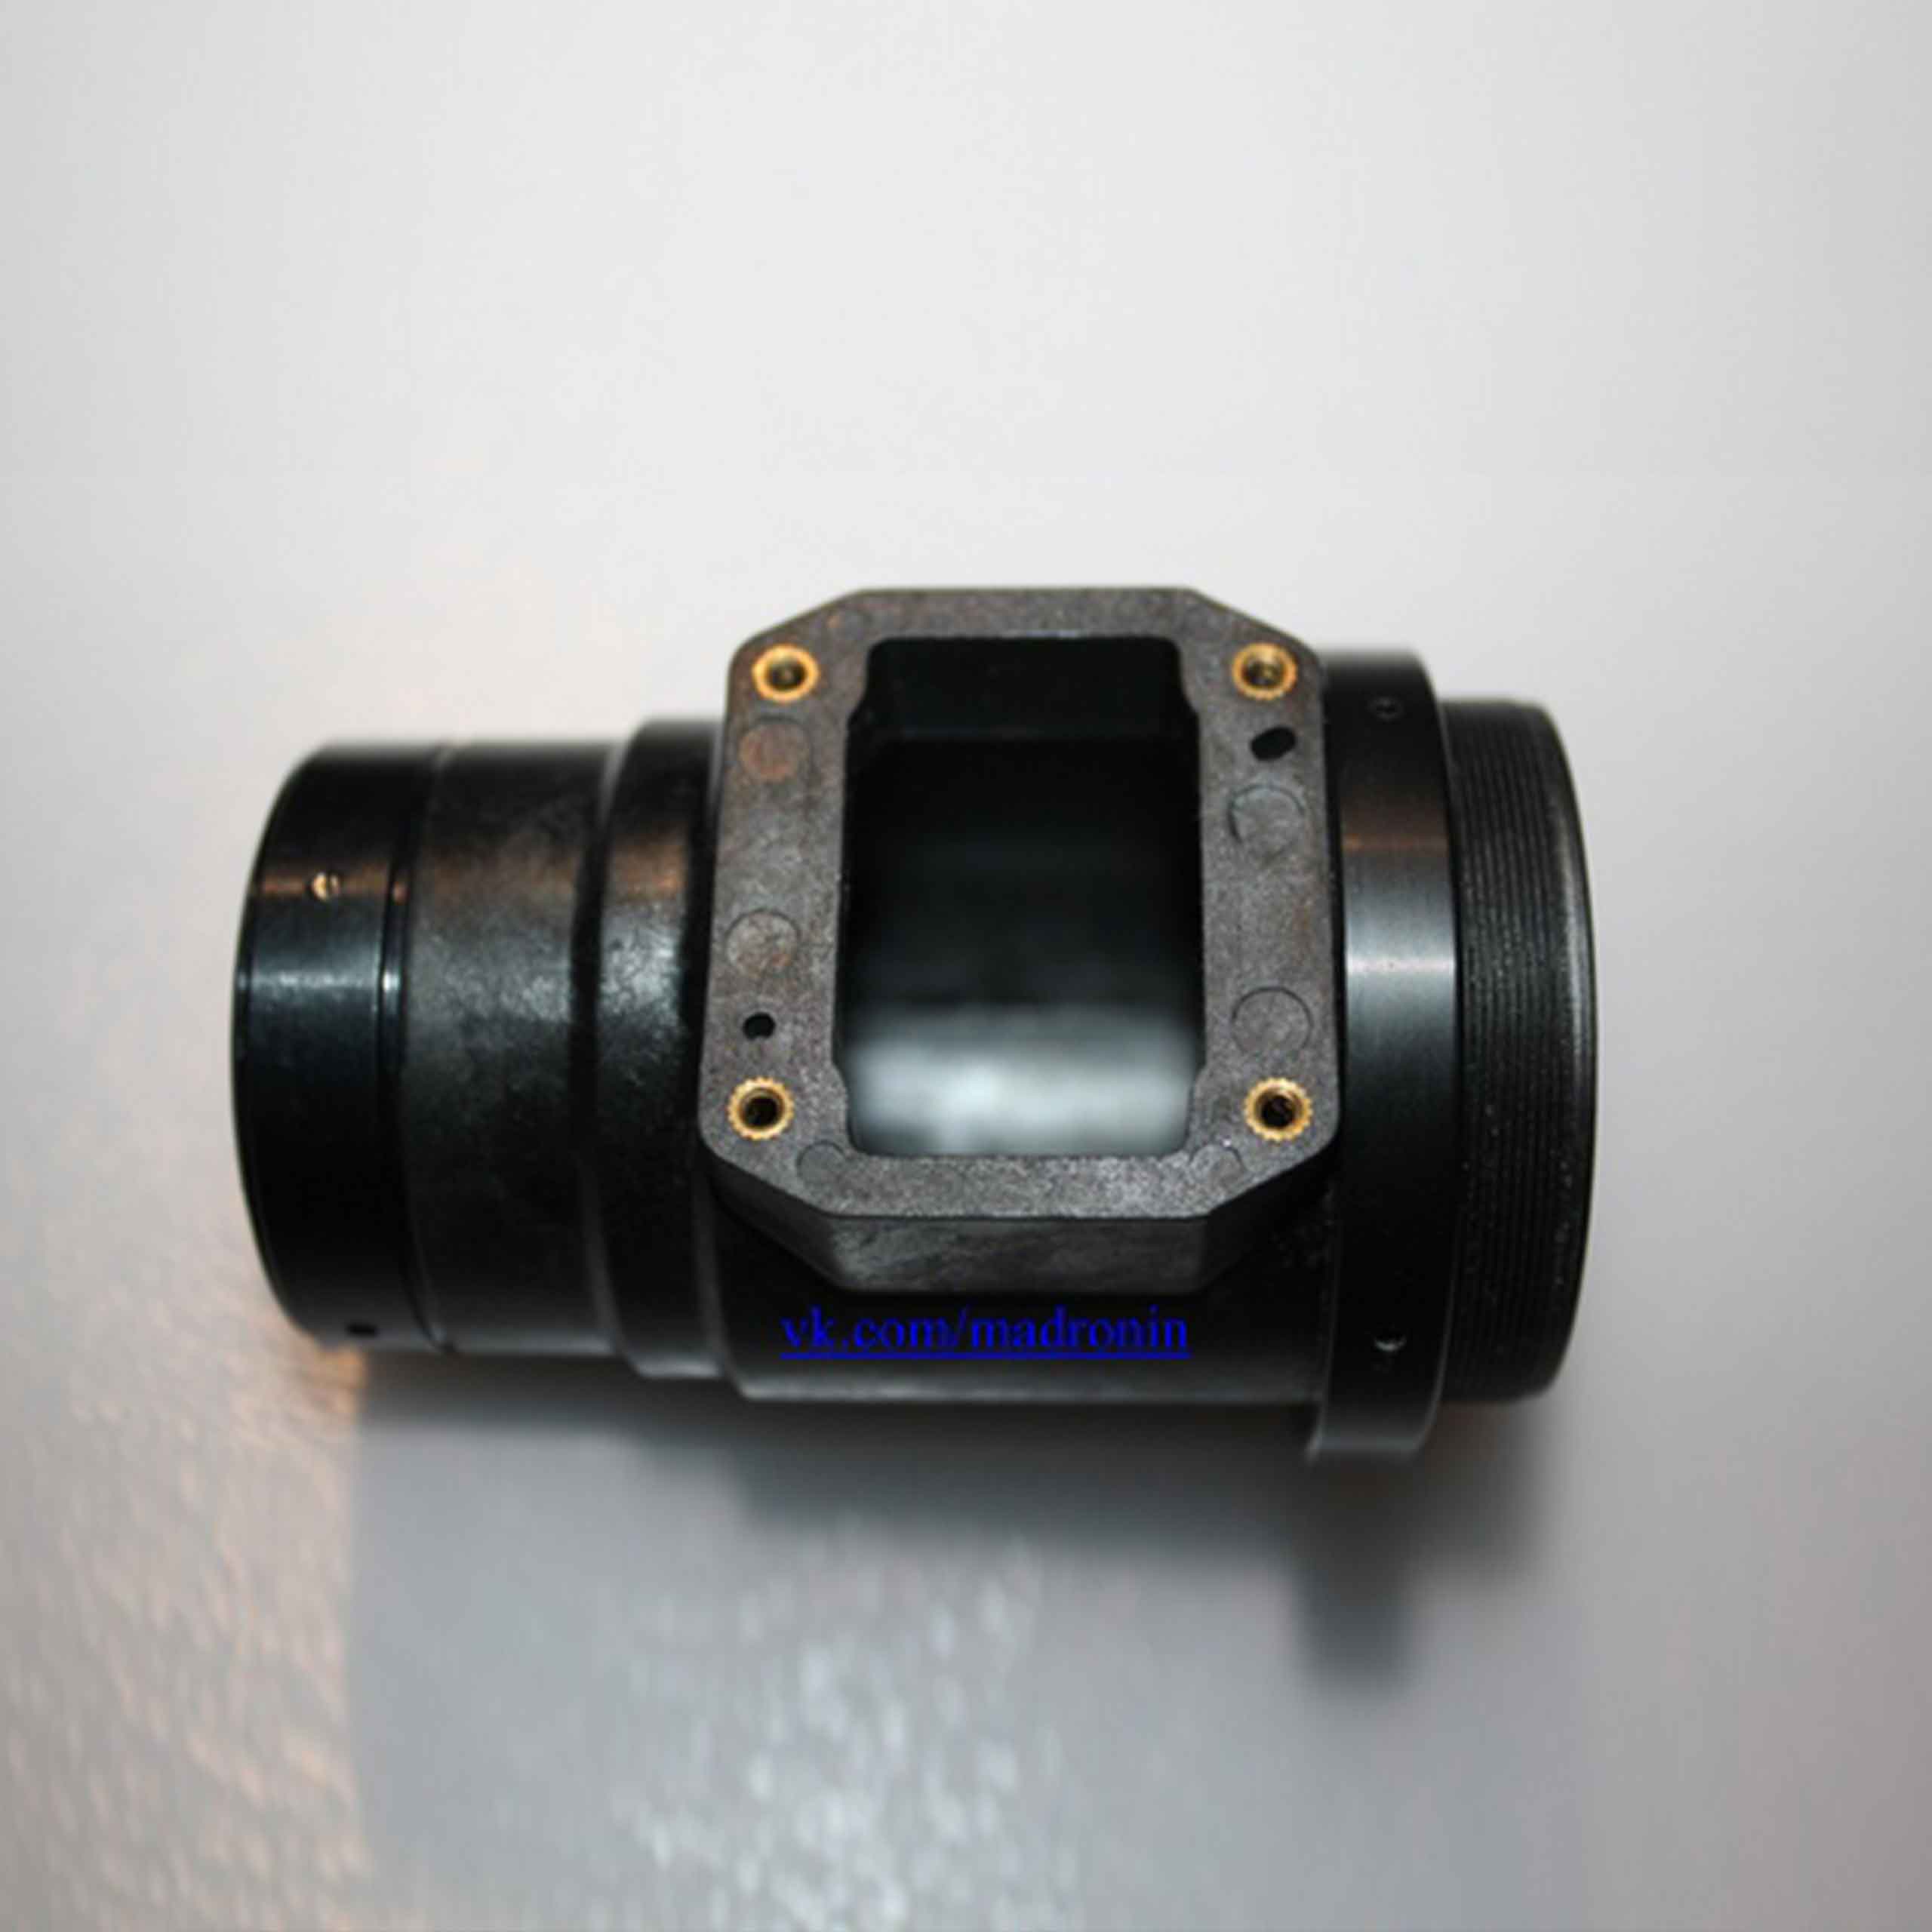
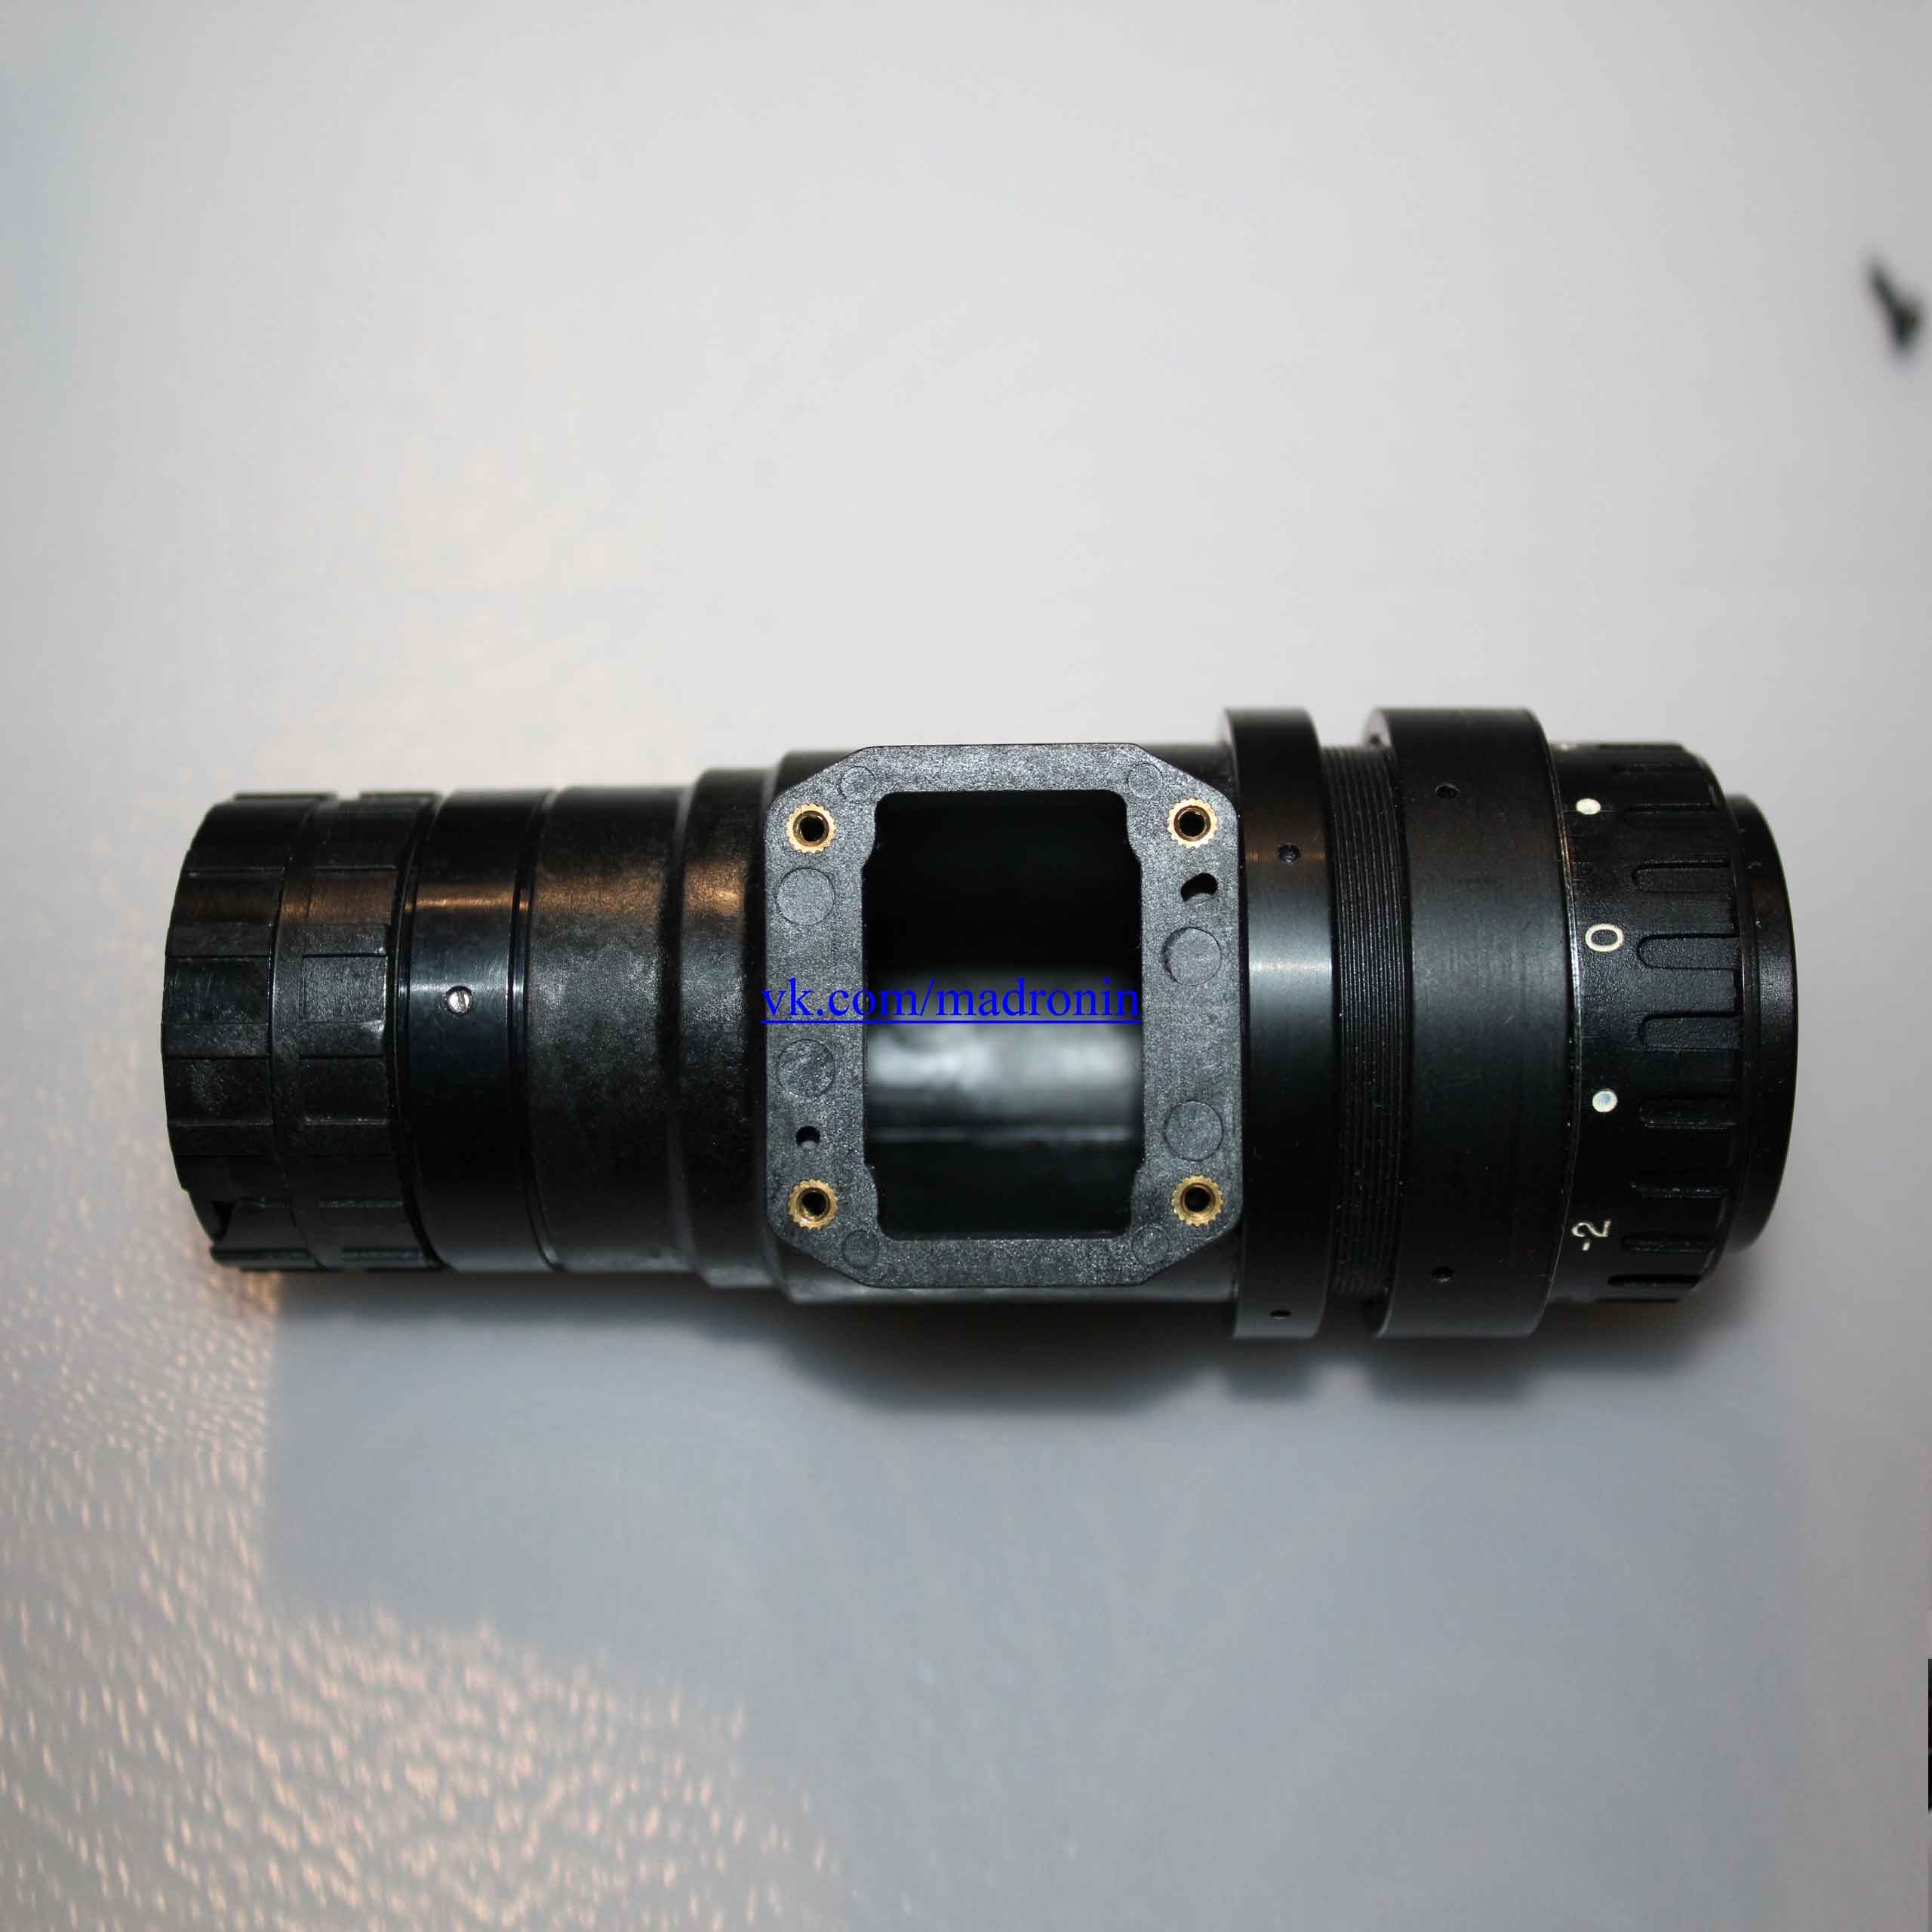
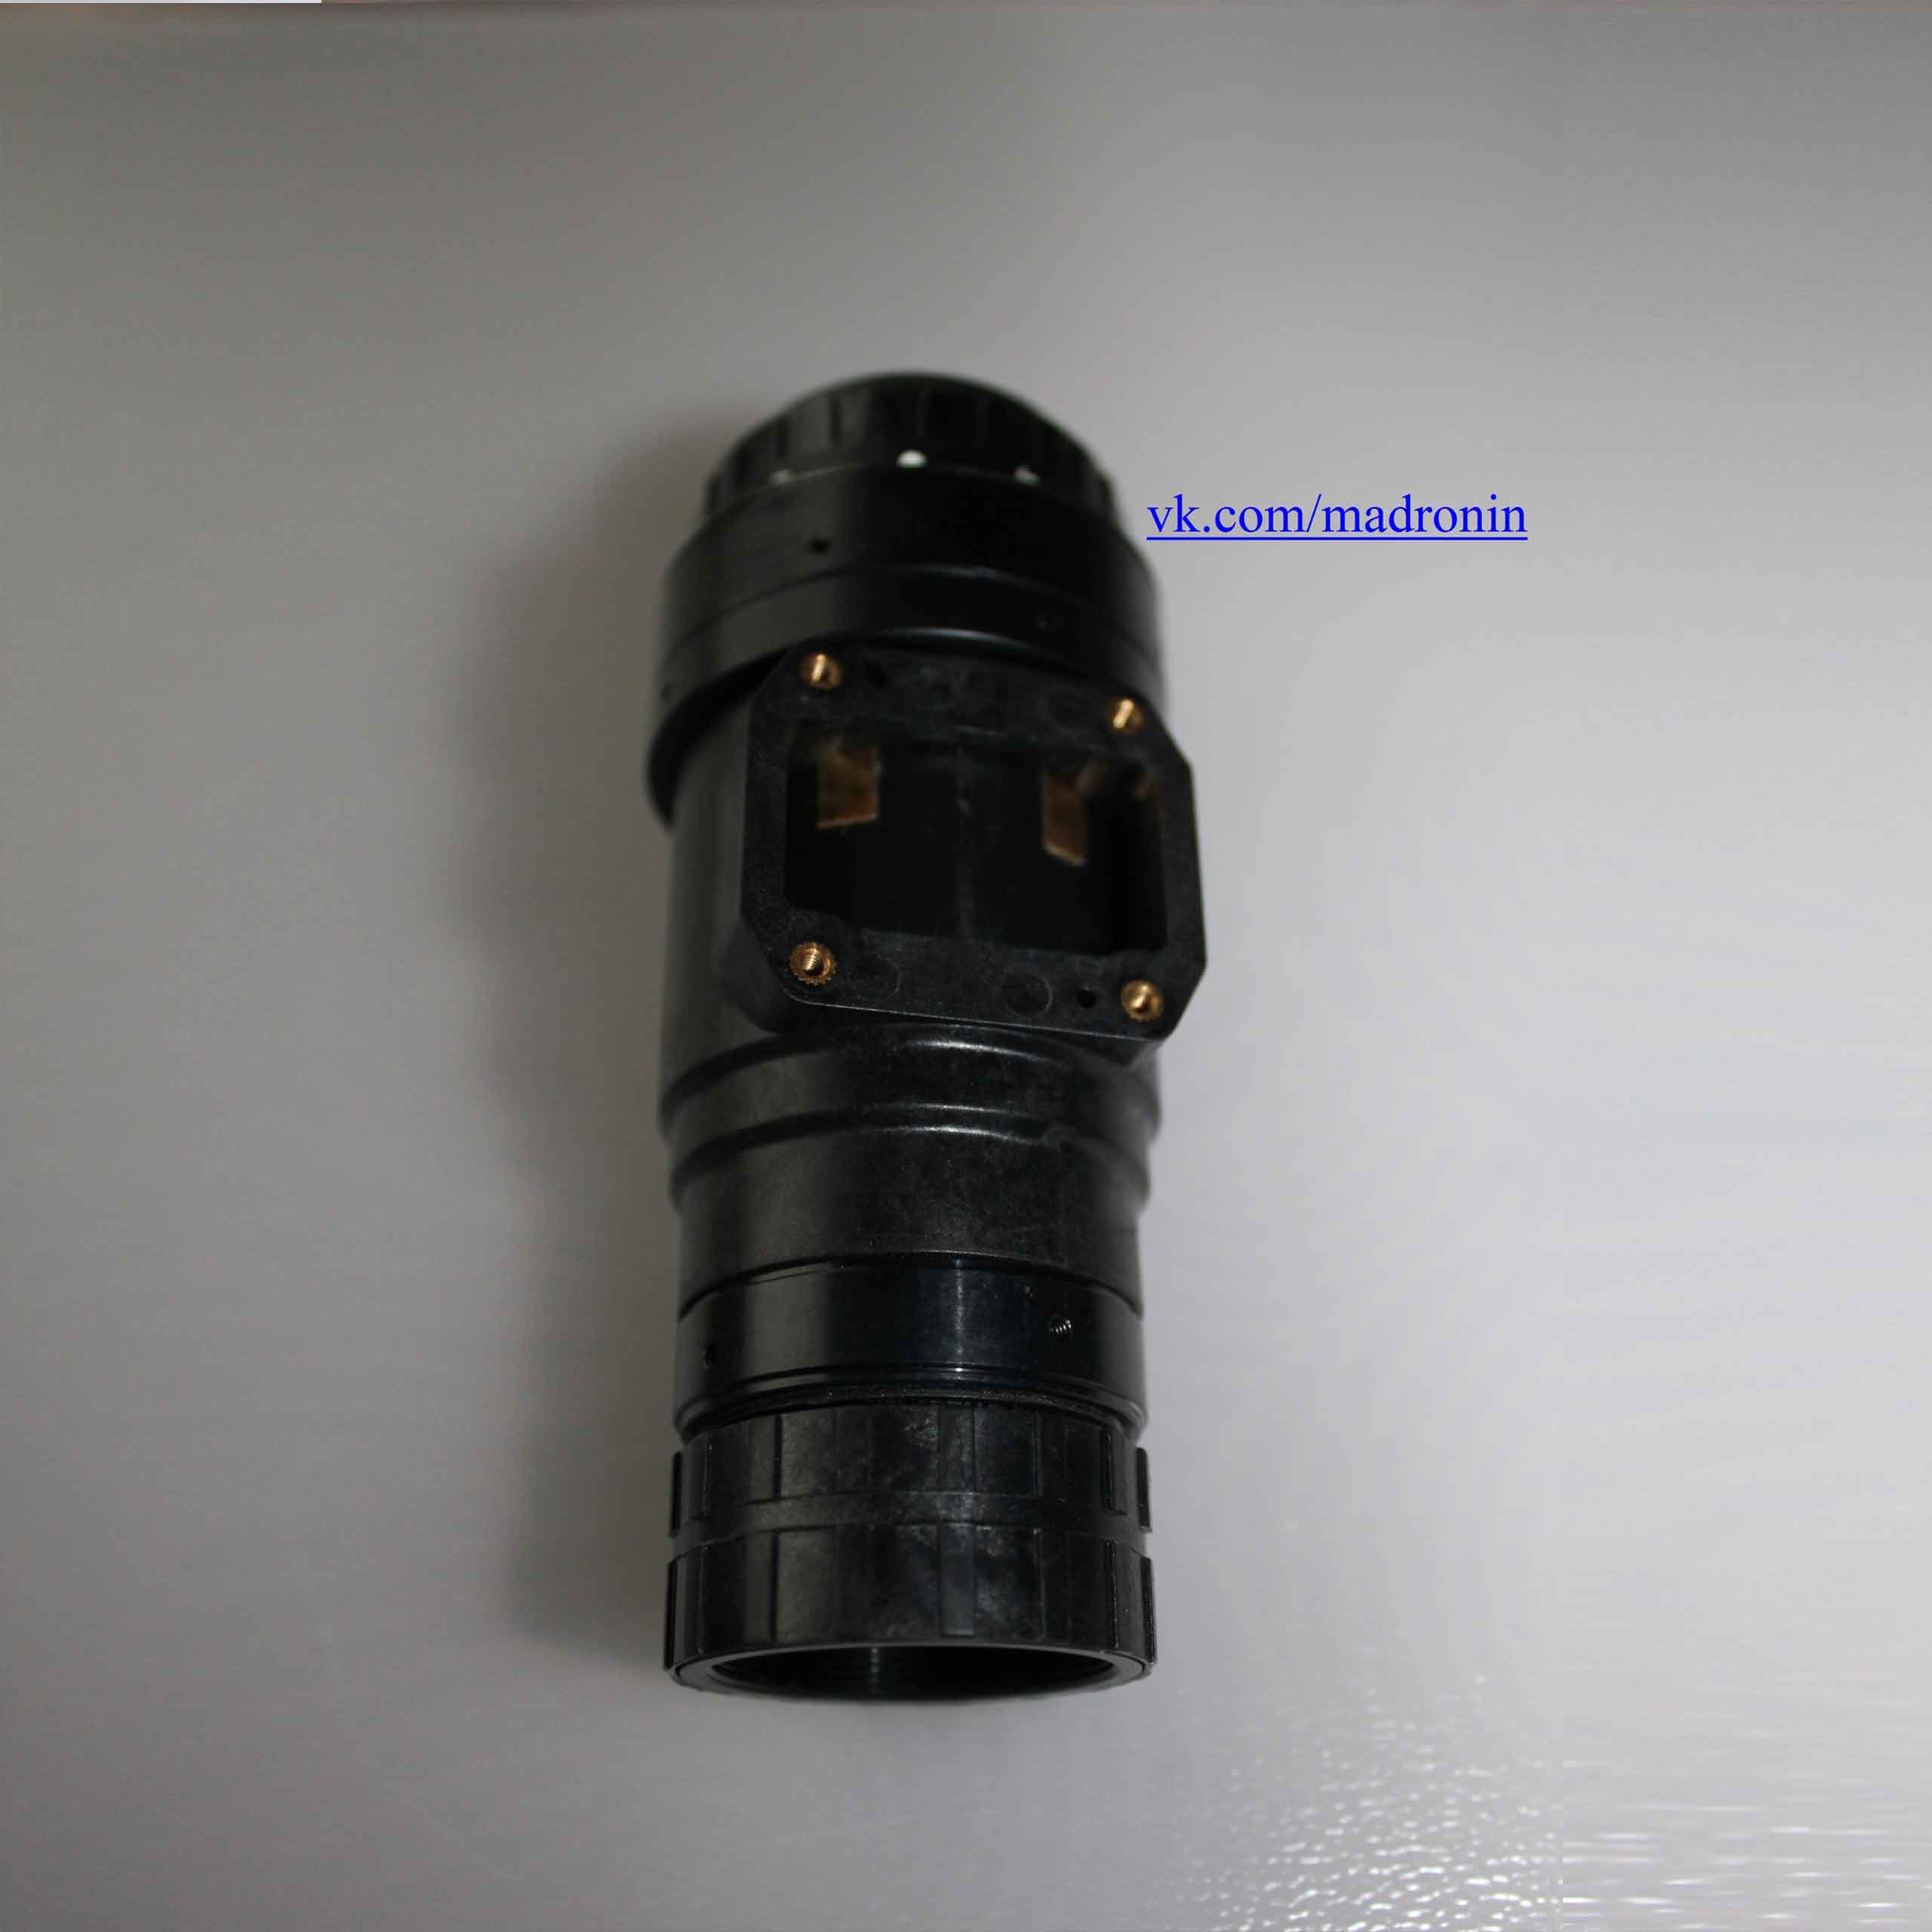
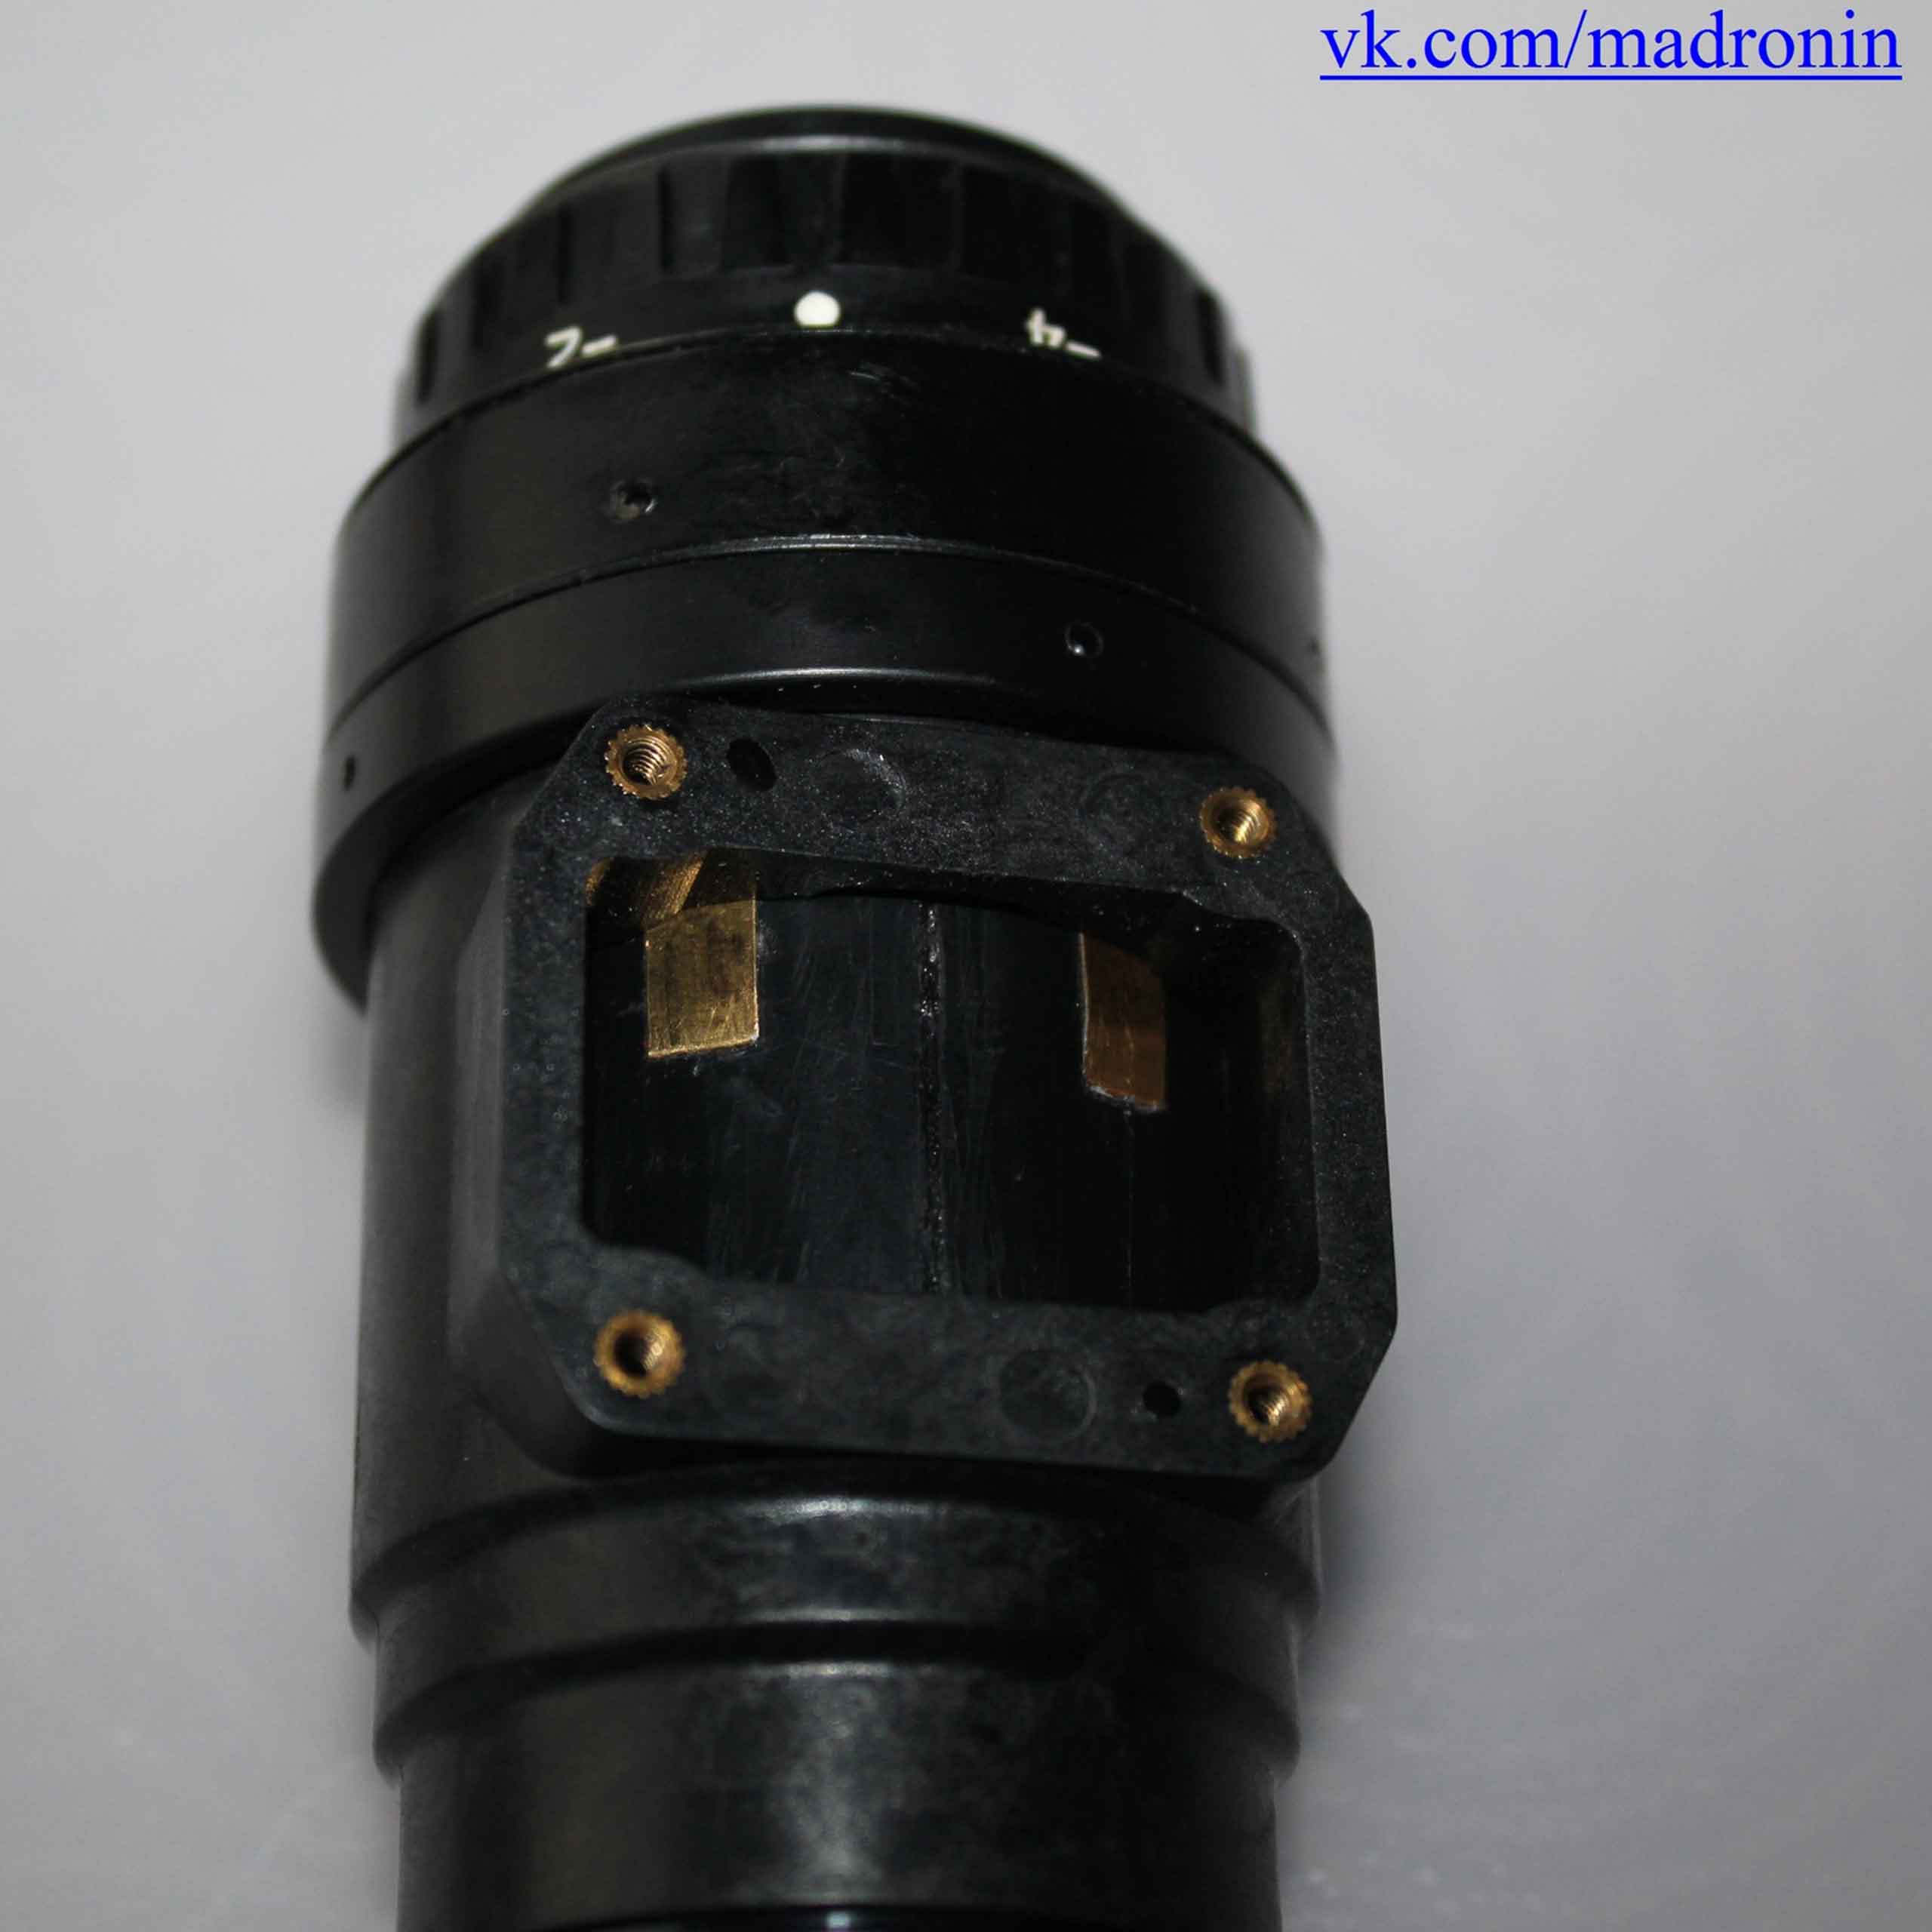
10. Housing. On the counterpart to the bridge part of the house, there are four mortgages with screw threads. There are also two holes for the centering tooth (it is located on the bridge). There is a rubber seal on the bridge. The screws that secure the house to the bridge are very soft: they need to be screwed in very carefully.
 |
 |
 |
 |
 |
 |
Next we will measure, compare and weigh.
Since God has not yet submitted the original PVS-31, we will compare it with what it is: with ANVIS 6/9. PVS-31/14 is very close to ANVIS.
 |
 |
 |
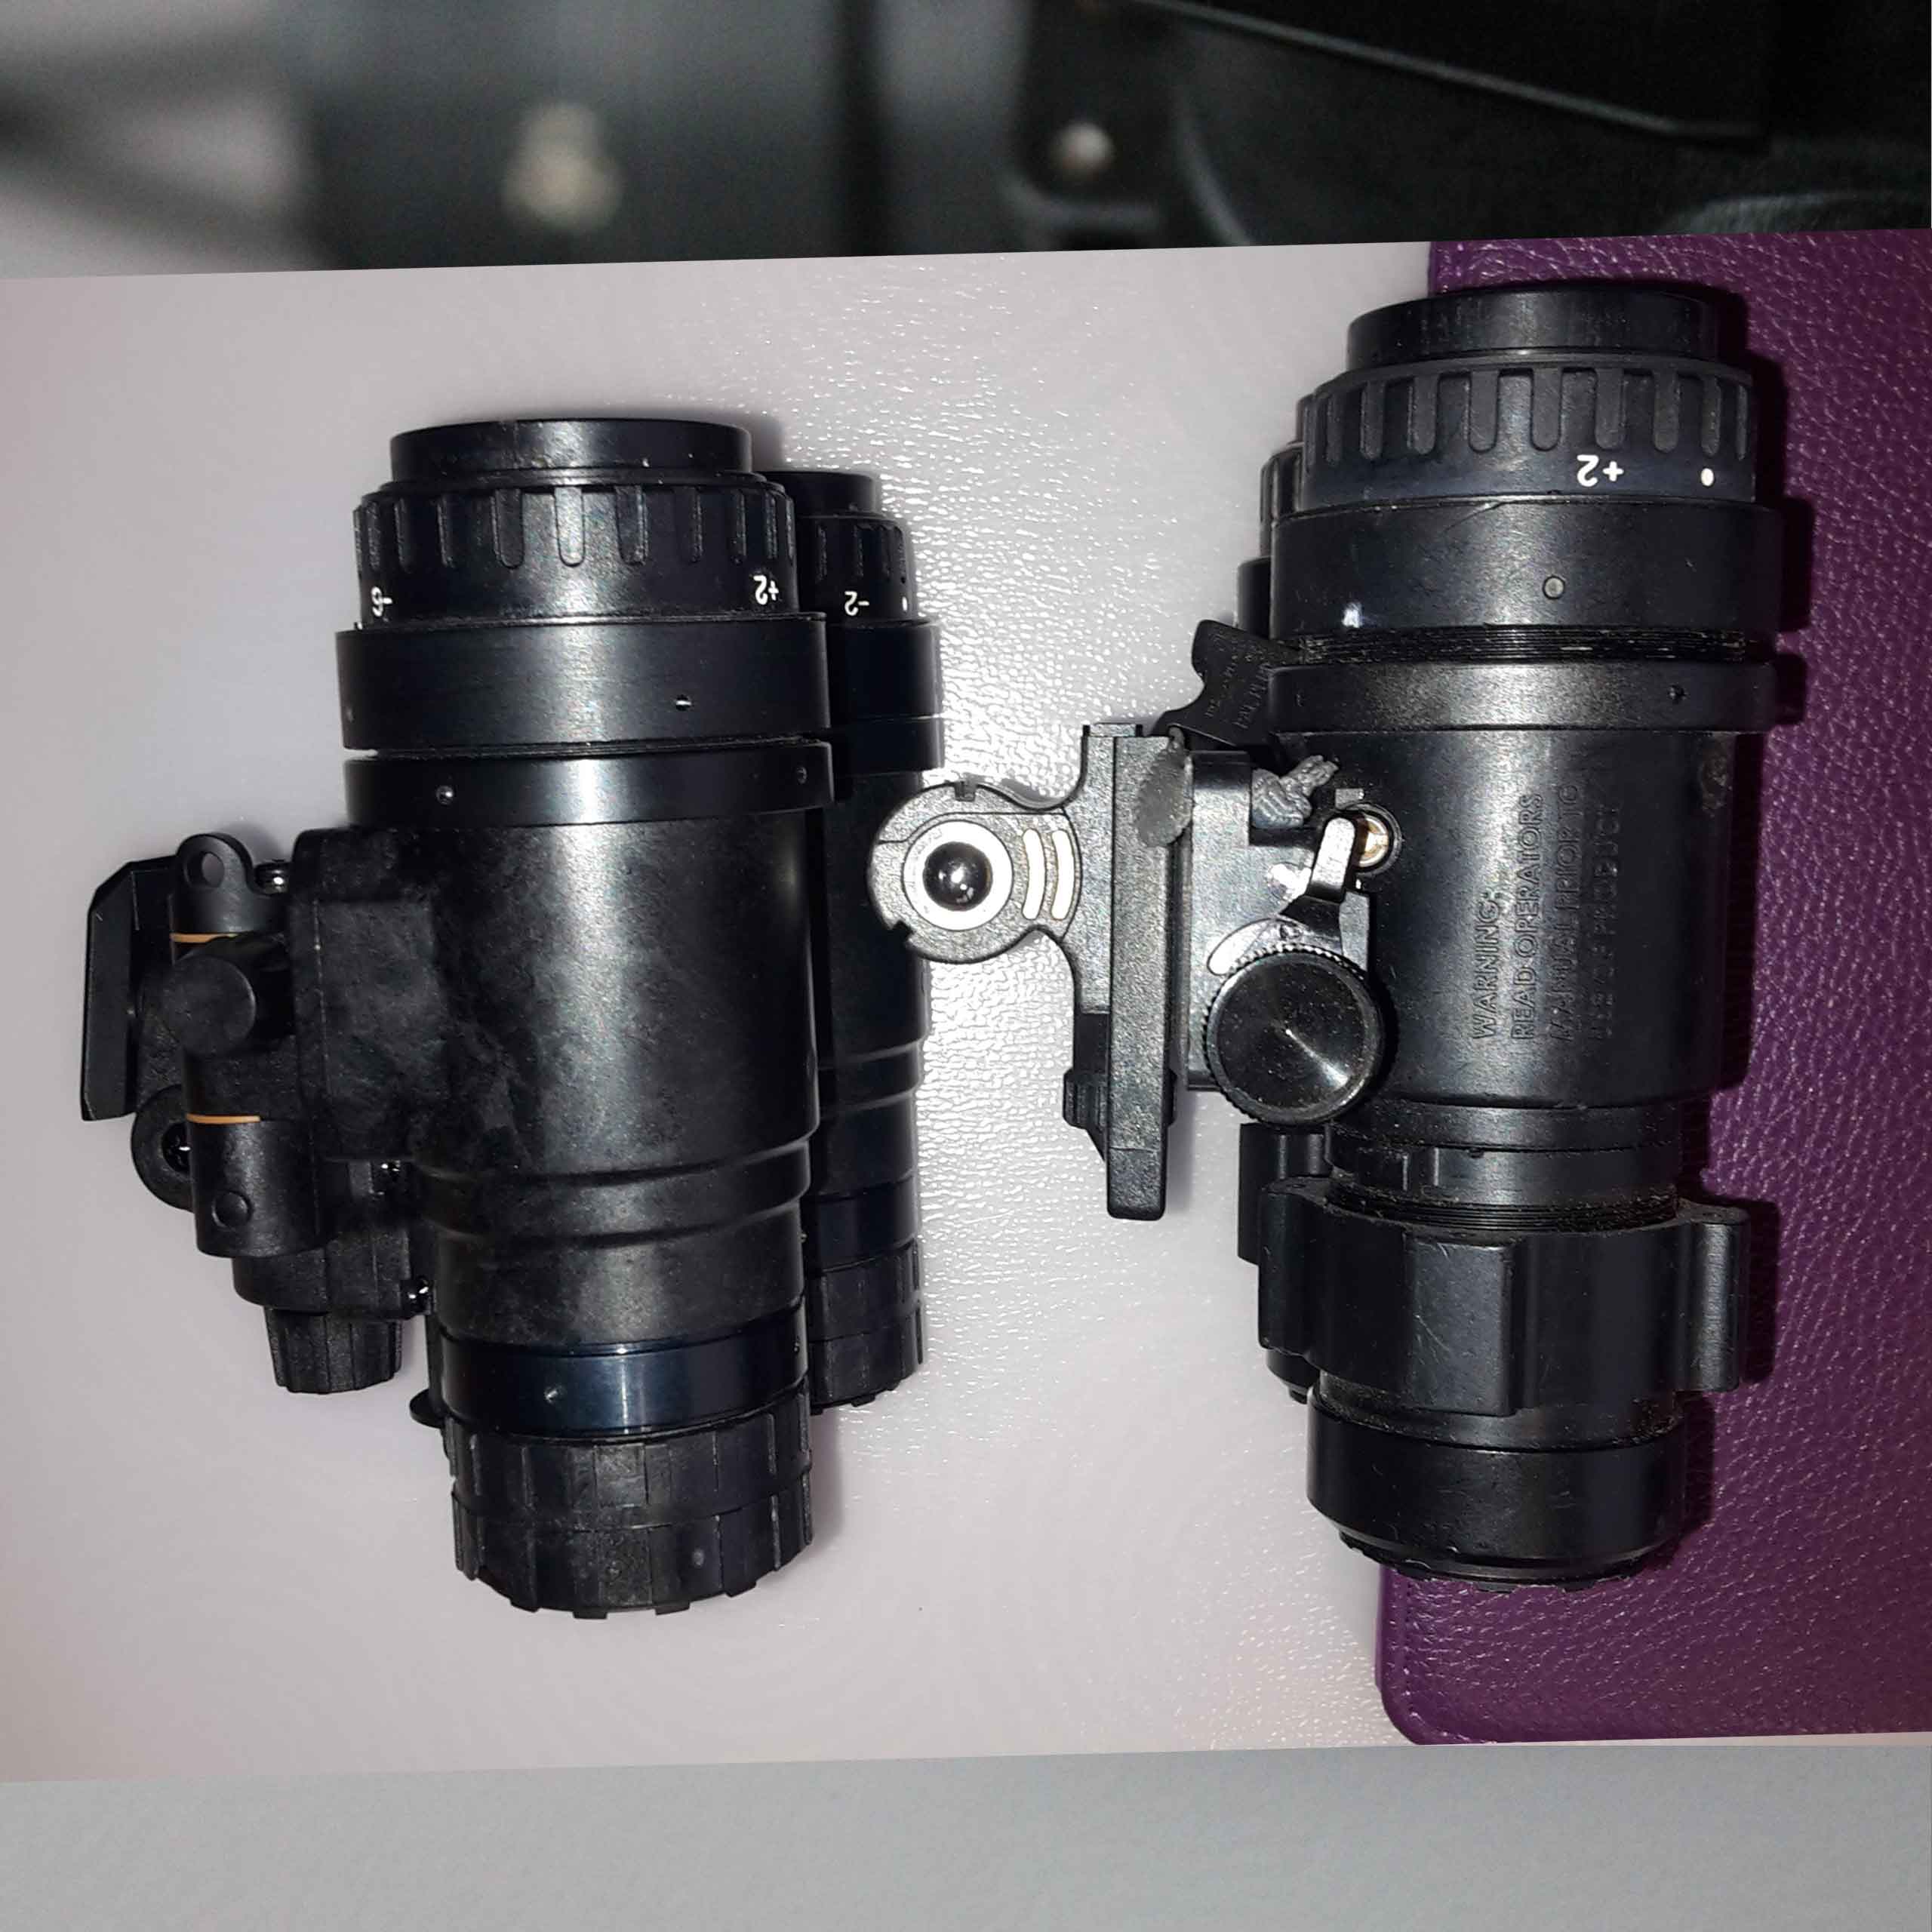 |
PVS-31-14 left, ANVIS right
By weight, our sample loses both to the original (the weight of the original is about 460 grams - 0.99 Lbs), and ANVIS (weight 522 grams). The weight of the complete device with a battery (AA lithium battery) is 576 grams, which is 120 grams higher than the original and 54 grams higher than ANVISa. ANVIS has a lighter bridge, the differences in the weight of the front lenses are not significant.
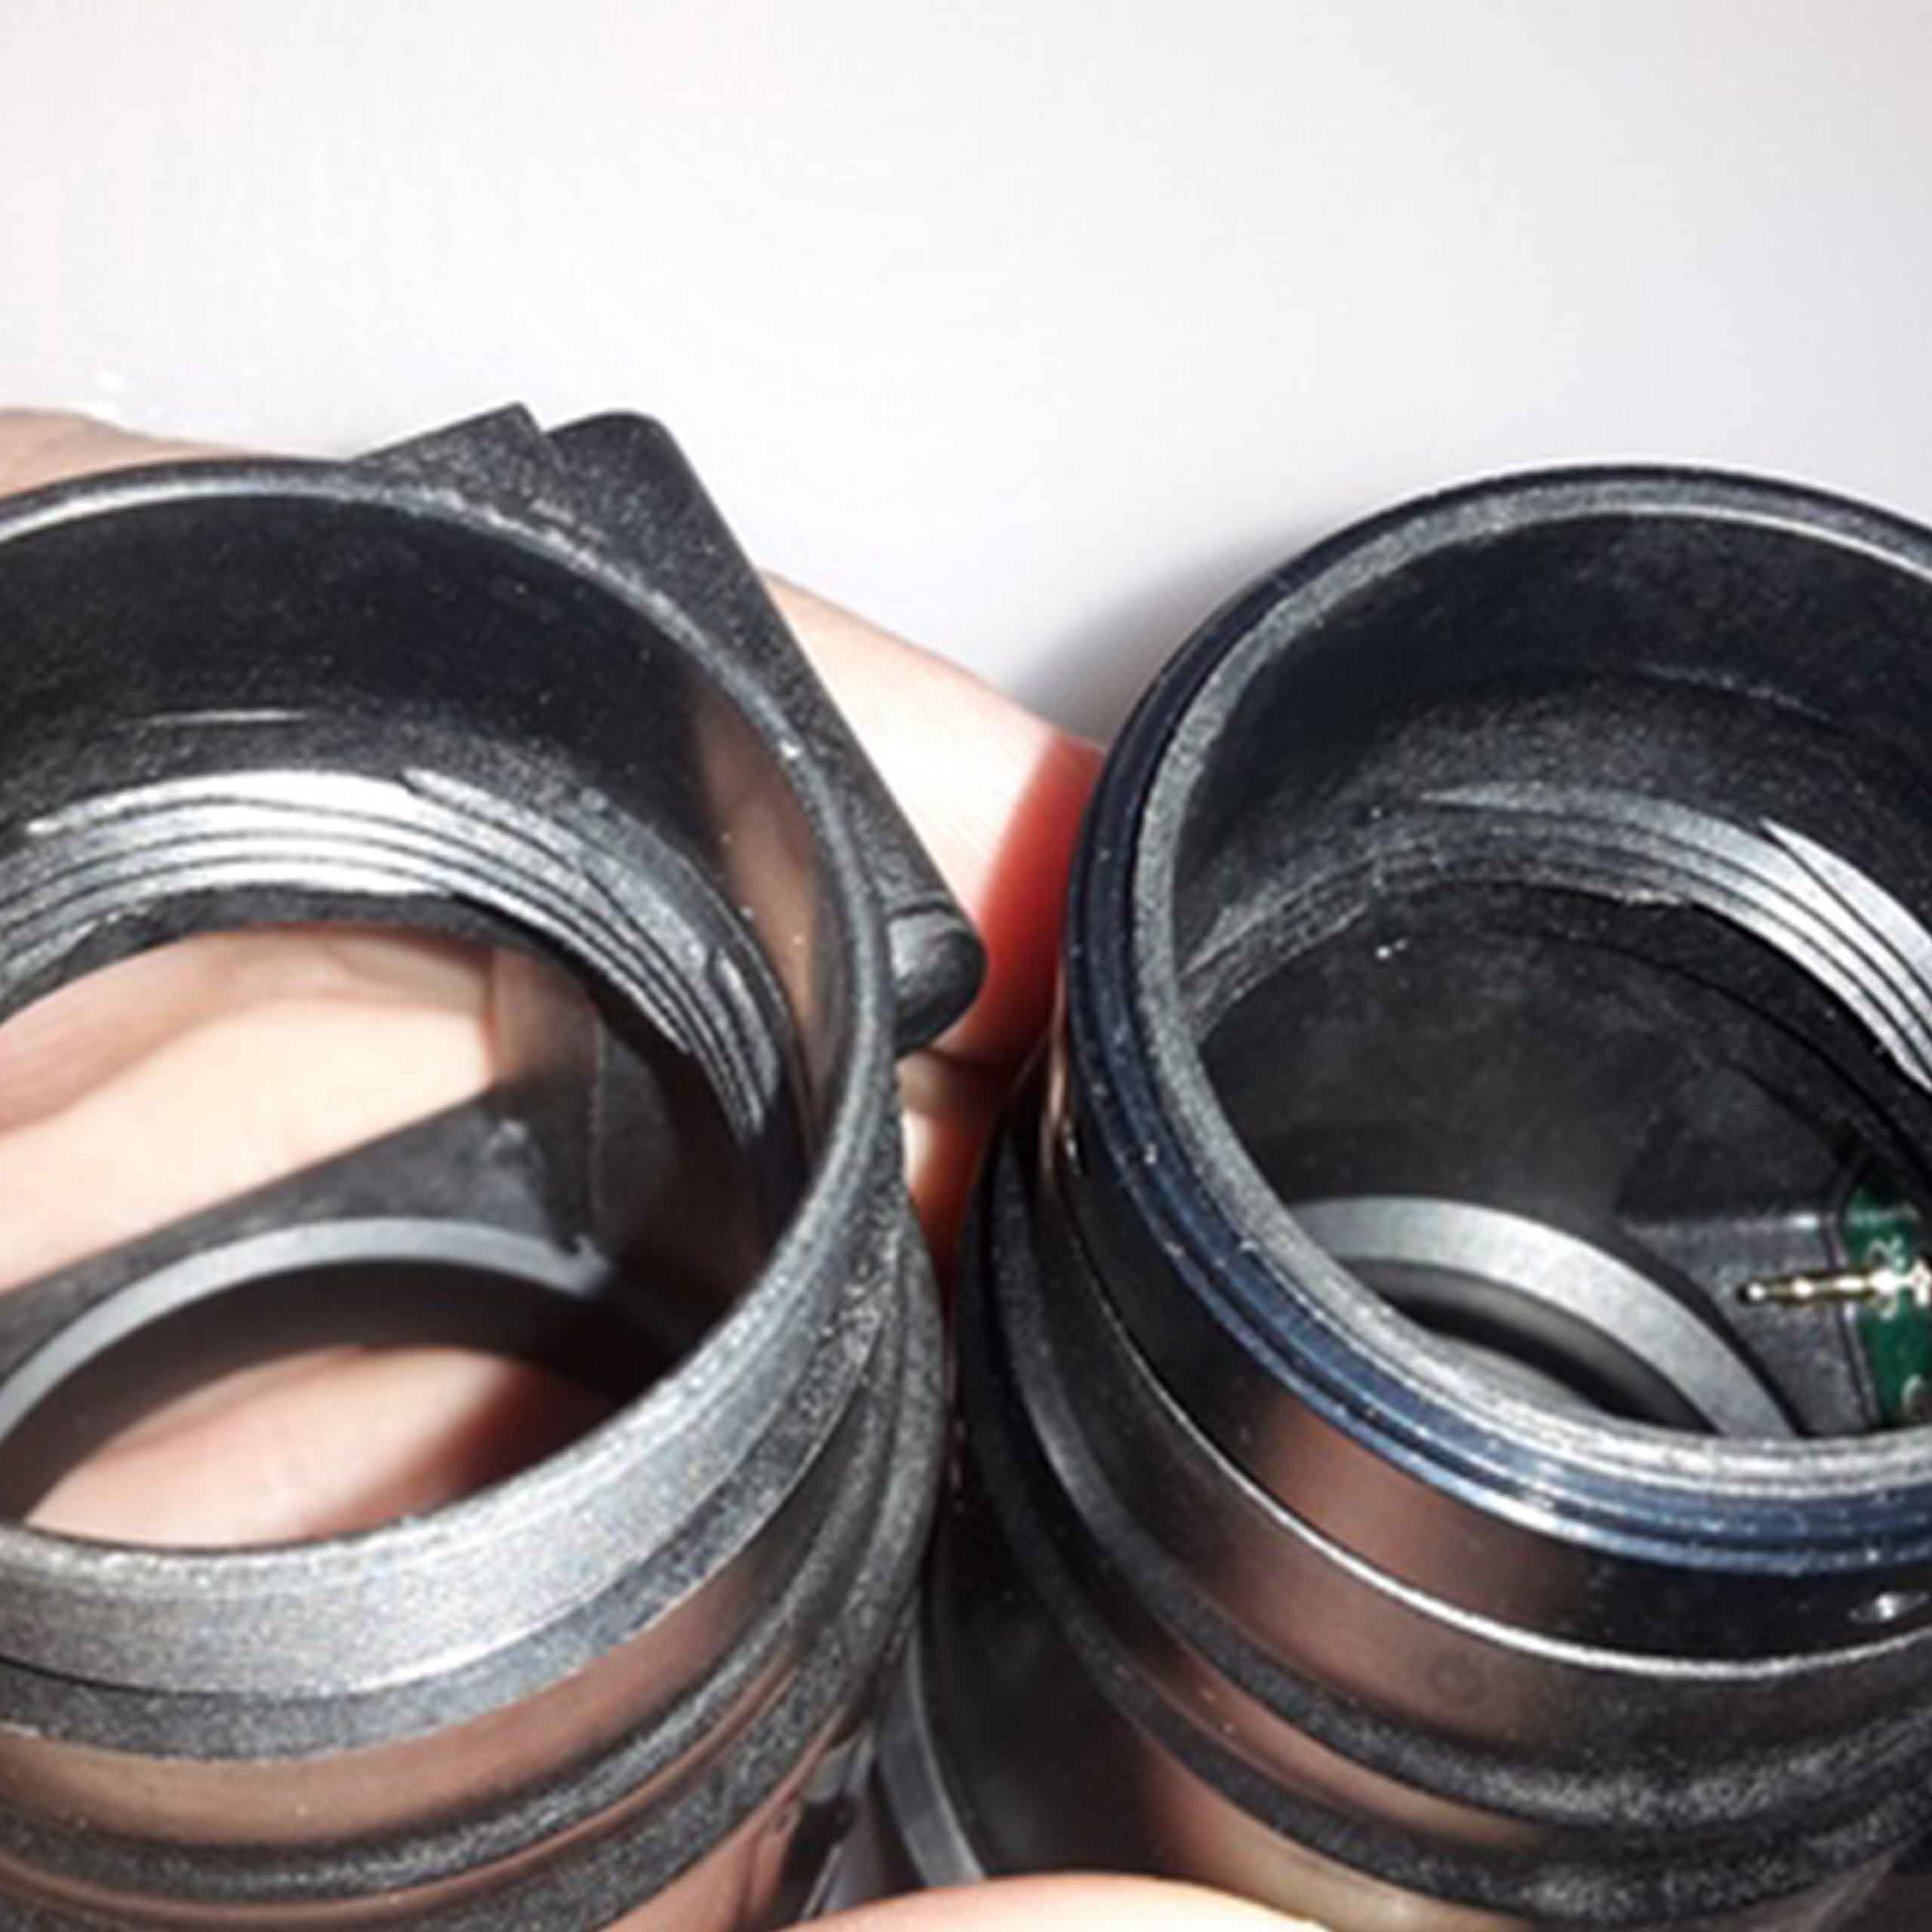
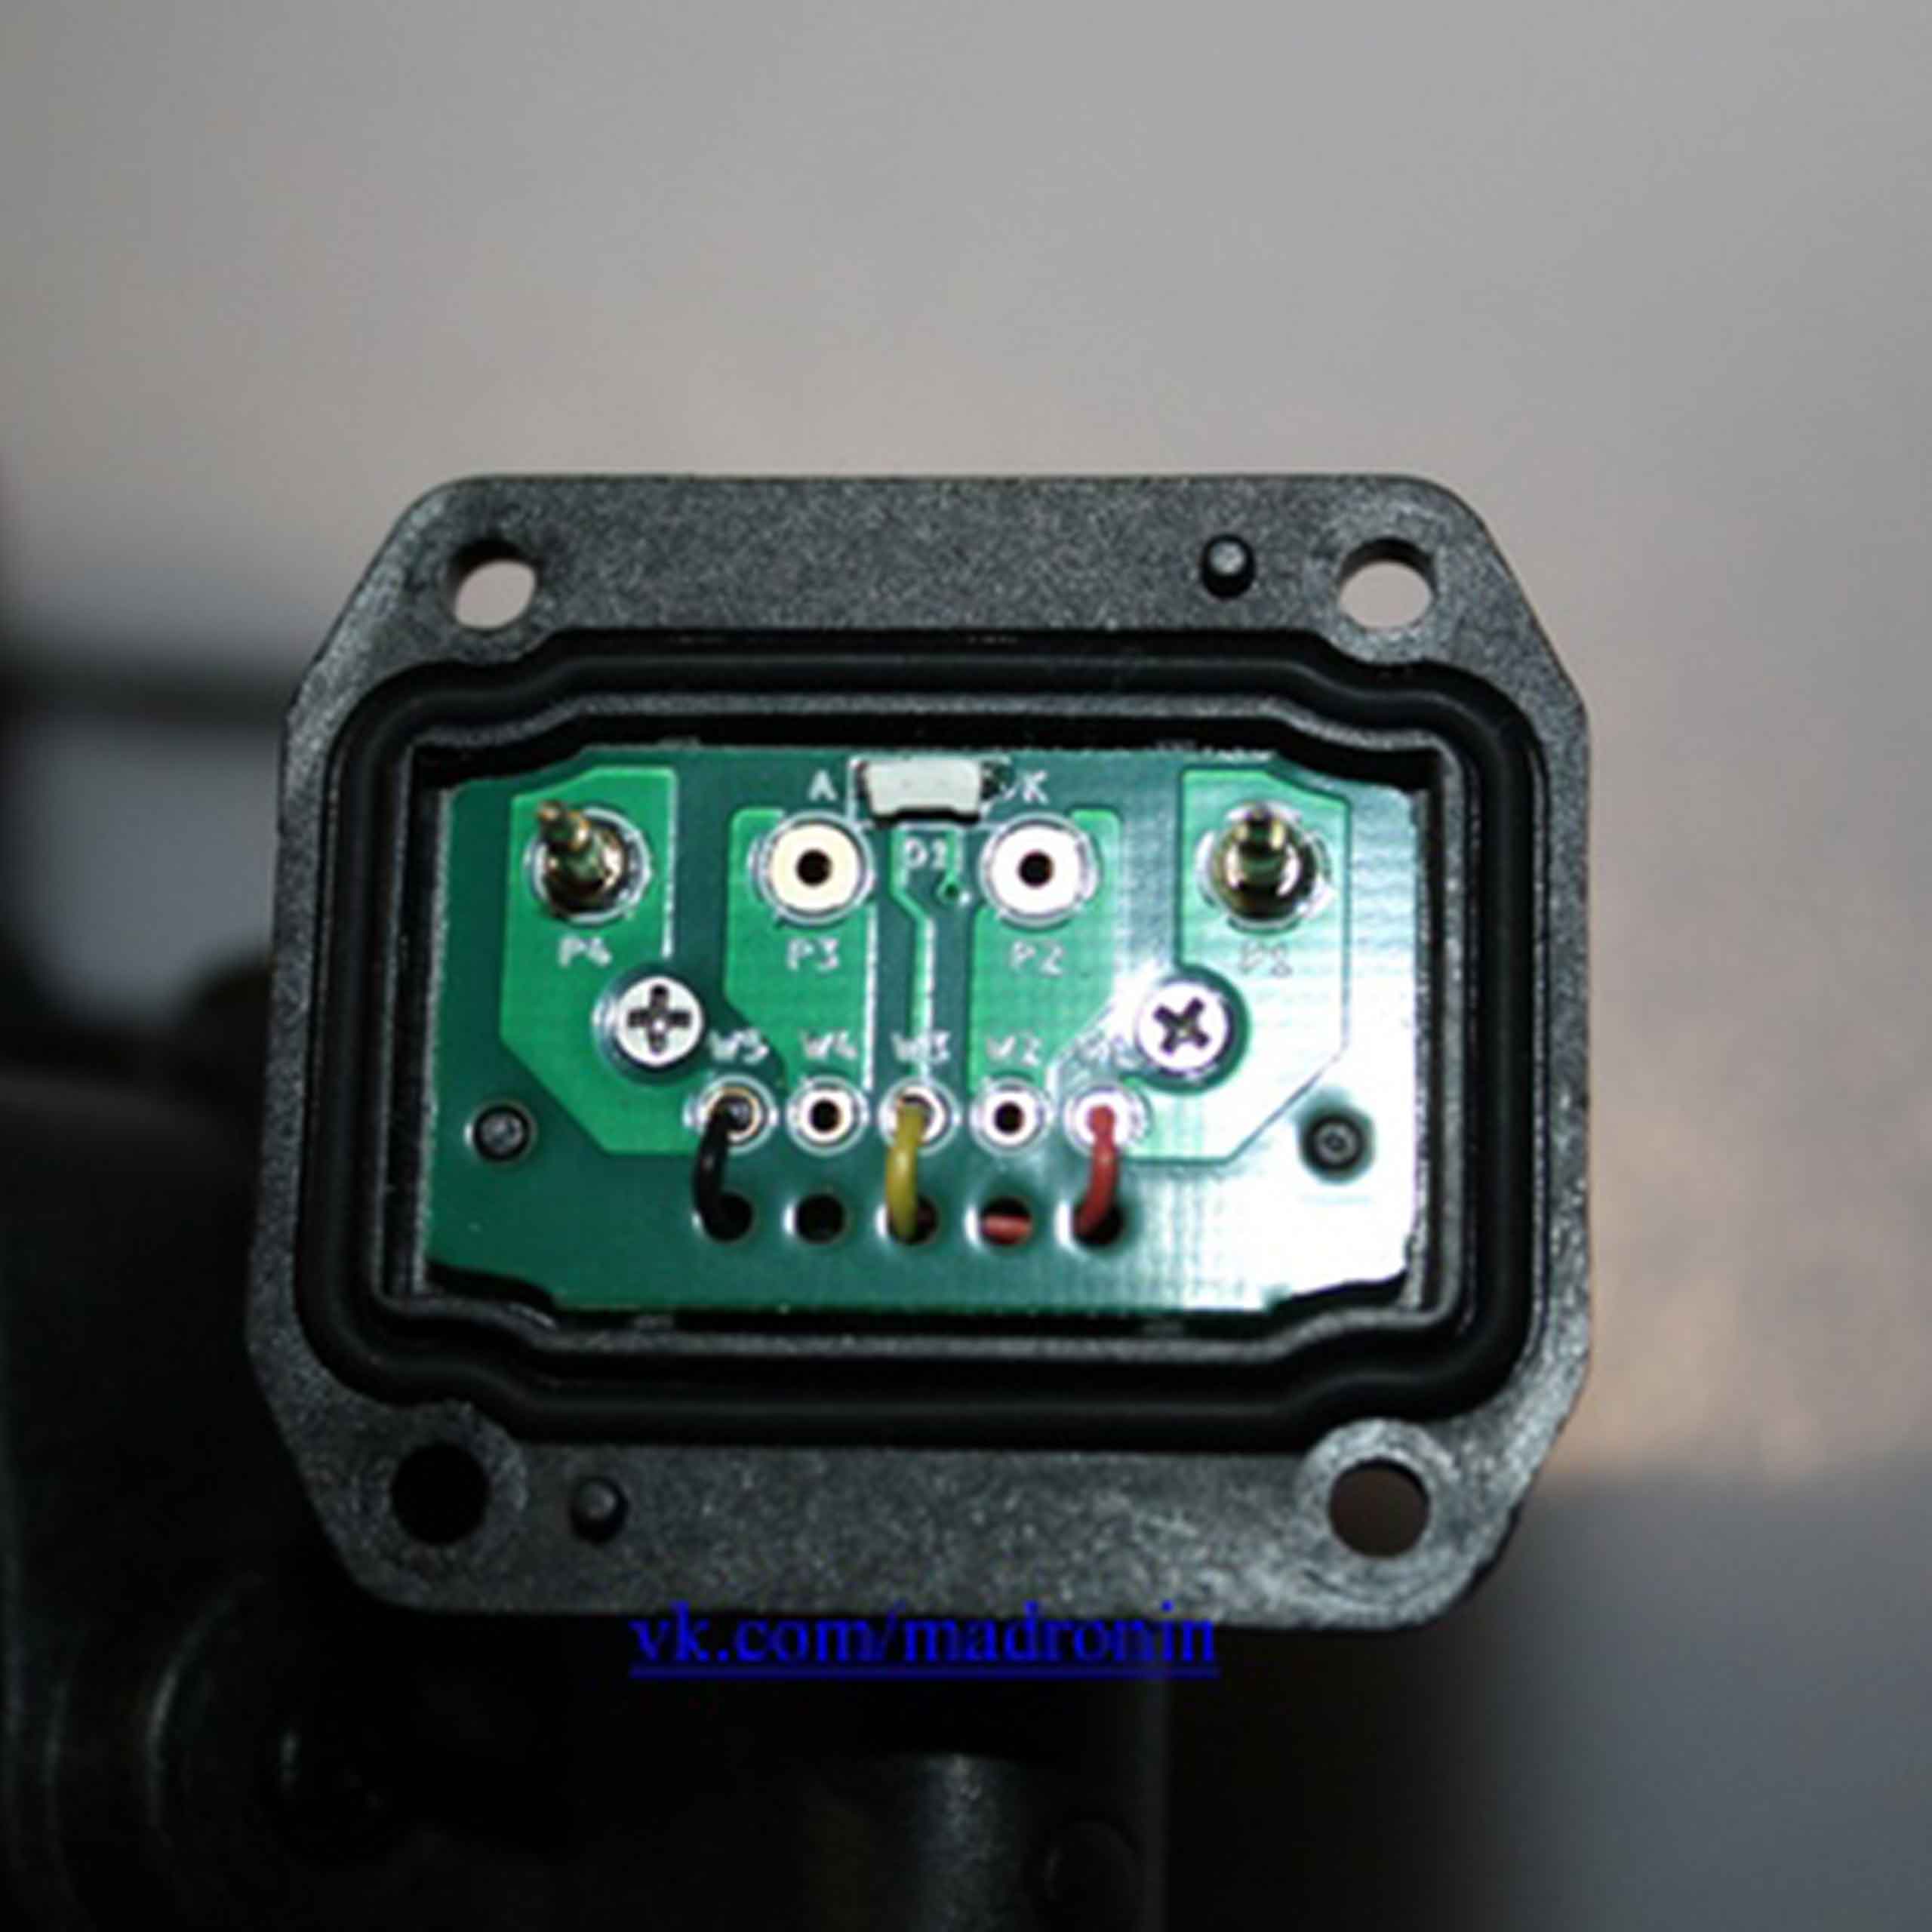
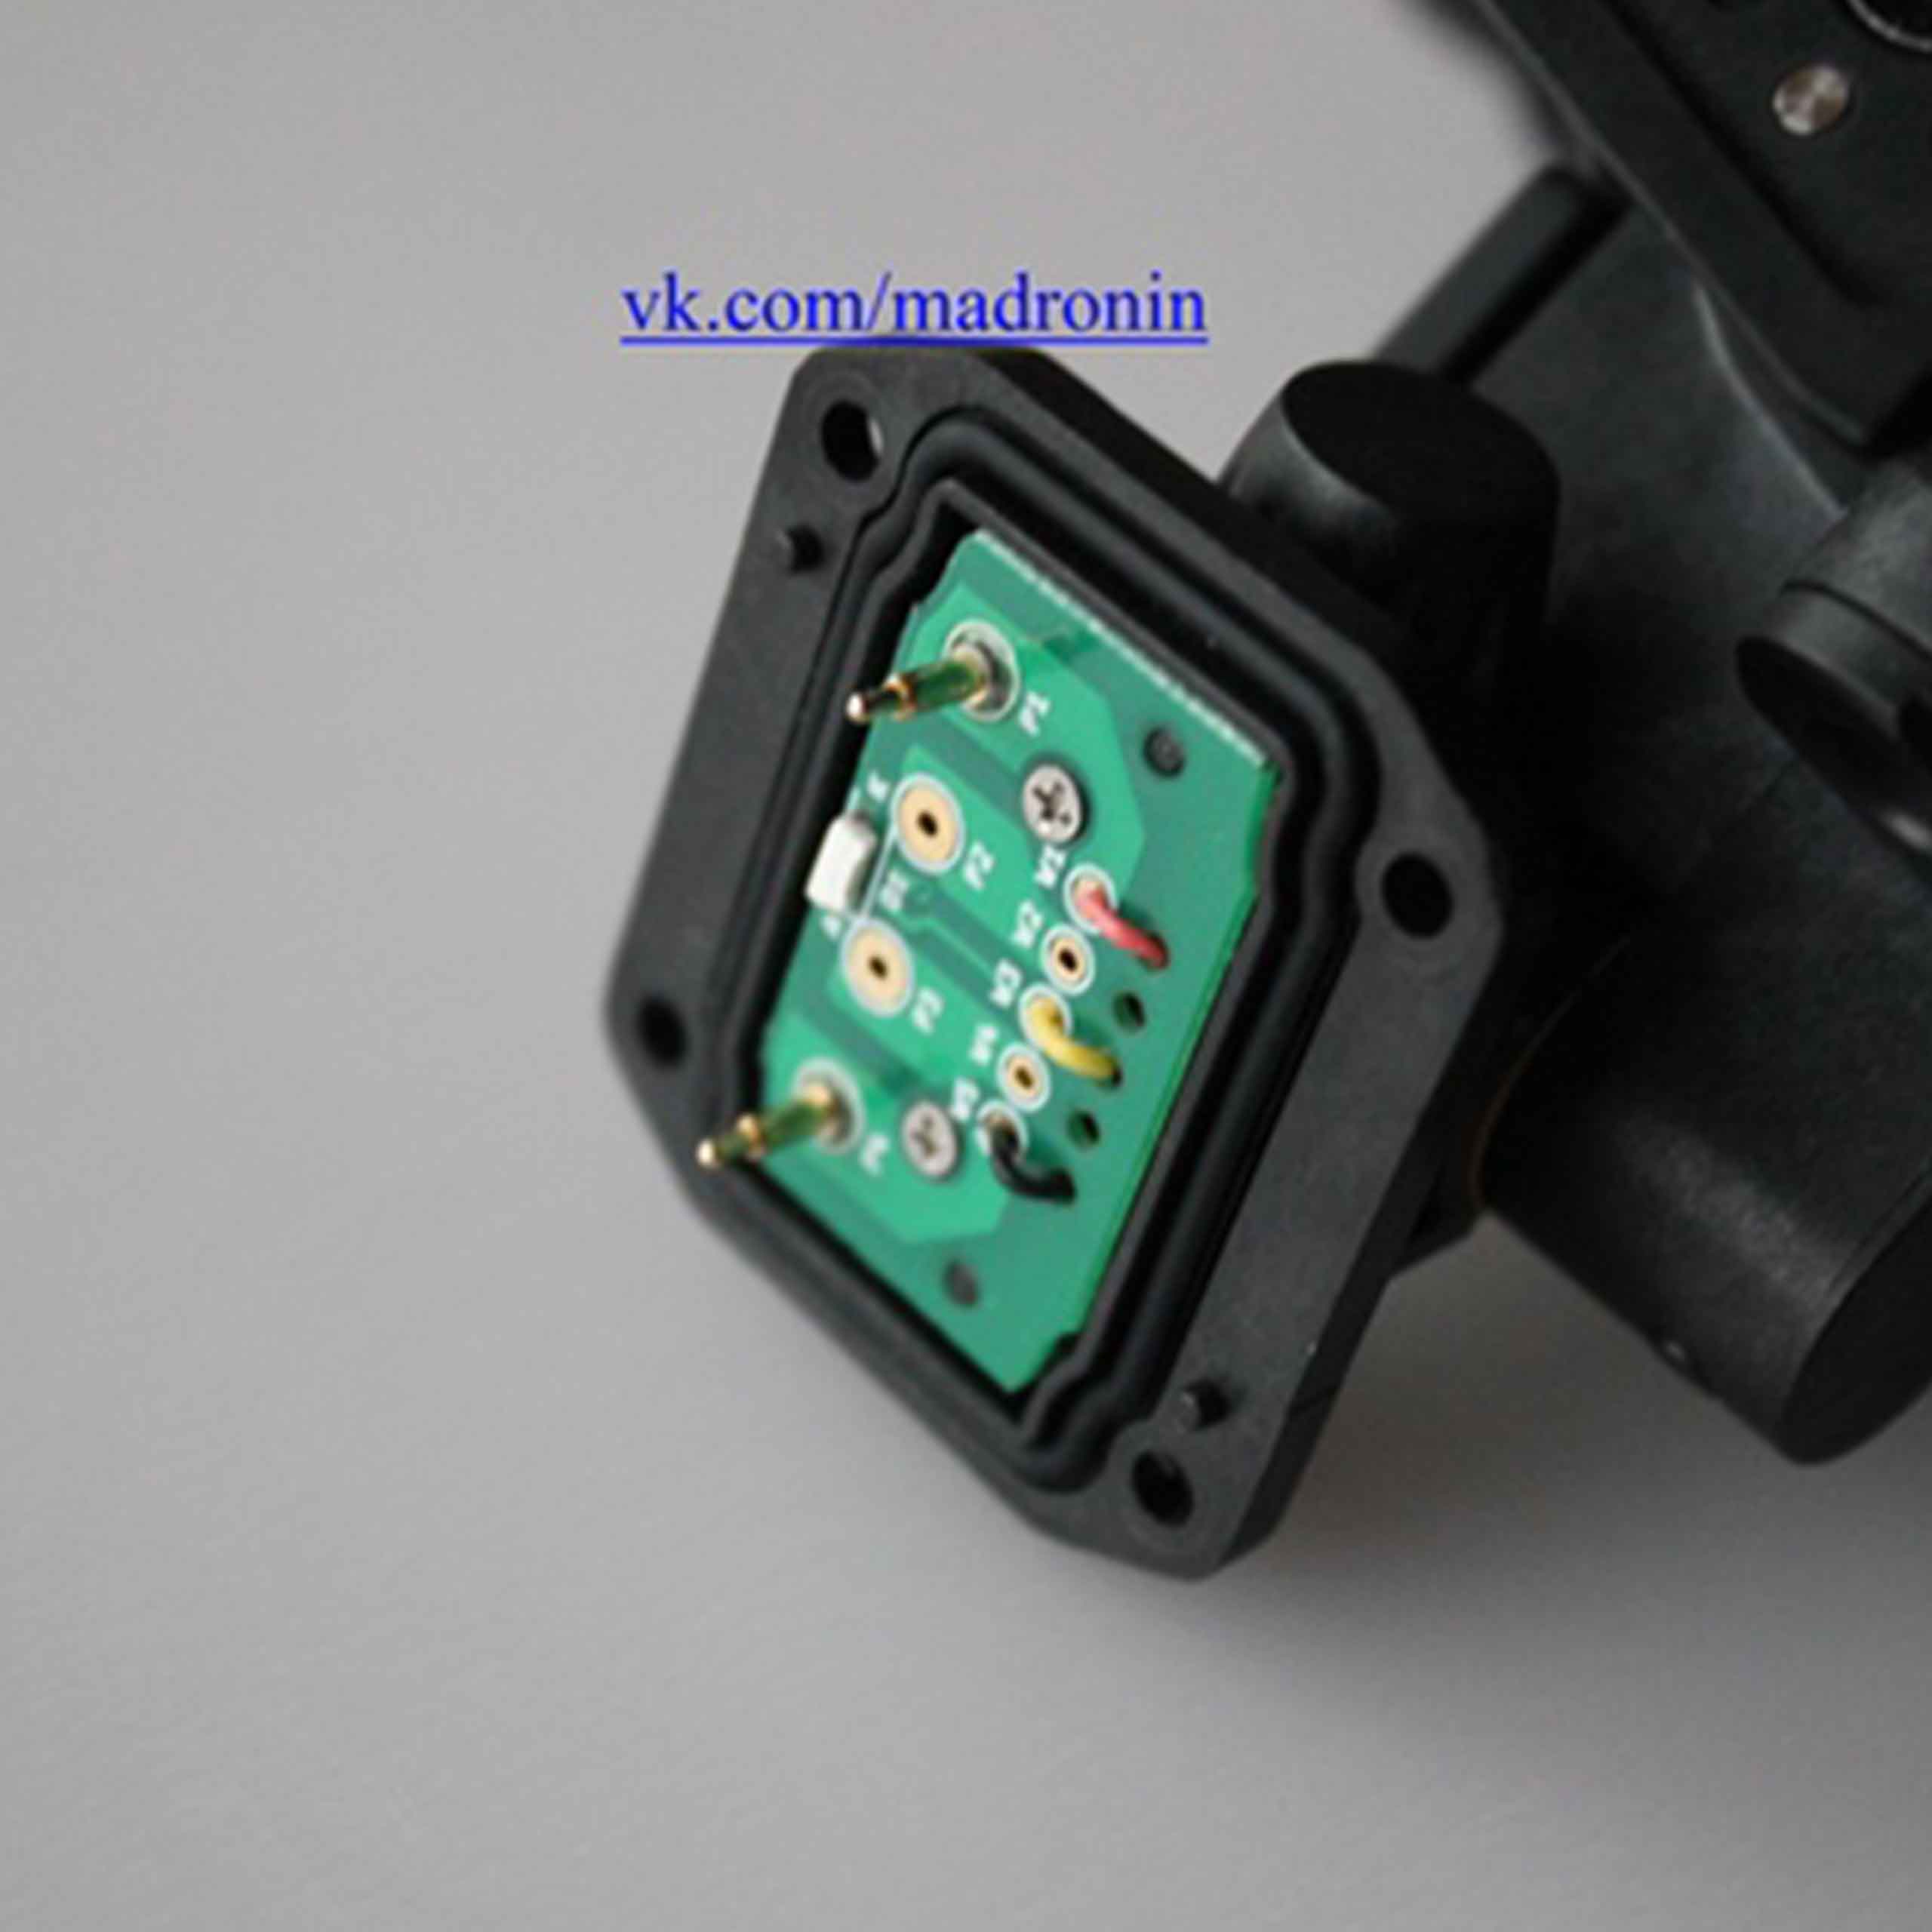
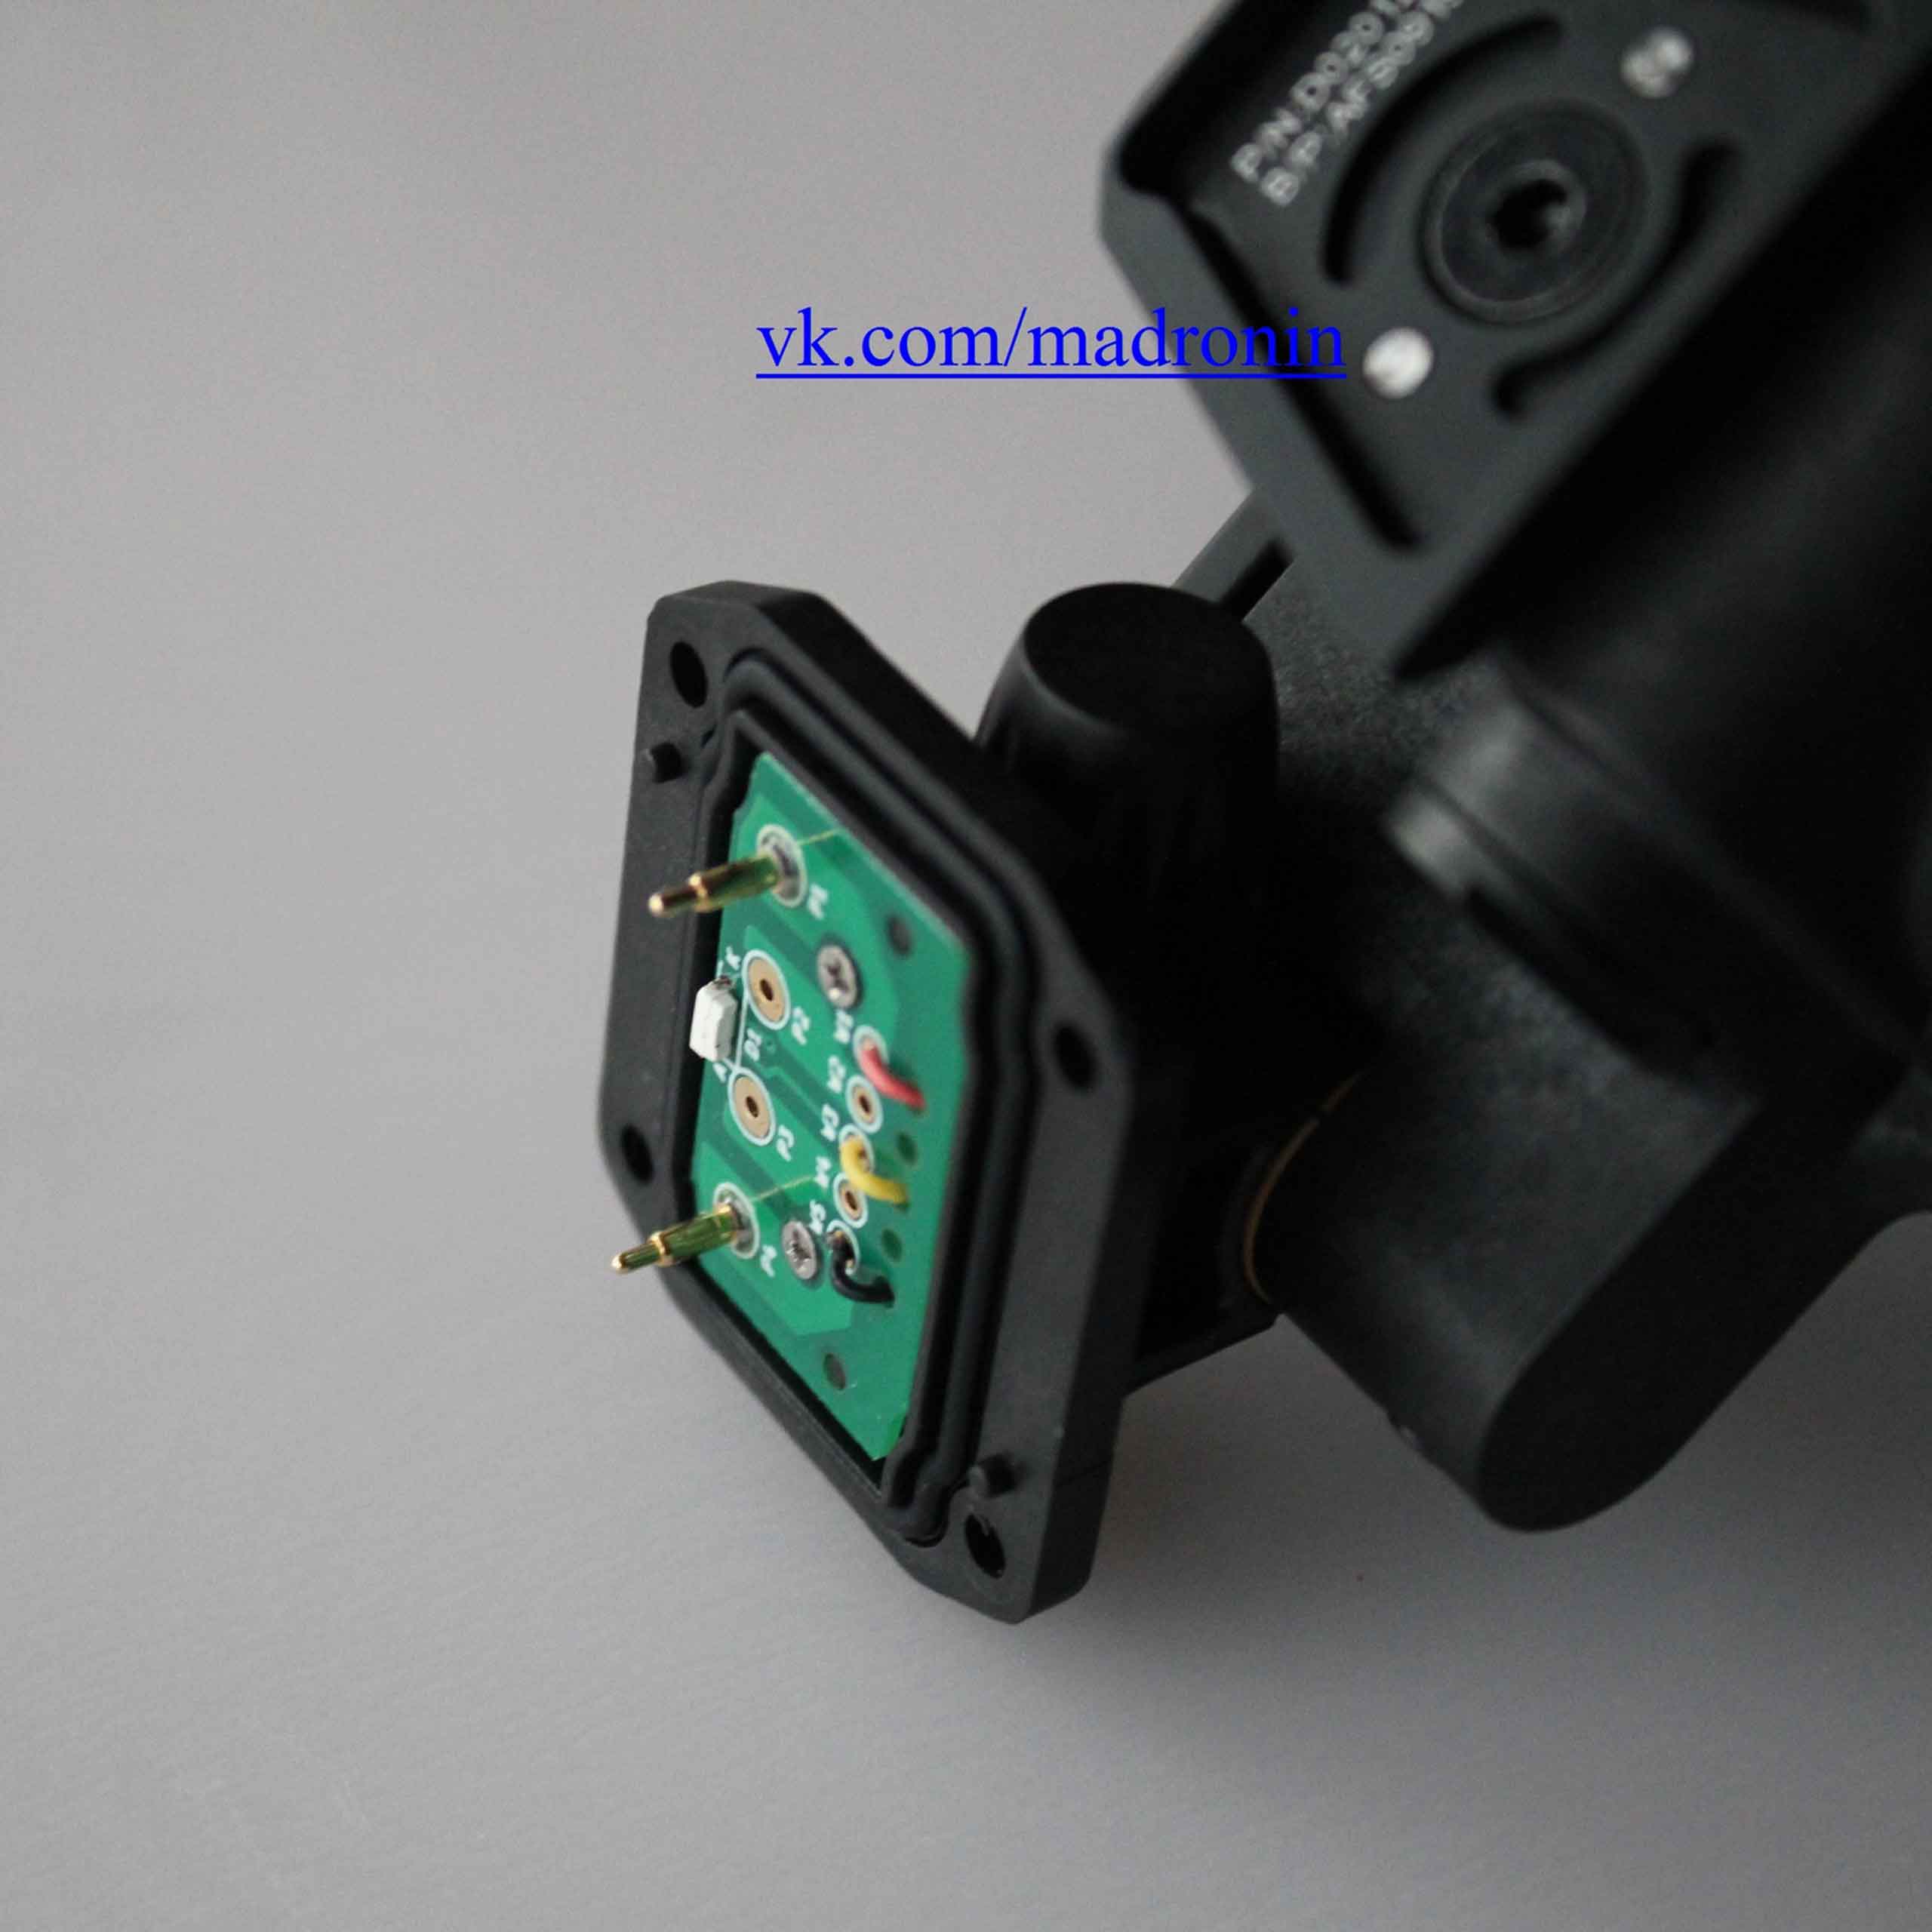
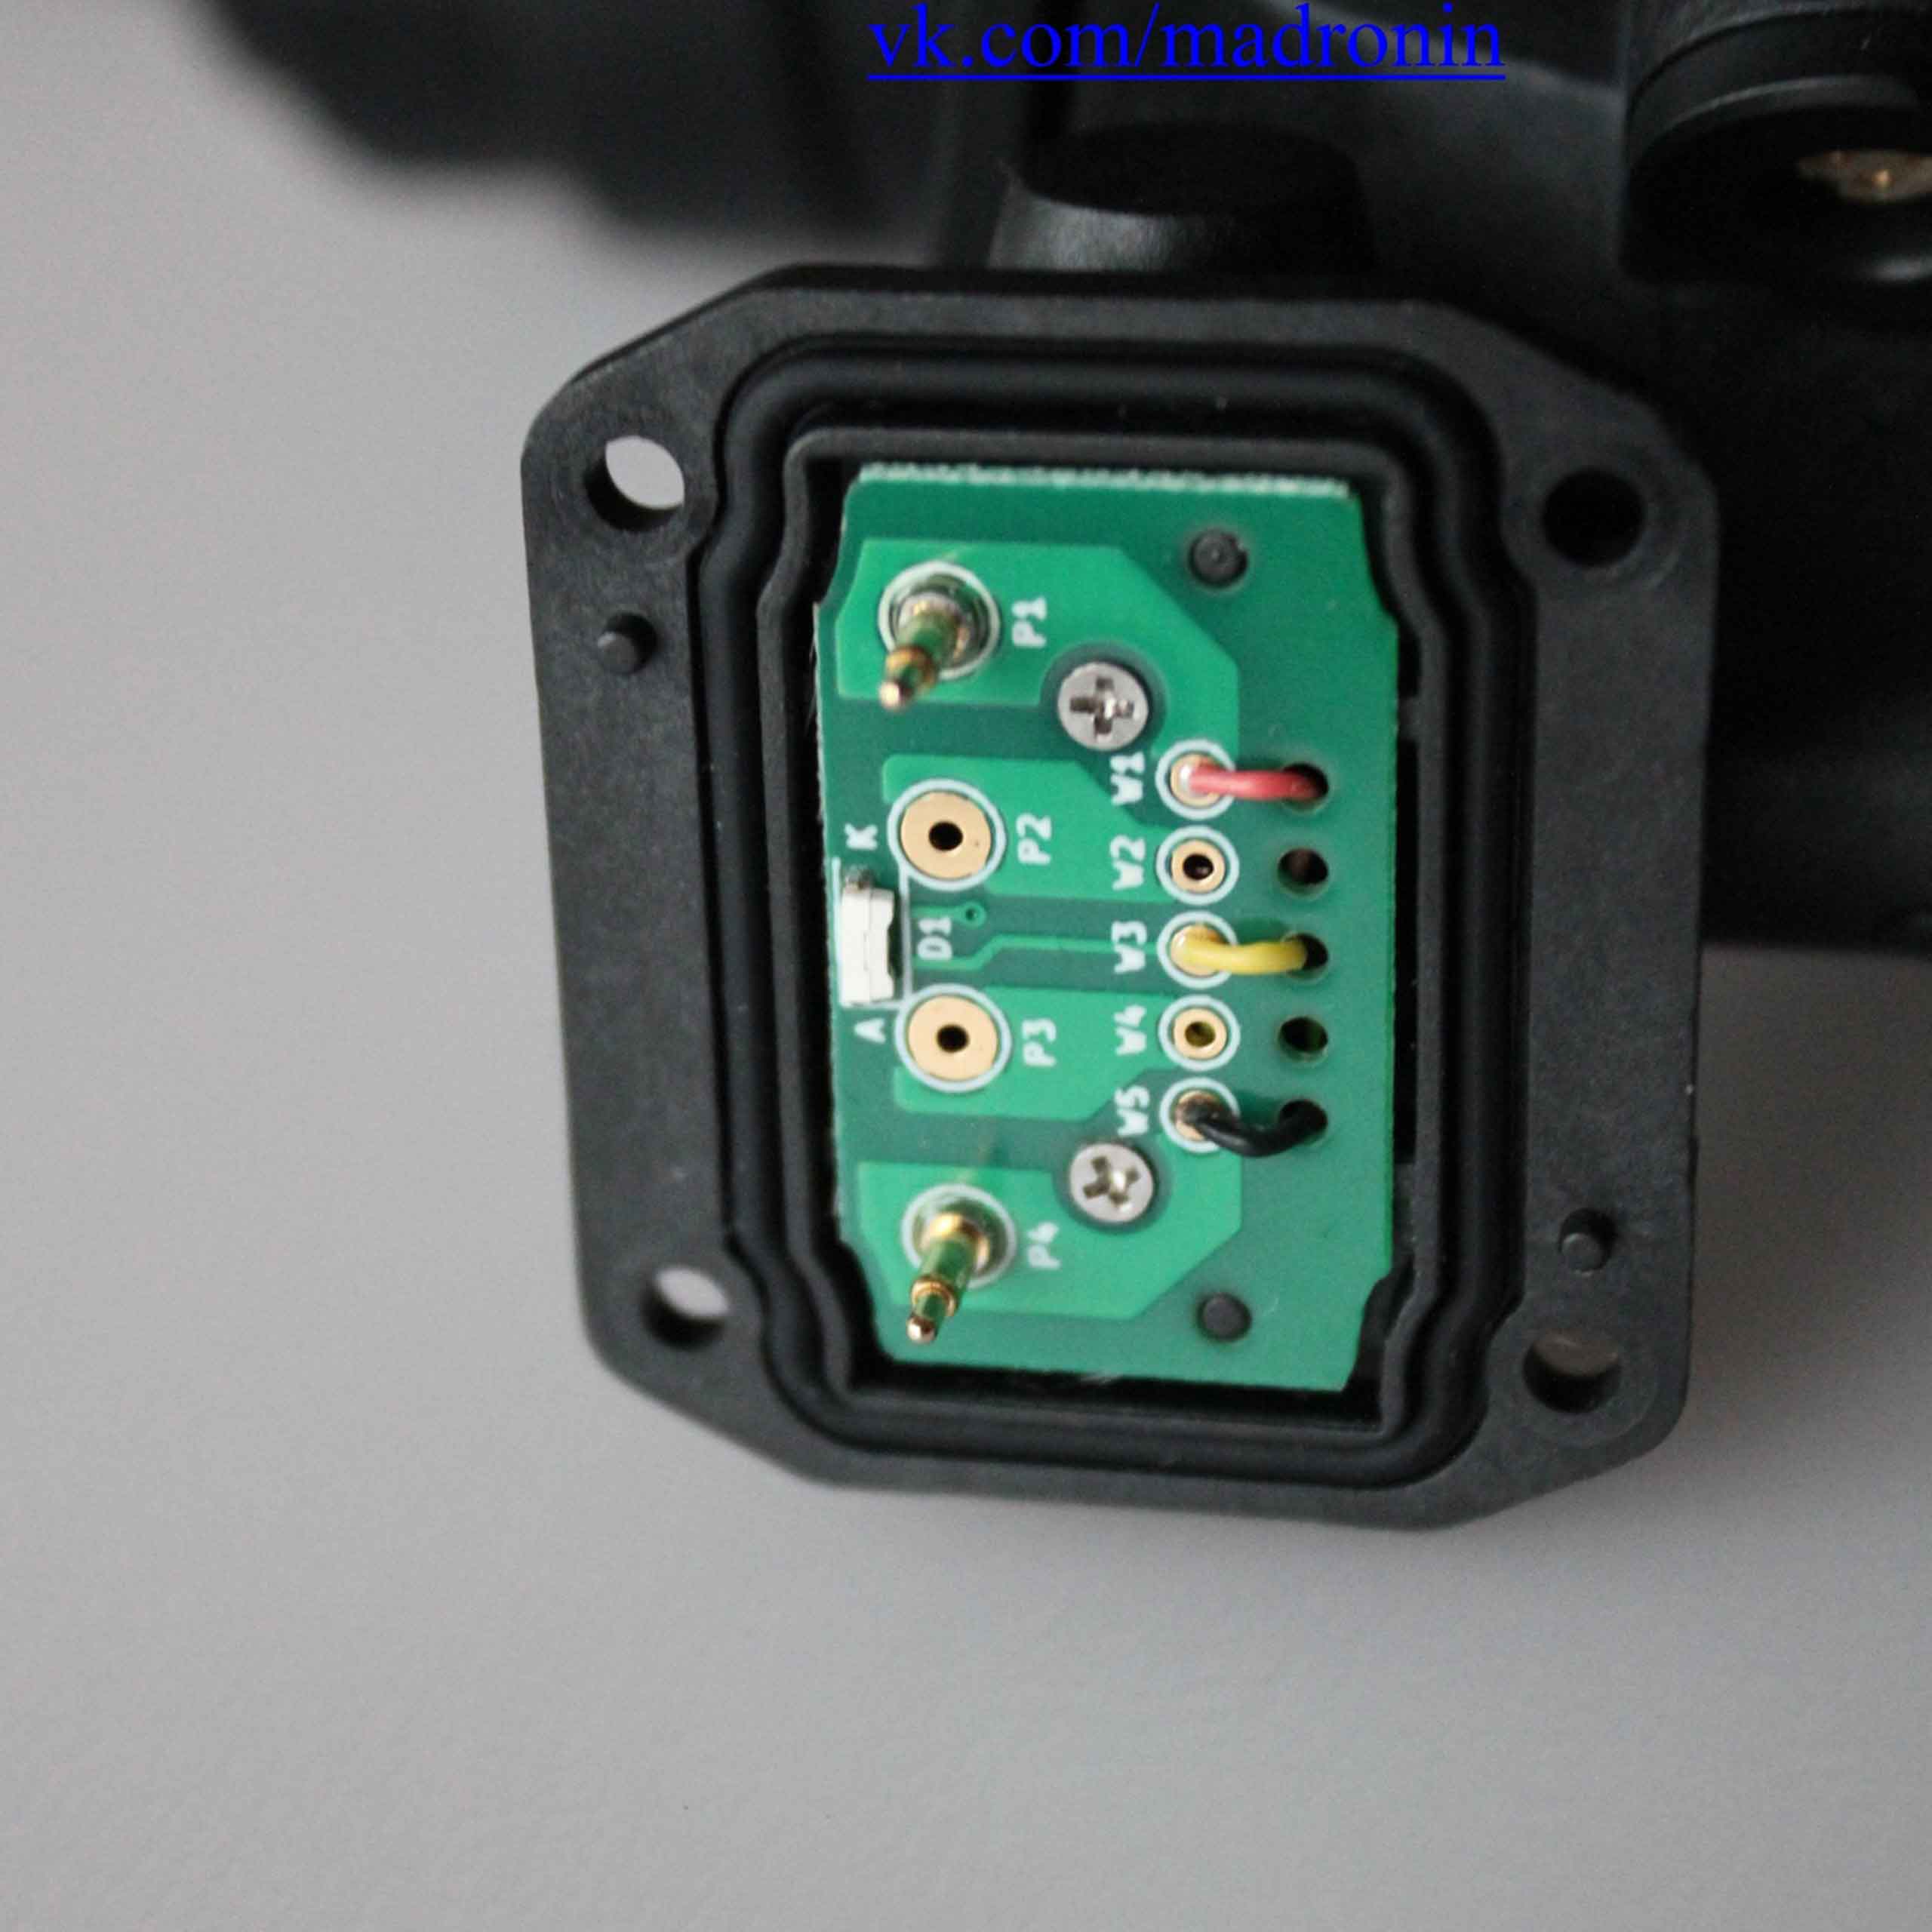
In terms of interior decoration, I can offer only a photo of the battery compartment from the inside, houseings, the mating part of the bridge and the board in it.
 |
 |
 |
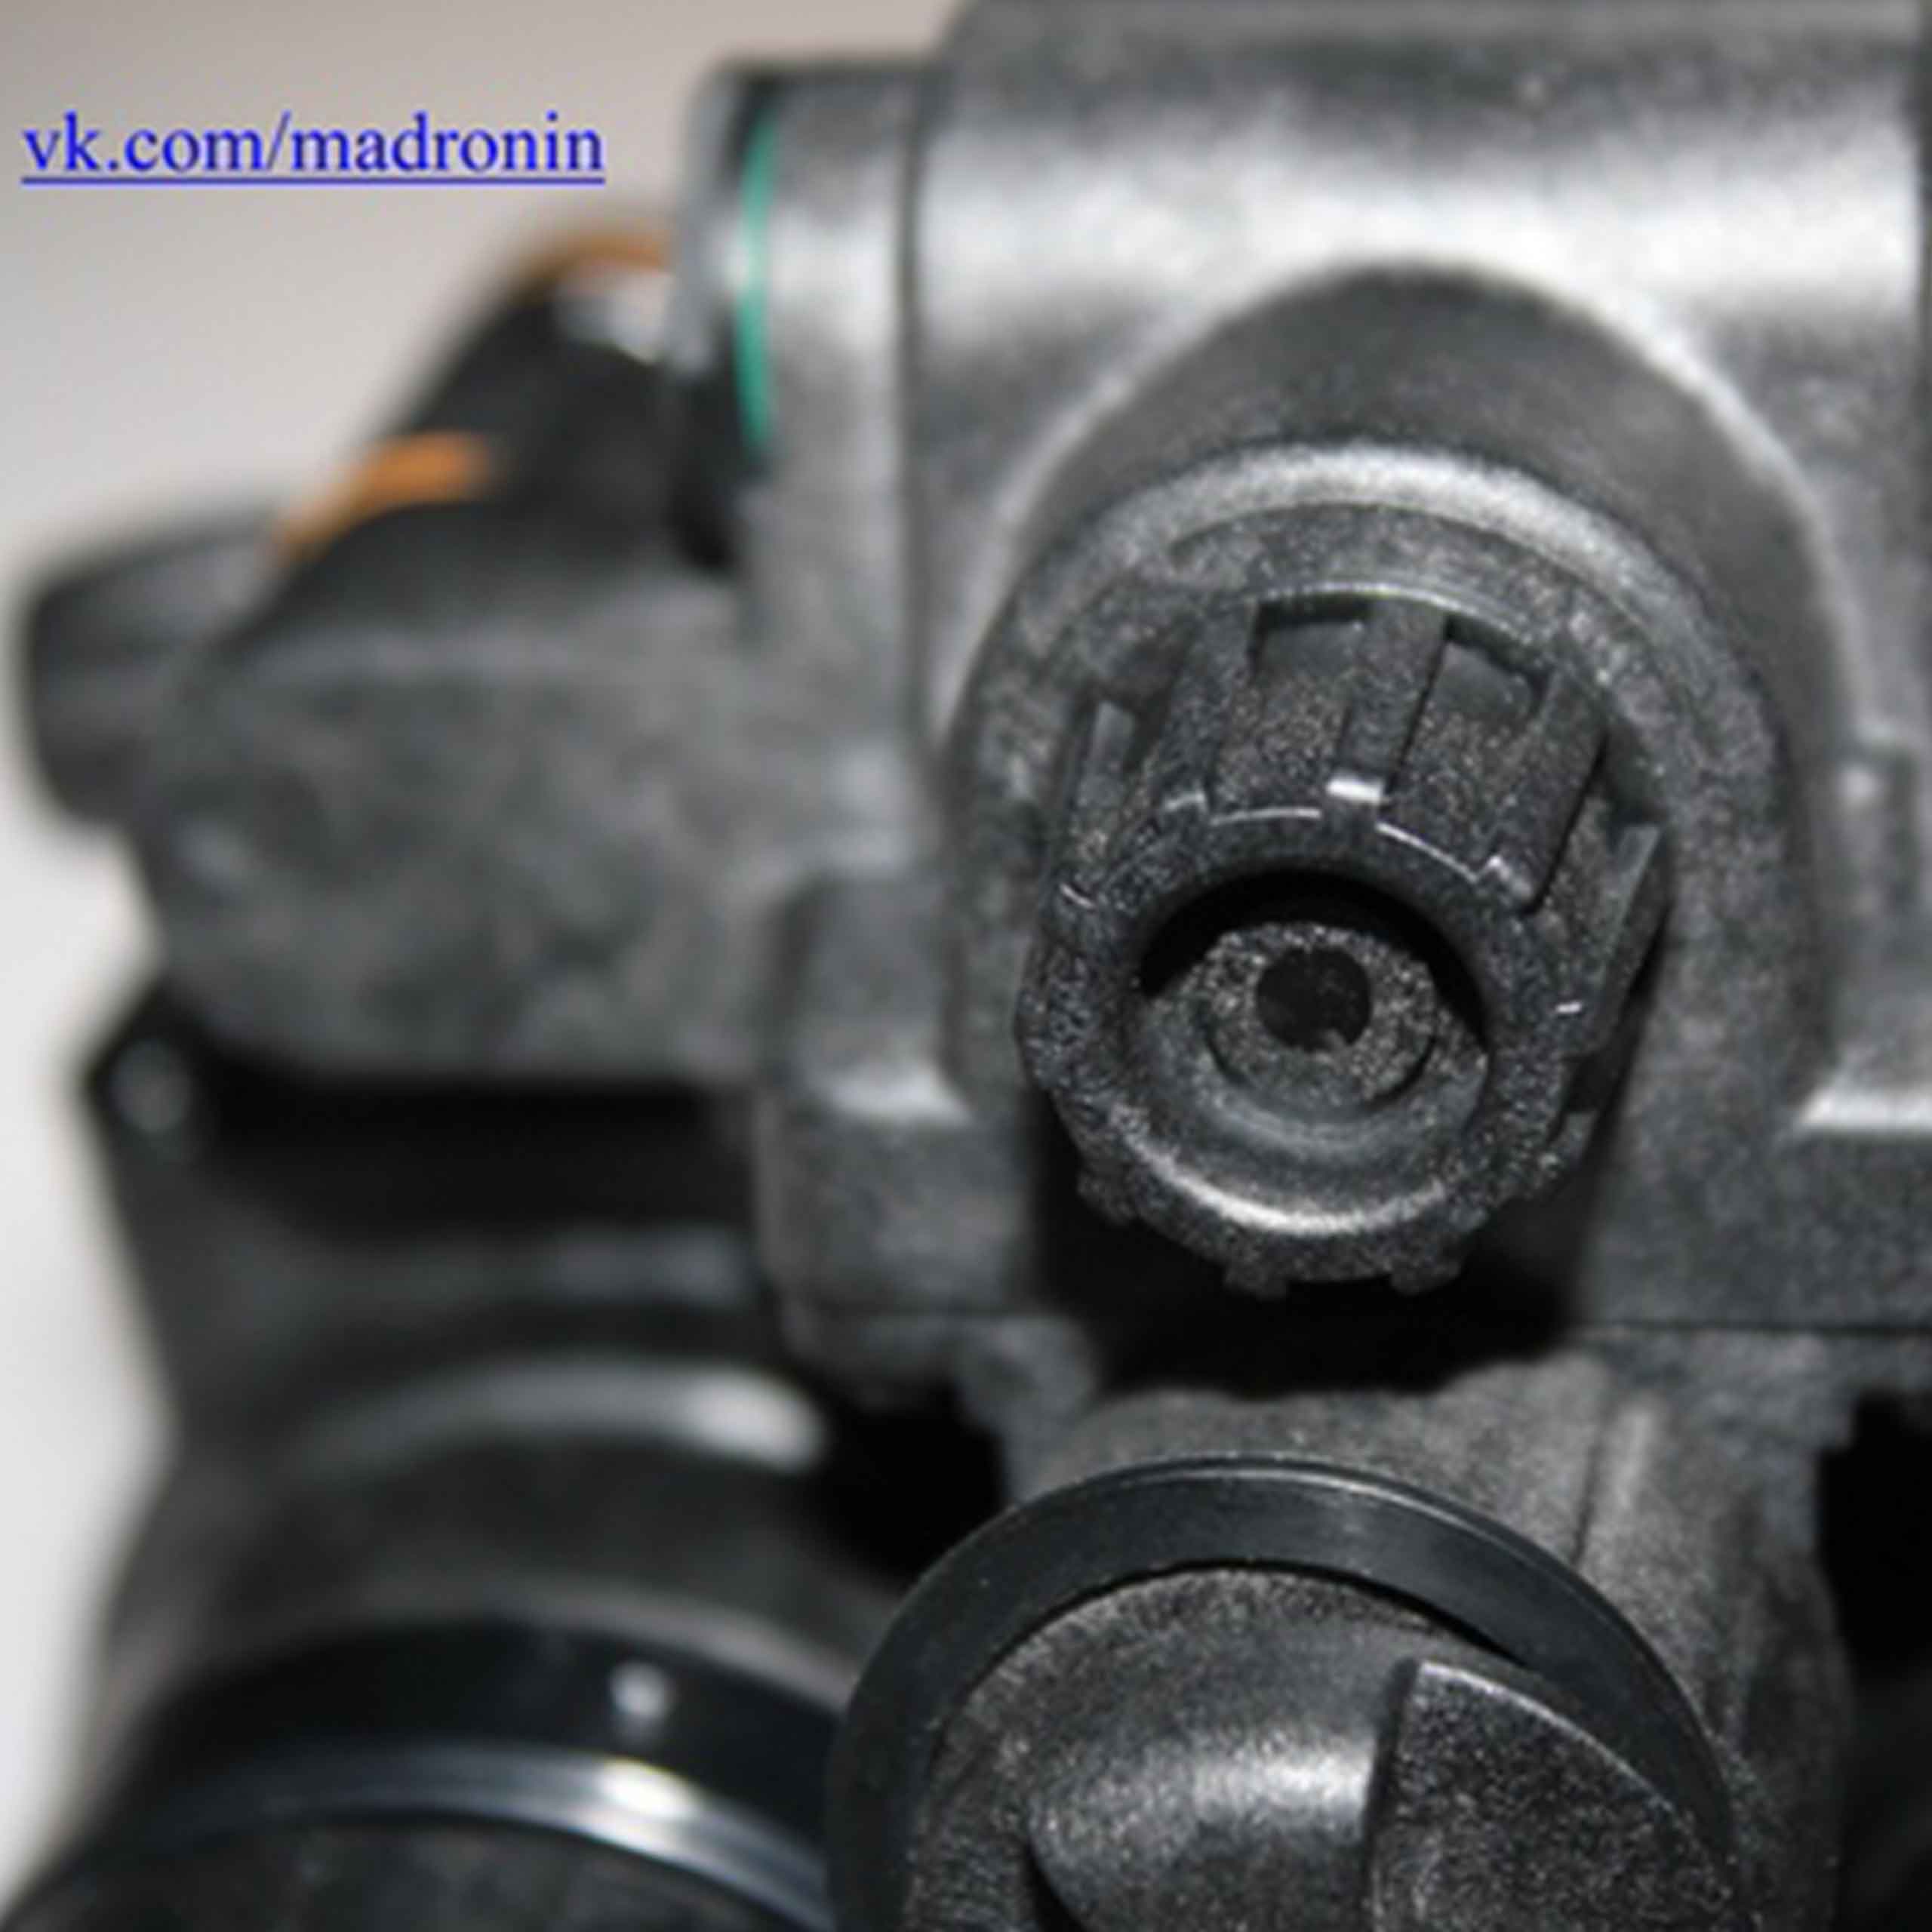
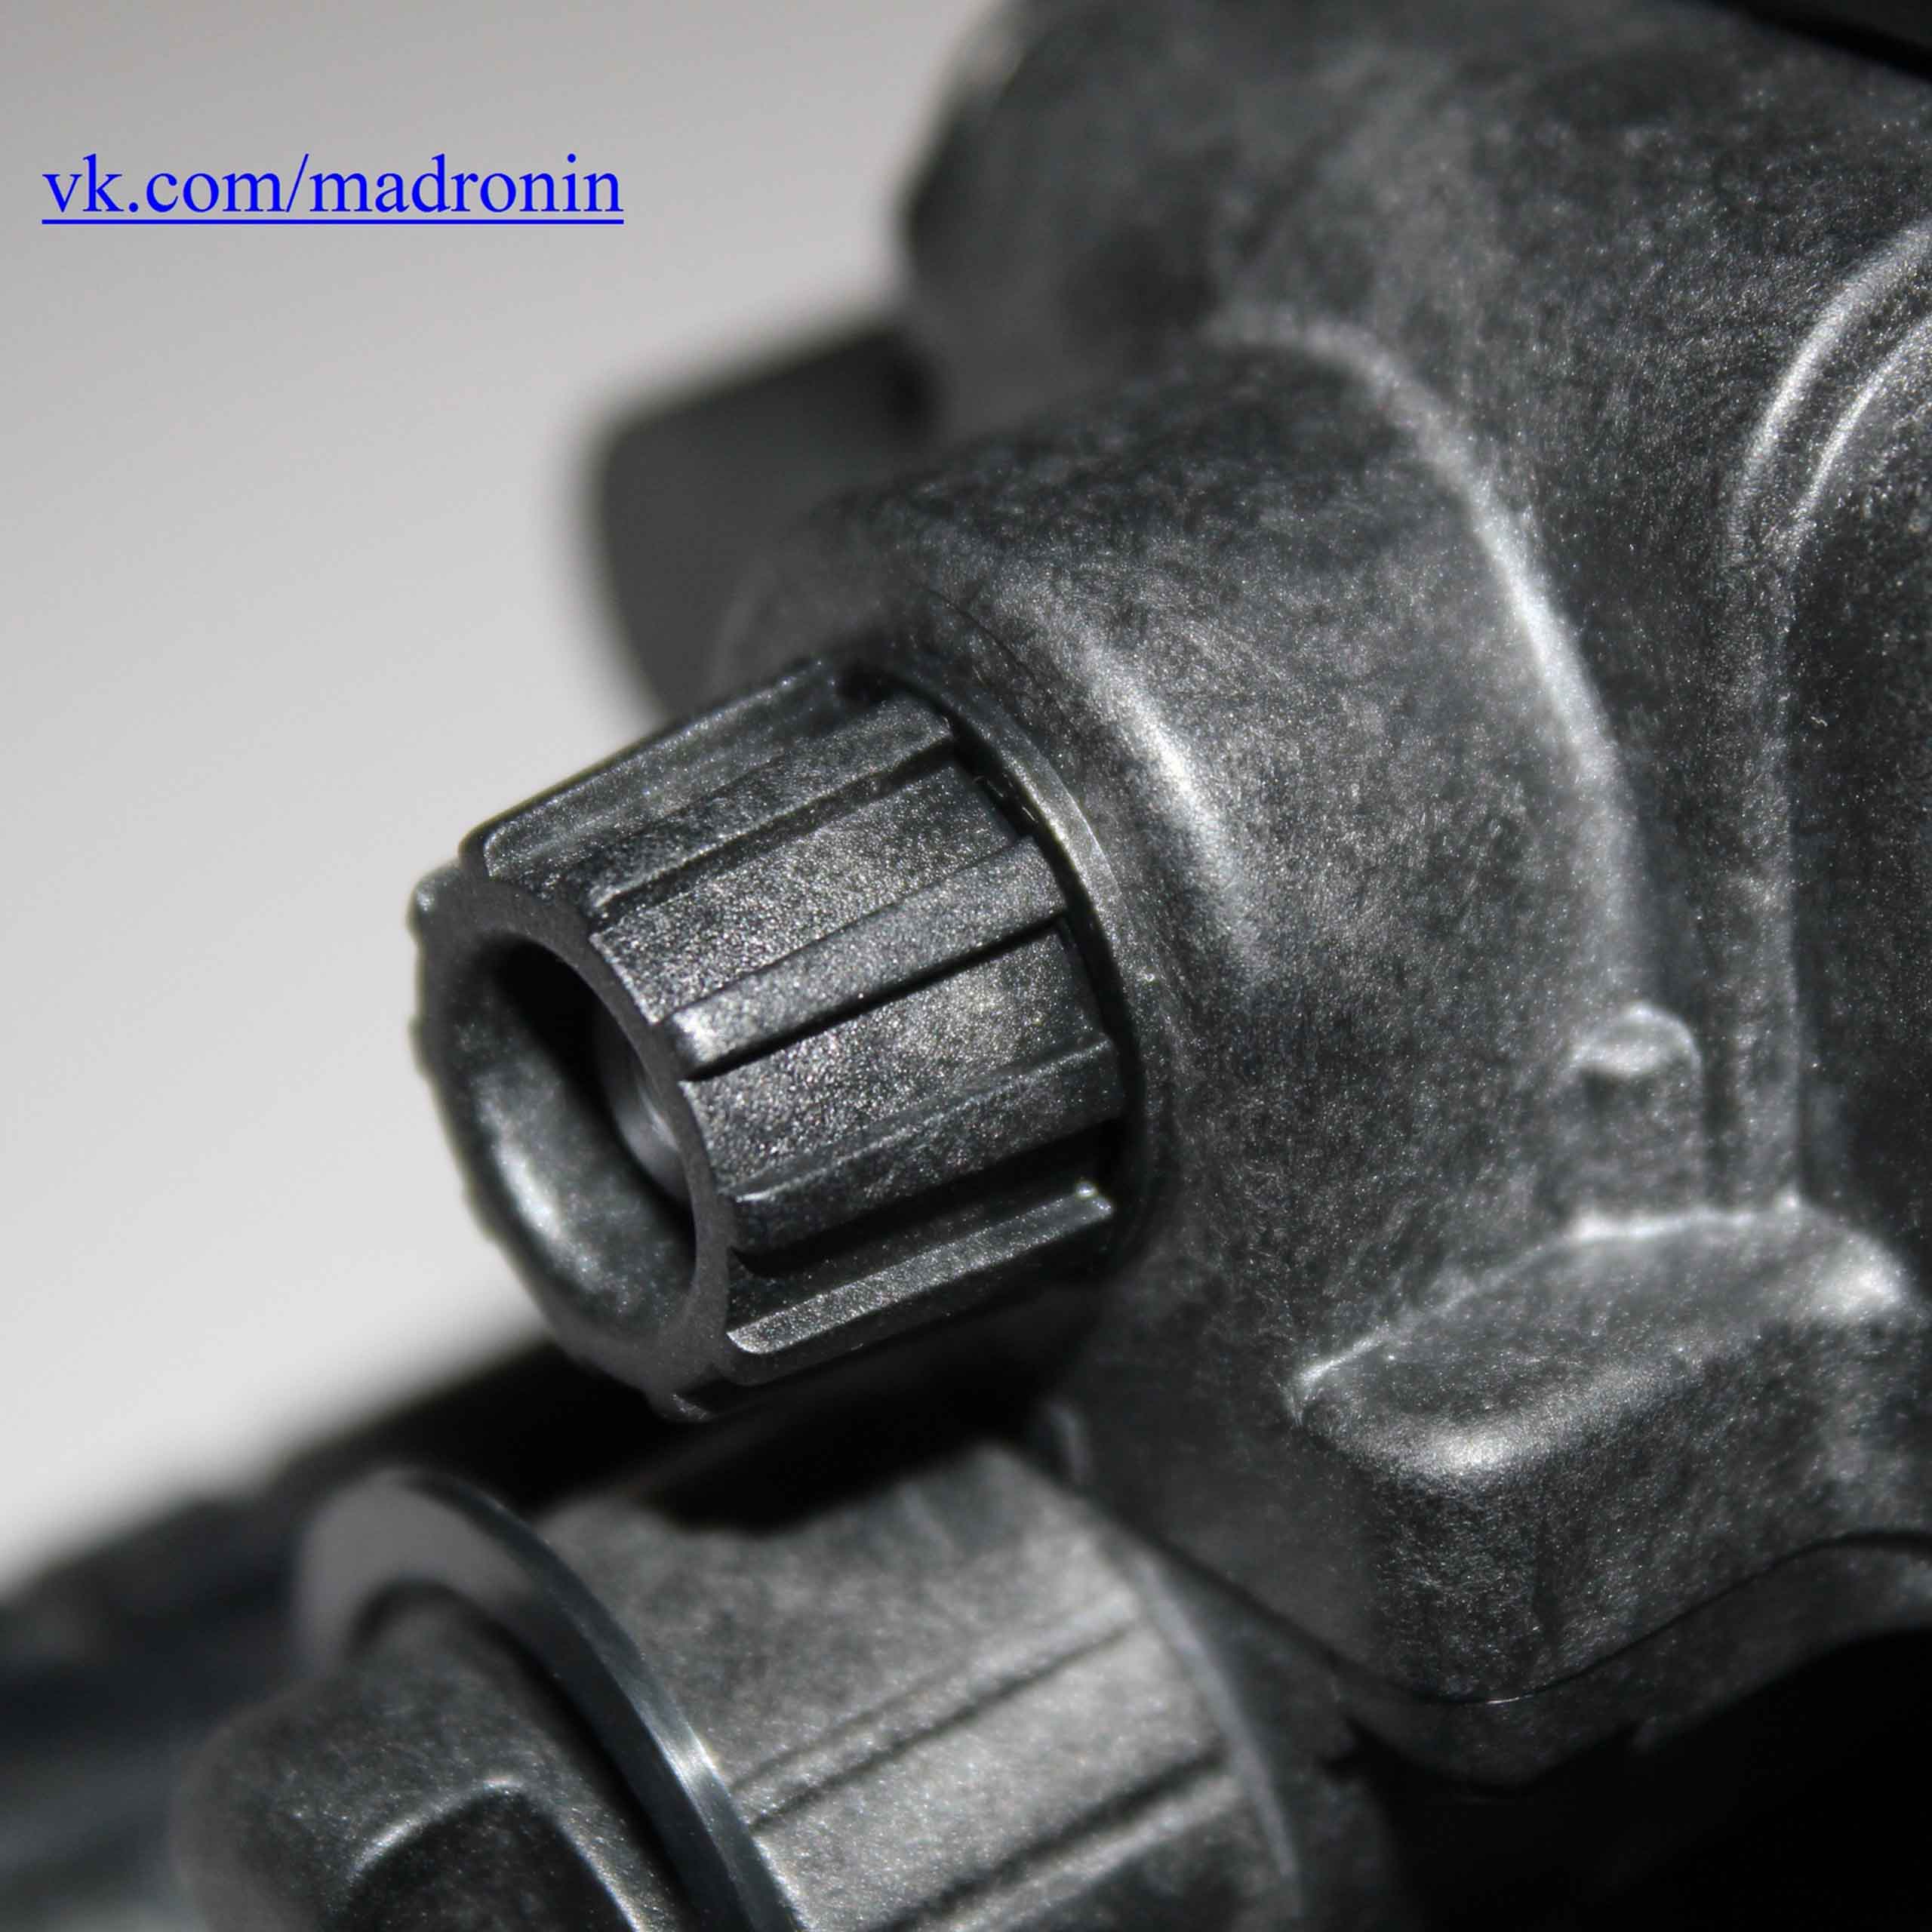
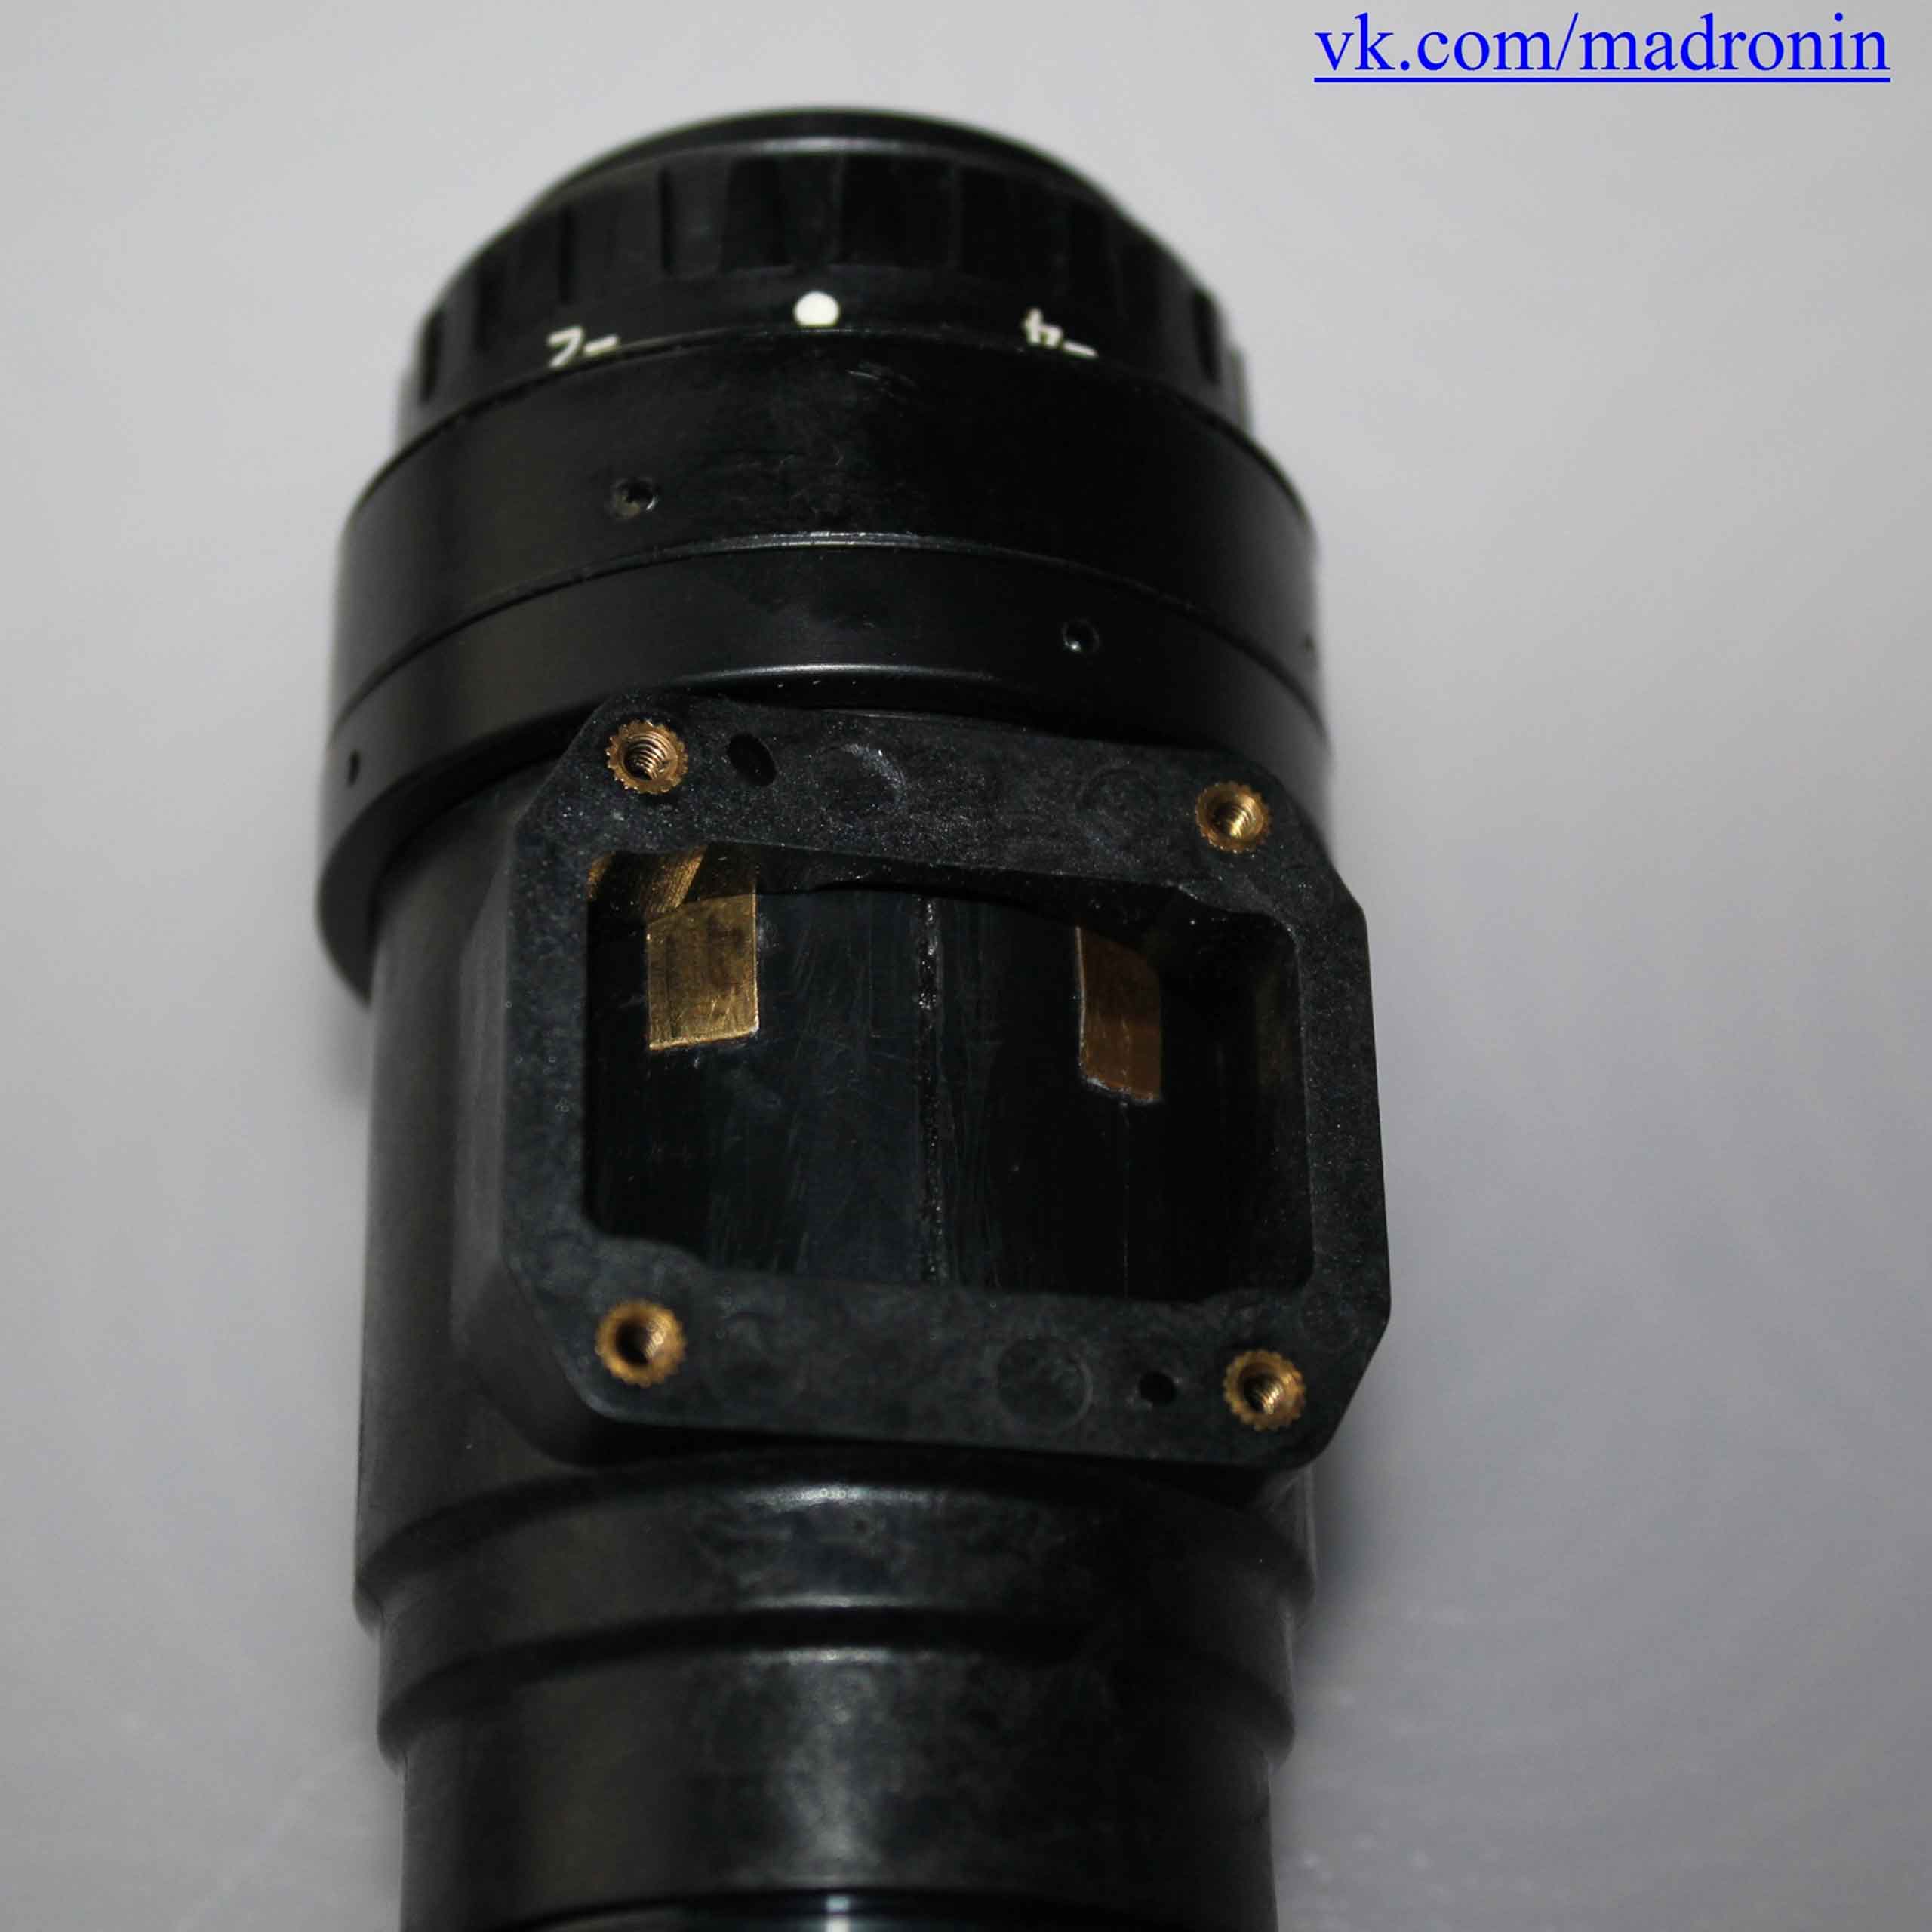
Unfortunately, I do not have enough experience to assess the quality of soldering and other nuances of manufacturing the board. In this regard, I will refrain from commenting on this issue; I’d better stick a couple of highres photos of the circuit itself. As far as I can judge from the photo of the original, the power supply contacts of the image intensifier tube on PVS-31/14 are made in a similar way. The power contacts are a tube with a spring in which a pin with a rounded head is installed.
 |
 |
 |
Bathing or not bathing, is that the question?
When asked about water / splash protection, the manufacturer answered very evasively. I have not yet decided to bathe the device on my own responsibility. Due to the not very successful design for installing front lenses (both on this device and on the original PVS-14), this thread can leak moisture (not my statement). The manufacturer hinted that, in general, the device should withstand immersion up to 15 meters, provided that there, under water, we won’t twist the front focusing lenses and process the WD-40 (0o) threads during assembly (the method with the WD40 is not mine). Knowledgeable people recommend processing with a "diver" sealant.
Management and indication.
Switching on is carried out by a long press of a button (1.5-2 seconds), switching off occurs in the same way. The same button is responsible for programming the device's auto-off function when folding on the helmet or mask (5 short quick presses in the on state).
According to the manufacturer, the device has an indication of low battery, I have not yet found this indicator personally. At a voltage of 1.36 volts, the device turns on, on a 1.29 battery, it is no longer there. Apparently, the extreme required voltage and the operation of the indication is within these limits of the voltage (1.29 - 1.35)
P.S. Tested on domestic tubes - the richer, the happier :)
Using screws at the base of the bridge, a more meticulous fit of the houseings to fit the eye fit can be made. Personally, it didn’t come in handy for me, I set it up like that.
There is no way to check how it works with an external power supply, due to the lack thereof. As soon as it arrives, I will supplement the review.
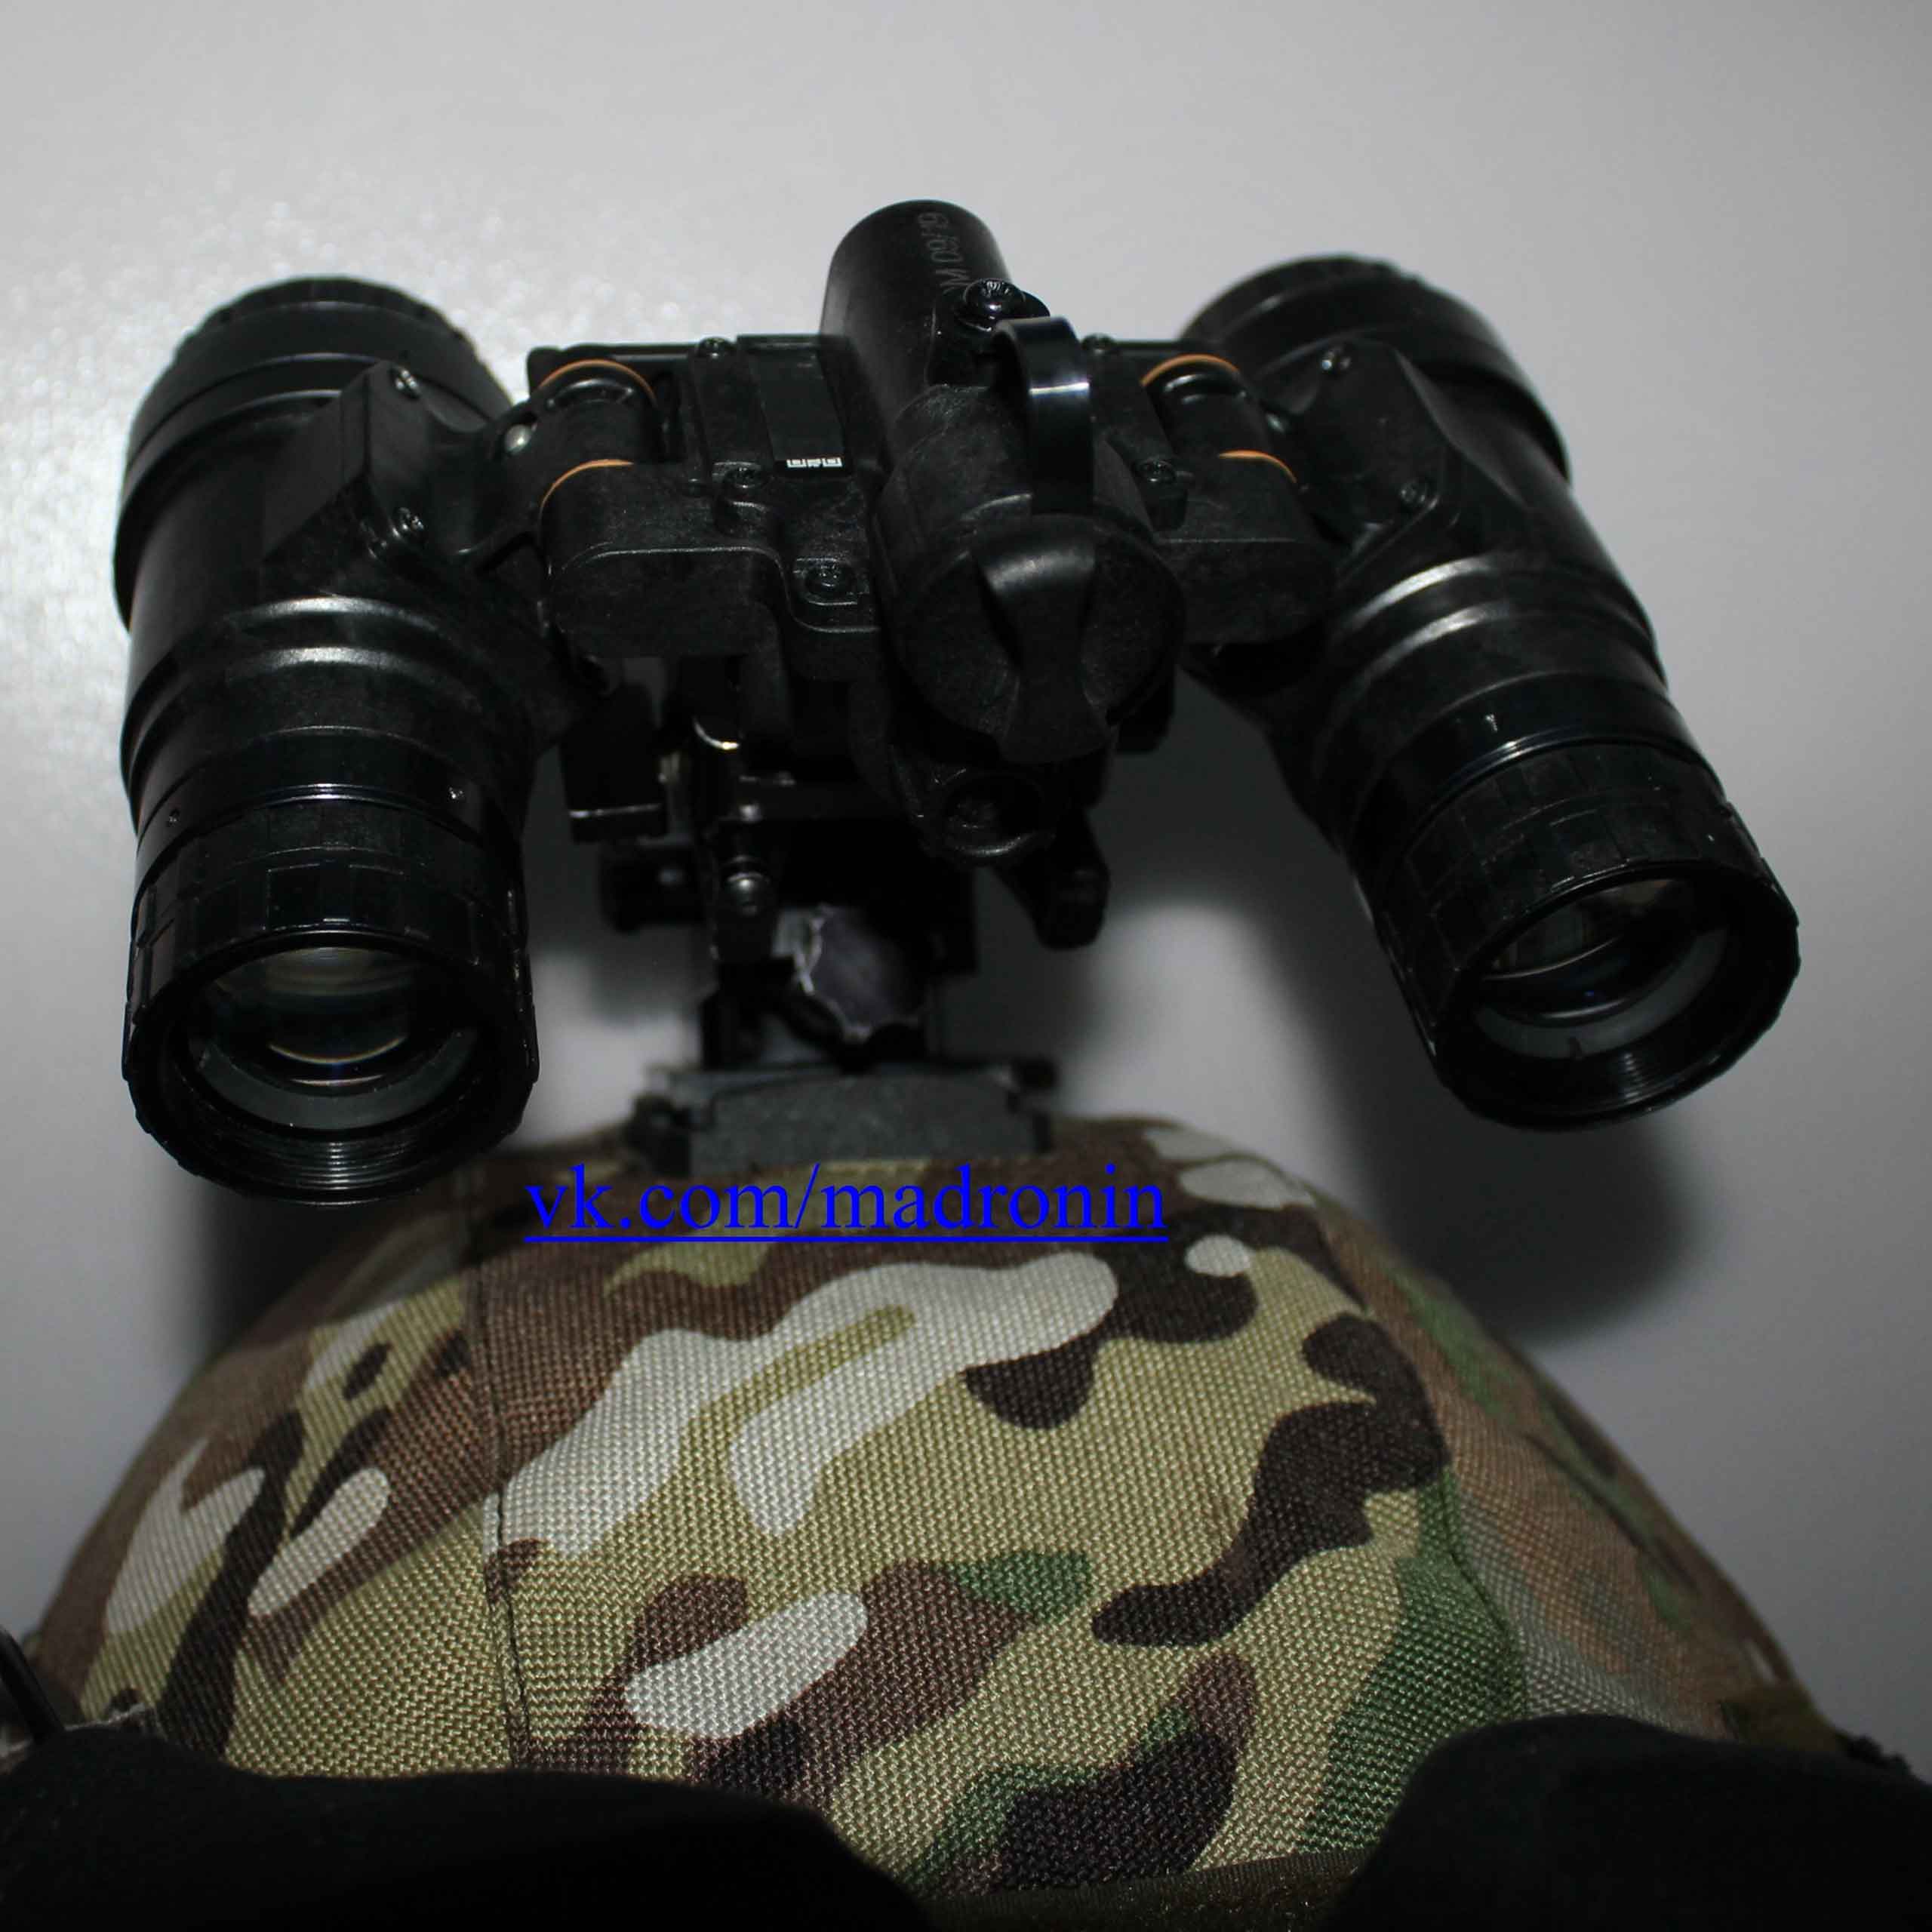
The device is in operation.
No jambs with binocular vision were seen. According to my feelings, everything works “as it should”: the picture is clear, without distortion, the 3D effect is fully present. Unfortunately, the possibilities of transmitting this aspect in the photo are very limited. Compared with the same ANVISom, for the other, sorry, no.
We managed to make all the adjustments of the lenses, nothing rested anywhere and did not interfere. According to the ergonomics of the device "5+".
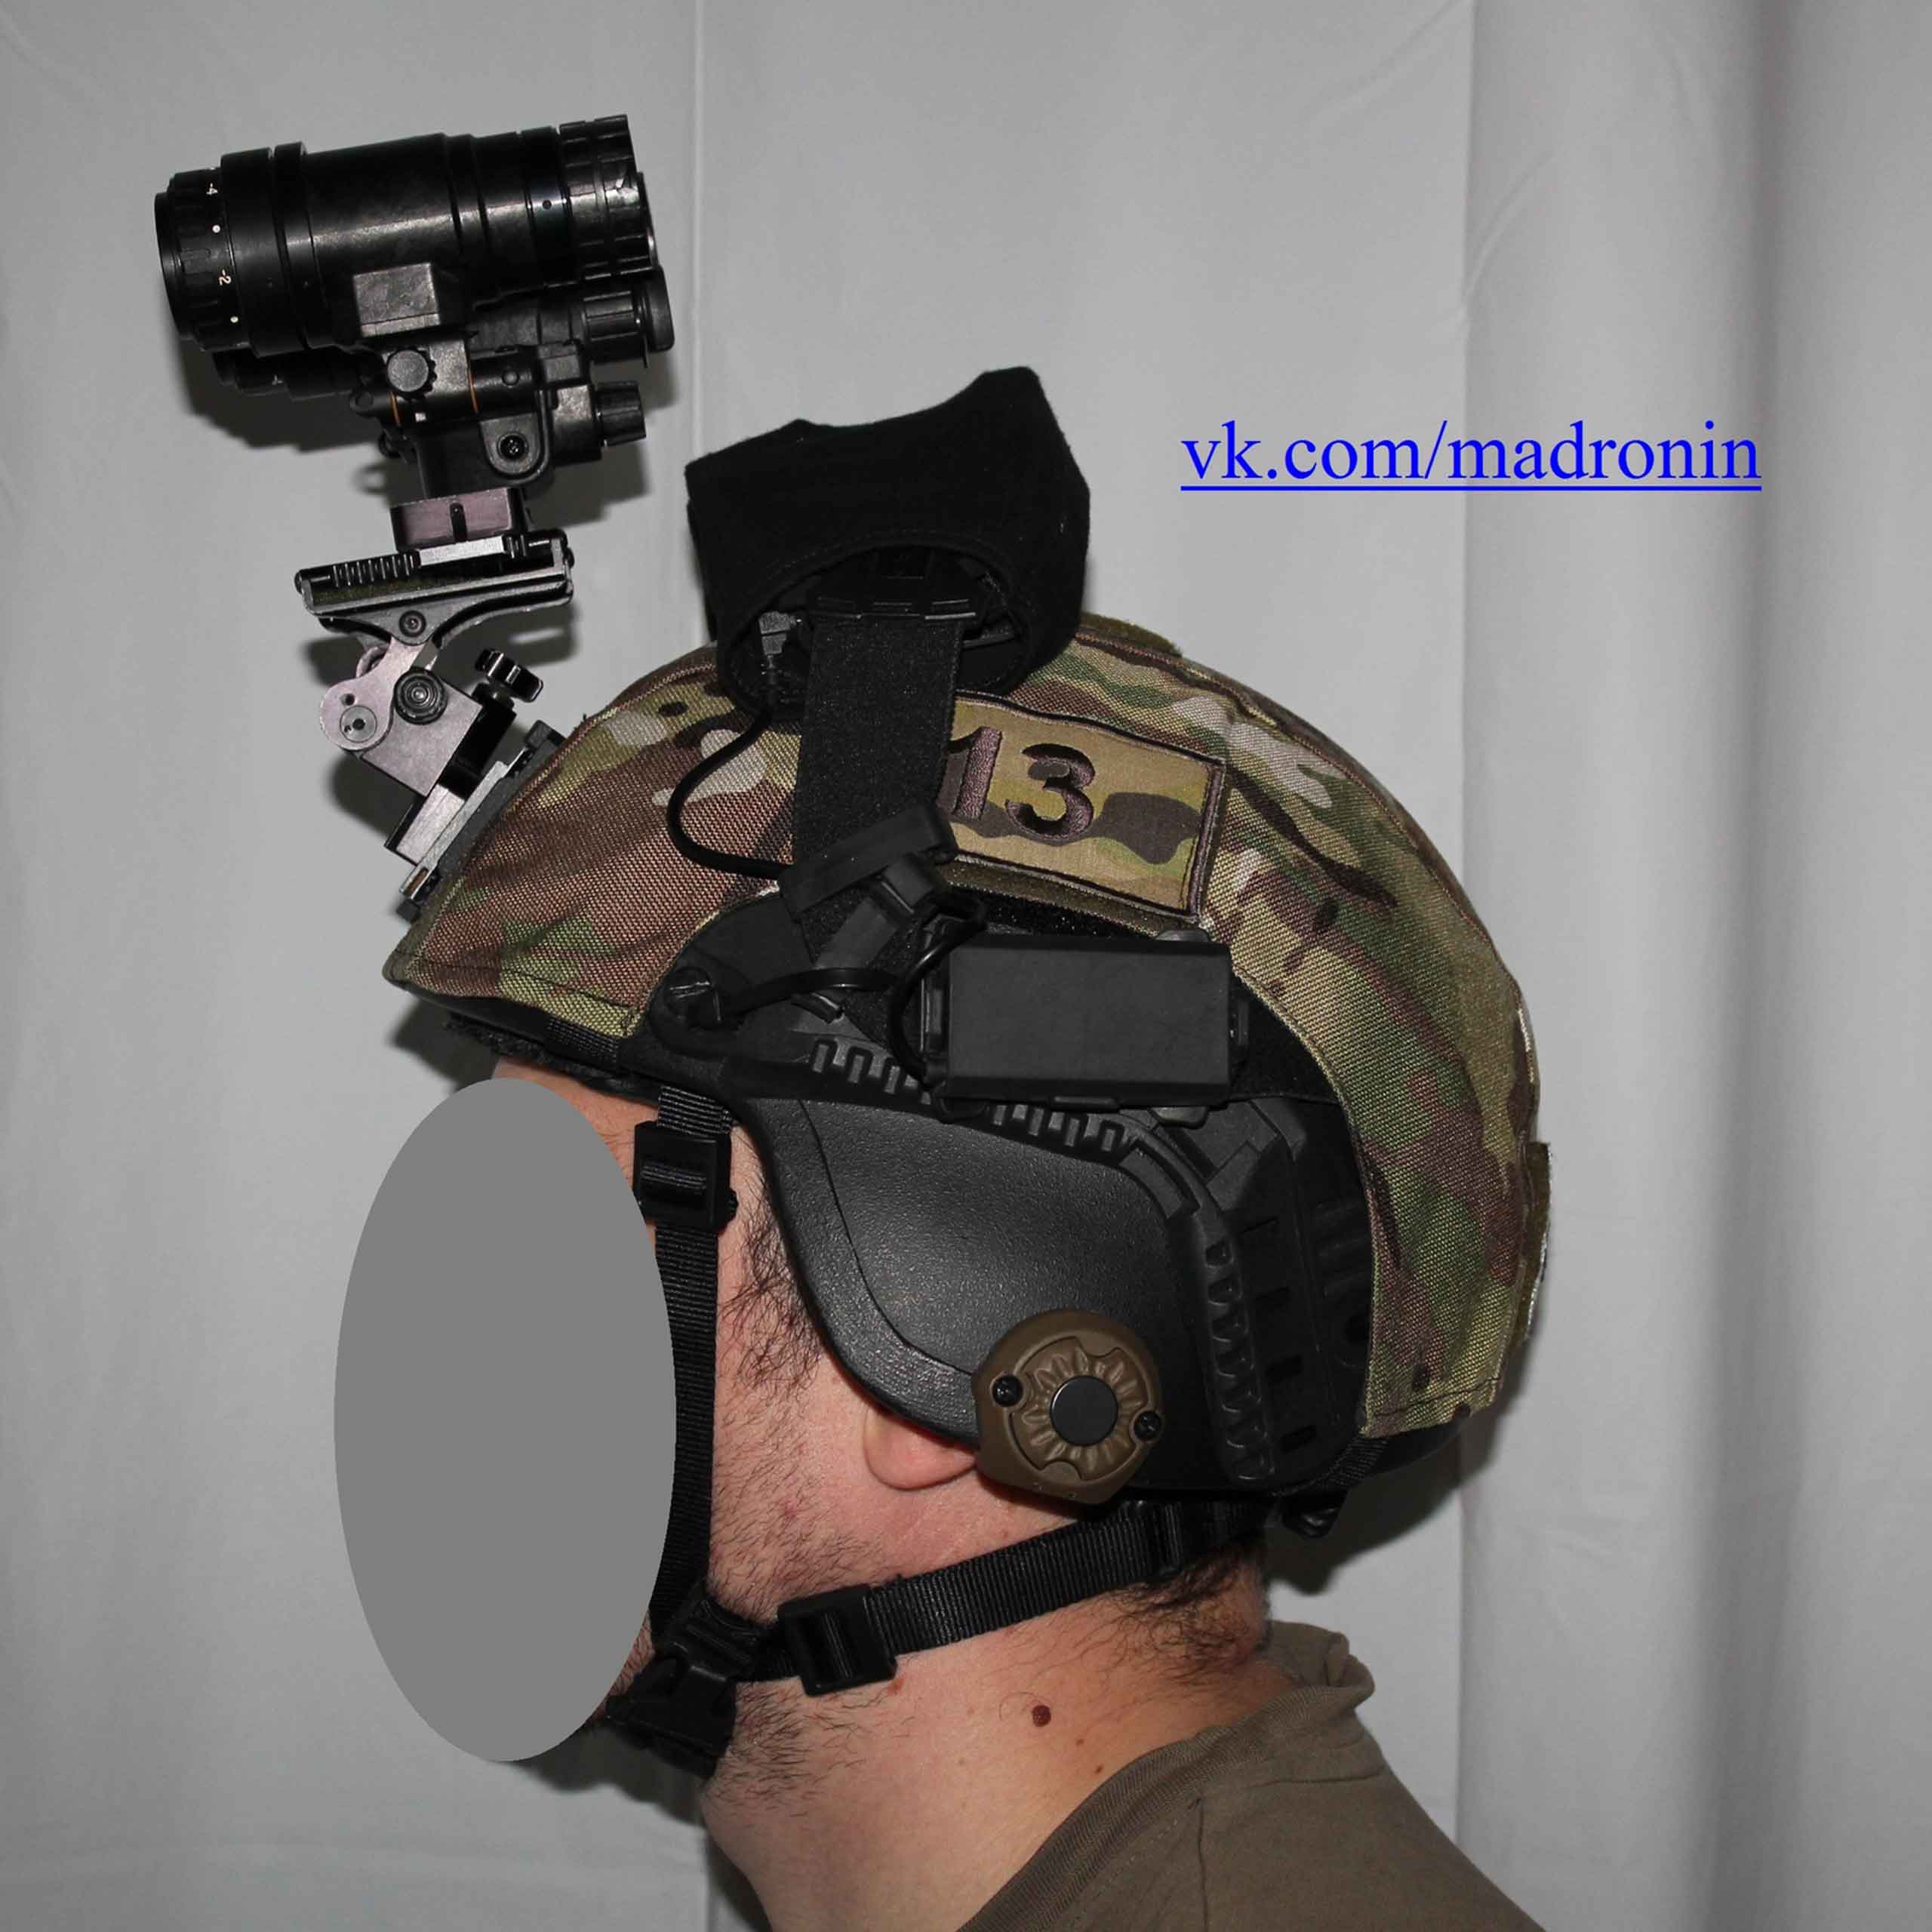
“Fly in the ointment”: the device was tested with a TATM “horn” and a replica of the “Wilcox” horn from EG. In terms of height on the helmet, the device on the horn of the TATM stood on the verge of its capabilities, the TATM was maximally twisted upwards, it was necessary to adjust the helmet again so that it was possible to look at the device. On rhino mount (horn) from EG (replica “Wilcox”) everything is much better, but, as I wrote earlier, Dovetail shoe dangles in the horn basket. On TATM Dovetail sits monolithically, there are practically no backlashes on my copy. As I understand it, the reason is in the features of the device and the outdated design of the TATM itself, not designed for such a height of the device.
 |
 |
 |
 |
 |
 |
 |
 |
 |
Equipment.
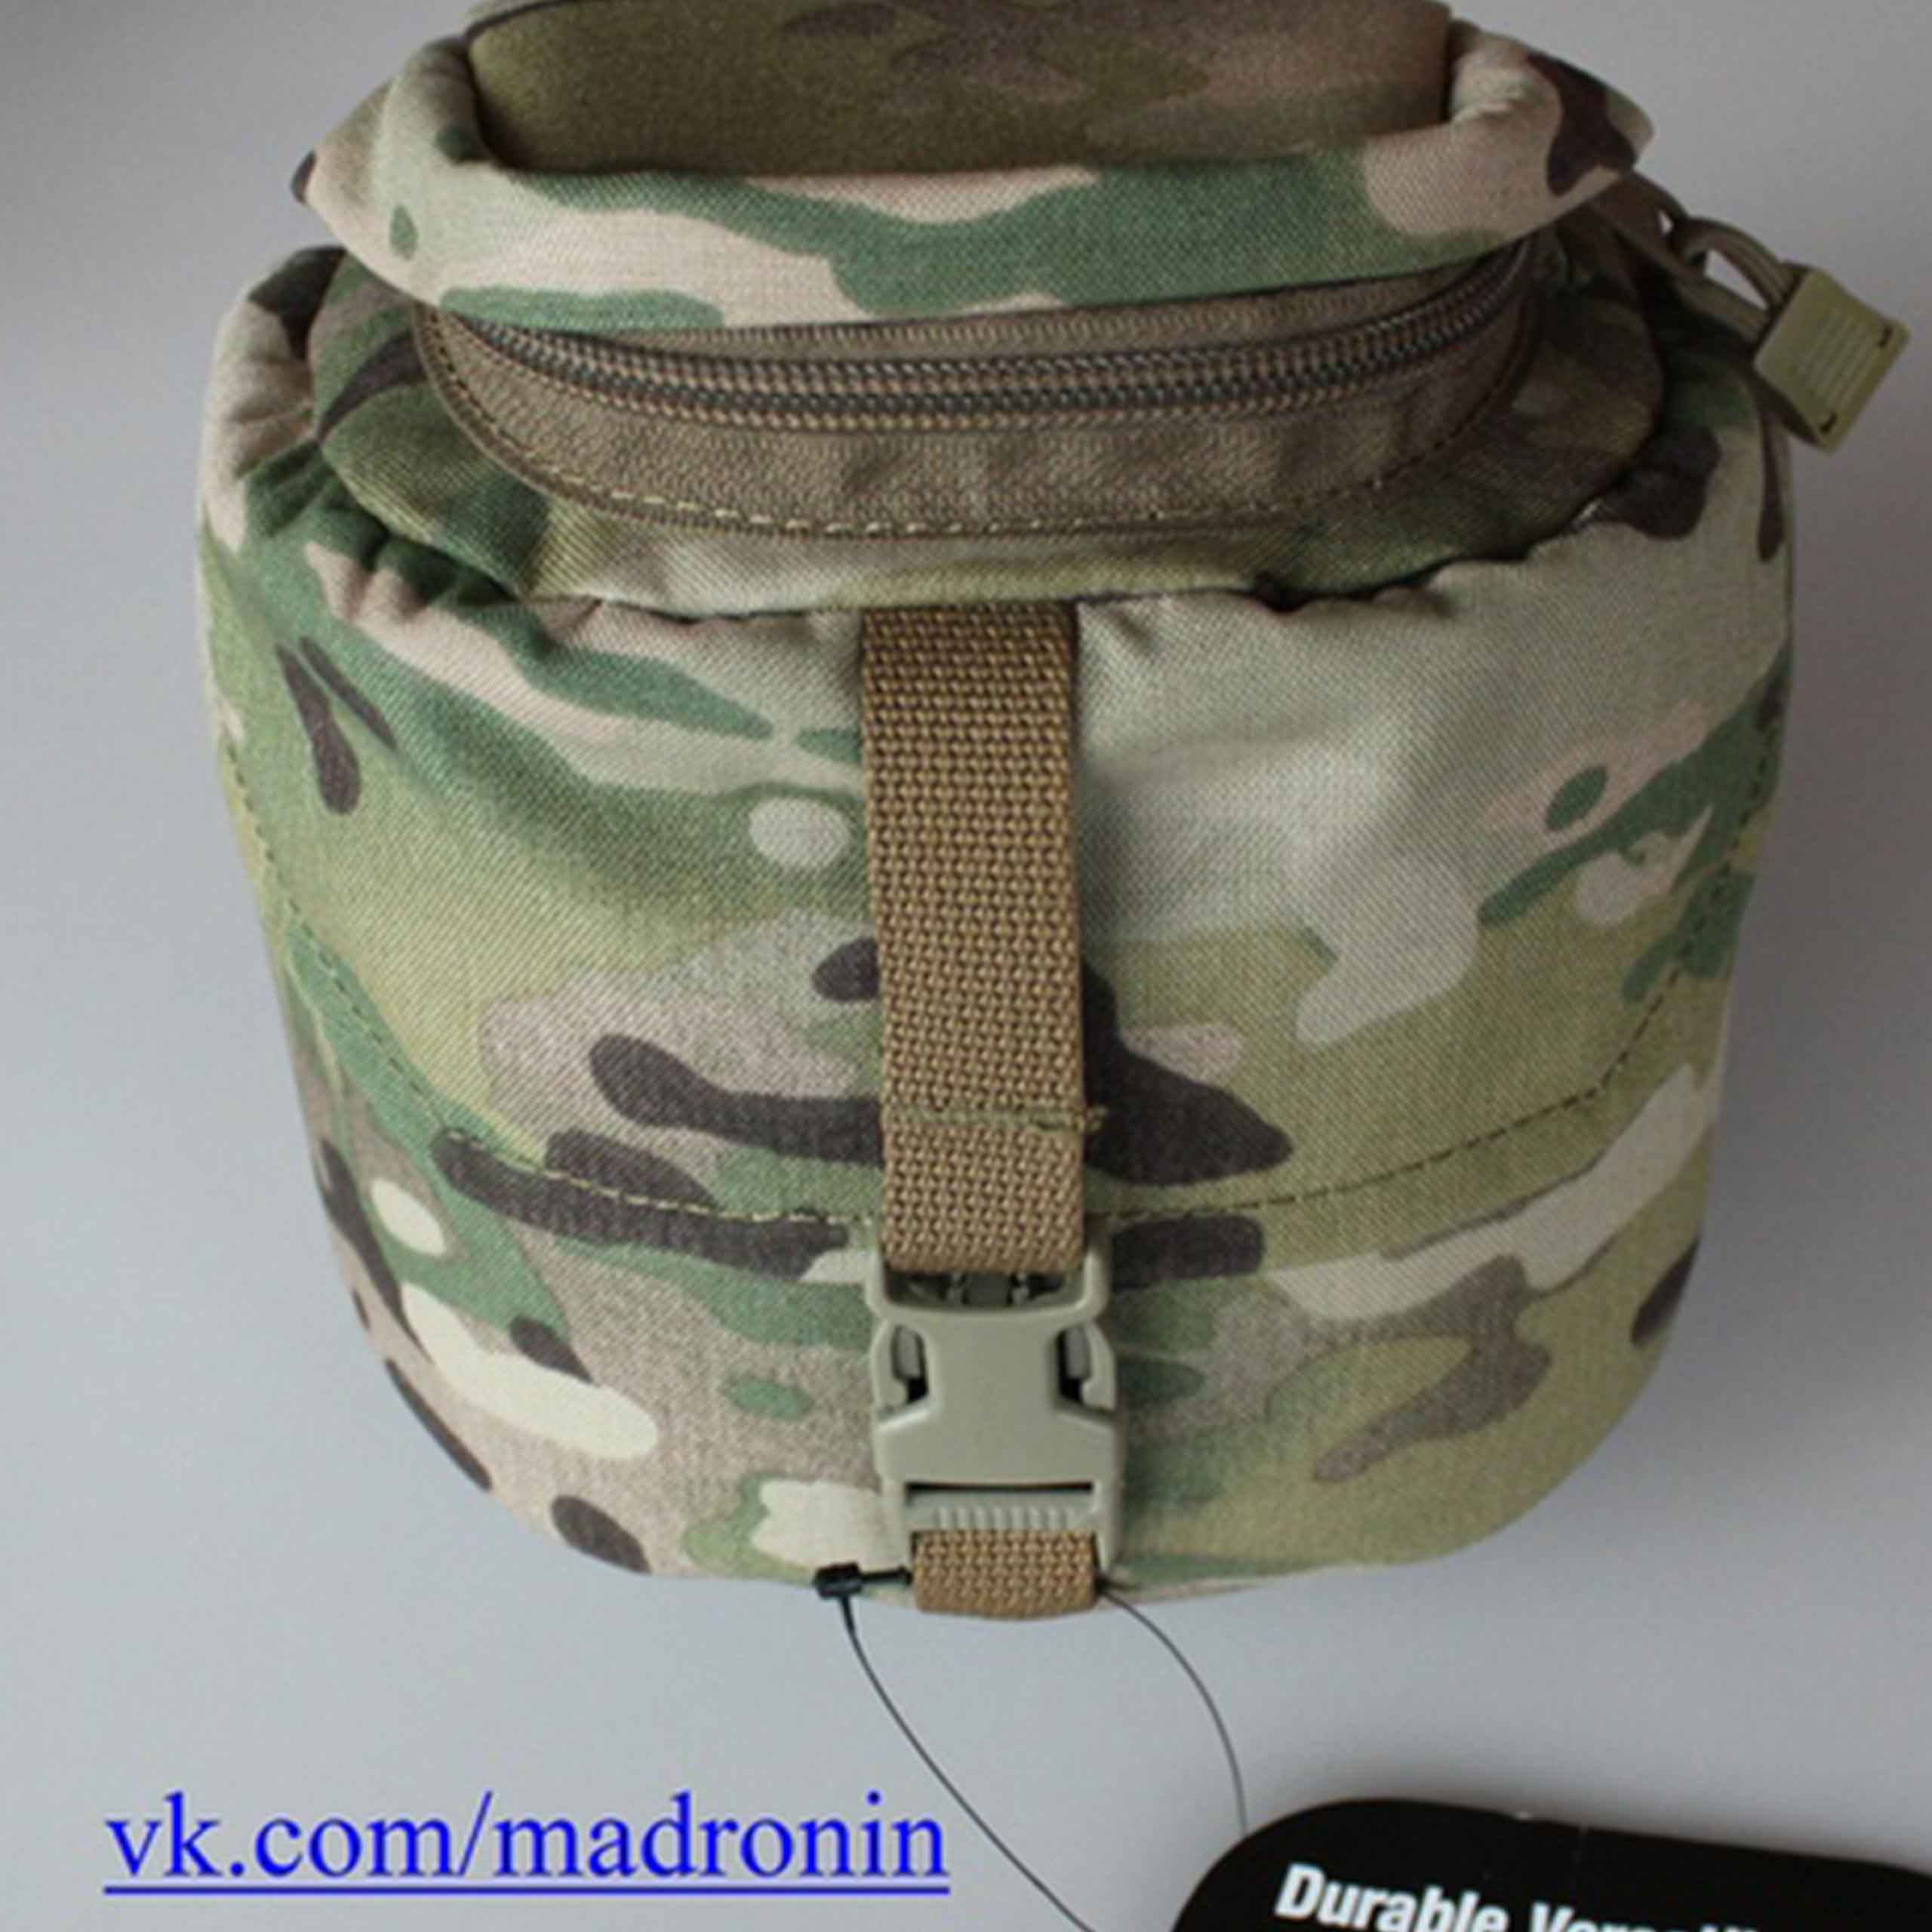
In the basic configuration, the whale consists of a bridge, two househouses (comes complete), two objective ring lenses (Objective Lens Locking Ring), two lens focus lock rings (Objective Lens Locking Ring) and two similar rings for eyepieces (Eyepiece Lens Locking Ring) , pouch with several compartments and mall slings. The manufacturer also distinguished itself with EOP fixation rings: they are of different sizes with rings on ANVIS / PVS14. In any case, they did not stand up to my PVS14 house. The diameter of the original rings is larger than the rings that come with the device.
The occipital battery pack is not included in the basic package.
 |
 |
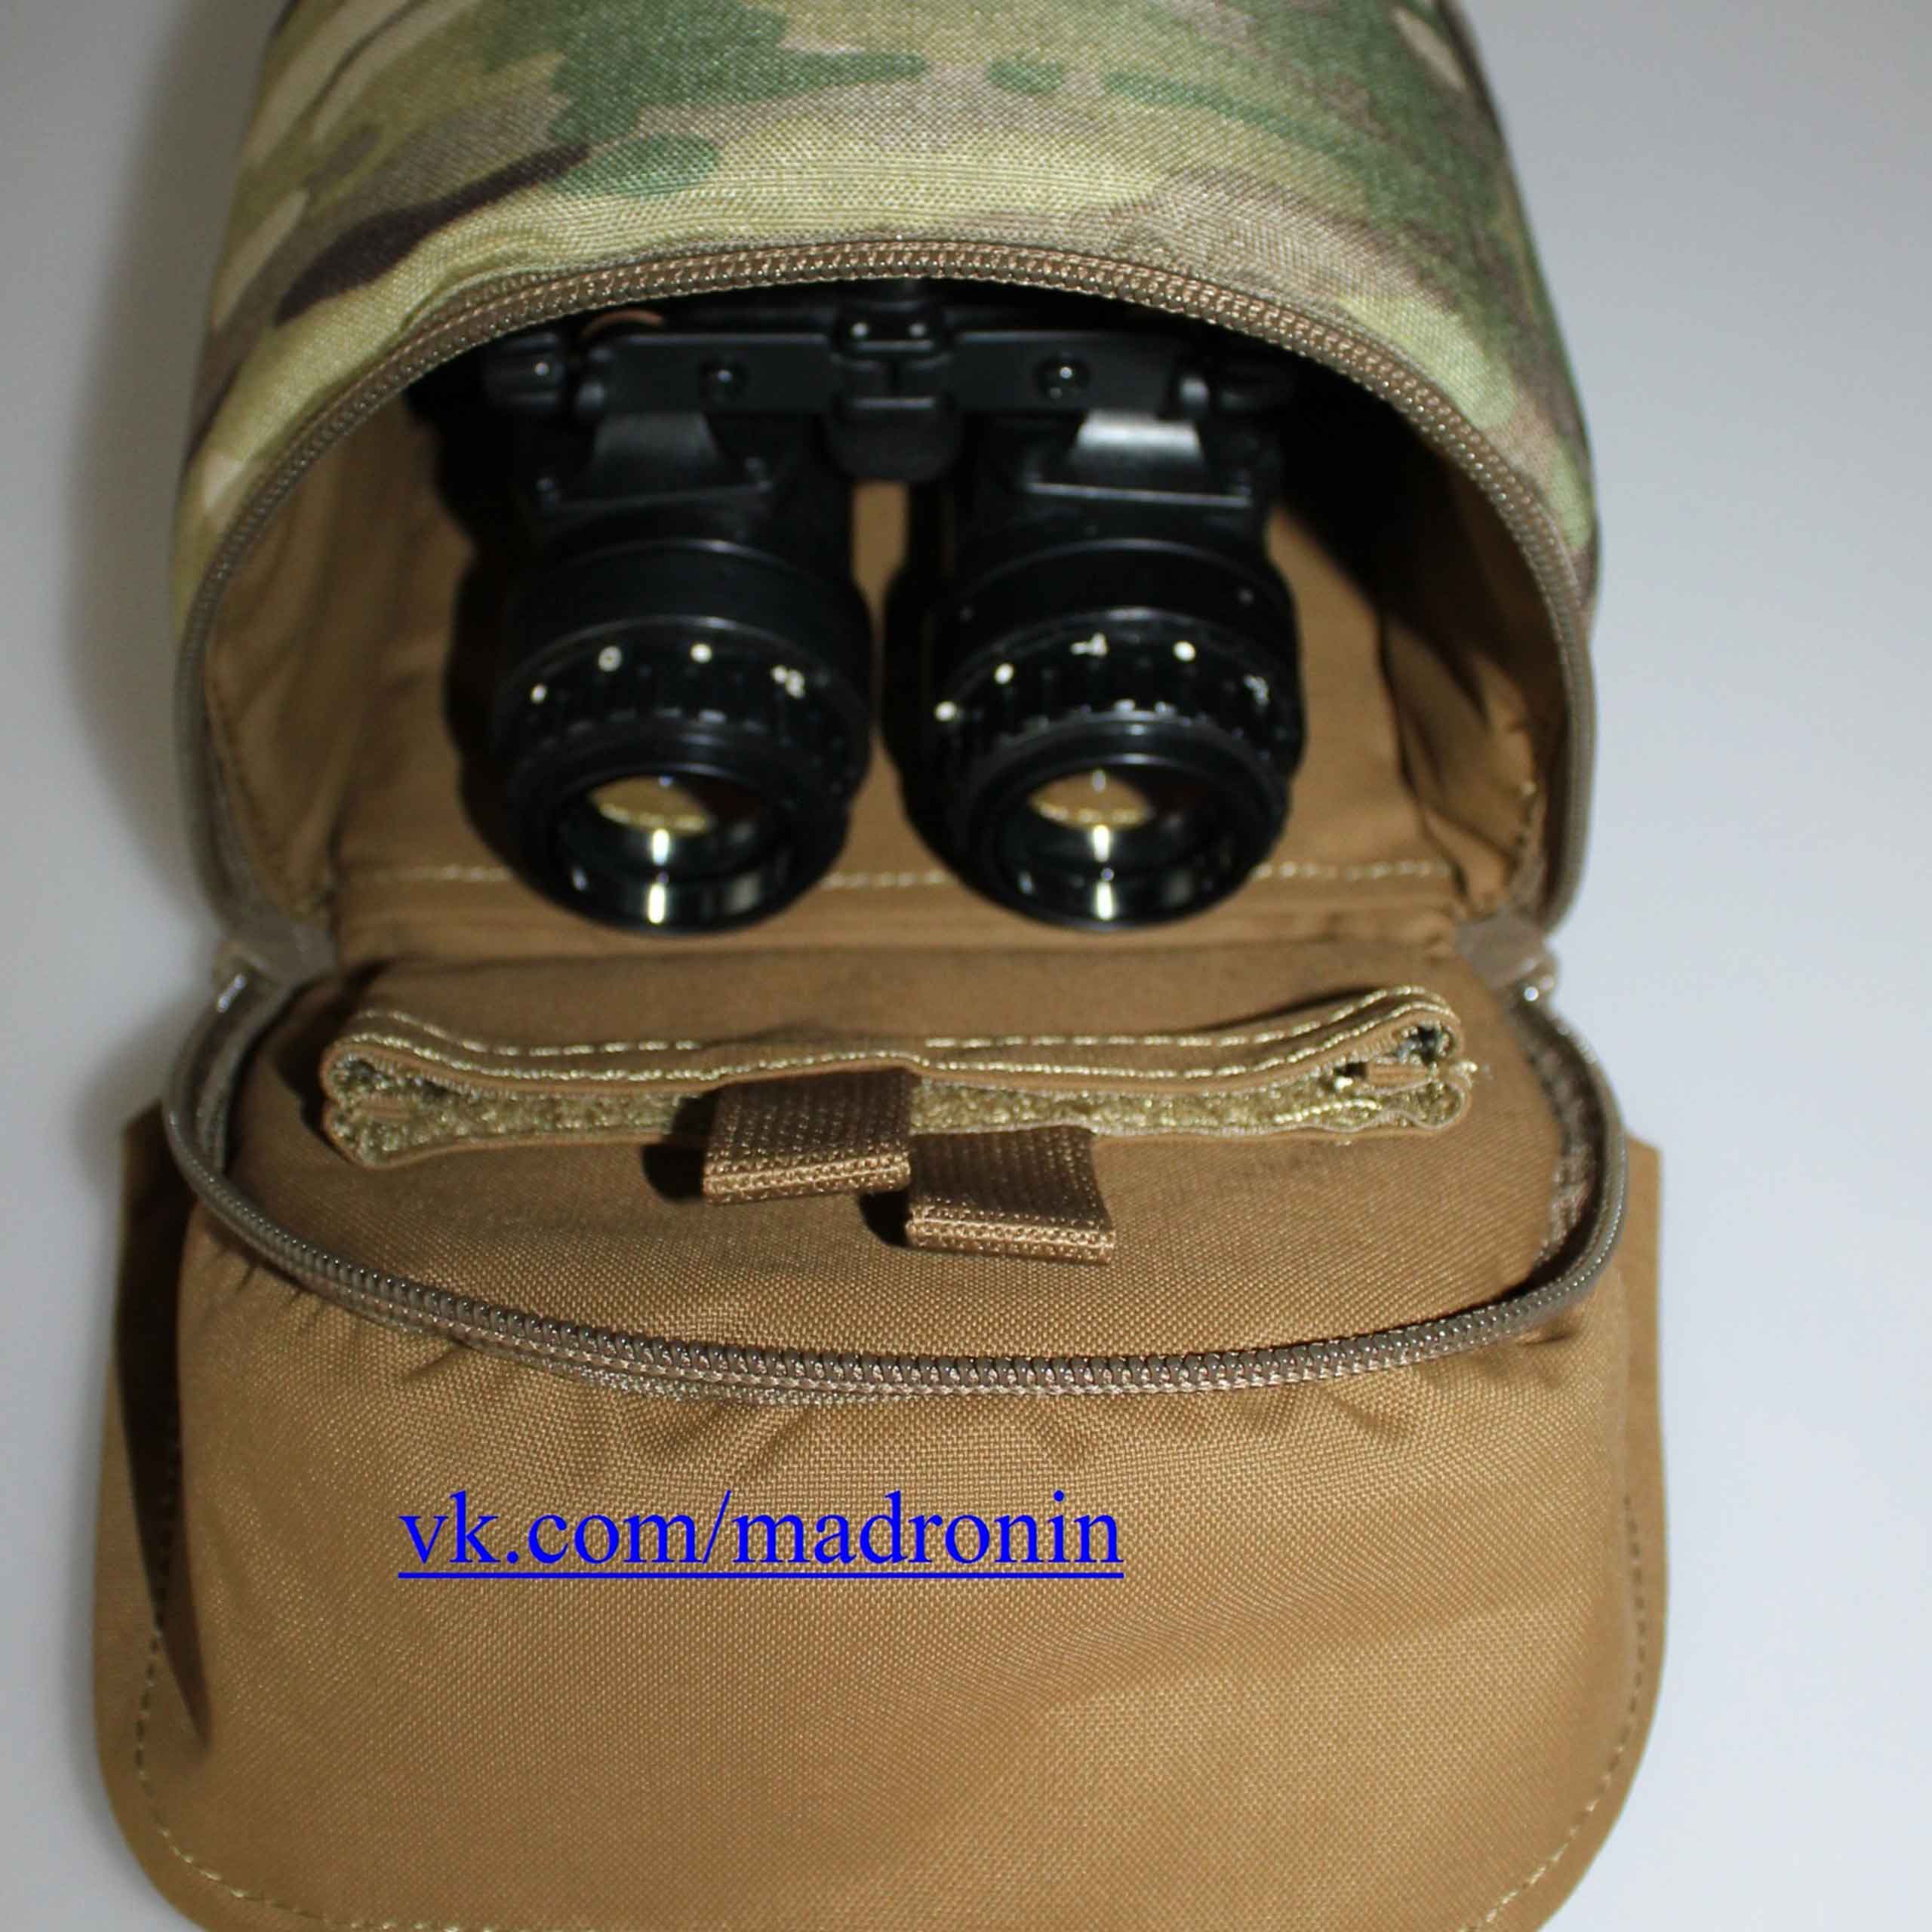 |
Here is such a great pouch comes in the kit, from the original cordura with molle slings and soft walls.
Price..
(Prices are for the period of writing and publication of article 28.11.19)
The price tag for this device promises to be in the range from $ 1000 to $ 1900 for housekeeping (housing and bridge without lenses with or without battery pack, with or without auto power off)
If you take the whole specs with lenses PVS-14 Mil spec from the manufacturer - it "will fly into a pretty penny": 3550 - 4100 $.
You can also aquaprint in Multicam or Multicam Alpine camouflage. The price of this pleasure is $ 250.
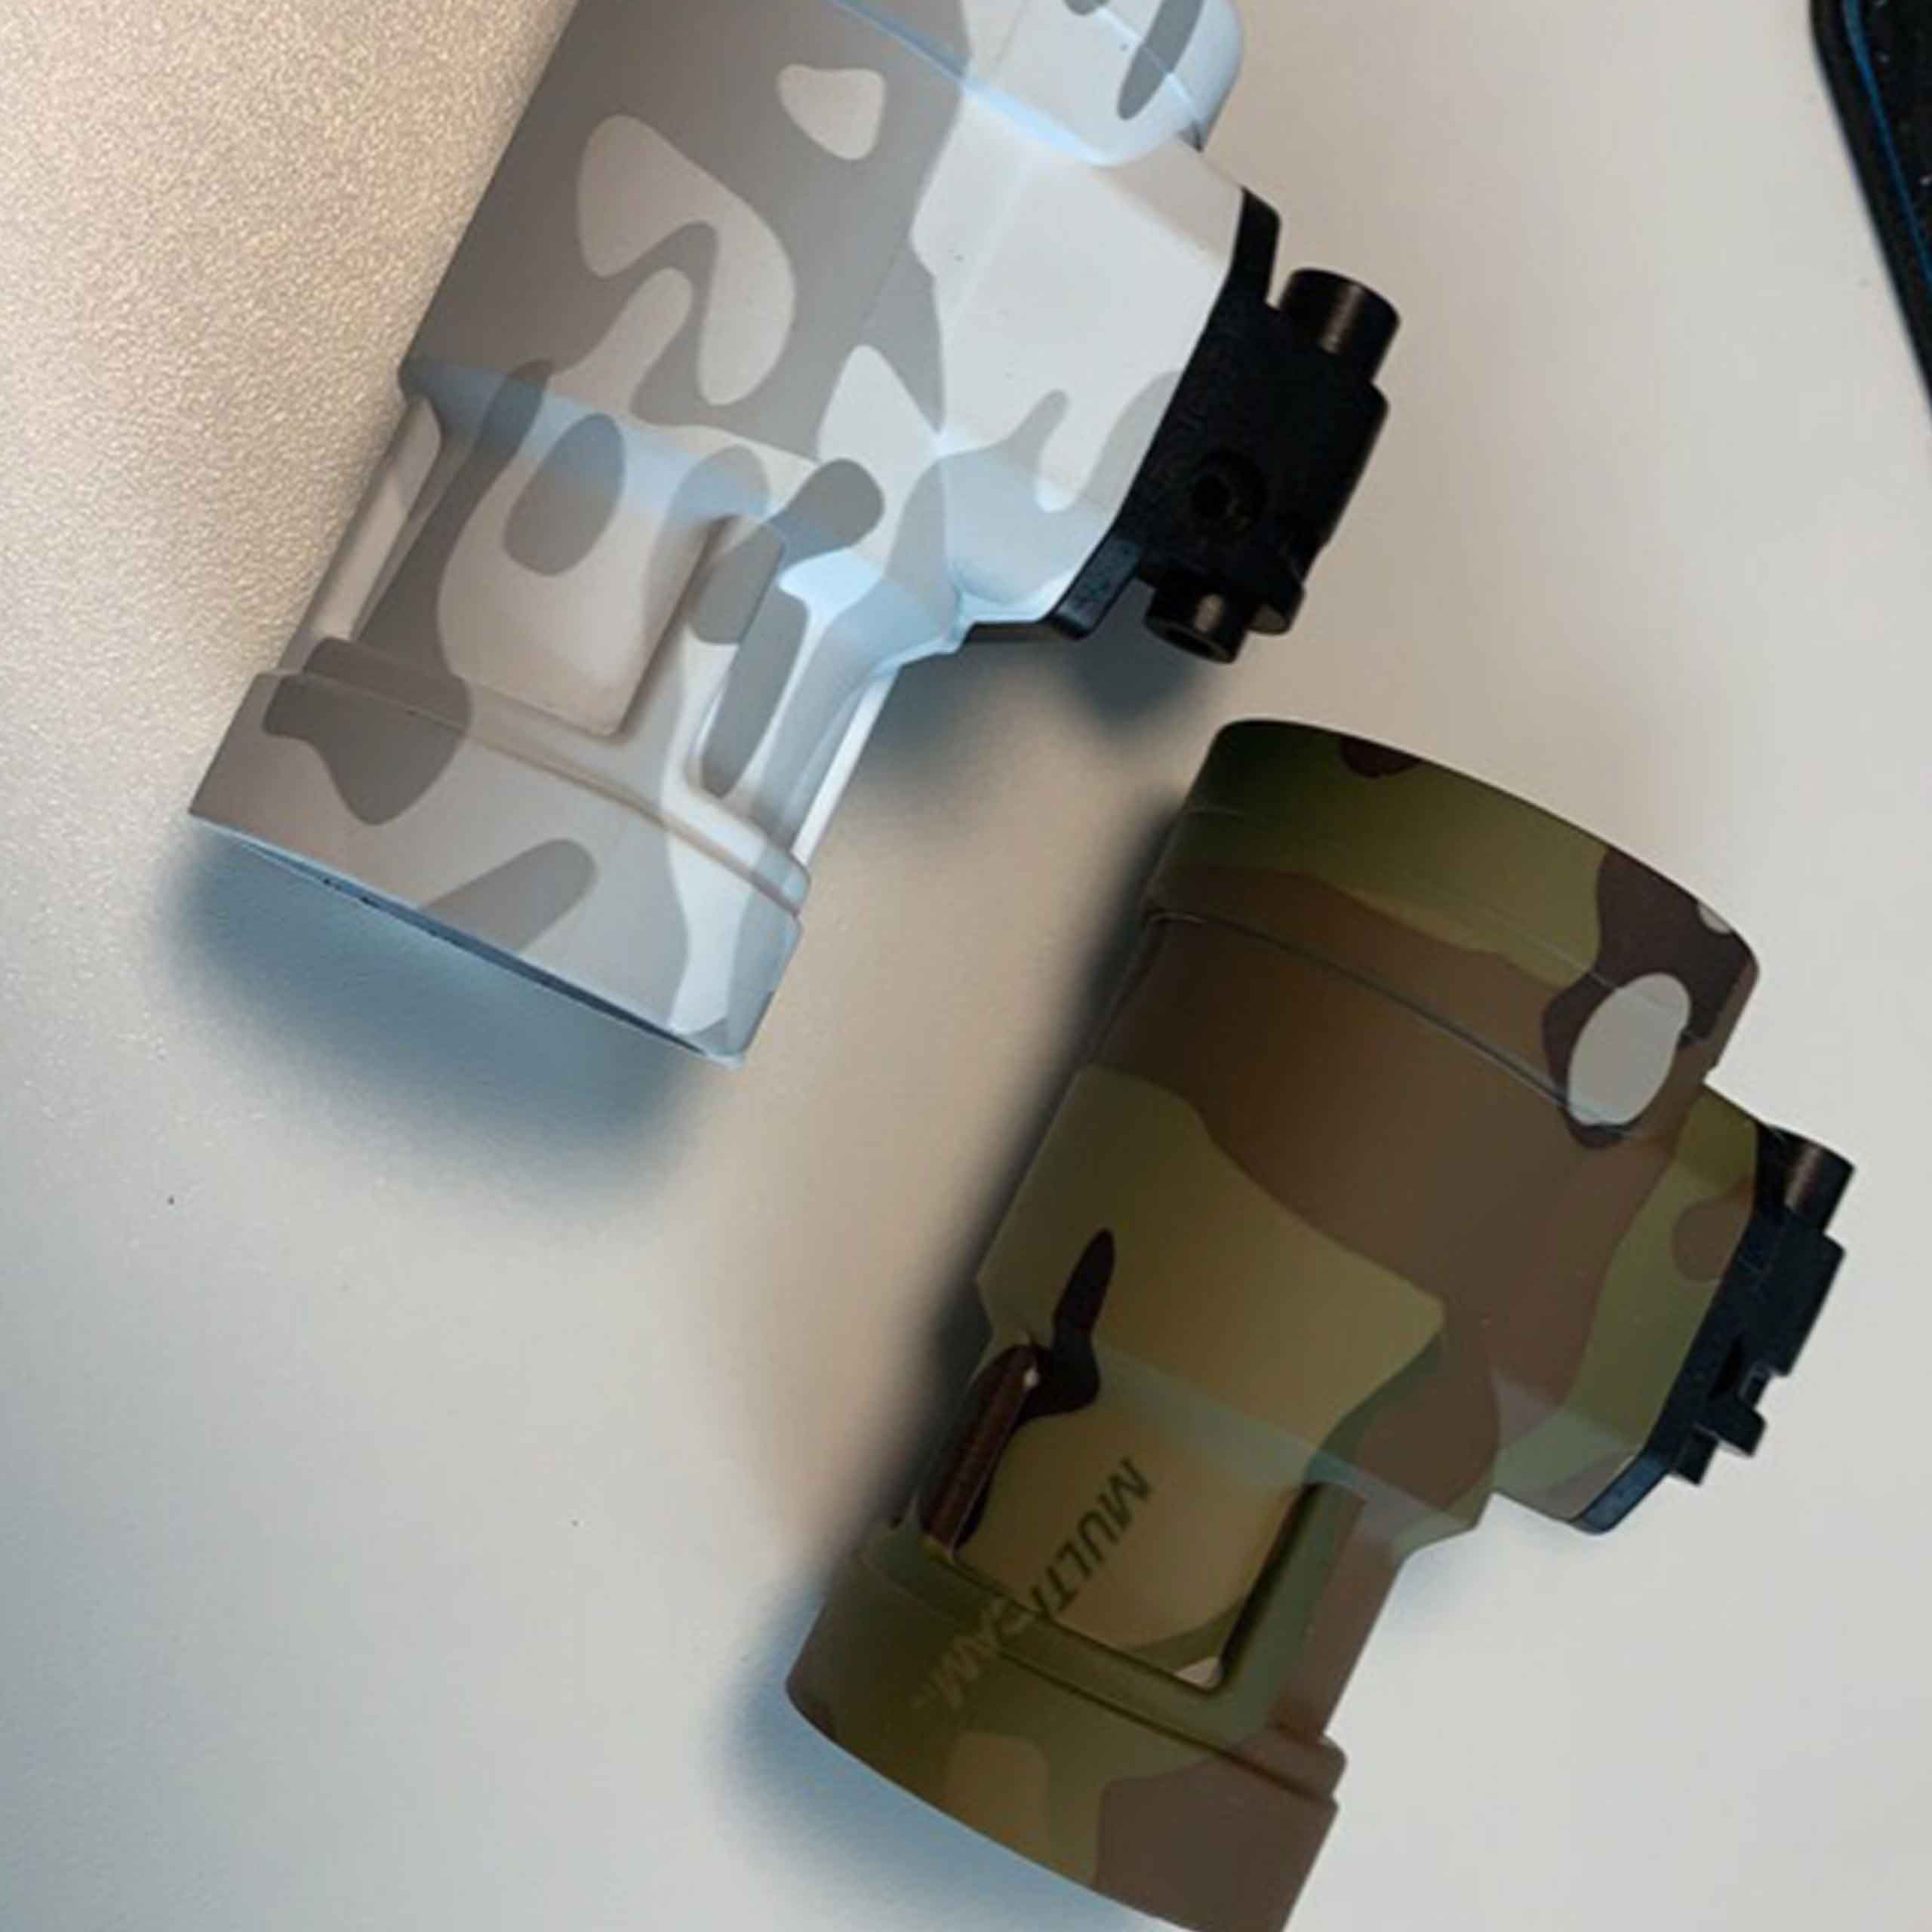
Aquaprint looks very cool, but it is not cheap $ 250
For a remote battery compartment of its own production, the manufacturer asks for $ 400, it is equipped with an original plug and wire.
In general, when compared with other devices in this class (BNVD, DTNVG, etc.), the price tag is quite good. For example, DTNVG in the States is $ 2850 without lenses, plus about $ 1000-1200 lenses. Total about 4000 $. And let's not forget that the device is not so easy to take out.
Conclusions.
I think that it turned out to be a very suitable product with good workmanship and a sane (I do not want to say "low") price. How he will prove himself in long-term operation - time will tell.
I’ll say from myself that the device came to me very much, although this is just the second “binocular” that fell into my hands.
Pros and cons that I could mention.
Pros:
1. A well-made product, not a “finished” replica. High-quality materials, good performance of threads, accuracy of the body as a whole.
2. Electronics works normally, as stated by the manufacturer. Auto power off works fine.
3. Lenses. The ability to take original PVS-14 lenses for me is still a plus. The price tag on them is quite sane and it is much easier to find them (I doubt that the original PVS31 lenses can actually be ordered / found separately). I repeat: if there is no difference in performance, why pay more? How the gentlemen of the Recon will react to this is a big question. But with expensive equipment on tolerances, it seems like there is less demand.
4. The most similar product in appearance to the original PVS-31 product for respected US Special Reconstructors.
5. The lowest price in the segment of the finished product (DTNVG whales, two PVS14 with a bridge, if the bridge was not manufactured in a "makeshift" way).
6. In terms of weight / strength, it is an excellent alternative to the most common binoculars we have: a pair of PVS14 on the bridge and ANIVS 6/9 (the first is heavier, the second is more fragile).
Minuses:
1. The main minus is the lack of the ability to install the MX-10160 (with three contacts) / 11769 type of image intensifier tubes with brightness control. As far as I can tell, it is not implemented here.
2. Changes in the geometry of the device compared to the original, associated with the installation of other lenses. Perhaps you can make out other differences by comparing my photos with the photos of the original. I did not study this side of the issue in great detail. If this is relevant, I can make a separate post with a comparison of these particular points.
Bonus track
Track # 1 There is still a hope that the manufacturer will nevertheless give the full version of PVS-31 with the “correct” lens format to the foreign market. The price tag is likely to be around $ 4000. At the same time, there is no understanding how good the lenses will be, and whether it will be just a beautiful device with mediocre lenses for a large number of forever green banknotes.
Track # 2 Soon, perhaps, we will see a working “four-eyed” case of the ANVIS10 / GPNVG-18 type. We already have a prototype, we are waiting for tests and we hope that it will go to the foreign market. Timing, approximate cost and other information is not yet known. I suppose that the toy will be saaaavsem not budget, although depending on what to compare;)
I, in turn, will more hope for the output of a similar device under the 11769 tubes, with the ability to manually adjust the brightness aka manual gain control.
P.S. The cry of the soul: VERY needed a human manual, at least in English. For he is not. I hope that there is no "yet."
P.P.S More photos in the album on my page.
Thank you for reading to the end, all the best to you and prosperity)
Source: https://vk.com/@madronin-aziatskii-pvs-31-14-bnvd-31-14-ili-budzhetnyi-binokulyar-noc
Author: Alexey Ov